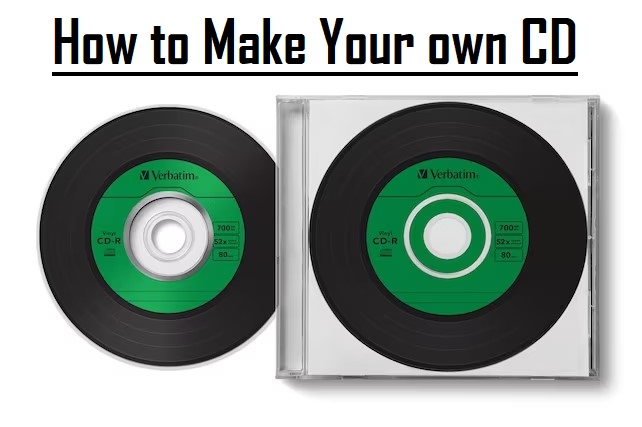
In today’s age of streaming and digital downloads, there’s a certain charm to creating a physical copy of your favorite music or even showcasing your own recordings. Burning your own CD allows for a tangible representation of your musical taste or artistic expression.

Making your own CD might seem like a relic of the past. However, there are still plenty of reasons why you might want to create your own CDs, whether it’s for distributing music, storing data, or simply for the nostalgic charm. In this comprehensive guide, we’ll walk you through the step-by-step process of creating your own CDs, from gathering the necessary materials to burning your content onto a blank disc.
Understanding the Basics of CD Burning
Before diving into the process, it’s important to understand the basics of CD burning. A CD, or compact disc, is a digital optical disc data storage format that was developed in the 1980s. CDs are typically used for storing and playing back audio, video, and other data. CD burning refers to the process of recording digital data onto a blank CD using a CD burner or writer.
Types of Writable CD Drives
There exist two primary types of writable CD drives:
- CD-R (CD Recordable): Functioning on a WORM (Write Once, Read Many) mechanism, CD-R drives permanently store data once it’s written onto the disc.
- CD-RW (CD Rewritable): Contrary to CD-R, CD-RW discs are rewritable, allowing users to store, erase, and replace data multiple times.
CD-R
A CD-R drive facilitates data recording on a specialized CD-R disc. Operating akin to a standard CD-ROM drive, it reads light reflected by a laser striking the disc’s surface. This reflection process forms binary code, with light either being reflected (land area) or not (pit area). Unlike standard CD-ROM discs, CD-R discs feature a unique composition.

While a traditional CD-ROM disc is etched with pits into a metallic or glass layer, a CD-R disc is coated with a photosensitive organic dye, mimicking the reflective properties of a new CD. During recording, the CD-R laser heats the gold and dye layers, causing diffusion and rendering certain areas non-reflective, akin to pits on a standard CD.
It’s crucial to note that once the CD is heated, its reflective properties cannot be restored, cementing the permanence of the recorded data.
CD-RW
CD-RW drives employ a distinct type of disc capable of multiple rewrites, typically exceeding a thousand cycles. Composed of a silver/indium/antimony/tellurium alloy, CD-RW discs start as reflective materials. When subjected to temperatures between 500-700 degrees Celsius, this alloy liquefies, losing its reflective nature upon solidification.

Remarkably, heating the material to a mere 200 degrees Celsius, well below its liquification point, reinstates its reflective state. Consequently, CD-RW discs can be restored to full reflectivity, allowing for subsequent recording sessions.
Gatherthe Necessary Materials
To get started, you’ll need the following materials:
- Blank CDs: Choose high-quality blank CDs suitable for your intended use, whether it’s for audio, data, or both.
- CD Burner: You’ll need a CD burner or writer, which can be an external device connected to your computer or built into your computer’s hardware.
- Computer: You’ll need a computer with CD burning software installed. Many computers come with built-in CD burning software, or you can download and install third-party software.
- Content: Prepare the digital content you want to burn onto the CD, whether it’s audio files, data files, or a combination of both.
Creating Your Own CD Using Windows Media Player
For those opting for a straightforward method to create a CD, Windows Media Player offers a viable solution. Despite primarily functioning as a media player, Windows Media Player boasts additional editing and burning capabilities. Before proceeding, ensure your computer is equipped with both Windows Media Player and a DVD disc drive. Follow these steps meticulously to burn a CD using Windows Media Player:
- Access Windows Media Player from your computer’s “Start” menu.

- Insert a blank CD into your computer’s DVD disc drive.

- Click on the “Switch to Library” button located in the upper right corner of the Player interface.

- Direct your attention to the left pane of the Player interface and click on the “Burn” button.
- Within the Burn tab, utilize the dropdown menu to select “Audio CD” as your preferred CD type.
- Drag and drop the desired songs into the designated burn list area.
- Under the “Burn” tab, locate and click on the “Start burn” button to initiate the burning process.

Creating a Playlist and Burning CDs Using iTunes
To begin the CD burning process in iTunes, you’ll first need to create a playlist. The steps for creating a playlist may vary slightly depending on the version of iTunes you’re using, but the general procedure remains consistent:
Step 1: Open iTunes
Launch iTunes and select the “File” menu.
Step 2: Create a New Playlist
Under the “File” menu, select “New” and then “Playlist.”

Step 3: Name Your Playlist
Once the new playlist appears in the left-hand column of iTunes, give it a suitable name by typing and pressing “Enter” to save.

Remember: It’s worth noting that while you can burn a song to CD an unlimited number of times, you’re limited to burning 5 CDs using the same playlist. After reaching this limit, you’ll need to create a new playlist to continue burning CDs. Moreover, only songs authorized to play through your iTunes account can be burned to CD.
Adding Songs to the Playlist
After creating the playlist, follow these steps to add music and arrange it in the desired order:
Step 1: Find Your Songs
Navigate through your music library to locate the desired songs.
Step 2: Add Songs to the Playlist
Drag and drop the selected songs onto the playlist in the left-hand column, or click on the ellipses next to a song and choose “Add to Playlist” > “New Playlist” or the desired playlist name.

Step 3: Arrange the Song Order
Arrange the songs by dragging and dropping them into your preferred sequence.

Step 4: Automated Sorting
For automated sorting options, go to “View” > “Sort By,” where you can choose from various sorting criteria like Playlist Order, Name, Genre, Year, Artist, Album, or Time. You can also select Ascending or Descending order.

Burning the Playlist to Disc
Once your playlist is ready, proceed with the burning process:
Step 1: Insert a Blank CD
Insert a blank CD into your computer’s CD drive.

Step 2: Burn the Playlist
After the CD loads, select “File” > “Burn Playlist to Disc” in iTunes.

Step 3: Configure Burn Settings
In iTunes 11 or later, confirm your preferred settings for burning the CD, including:
- Preferred Speed
- Disc Format (Audio CD, MP3 CD, Data CD or DVD)
- Gap Between Songs (for Audio CDs)
- Use Sound Check
- Include CD Text

Step 4: Initiate Burning
Once all settings are selected, click “Burn” to commence the burning process.
Throughout the burning process, iTunes will display the progress at the top center of the window and alert you with a sound upon completion.

Making Your own CD with EaseUS MakeMyAudio
To transfer your favorite songs onto a CD, employing a burning program is essential. A robust disc creation software not only ensures swift burning speeds but also guarantees optimal playback quality. Amidst the plethora of options available, EaseUS MakeMyAudio emerges as a top-tier choice due to its user-friendly interface and comprehensive editing functionalities. Additionally, the software facilitates audio editing tasks such as cutting, trimming, and format conversion.
Steps to Burn a CD with EaseUS MakeMyAudio:
Step 1: Launch EaseUS MakeMyAudio
Upon launching the program on your PC, navigate to the main screen and select “CD Burner.”

Step 2: Import Audio Files
Access the top menu and click on “Add Files” to import the audio files destined for the CD.

Step 3: Initiate Burning Process
With your desired audio files added, click “Start” to commence the burning process. Patiently await the completion of the process.

Step 4: Completion Confirmation
Once the burning process concludes, a prompt will notify you that the task has been successfully completed.

How to Revert a CD to Blank Status
If you need to erase or format a CD, you can effortlessly accomplish this task by following these simple steps:
- Begin by inserting your CD into your computer’s CD drive.
- Navigate to the “Start” menu and open “File Explorer.”
- Locate and select the CD drive under “This PC” within File Explorer.
- Click on the “Manage” tab and then proceed to click on “Erase this disc.” Follow any prompts that may appear.
- For those opting to format the CD, an alternative method is available within File Explorer. Simply right-click on the CD/DVD drive and select “Format.” Customize the formatting options as per your requirements, then click on “Start” to initiate the process.

Troubleshooting Tips
Creating your own CDs might encounter minor hiccups along the way. Here are some solutions to common problems:
- Burning Errors: If the burning process fails, try a slower burning speed or a different brand of blank CD. Ensure your music files are not corrupted and try re-encoding them if necessary.
- Audio Quality Issues: If your burned CD sounds distorted or skips, consider using a higher-quality blank CD and a slower burning speed during the burning process. Check your CD player’s compatibility with burned CDs.
Conclusion
Making your own CD may seem like a daunting task, but with the right tools and know-how, it can be a rewarding and enjoyable experience. Now, you’ll be able to create your own CDs with ease, whether it’s for personal use or distribution.
Through this comprehensive guide, you’ve learned the ins and outs of CD burning, from understanding the basics of CD-R and CD-RW drives to utilizing popular software like Windows Media Player and iTunes. You’ve discovered the step-by-step procedures for creating playlists, importing songs, and initiating the burning process. Additionally, you’ve gained insights into erasing and formatting CDs, ensuring versatility in managing your disc collection. With the right tools and knowledge at your disposal, you’re now equipped to embark on your CD creation journey with confidence.
We value your opinion! Share your thoughts on this guide to CD creation. Did you find the information helpful? Were the instructions easy to follow? Do you have any additional tips or tricks to enhance the CD burning experience? Your feedback is invaluable to us and will help us improve future content. Leave your comments below and let’s continue exploring the world of digital media together!
When creating your own CD, audio clarity is essential – especially if you’ll record your own vocals or instrumental performances. Investing in a wireless lavalier microphone ensures crisp, professional-quality sound that’s easy to capture when recording your tracks, allowing greater flexibility during production.
Frequently Asked Questions
How do I create a CD with my own playlist?
To create a CD with your personalized playlist, first, compile a playlist containing the desired songs or files. Ensure the items are selected by choosing View > View As > Songs. Insert a blank disc into your computer’s drive, then select the playlist and navigate to File > Burn Playlist to Disc.
What materials are used to make a CD?
In commercial CDs, data is stored on a thin layer of aluminum, physically pressed into a master to create the data. Recordable CDs utilize a layer of dye that reacts to high-powered lasers, with a silver reflective layer on top. Adhesives hold these layers together.
Can laptops still burn CDs?
Yes, laptops equipped with Windows Media Player have the capability to burn three types of discs: audio CDs, data CDs, and data DVDs.
Is burning a CD permanent?
Yes, once a disc is burned, the information is permanently stored on it unless it is a rewritable disc. Even with rewritable discs, the original information is erased when new data is written onto it.
How long does it take to burn a CD?
The time it takes to burn a CD depends on the recording speed. For example, at 1x record speed, it takes 74 minutes to burn 74 minutes of audio. Exceptions may occur with old CD-Rs, such as 63-minute discs, or ‘Type 80’ discs, which contain almost 80 minutes of content.
Can I use any type of blank CD to burn my content?
It’s essential to use blank CDs compatible with your burning device and intended purpose, whether for audio, data, or both.
What’s the difference between CD-R and CD-RW?
CD-R discs allow one-time recording, while CD-RW discs can be rewritten multiple times, providing flexibility for data storage needs.
Can I create a CD with mixed content, like both audio and data files?
Yes, modern CD burning software allows you to compile CDs with a combination of audio and data files to suit your preferences.
Will burning a CD affect the quality of my audio files?
When burning audio CDs, the quality of your audio files remains intact, ensuring faithful reproduction during playback.
Can I add metadata, like track titles and artist names, to my burned CDs?
Yes, most CD burning software allows you to customize metadata for your tracks, enhancing organization and user experience.


.png)


