.png)
The world of audio editing is undergoing a tremendous shift as technology advances and accessibility to powerful editing tools increases.
With the rise of software like Audacity and other innovative platforms, individuals and professionals alike now have unprecedented opportunities to create, refine, and share audio content with ease.
While convenient, this audio editor could potentially reduce the need for costly professional studio time and equipment.
Wondering how Audacity can help you cut audio with precision? Check out this step-by-step guide on using Audacity’s audio-cutting feature to achieve flawless edits in your audio projects.
So, without further ado, let’s dive in!
What is Audacity?
Audacity is a free and open-source software designed for editing audio. It’s available for Windows, MacOS, Linux, and UNIX operating systems, making it accessible to a wide range of users.

Despite its somewhat dated appearance, Audacity is straightforward to use and can be customized to fit your specific workflow.
It provides a variety of tools for recording, editing, and manipulating audio that makes it popular among podcasters, musicians, and audio enthusiasts alike.
With Audacity, you can trim, splice, apply effects, and enhance the quality of audio recordings to create professional-sounding projects.
How to Cut Audio in Audacity: A Step-by-Step Guide
Audio editing tools have been around for some time now. Audacity goes further because it can easily cut audio while offering a range of other powerful features. Here’s a step-by-step guide to using the tool to cut audio creations only.
Step 1. Preparing Audacity for Editing
Before you can begin editing audio in Audacity, you need to install and set up the software. Here’s how you do it:
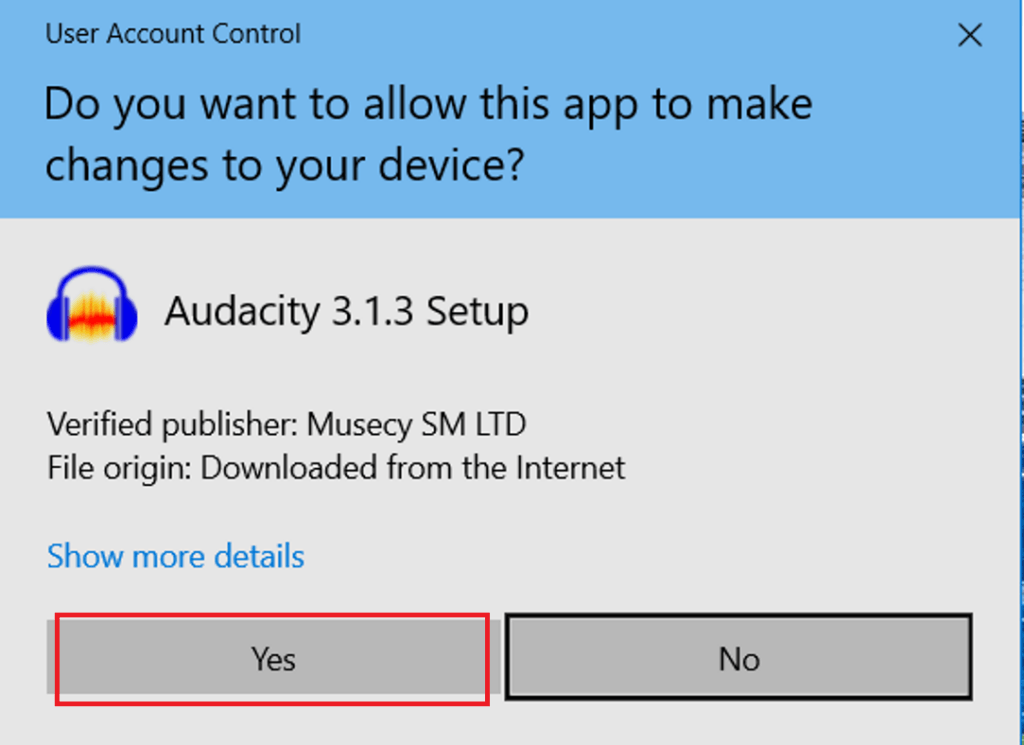
- Download and Install Audacity: Head to the official Audacity website, download the installer for your operating system and follow the on-screen instructions to complete the installation process.

- Launch Audacity: After installation, double-click the Audacity icon to open the program. Familiarize yourself with the main interface, which includes menus, tools, and the waveform display area.
- Creating a Backup of the Original File: Before making any edits, it’s wise to create a backup of the original audio file. This ensures that you have a safety net in case any unintended changes occur during the editing process. Simply make a copy of the file and store it in a separate folder for safekeeping.
Step 2: Importing Audio File
To get started with editing, follow these steps to import your audio files into Audacity:
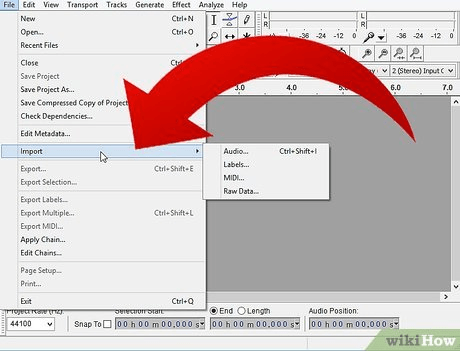
- Access the “File” Menu: Navigate to the top of the Audacity window and click on the “File” menu.
- Select Import Audio: From the dropdown menu, choose “Import” and then “Audio”.
- Browse and Select Files: A file explorer window will open. Navigate to the location on your computer where your audio files are stored. Select the desired audio files you wish to import by clicking on them.
- Open or Drag and Drop: Click “Open” to import the selected files. Alternatively, you can skip the menu navigation and simply drag and drop your audio files directly into the Audacity window from your file explorer.
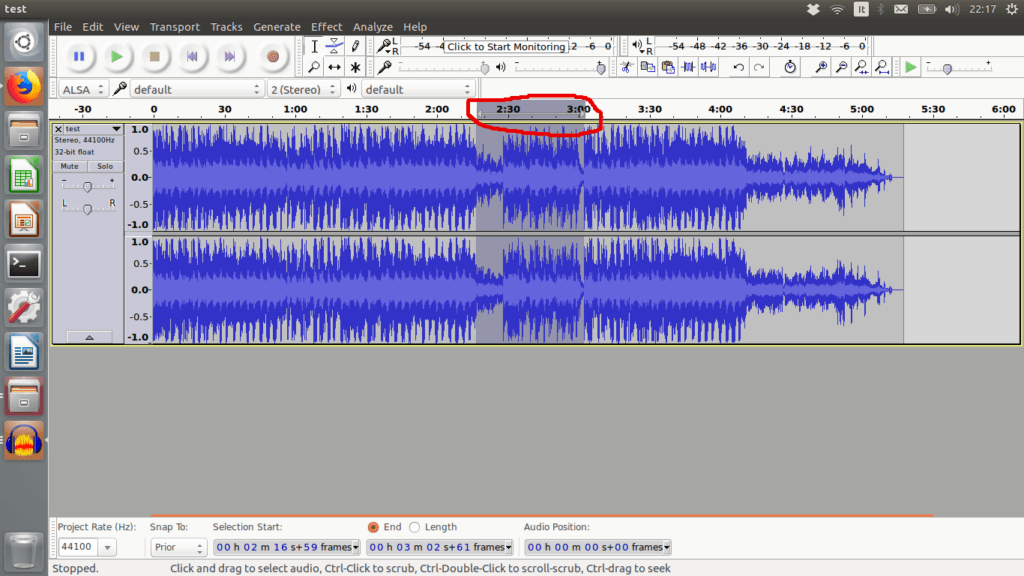
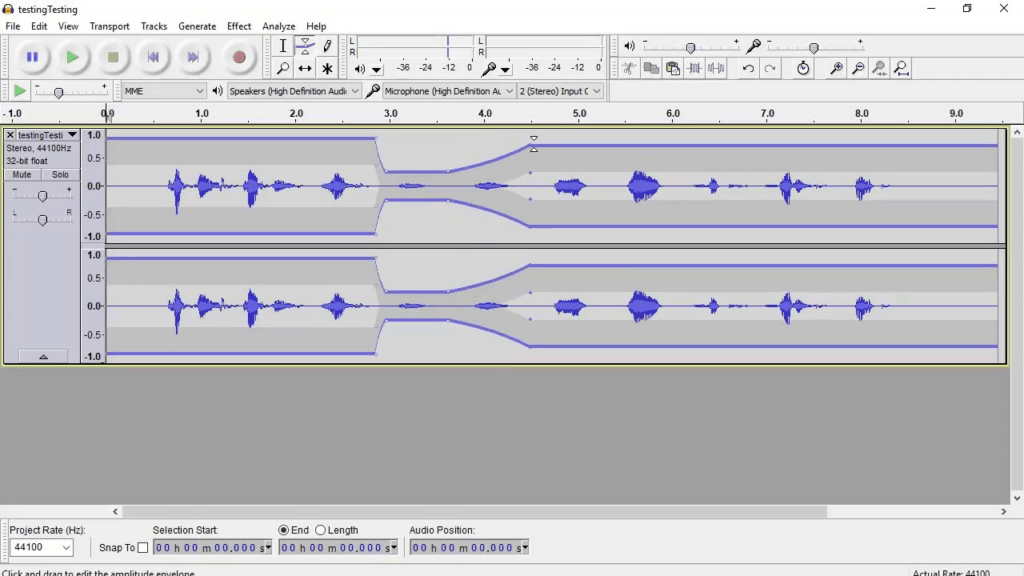
- Confirmation: Once imported, the audio files will appear as waveforms in separate tracks within the Audacity timeline. They are now ready for editing, and you can proceed with cutting, trimming, or applying other modifications as needed.
Step 3: Cutting Audio in Audacity
Cutting audio in Audacity allows you to remove unwanted sections from your audio tracks. Here’s how to do it:
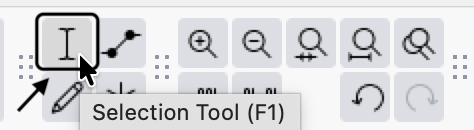
- Select the Section: Use the selection tool (cursor icon) to click and drag over the portion of the audio you want to cut. This action will highlight the selected region, indicating the part you intend to remove.
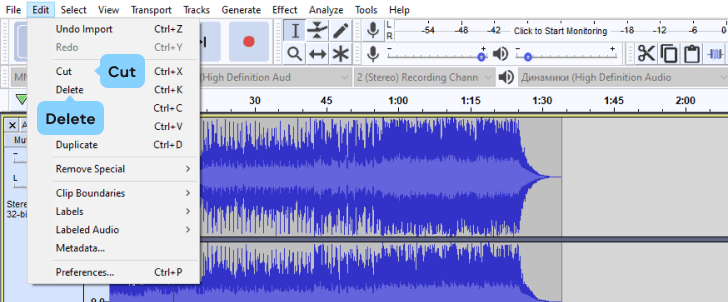
- Execute the Cut: With the desired section highlighted, proceed to the “Edit” menu. From there, choose “Cut” or use the shortcut Ctrl + X on your keyboard. Alternatively, you can press the “Delete” key on your keyboard to remove the selected portion.
- Automatic Adjustment: Audacity will seamlessly adjust the audio waveform, joining the remaining parts together without any gaps or interruptions. This ensures a smooth transition between the edited segments.
Step 4: Trimming Audio in Audacity
Trimming audio in Audacity allows you to keep specific sections of your audio track while removing the surrounding areas. Follow these steps to trim audio effectively:
- Select the Desired Portion: Using the selection tool, click and drag to highlight the portion of the audio you want to keep. This selection will define the segment you wish to retain.
- Execute the Trim: Navigate to the “Edit” menu and choose “Remove Special” > “Trim Audio”. Alternatively, use the shortcut Ctrl + T on your keyboard to perform the trim. This action will remove the audio outside of the selected region, preserving only the desired portion.

- Result: Audacity will automatically remove the unwanted audio, leaving behind the trimmed segment intact. The waveform display will reflect the trimmed audio, showing a concise representation of the edited section.
Step 5: Splitting an Audio Track
Splitting an audio track in Audacity allows you to divide it into two separate clips, enabling individual editing of each segment. Here’s how to split an audio track:
- Position the Cursor: Move the cursor to the point in the audio track where you want to create the split. This could be where you want to transition to a different section or apply specific edits.
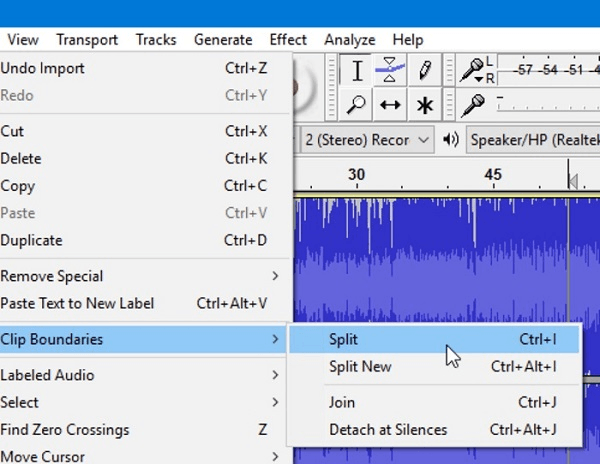
- Execute the Split: Go to the “Edit” menu and choose “Audio Clips” > “Split”. Alternatively, use the shortcut Ctrl + I on your keyboard to split the track. Audacity will create two separate clips at the cursor position, allowing for independent editing.
- Result: The audio track will now be divided into two distinct segments, each represented as a separate waveform within the Audacity timeline. You can edit these segments individually, applying different effects or adjustments as needed.
Step 6. Fine-Tuning the Edit
After cutting, trimming, and splitting your audio tracks in Audacity, you may need to fine-tune your edits for a seamless final result. Here are some techniques for refining your audio project:
- Adjusting the Remaining Audio Clips to Fill the Gap: If cutting or trimming audio leaves gaps between clips, you can adjust the remaining clips to fill those gaps. Simply click and drag the clips to align them smoothly, ensuring there are no abrupt transitions or silences.
- Utilizing the Time Shift Tool to Rearrange Clips: The Time Shift Tool in Audacity allows you to move audio clips horizontally along the timeline. Use this tool to rearrange clips as needed, adjusting the timing and flow of your audio project to achieve the desired pacing and rhythm.
- Merging Clips if Necessary: In some cases, you may want to merge two or more audio clips into a single cohesive segment. To do this, select the clips you wish to merge, then go to the “Tracks” menu and choose “Mix and Render to New Track”. Audacity will combine the selected clips into a single waveform, simplifying your project structure.
Step 7. Additional Editing Features
As you refine your audio project in Audacity, consider utilizing these additional editing features for enhanced control and creativity:
- Applying Fade In and Fade Out Effects for Smoother Transitions: Create smooth transitions between audio clips by applying Fade In and Fade Out effects. These effects gradually increase or decrease the volume at the beginning or end of a clip, eliminating abrupt starts or endings.

- Using the Envelope Tool for Volume Adjustments: Fine-tune the volume levels of your audio tracks with the Envelope Tool. This tool allows you to create custom volume curves, adjusting the volume levels at specific points throughout the track for dynamic audio output.
- Using Labels for Easier Navigation and Editing: Improve workflow efficiency by adding labels to your audio tracks. Labels act as markers within the timeline, making it easier to navigate to specific sections of your project and perform precise edits.
Step 8: Saving and Exporting the Edited Audio
Once your audio project is polished to perfection, it’s time to save and export your work for distribution or further processing. Here’s what you need to know:
- Previewing the Final Product Before Saving: Before saving or exporting your edited audio, take the time to preview the final product. Listen to the entire project using a top-notch microphone like Lark 150 to ensure that all edits are seamless and that the audio meets your expectations.
- Saving the Project File Versus Exporting the Audio: Audacity allows you to save your project in its native format (.aup) for future editing sessions. Additionally, you can export the edited audio as a standalone file in various formats for playback or distribution.
- Exporting Options: Format, Quality, and File Size Considerations: When exporting your edited audio, consider the desired format, audio quality, and file size. Audacity offers options to export audio in formats such as MP3, WAV, FLAC, and more, each with its own quality settings and compression options. Choose the format and settings that best suit your needs and intended use for the audio file.
Conclusion
Editing audio in Audacity offers a powerful toolkit for creating professional-quality audio projects. By following the step-by-step guide above, you can cut your audio recordings with great precision.
Everyone from new editors to seasoned ones can take advantage of Audacity’s capabilities and learn audio editing from scratch. Whether you’re editing podcasts, music tracks, interviews, or soundscapes, Audacity provides the features you need to achieve your desired results.
All you need to remember is to save your project frequently and export the final audio file in the desired format for distribution or further processing.
In the end, you may also prefer to use Audacity instead of some expensive online audio editors, since the results are fabulous!
After mastering audio editing basics in Audacity, upgrading your recording gear can significantly enhance your audio quality right from the source. For clear, professional-sounding recordings that need minimal editing later, consider using a Wireless Lavalier Microphone to capture crisp audio effortlessly.
FAQs
- Can I undo a cut in Audacity?
Yes, Audacity allows you to undo and redo edits, including cuts. Simply use the “Edit” menu or the Ctrl + Z (Undo) and Ctrl + Shift + Z (Redo) keyboard shortcuts to reverse or redo your actions.
- How do I select multiple segments of audio to cut in Audacity?
To select multiple segments of audio, hold down the Shift key on your keyboard while clicking and dragging with the selection tool. This allows you to create a selection encompassing multiple segments across the timeline.
- What is the difference between cutting and deleting audio in Audacity?
Cutting audio removes the selected portion of audio from the track and automatically adjusts the remaining segments to fill the gap. Deleting audio, on the other hand, removes the selected portion without adjusting the surrounding segments, potentially leaving gaps in the audio track.
- Can I cut audio from multiple tracks at once in Audacity?
Yes, Audacity allows you to cut audio from multiple tracks simultaneously. Simply select the desired sections across all tracks using the selection tool, then execute the cut command to remove the selected portions from all tracks at once.