In our modern world, technology has revolutionized the way we connect and communicate. One such advancement is the J5Create USB to HDMI adapter, a nifty device that allows you to extend or duplicate your computer screen onto an external display through a simple USB connection. However, like any technology, these adapters can sometimes face issues.

Just imagine that you’re all ready to show off your cool presentation on a huge screen or have a super fun movie night, and your J5Create USB to HDMI adapter starts causing trouble. You will be pretty annoyed.
But hold on. Don’t let the annoyance take over, as we are here to help you out. In this comprehensive guide, we will talk about the common problems users encounter with the J5Create USB and provide step-by-step solutions to get your adapter working seamlessly. So let’s start!
J5Create USB to HDMI Adapter Not Working? Here’s What to Do!
If you’re experiencing issues with your JCreate USB™ to HDMI adapter not working, don’t worry; we’ve got some steps to help you get it up and running. Let’s start with checking the hardware connections.
Method 1: Check Hardware Connections

Before we dive into the troubleshooting steps, please ensure your adapter and all related devices are powered off.
Step 1: Ensure that your JCreate USB™ to HDMI adapter is securely plugged into the USB port on your computer.

Step 2: Verify that the HDMI cable is firmly connected to the JCreate adapter on one end and your monitor or TV on the other end.
Step 3: Double-check that your monitor or TV is turned on and set to the correct HDMI input source.
Step 4: If you’re using a USB hub, try connecting the JCreate adapter directly to your computer’s USB port to rule out any potential issues with the hub.
If you’re still facing the issue, let’s move on to the next troubleshooting method.
Method 2: Restart Your Computer

The next simple yet effective method is to restart your computer. This can help resolve software-related problems that may be affecting the adapter’s functionality.
Before we proceed, make sure to save any open files and close all applications on your computer.
Step 1: Disconnect the JCreate USB™ to HDMI adapter from your computer’s USB port.
Step 2: Restart your computer. You can do this by clicking the “Start” button (Windows) or the Apple menu (Mac), selecting “Restart,” and confirming the action.
Step 3: After your computer has fully restarted, reconnect the JCreate adapter to a different USB port on your computer. Wait for your computer to recognize the device.
Step 4: Check if the HDMI output is now working on your monitor or TV.
Still facing the same issue ? Let’s try our next method!
Method 3: Update USB and Graphics Drivers
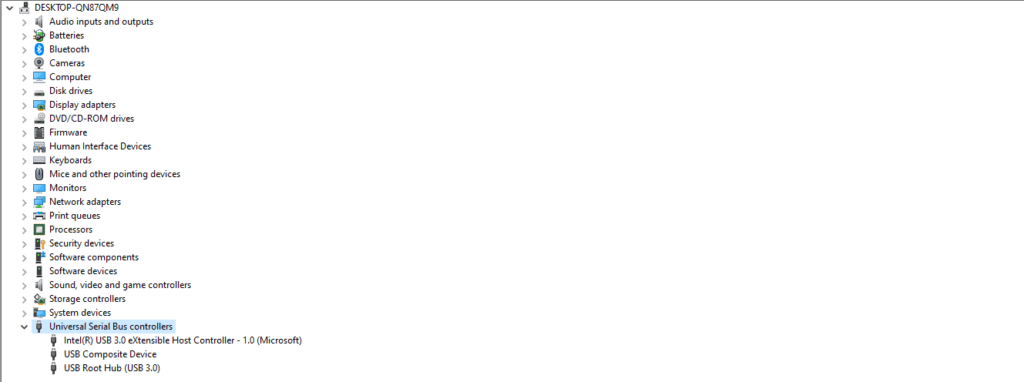
Updating drivers can often fix compatibility issues and improve device functionality. Let’s check and update your USB and graphics drivers.
Step 1: Press the “Windows” key (Windows) or click the Apple menu (Mac) and type “Device Manager” in the search bar. Press “Enter” (Windows) or click on “Device Manager” (Mac).
Step 2: In the Device Manager window (Windows), locate the “Universal Serial Bus controllers” section and expand it. Right-click on the JCreate USB™ to HDMI adapter and select “Update driver.”
Step 3: Follow the on-screen instructions to search for and install any available driver updates for the adapter.
Step 4: Similarly, update your graphics drivers by going to the website of your graphics card manufacturer (e.g., NVIDIA, AMD, Intel) and downloading the latest drivers for your graphics card model.
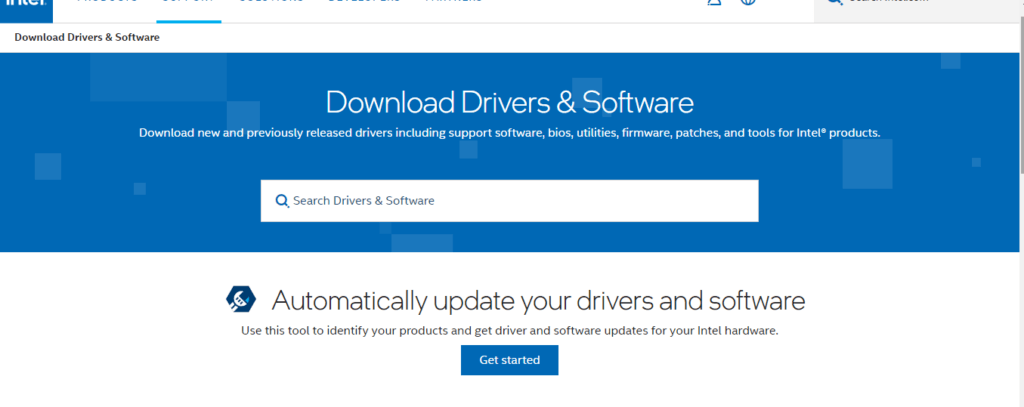
Step 5: After updating both USB and graphics drivers, restart your computer.
Let’s continue to our next troubleshooting method.
Method 4: Test on Another Computer

If the previous methods haven’t resolved the issue, we’ll now determine if the problem lies with the JCreate USB™ to HDMI adapter itself or your computer.
Step 1: If possible, try the JCreate USB™ to HDMI adapter on another computer to see if it works there. This helps determine whether the issue is with the adapter itself or your computer.
Step 2: If the adapter works on another computer, it may indicate a problem with your computer’s USB ports or drivers. You can then revisit Troubleshooting Methods 2 and 3 to address these issues.
Step 3: If the adapter still doesn’t work on another computer, it may be a faulty adapter, and you should consider contacting the manufacturer for warranty support or a replacement.
Now, let’s proceed to the next troubleshooting method.
Method 5: Check for Compatibility
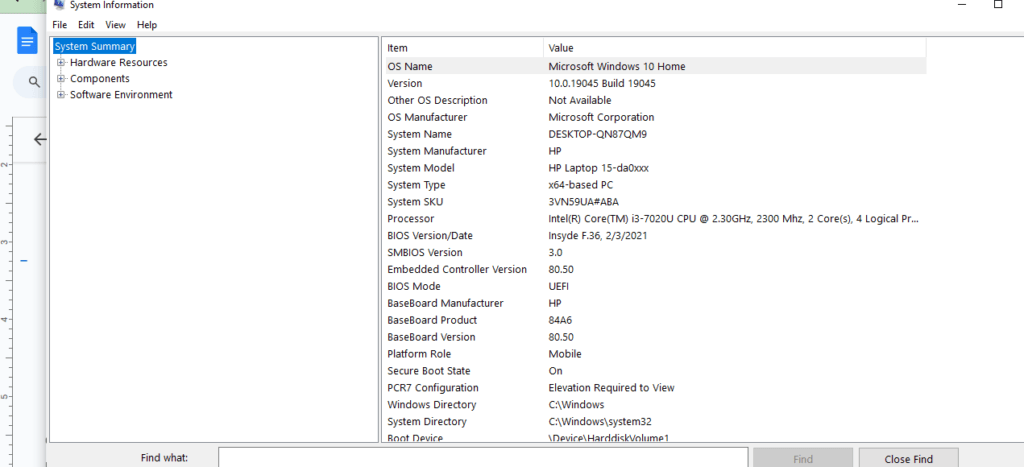
Sometimes compatibility issues can be the root cause of problems. Let’s check if your JCreate USB™ to HDMI adapter is compatible with your computer.
Before we begin, make sure you know your computer’s specifications.
Step 1: Ensure that your computer’s operating system is compatible with the JCreate USB™ to HDMI adapter. Check the product’s packaging or user manual for compatibility information.

Step 2: Verify that your computer meets the minimum system requirements for the adapter, including processor, RAM, and available USB ports.
Step 3: If your computer doesn’t meet the requirements or is running an unsupported operating system, you may need to consider upgrading your hardware or using a different adapter that is compatible with your system.
No progress yet? Don’t worry. Let’s try our next troubleshooting method.
Method 6: Disable Power Saving Features
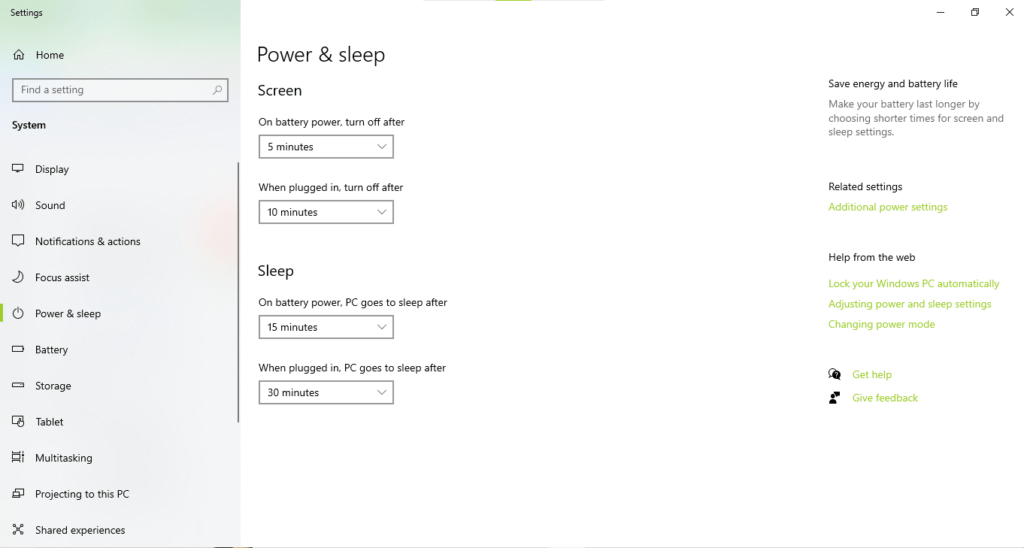
Power-saving features can sometimes interfere with the functionality of USB devices. Let’s disable these features temporarily to see if it resolves the issue.
Step 1: On Windows, right-click on the “Start” button and select “Control Panel.” On Mac, go to “System Preferences.”
Step 2: In the Control Panel (Windows) or System Preferences (Mac), search for and select “Power Options” (Windows) or “Energy Saver” (Mac).
Step 3: Adjust your power plan settings to prevent your computer from entering sleep mode or turning off USB ports to conserve power. You can usually find these settings under “Change plan settings” (Windows) or by adjusting the sliders in the Energy Saver preferences (Mac).
Step 4: Apply the changes and restart your computer.
If you’re still facing the same issue, let’s proceed to the final troubleshooting method.
Method 7: Test with a Different HDMI Cable and Monitor/TV

If you’re still encountering issues, it’s time to test your setup with different components to isolate the problem.
Step 1: Replace the existing HDMI cable and monitor/TV with the borrowed ones.
Step 2: Connect the JCreate USB™ to HDMI adapter to your computer using the new HDMI cable and connect it to the borrowed monitor or TV.
Step 3: Check if the JCreate adapter works with the new setup. If it does, it suggests that the original HDMI cable or monitor/TV may be faulty.
Step 4: If the adapter still doesn’t work with the new setup, it may indicate a problem with the adapter itself. Consider contacting the manufacturer for further assistance or a replacement.
Method 8: Disable Security Software
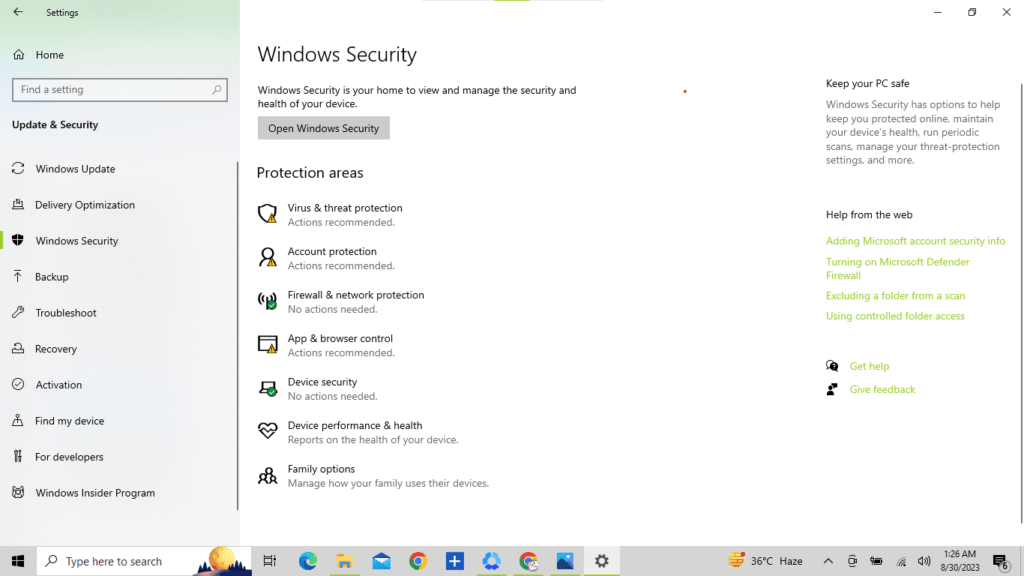
Security software, such as antivirus or firewall programs, can sometimes block or interfere with the operation of USB devices like the JCreate USB™ to HDMI adapter. Let’s temporarily disable security software to see if it’s causing the problem.
Before we proceed, please ensure that you have administrator privileges on your computer.
Step 1: Locate the security software icon in your system tray or taskbar. It may look like a shield, antivirus logo, or firewall icon.
Step 2: Right-click on the security software icon and look for an option to disable or turn off the software temporarily. This option might be labeled as “Disable,” “Pause,” or “Turn off protection.”
Step 3: Follow the on-screen prompts to disable the security software. Note that some security software may require you to set a duration for the temporary disablement.
Step 4: Once the security software is disabled, reconnect the JCreate USB™ to HDMI adapter to your computer’s USB port and check if the HDMI output is now working on your monitor or TV.
Step 5: After testing, remember to re-enable your security software to ensure the ongoing protection of your computer.
If disabling the security software resolves the issue, you may need to configure the software to allow the JCreate adapter or add it to an exclusion list. Consult the security software’s documentation or support for guidance on how to do this.
By following these troubleshooting methods step by step, you should be able to diagnose and resolve most issues with your JCreate USB™ to HDMI adapter not working. Remember to test each method carefully, and if all else fails, don’t hesitate to seek help from the manufacturer’s customer support or a professional technician for further assistance.
Bonus Tip:
Stay updated with the firmware for your J5Create USB to HDMI adapter. Updates enhance compatibility and performance and fix bugs for a smoother experience.
Conclusion
So, that’s the scoop on fixing your J5Create USB-to-HDMI adapter. There’s no need to get frustrated if it’s not working; there is always a solution! Just remember to check your cables, update things like drivers and graphics, and try a few other tricks we talked about.
If you’re still stuck, don’t hesitate to ask for help from J5Create’s support team. With these steps, you’ll be well on your way to enjoying your adapter and all the cool stuff it can do. Happy connecting
If you’re frequently encountering connectivity issues with wired solutions like USB to HDMI adapters, it might be time to explore a reliable wireless alternative. A wireless video transmitter ensures smooth and hassle-free video streaming without the need to troubleshoot tricky cable connections.
FAQs about J5Create USB
Q: What if my adapter’s not showing on the external display?
A: Double-check the input source on your external display. Make sure you’ve selected the right HDMI input.
Q: How do I make sure my adapter doesn’t overheat?
A: Give your adapter some space to breathe. Avoid tight spaces or covering it up to prevent overheating.
Q: Can a software update help?
A: Yes, updating your computer’s operating system can fix compatibility problems and improve adapter performance.
Q: What if my computer only has USB 2.0?
A: The adapter is backward compatible with USB 2.0. It’s great for regular office stuff but might not support all features.


.png)
.png) Français
Français .png) Deutsch
Deutsch .png) Italiano
Italiano .png) 日本語
日本語 .png) Português
Português  Español


