.png)
Lights, camera, action! You’ve spent hours meticulously editing your video masterpiece in Adobe Premiere Pro, and now it’s time to bring your vision to life. As you approach the final step of exporting your video, you may find yourself wondering: Do I need to render before exporting? Will it make a significant difference in the quality or performance of my final product? Well, hold on to your editing seats because we’re about to dive into the truth behind this age-old question.

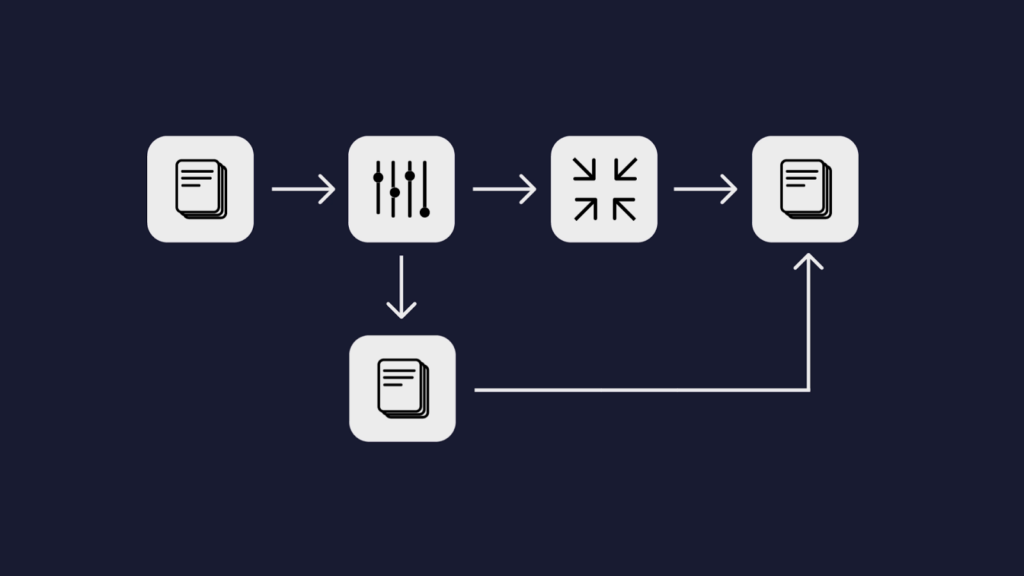
Before we explore the need for rendering before exporting, let’s clarify a crucial point: exporting a video essentially involves two primary processes—rendering and encoding. Rendering refers to the process of generating preview files or rendering effects within your editing software, while encoding is the conversion of those rendered files into a specific video format suitable for playback.
Now, here’s the kicker: Whether you render before exporting or not, when you export the final video, the software will automatically render the video or use any pre-rendered video files it has available. In other words, rendering will occur during the export process regardless of your prior rendering efforts. So, does this mean rendering before exporting is a futile endeavor? Let’s find out!
When it comes to rendering before exporting in Adobe Premiere Pro, the answer can vary depending on different scenarios. Let’s explore two common scenarios where rendering can have a significant impact.
Scenario 1: If You Want Exporting Faster.
If your priority is to speed up the exporting process, rendering before exporting becomes crucial. When you render a sequence in Premiere Pro, it creates pre-rendered files that store the processed data, such as effects, color corrections, and transitions. These files can be utilized during the export phase, resulting in faster rendering times since the software can use the pre-rendered files rather than processing everything in real-time during export. By pre-rendering, you essentially offload the rendering workload from the export phase, significantly reducing the overall export time. We’ll discuss the tricks to make exports process faster in-depth in our further discussion.
Scenario 2: Smooth Playback While Editing
For smooth playback during editing, rendering is beneficial. Pre-rendering generates temporary preview files that allow for playback without real-time rendering, ensuring a seamless editing experience, especially when working with complex effects or high-resolution footage. We’ll also discuss smooth playback while editing
The Scenarios You Can Choose to Pre-Render or Not
In certain situations, such as when you are working on simple cuts, adding background music, or incorporating subtitles, you may not necessarily need to pre-render before exporting. If your project involves minimal processing or includes small-sized videos that can be handled by your system’s resources without performance issues, you can choose to leave the rendering step out of the workflow and proceed directly to exporting.
Ultimately, the decision to render before exporting in Premiere Pro depends on the specific requirements of your project, your desired export speed, and the need for smooth playback during the editing process. Assess the complexity of your project and the resources available to you, and make an informed choice based on the specific circumstances.
Tricks to Make Premiere Pro Exports Faster
We’ll delve into some tried-and-true tricks that can help you accelerate your Premiere Pro exports, unlocking the speed potential and saving you precious time.
- Utilize Adobe Media Encoder
One powerful way to speed up your Premiere Pro exports is by harnessing the capabilities of Adobe Media Encoder (AME). AME is a dedicated encoding software that works seamlessly with Premiere Pro, allowing you to queue multiple exports, apply presets, and continue working on other projects simultaneously. By leveraging AME, you can distribute the processing load across multiple cores, resulting in faster exports.
- Optimize Your Export Settings
Choosing the right export settings is essential for balancing video quality and export time. Consider the following tips:
- Video Codec: Select a codec that strikes a balance between file size and quality. H.264 is a widely used codec that offers good compression and compatibility.
- Bitrate: Adjust the bitrate to find the optimal balance between quality and file size. Higher bitrates generally result in better quality but larger file sizes.
- Resolution: Export at the resolution required for your specific project. Scaling down the resolution can significantly reduce export times.
- Frame Rate: Ensure that your export settings match the frame rate of your project. Mismatched frame rates can lead to unnecessary processing overhead.
- Smart Rendering and Preview Files
Premiere Pro offers a feature called Smart Rendering, which allows you to skip the rendering process for certain portions of your timeline. This is particularly useful if you have sections of your video that require no further changes or effects. By utilizing Smart Rendering and preview files, you can save considerable time during the export process.
- Compressing the Previews
When exporting a clip with color corrections in Premiere Pro, the software goes through a rendering process, including compressing the data into the output codec. This can take around 60 seconds for a lengthy clip with numerous adjustments. However, there’s a way to save time by utilizing preview files.

Instead of rendering and exporting immediately, you can choose to render the clip separately and save it as a preview file on your hard drive. To do this, click on “sequence” and select “render in to out.” Premiere Pro will then render the clip and store it as a preview file, indicated by the green bar on the timeline.
By creating a preview file, you can use it for exporting later without the need to render the clip again, significantly reducing export time.
- Smart Rendering from the Source
This next trick can have a significant impact on Premiere Pro exports, but it’s specifically beneficial for those who are solely focusing on editing and not performing color correction.
Imagine you’re the film editor, and the camera department has provided you with proxy files for editing. These proxy files are converted from the raw camera footage into a DNxHD proxy format with a standard rec709 look. Since your task is solely editing, without any color correction or special effects in Premiere Pro, you can take advantage of this workflow.
If you export your project using the same format as your source footage (DNxHD in this case), Premiere Pro doesn’t need to render or compress anything. As you haven’t applied any color correction or effects to your clips, Premiere Pro can directly copy the images from the original DNxHD files and paste them into your exported file, which is also in DNxHD format.
This method utilizes Premiere Pro’s Smart Rendering feature for faster exports, but in this case, we’re not using the Use Previews feature. Smart Rendering from your source footage allows you to export an entire 10-minute film within seconds—it’s that fast.
Keep in mind that since we’re using Smart Render, you can only use specific codecs listed on the page. Codecs like H.264 won’t work with this workflow, but ProRes, DNxHD, and Cineform are compatible and yield excellent results.
- Trim Your Timeline
Before exporting, carefully review your timeline and trim any unnecessary clips or sections. By removing unused or redundant content, you reduce the amount of data that needs to be processed during export, resulting in faster export times.
- Export in the Background
Premiere Pro allows you to export your project in the background while you continue working on other tasks. This feature maximizes your productivity by enabling you to work on new projects or make edits in other sequences while the export process runs in the background.
Cons of Rendering Previews Files
- Time-Consuming: Rendering your entire timeline before exporting can be time-consuming, especially for lengthy or complex projects. It adds an extra step to the process, which might not be practical if you’re working under tight deadlines.
- Storage Space: Rendered files can occupy a significant amount of storage space on your computer. If you have limited storage capacity, rendering before exporting may not be the best option, especially if you plan to make further edits or changes to the project.
Setting Up Smart Previews without Quality Loss
If you’re looking to accelerate your Premiere Pro exports without compromising quality, the Smart Previews feature can be a game-changer. By utilizing Smart Previews, you can render previews of your footage that maintain high quality while significantly speeding up the export process. Here’s how to set it up:
Create Smart Previews
Before you start editing, you’ll need to generate Smart Previews for your footage. To do this, follow these steps:
- Import your media files into Premiere Pro.
- Right-click on the media files in the Project panel.
- From the drop-down menu, select “Create Proxies.”
- In the “Create Proxies” window, choose the “Ingest” checkbox and select “Smart” from the Proxy Format options.
- Click “OK” to generate Smart Previews for your footage. Premiere Pro will start creating proxy files with smaller file sizes while maintaining high-quality visuals.
Edit with Smart Previews
Once the Smart Previews are created, you can edit your project using these lower-resolution files. Smart Previews allow you to maintain real-time playback and smooth performance even with high-resolution or complex footage, ensuring a seamless editing experience.
Enable Smart Previews for Export
When you’re ready to export your project, ensure that Smart Previews are enabled for faster export times. To do this:
- Go to the “File” menu and select “Project Settings.”
- In the “Project Settings” window, navigate to the “General” tab.
- Check the box next to “Use Previews” to enable the use of Smart Previews during export.
- Click “OK” to apply the settings.
By enabling Smart Previews for export, Premiere Pro will utilize the already-rendered Smart Previews instead of re-rendering the original high-resolution footage. This significantly speeds up the export process while maintaining the visual quality of your project.
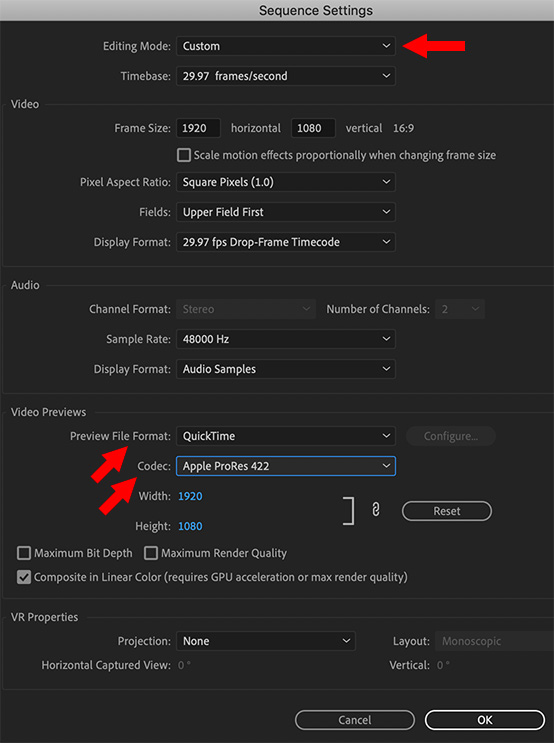
NOTE: For effective Smart Rendering in Premiere Pro, it’s crucial to have matching parameters between the source codec, size, frame rate, and bit rate with the export settings. This ensures optimal performance and faster exports. Smart Rendering is compatible with both MXF and QuickTime wrappers, but it requires consistency in these parameters. Mismatches may prevent Smart Rendering and require traditional rendering methods. Ensure alignment for efficient Smart Rendering and faster exports without sacrificing quality.
Feature of Smooth Playback While Editing in Premiere Pro
When working on a complex project in Adobe Premiere Pro, experiencing laggy or choppy playback can hinder your editing process. Fortunately, there are techniques you can employ to ensure a smoother playback experience. Here’s how:
Pre-Render Sequences
One effective method is to pre-render sequences in Premiere Pro. Pre-rendering generates temporary preview files for your timeline, allowing for smoother playback during editing. To pre-render a sequence:
- Select the sequence you want to pre-render in the Timeline.
- Go to the “Sequence” menu and choose “Render In to Out” or press the shortcut Ctrl+Enter (Windows) or Command+Return (Mac).
- Premiere Pro will begin rendering the selected sequence, and a green bar will appear indicating the pre-rendered sections.
By pre-rendering sequences, you’re essentially creating preview files that can be played back without the need for real-time rendering, resulting in smoother and more fluid playback during the editing process.
Adjust Playback Resolution
Lowering the playback resolution can also enhance playback performance in Premiere Pro. By reducing the resolution, you reduce the computational load on your system, leading to smoother playback. To adjust the playback resolution:
- In the Program Monitor, click on the wrench icon to access the Playback Settings.
- Under “Playback Resolution,” select a lower resolution option, such as 1/2 or 1/4.
- Play back your sequence to experience improved playback performance.
Utilize Proxy Workflow
Another powerful technique for achieving smooth playback is using the proxy workflow in Premiere Pro. Proxies are lower-resolution versions of your original media files, allowing for faster and more efficient editing. To set up proxies:
- Right-click on your media files in the Project panel.
- Select “Proxy” > “Create Proxies…”
- In the “Create Proxies” window, choose a proxy format and resolution that suits your needs.
- Click “OK” to generate proxies for your media files.
By switching to proxy files, Premiere Pro uses the lightweight versions for editing, resulting in improved playback performance even with high-resolution or resource-intensive footage. You can easily toggle between proxy and original files for editing and final rendering.
Bonus Tip: How to Pre-Render Videos in Premiere Pro
Pre-rendering your videos in Adobe Premiere Pro can significantly improve playback performance and enhance the editing experience. Here’s a step-by-step guide on how to pre-render videos:
Select the Sequence
Choose the sequence in the Timeline panel that you want to pre-render.
Enable Pre-Roll and Post-Roll
To ensure a seamless transition between pre-rendered and unrendered sections, enable pre-roll and post-roll options. These settings allow for smoother playback when moving in and out of the pre-rendered sections.
Render In to Out
Go to the “Sequence” menu and select “Render In to Out” or use the keyboard shortcut Ctrl+Enter (Windows) or Command+Return (Mac).
Monitor the Rendering Process
Premiere Pro will start rendering the selected sequence, and a progress bar will appear in the program monitor or the status panel. Allow the rendering process to complete.
Playback Pre-Rendered Sections
Once the pre-rendering is finished, the pre-rendered sections of the sequence will be indicated by a green bar above the timeline. You can now play back these sections without any rendering delays.
By pre-rendering your videos, Premiere Pro generates temporary preview files that store the rendered data. This enables smoother playback during editing, eliminating the need for real-time rendering of complex effects or high-resolution footage.
NOTE: Remember to save your project regularly to preserve the rendered preview files. If any changes are made to the sequence after pre-rendering, you may need to re-render the affected sections.
Codecs Understanding
Codecs in an MXF wrapper that support smart rendering:
- AVC-Intra in MXF (Format: MXF OP1a, AS-11)
- DNxHD & DNxHR in MXF (Format: DNxHR / DNxHD MXF OP1a)
- DNxHD MXF OP-Atom to DNxHD MXF OP1a
- JPEG 2000 (only in 12-bit PQ space)
- MXF OP-Atom AVC Intra to MXF OP1a AVC-Intra
- MXF OP1a to DNxHD MXF OP1a
- XDCAM HD (Format: MXF OP1a, AS-10)
- XDCAM EX (Format: MXF OP1a)
- XAVC-Intra in MXF (Format: MXF OP1a)
To activate smart rendering for MXF codecs, enable the “Enable smart rendering codec” option in the Video settings tab of the preset.
Codecs in a QuickTime wrapper that support smart rendering:
- Animation
- DNxHD
- GoPro CineForm
- Uncompressed RGB 8-bit (NONE)
- ProRes 422
- ProRes 422 (HQ)
- ProRes 422 (LT)
- ProRes 422 (Proxy)
- ProRes 4444
Smart rendering for QuickTime codecs is automatically enabled when the source settings match the export settings.
While you’re fine-tuning your Premiere Pro workflow, having a reliable wireless video transmitter can greatly streamline monitoring your edits in real-time. It helps you preview high-quality video playback externally without frequent rendering, letting you easily share results right on set or in the edit suite.