.png)
Inverting your camera is one way to go if you want to unlock new possibilities in creative photography. It involves modifying the orientation of your photos or videos or changing the positioning of your device vertically or horizontally. This enables you to get unique perspectives on your photos and enhance your multimedia experience.

Inverting the camera also involves flipping the picture or video during post-processing. When it comes to computer vision or 3D graphics, it refers to changing the position from which the real or virtual world is captured. There are two reasons why people invert cameras – to correct the orientation and to add creative depth to their artistry.
Whichever reason you have for inverting the camera on your device, you’ll be pleased to know that the process is straightforward. Let’s explore how you can invert the camera on various devices.
Why Do You Need to Invert Your Camera?
If you’ve wondered what people gain from inverting their device cameras or pictures, this section will grant you some insights.
- Exploring Creativity: People have adhered to the “normal” rules of photography and videography for too long. Now, we’re in an era where people challenge traditional perspectives by enabling compelling but unique compositions. Inverted camera usage opens up tons of possibilities for creative expressions and displays.
- It Unlocks New Levels of Visibility: An inverted camera brings to light details you never thought existed. When you take perspectives such as low-angle filming or overhead shots, camera inversion gives you a much clearer shot of the object or subject. The end product will be a visually captivating video or image.
- Enhanced Adaptability: The inverted camera does more than allow for enhanced artistry. The inverted camera also has practical benefits as well. In a scenario where you have to capture something from a difficult position or document intricate processes, inverting your camera makes it easier and improves the detail you’ll get from the shot.
- Makes You Better At Your Craft: When you know to use inverted cameras for your content creation, photography, or videography, the artistry will distinguish you from the crowd. You’ll develop a reputation as a non-conforming creative. An inverter camera enables the synergy between visual storytelling and innovation.
- Improved Ergonomics: Inverted camera usage gives you a better grip on your camera during a shoot. This enhances control and minimizes strain on your hand. This can be incredibly useful in situations where you have to shoot for a long period.
Step-By-Step Guide to Inverting Camera
How to Invert The Camera On An Android Phone/Tablet?
The process of inverting cameras on Android devices is generally similar, with a few variations based on the make, model, and Android version of the device. So, even if the steps below are not identical to those required for your device, you’ll know what to do. We’re using a Samsung phone for this illustration:
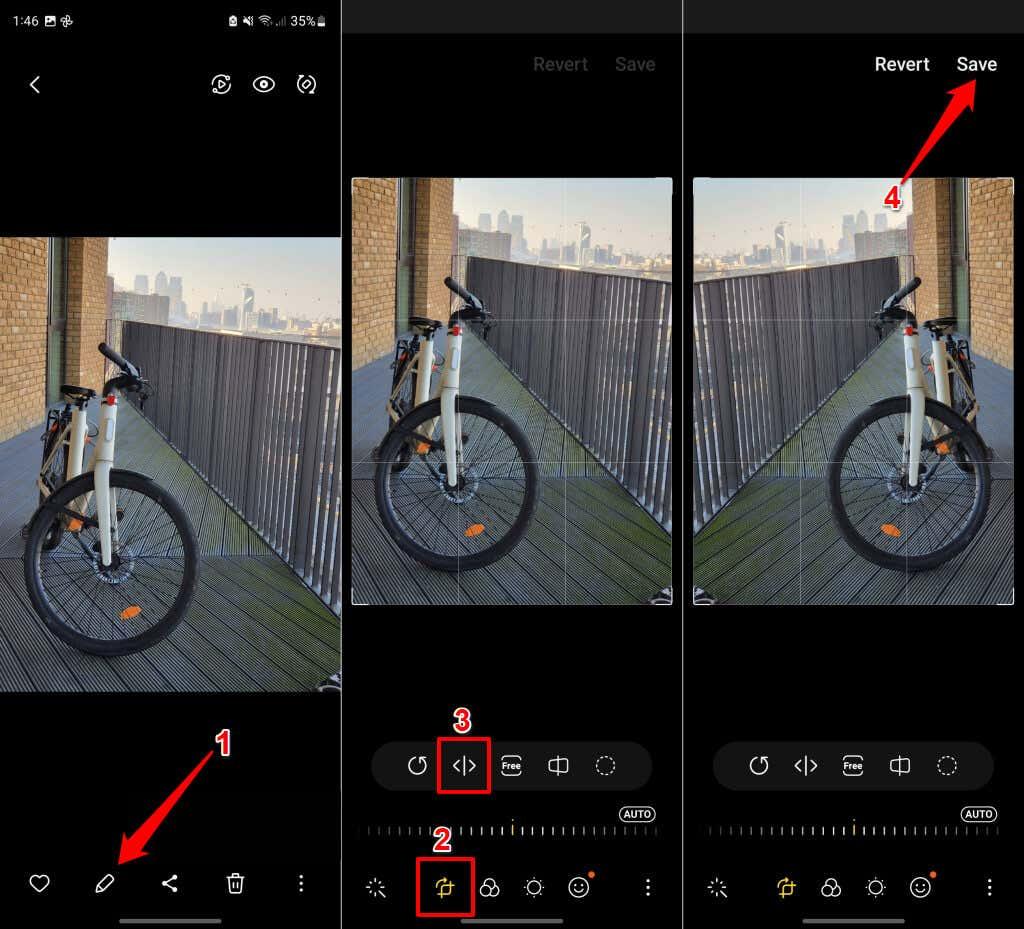
- Launch your camera application and capture a photo, preferably one that contains multiple objects.
- Ensure that everything you want to capture is within the frame of the camera.
- The next thing is to flip the photo, so tap on the edit icon. It’s usually denoted by a pencil on many devices.
- You’ll see five icons on display; tap the second one, which is denoted by a vertical line between two brackets. You’ll notice it flipping to the reverse side (the first image in the original photo will be the last photo in the modified one).
How To Invert Camera On iPhone/iPad?
Like Android devices, the process for inverting the camera on an iPhone may vary slightly based on the phone and iOS version. Here are the steps:

- Take your iDevice and go to settings. Scroll down, and tap on your camera icon to access the settings menu for that application.
- Go to ‘composition.’ You’ll see various options displayed. Look for ‘Mirror Front Camera’.
- If it’s enabled, toggle it off.
- Then, test your camera to see if the changes have taken effect by taking a photo. You can also close the app and reopen it to test it again to ensure that the changes have taken place.
How To Invert Camera On Webcam For Your Windows & Mac PCs?
It can be frustrating to have your appearance incorrectly flipped in virtual meetings or video interviews. To resolve this for all video conferencing platforms you use, you should do the following:
- Download and install virtual webcam software. FineCam is a good example.
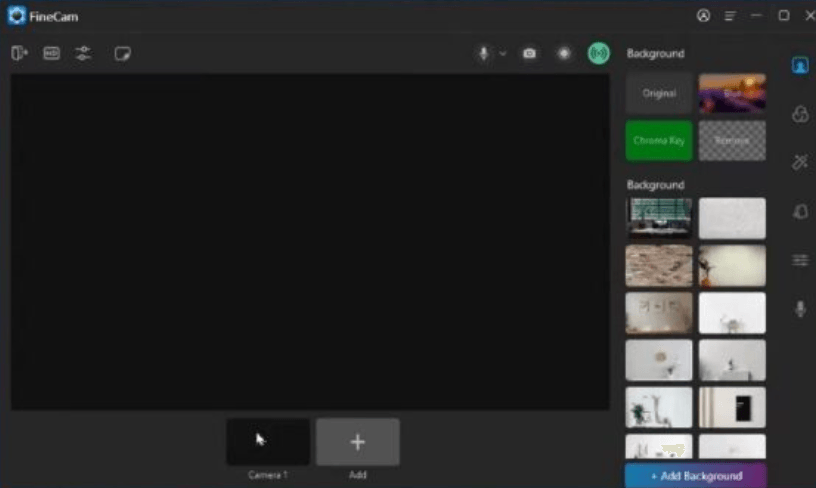
- Launch the application and connect your webcam to it. Start by connecting your webcam to capture the video.
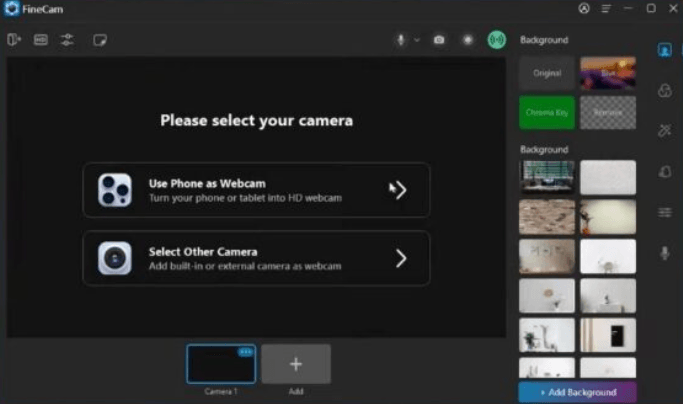
- Then, connect the internal or external camera (depending on the kind of webcam you use) via WiFi or USB. Alternatively, you can use your iPhone or Android phone as a 4k HD webcam.
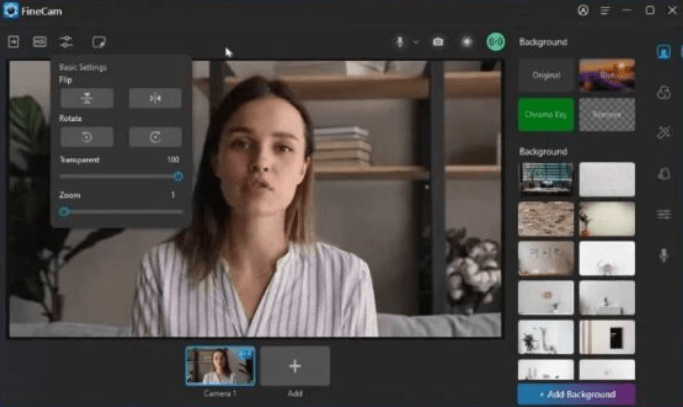
- Use the “Transform penal” to flip or rotate webcams depending on how they appeared initially. You’ll see the transform buttons at the top of the page. You can choose to flip it vertically or horizontally.
To apply this on video chat platforms:
- Enable the virtual webcam software.
- Select the application as the default camera on the video-conferencing application. Let’s use Microsoft Teams, for example.
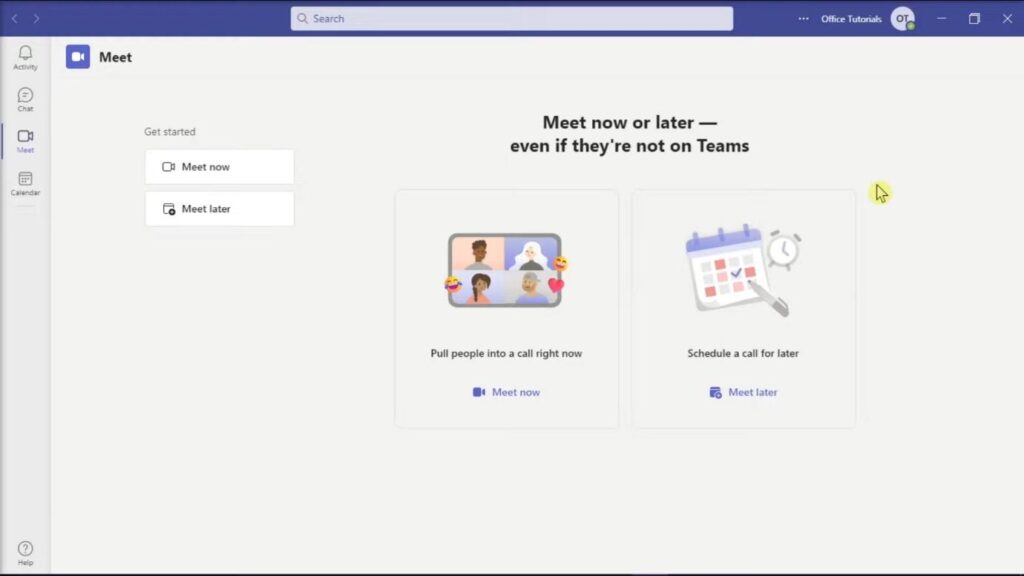
- Launch Teams.
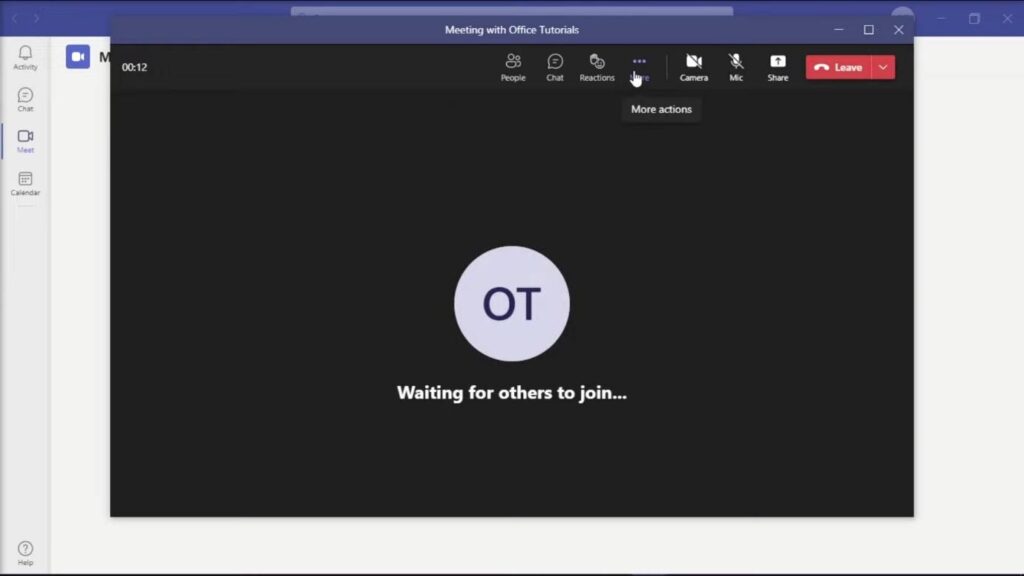
- Tap on “More Actions” and select Settings.
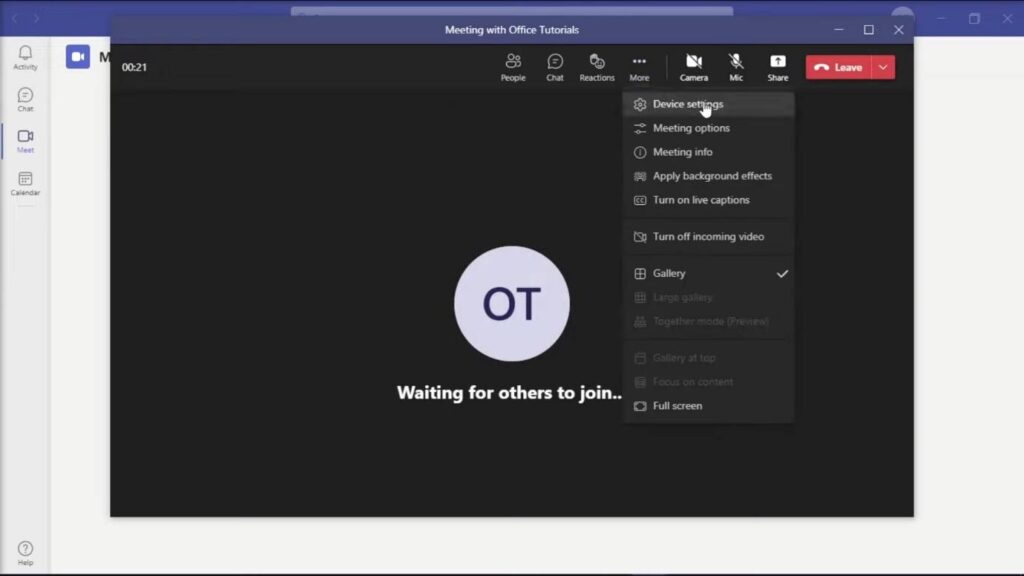
- Go to Device Settings and scroll down to the camera section.
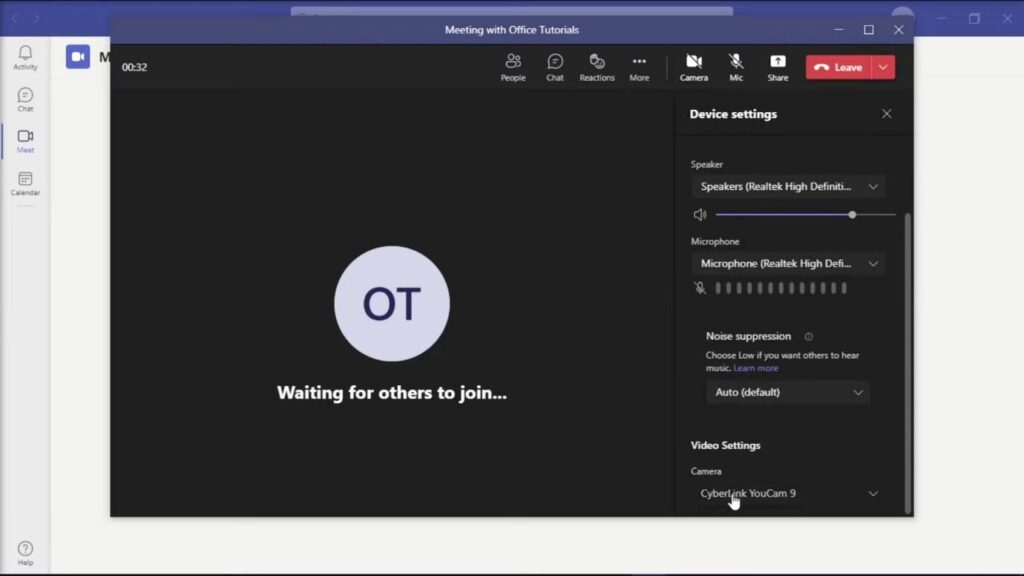
- Here, you’ll expand the camera list and select the virtual webcam software as your camera.
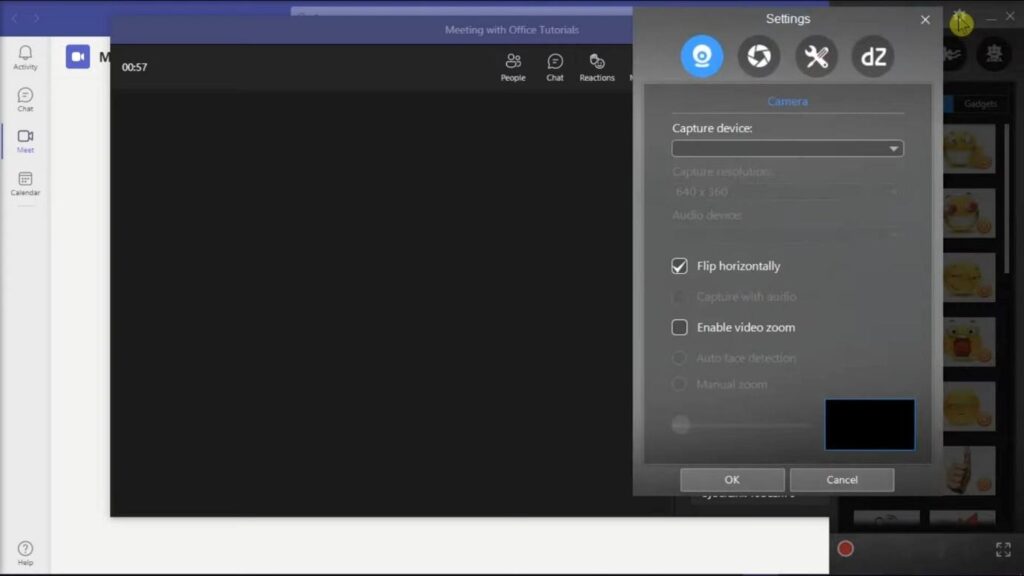
- Then, exit the settings menu and open webcam software. In the settings, click “Flip Horizontally”. The video orientation should be correct now.
How to Invert a Camera Lens?
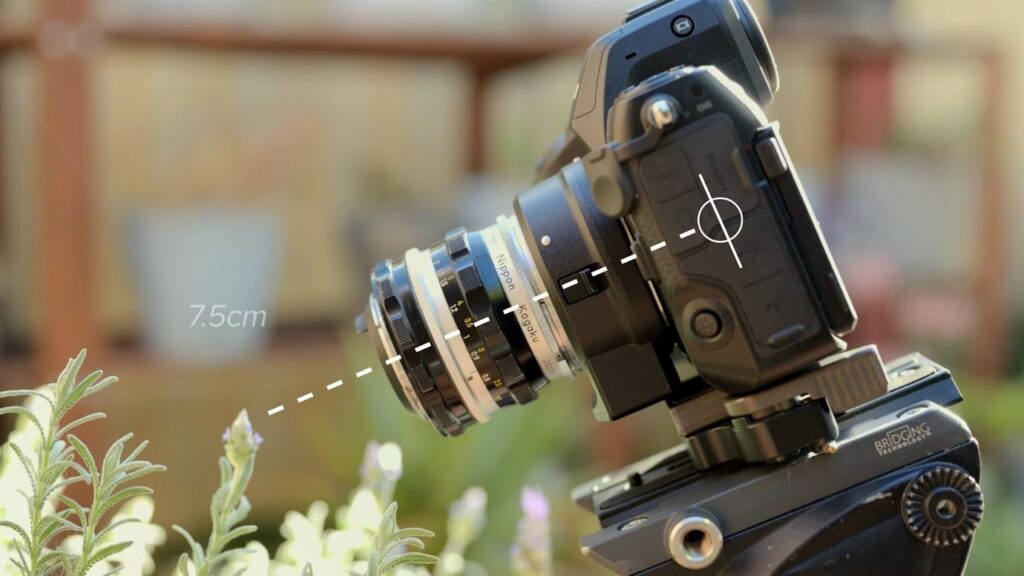
Filmmakers and photographers who want to get close-up shots for enhanced detail, like macro photography, have to invert their camera lenses. It’s a very short process. When you get your lens, reverse it instead of mounting it the usual way on your camera. Ensure that the larger side is attached to the camera and the smaller side is used to focus on the object of the image.
Best Practices for Camera Inversion
Unfortunately, not all cameras are like Hollyland VenusLiv, which enables horizontal and vertical inversion in the blink of an eye and without learning techniques.
Therefore, to get the best of camera inversion and distinguish yourself from the crowd, there are specific practices that should be second nature. All these methods will help you make the best inversions, bringing you closer to the realm of creative possibilities.
- Consistent Platform Standards: There are established standards for camera inversion regardless of the device or platform. This means it doesn’t matter if you’re inverting the camera on an Android or Apple smartphone, a webcam, a PC, a professional camera, or platforms such as Google Meet, Zoom, etc. Being consistent with certain standards enhances familiarity with the process and makes mastery easier to attain. Most importantly, it reduces the user’s learning curve when switching between platforms or devices.
The best way to go about this is through testing across devices. You should thoroughly test camera inversion functionality across various tablets, smartphones, webcams, and PCs. Consider the responsiveness of the input methods and screen sizes as well as the consistency in performance.
- Give Room for Customisation: Even among photographers, filmmakers, editors, and content creators who utilize camera inversion in their professions, there are a variety of preferences. This is where customization comes in. Implementing customizable camera inversion settings makes it possible to adapt the multimedia experience to your taste and preference. Furthermore, it incorporates accessibility features, for example, flexible sensitivity settings, and provides options for horizontal and vertical inversion to accommodate diverse user needs.
- Use Responsive Controls: This is one good way to have a seamless photography or cinematography experience. Tolerating lags or delays in camera adjustments can harm the process, and that’s a big minus for user satisfaction and immersion. On the other hand, having responsive controls can be the difference maker because the camera inversion controls can imitate real-time movements.
- Documentation: Going through the motions without documenting each step results in an incomplete experience. So, provide detailed documentation on camera inversion features and the steps to troubleshoot common issues for users to refer to easily in the future.
- Integrate User Feedback: No one knows it all. That’s why there should be channels through which you can get user feedback. This will not only provide relevant insights but give you something to work with for future updates. Through reviews, surveys, and analytics, you can figure out potential improvements or modifications for the camera inversion features.
Conclusion
Camera inversion only works when you can access certain settings to enhance user experience. For smartphones, the solution lies within the camera settings. For PCs, access the camera settings via the webcam application or operating system. To get the best out of camera inversion, ensure you tick the boxes of regular software updates, secure webcam connections, and fix unexpected inversions. Sticking to the steps in the above guides will ensure enhanced control, improved functionality, and a richer multimedia experience.
Frequently Asked Questions – FAQs
Why Does My Camera Automatically Invert During Video Calls?
The reason for this is the kind of configurations within the video-conferencing application. To rectify the problem, you need to visit the settings menu in the video chat app. Check to see if the option for automatic camera adjustment is enabled. If it is, toggle it off. Furthermore, ensure that your device’s camera drivers and operating system are up-to-date.
What Should I Do If My Device Isn’t Saving My Camera Inversion Settings?
If you’ve repeatedly done some configurations on your phone, laptop, webcam, or tablet for camera inversion and they aren’t taking effect, there are some things you can do to troubleshoot the issue. Firstly, update your device’s software if it’s not the current version. If that doesn’t work, re-launch your camera app or restart the device. Check if you have the relevant permissions that will enable you to modify camera settings. If all these don’t work, you can uninstall the camera app and reinstall it or contact technical support for assistance.
What Are The Upsides Of Camera Inversion On Video Conferencing Platforms?
Camera inversion fosters a more intuitive communication experience. Secondly, you can present a mirrored and natural view to other parties. Thirdly, it makes it easier to interpret visuals, gestures, and text on-screen.
Are There Third-Party Apps That Can Help With Camera Inversion?
Yes, there are. Some third-party camera applications come with advanced customization options that enable camera inversion. The trick is to find the ideal app that’s compatible with your device and offers features that appeal to your preferences.
Do All Webcams Have Internal Camera Inversion Features?
No, they don’t. The availability of the camera inversion feature depends on the make and model of the webcam. To determine if your webcam has the feature or not, check the device’s specifications or the user manual.