


.png)
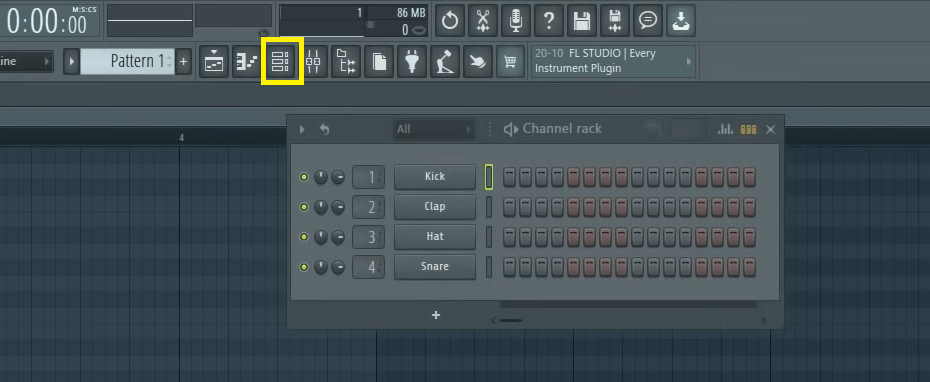
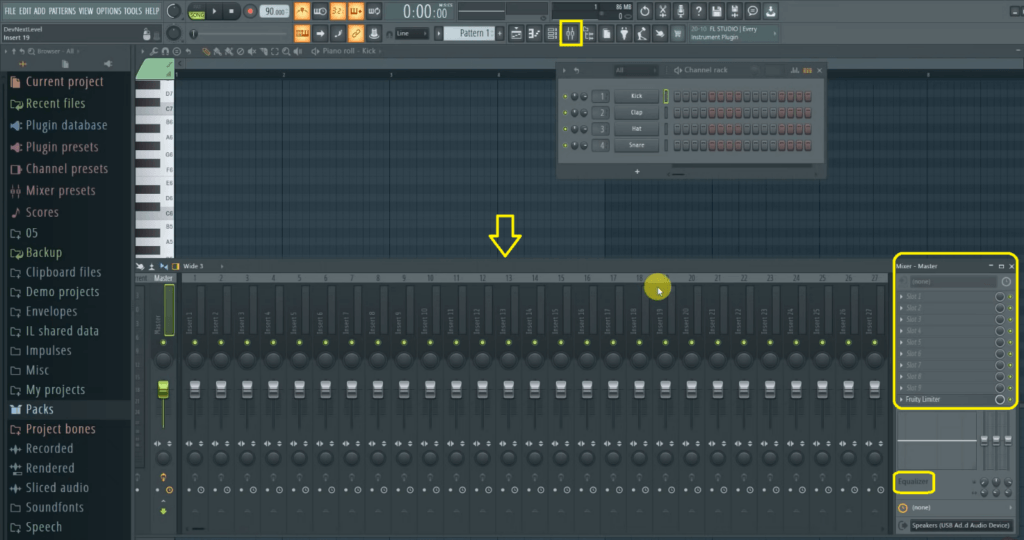
Users get control over their sound sources and can unleash their creativity in creating tracks by accessing the channel rack. In FL Studio, there are multiple ways to access the channel rack. Users can alter the visibility of the channel rack using keyboard keys such as F6 or select specific layouts from the “View” menu. The picker panel can also be used to enable the channel rack display option. Understanding how to unlock the channel rack is critical for fully utilizing FL Studio’s amazing audio composing capabilities.
What is a channel Rack in FL Studio?
The Channel Rack is an essential component of the FL Studio workflow. It is a section in which you can arrange and organize patterns and sequences for various instruments and sounds.
The Channel Rack is located at the bottom of the FL Studio interface and is divided into individual slots, each of which represents a different channel or instrument. Consider it a virtual rack in which you may add and manage multiple musical parts.
The Channel Rack is where you start when making music in FL Studio. It displays your patterns and allows you to simply combine and modify them to make your compositions.
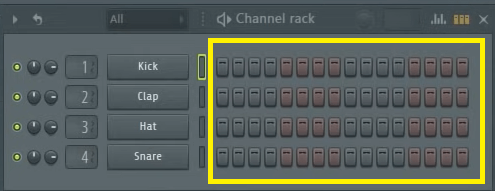
Patterns for each instrument or sound can be created and edited in the Channel Rack. Patterns are simply musical sequences that might range from a single note to a full song. Patterns can be programmed using MIDI notes, automation data, and other sound events.
You can create advanced musical arrangements by layering multiple sounds and instruments by arranging patterns in the Channel Rack. You can also apply different effects and processing to each channel or instrument.
Where is the Channel Rack in FL Studio?
By default, the Channel Rack in FL Studio is placed at the bottom of the interface. It’s a horizontal section that covers the width of the main window. However, the specific layout and arrangement of windows in FL Studio can be customized, so the Channel Rack’s position may vary based on your settings.
You should be able to identify the Channel Rack in FL Studio and use its tools for creating and arranging musical patterns if you follow these steps.
How to Open Channel Rack in FL Studio?
To open the Channel Rack in FL Studio, take the following steps:
- Install FL Studio on your device.
- You will need a functioning keyboard.
- You should see the main interface with multiple windows and sections when FL Studio has loaded.
- By default, the Channel Rack is at the bottom of the user interface.
How to Use Channel Rack in FL Studio?
The Channel Rack is a key component of FL Studio since it allows you to build and organize patterns, melodies, and beats. If you’re new to the Channel Rack and want to learn how to make the most of it properly, follow this step-by-step guide:
Let’s dive in…
- Step 1: Understand the Channel Rack.
You are able to organize and arrange your patterns and sequences in the Channel Rack. It is in the center of the FL Studio interface and has a grid-like arrangement where you can insert and edit various sounds and instruments.
- Step 2: Understand the Channel Rack Layout.
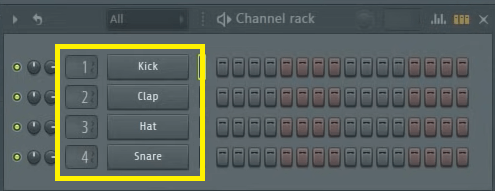
The Channel Rack is made up of numerous channels, each representing a particular instrument or sound. The channels are arranged vertically and can be added, removed, and rearranged as needed.
- Step 3: Add Channels.
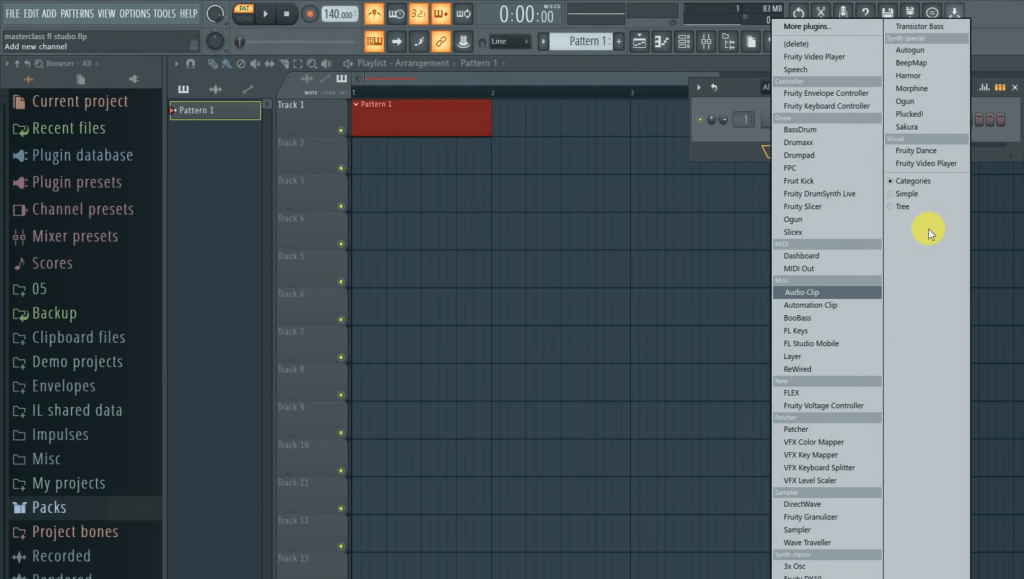
Channels can be added by right-clicking anywhere in the Channel Rack and selecting “Add” from the context menu. A list of available channels, including instruments and audio samples, will emerge. Choose the channel type you want, and it will be added to the rack.
- Step 4: Rename Channels.
By default, each channel is named “Channel X,” where X is a number. To make it easier to identify channels, right-click on one of them, select “Channel settings,” and change the name in the window that displays the appropriate name.
- Step 5: Add Sounds to the Channel Rack.
You can use the built-in instruments or import audio samples to add sounds to the Channel Rack. Here’s how it’s done:
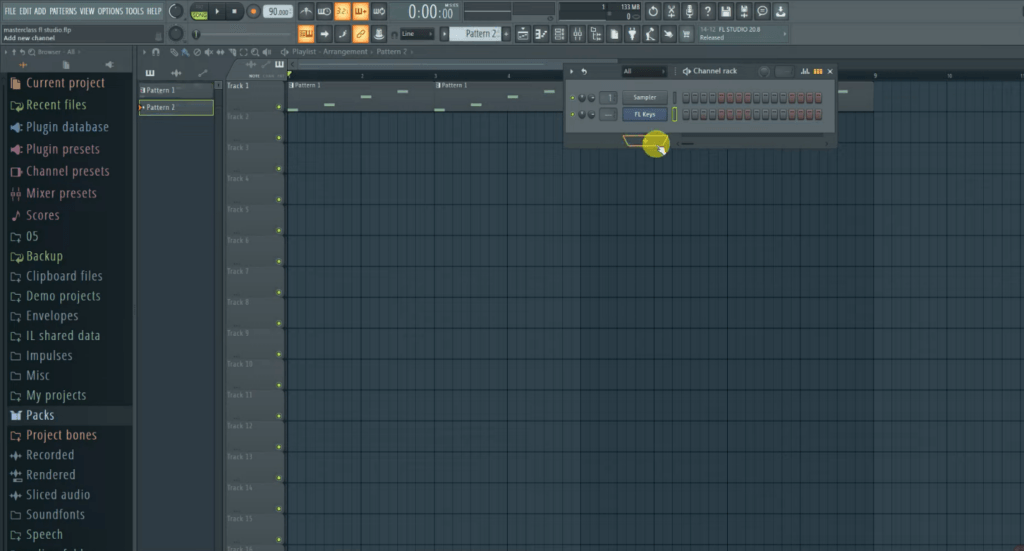
- Adding Built-in instruments.
To add a built-in instrument, right-click in the Channel Rack on an empty channel and select “Add One.” Select an instrument from the list to add it to the channel.
- Importing an Audio Sample.
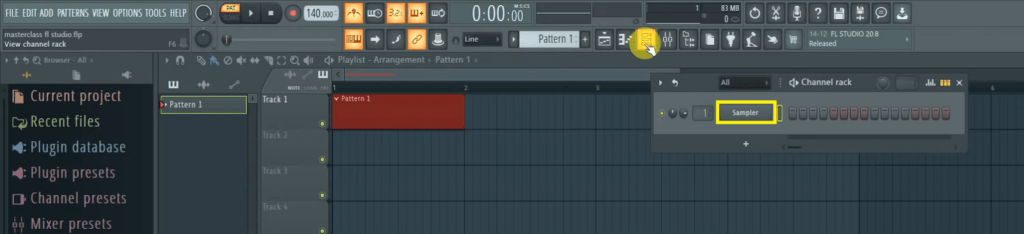
To import an audio sample, right-click an empty channel, choose “Add One,” and then “Sampler.” Click on the empty slot under the “Sample” section in the Sampler settings, and then browse for your audio sample file. The audio sample will be loaded into the channel after it is selected.
- Step 6: Creating Patterns
Patterns are sequences of sounds made in the Channel Rack. Each pattern might include a variety of sounds and notes. Here’s how to make a pattern:
- In the Channel Rack, right-click an empty channel and select “Rename” to give it a suitable name.
- To build a pattern, click the “+” button in the top left corner of the Channel Rack. By double-clicking on the newly formed pattern, you may give it a name.
- To add sounds to a pattern, choose the sound from the Channel Rack and drag it to the chosen pattern. You may also use the paintbrush icon to add or remove sounds by clicking on the desired cells in the pattern grid.
- To extend or loop a pattern, click and drag the pattern’s edge to the desired length. Duplicating patterns is also possible by choosing them and hitting Ctrl+C and Ctrl+V (or Cmd+C and Cmd+V on macOS).
- Step 7: Editing Patterns.
You can edit patterns to create melodies, chords, and rhythms after you’ve made them. Here are some examples of common editing features:
- Right-click on a pattern and choose “Edit” to bring up the Step Sequencer. Using a grid-based interface, you may programme beats and rhythms in the Step Sequencer.
- To modify a sound’s properties, such as volume, panning, or effects, select the sound in the Channel Rack and edit the controls in the Channel Settings box on the left side of the FL Studio interface.
- Step 8: Arranging Patterns in the Playlist.
After you’ve created and edited your patterns, you can arrange them in the Playlist to form a complete song structure. Here’s how it’s done:
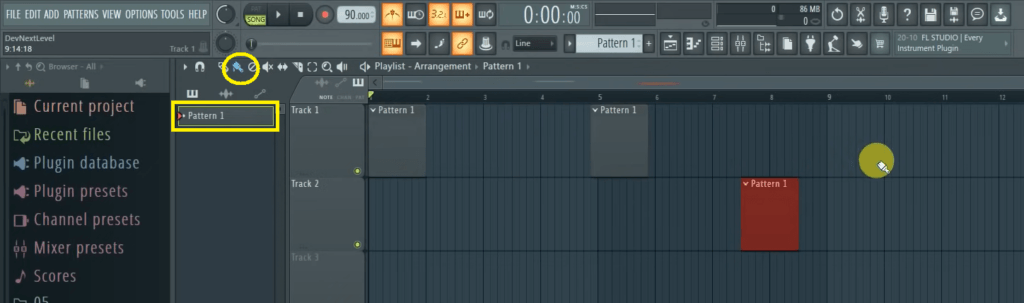
- To access the Playlist, click the “Playlist” tab at the top of the FL Studio screen.
- Drag and drop your Channel Rack patterns onto the Playlist. You can arrange them in the desired sequence by placing them on various tracks.
- Manipulate and organize the patterns in the Playlist using the selection tools. Within the Playlist, you can resize, copy, cut, paste, and move patterns to build the song structure you want.

That’s all! You should now have a good idea of how to utilize the Channel Rack in FL Studio to construct patterns and sequences after reading this beginner’s guide. Remember to experiment and have fun while discovering the numerous possibilities for sound production that FL Studio provides.
Knowing about FL Studio Mobile
FL Studio Mobile is a mobile version of Image-Line’s acclaimed FL Studio digital audio workstation (DAW) software. Users of FL Studio Mobile can create and produce music on their mobile devices, such as smartphones and tablets. It has several features and tools for creating, arranging, recording, editing, and mixing music.
Here are some of FL Studio Mobile’s important features:
Let’s start one-by-one:
- User Friendly Interface.
FL Studio Mobile has an intuitive and user-friendly interface that is optimized for touchscreens, making it easier to access and manipulate the software on mobile devices.
- Instrumentation and Sampling.
It includes a number of virtual instruments, synthesizers, and drum kits that can be controlled with touch gestures. Users can also import their own samples to make their own sounds.
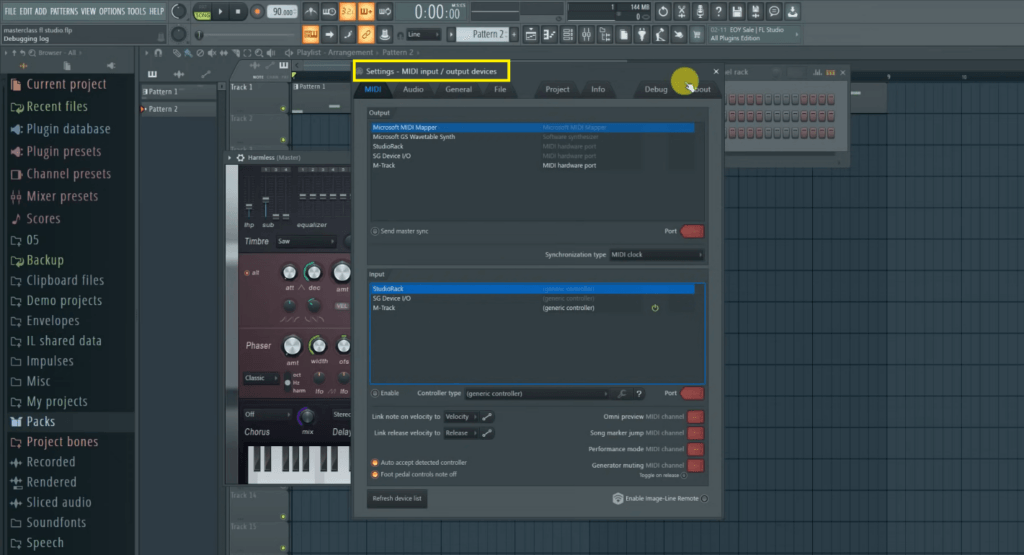
- MIDI Support.
FL Studio Mobile supports MIDI input and output, allowing users to operate the software using MIDI controllers or virtual MIDI instruments.
- Step Sequencer.
The step sequencer allows users to build patterns and sequences by programming individual steps for each instrument or sample, giving them exact control over the rhythm and timing of the music.
- Audio Recording and Editing:
Users can record and edit audio right in the app, whether it’s vocals, instruments, or external sound sources. FL Studio Mobile includes audio editing, cutting, and arranging features.
- Effects and Mixing.
The software offers a number of effects, including as reverb, delay, EQ, and others, that may be applied to individual tracks or the entire mix. It also supports mixing, allowing users to alter levels, pan, and apply automation to produce the desired sound.
- File Management and Export.
FL Studio Mobile supports multiple projects and allows users to organise their files and projects within the app. It also allows you to export projects as audio files, MIDI files, or stems for additional editing in FL Studio’s desktop edition.
FL Studio Mobile is accessible for both iOS and Android devices and allows musicians, producers, and enthusiasts to create sound content on the go.
FL Studio channel rack not showing.
If the channel rack does not appear in FL Studio, you can try the following troubleshooting steps:
- Check the workspace layout.
Make sure to use a plan that incorporates the channel rack. The channel rack should be displayed by default in the “Pattern” arrangement. You can change the layout by selecting a different layout option from the “View” menu.
- Reset the current view.
The channel rack may become hidden or closed by unintentionally. To revert to the default view, go to the “View” menu and choose “Layouts” followed by “Default.” This will return the whole FL Studio interface, including the channel rack, to its default settings.
- Enable the channel rack in the picker panel.
Click the “View” option and then choose “Picker Panel.” Make sure the “Channel Rack” option is selected in the selection panel. If it isn’t already checked, click it to enable channel rack visibility.
- Check the channel rack display option.
Right-click on any existing channel in the channel rack area and uncheck the “Compact View” option. If it’s turned on, click it to turn it off and display the whole channel rack.
- Update FL Studio.
If you’re using an older version of FL Studio, there could be a bug or a compatibility issue. Consider updating FL Studio to the latest version to ensure you have the most stable and up-to-date software.
If you cannot find the Channel Rack in its default location, take a few steps in order to make it visible:
- Look for a “Channel Rack” tab at the bottom of the FL Studio window interface. It may be collapsed or minimized.
- Click on the tab to expand it and reveal the Channel Rack.
- If you have customized the layout and the Channel Rack is still not visible.
- Go to FL Studio’s top menu and select “View.” Navigate to “Layout” and select the “Default” layout option from the drop-down menu. This will restore the interface to its original configuration, which includes the Channel Rack at the bottom.
- If none of the above procedures work, the Channel Rack may have been closed or undocked from the main window.
- FL Studio users can customize their interface by moving or hiding various sections and windows. It’s possible that the Channel Rack was moved, resized, or closed by accident.
- In this scenario, you can toggle its visibility by going to the top menu and clicking “View,” then selecting “Channel Rack” from the drop-down menu.
- You can toggle its appearance by pressing the “F6 key” on your keyboard. To open or close the Channel Rack, press F6 once.
- Pressing F6 several times should cycle through the various display settings, and the channel rack should become visible again.
- If pressing F6 does not bring up the channel rack, there could be a problem with your FL Studio installation. In these situations, it is recommended that FL Studio be uninstalled and reinstalled to verify that all necessary components are properly installed.
If none of these procedures resolve the problem, you may need to contact Image-Line, the FL Studio developer, for more assistance. They can provide you particular troubleshooting instructions or decide if there is a bigger problem that needs to be addressed.
Conclusion:
The channel rack in FL Studio is a vital element of the software’s workflow, allowing users to organize and manage instruments, samples, and patterns. It serves as a hub for creating and arranging sounds, making it a fundamental component for music production. Users can add, rename, and delete channels, as well as group them for streamlined control. The channel rack can be hidden or shown, and its size can be adjusted to fit individual preferences. With its versatile functionality and intuitive interface, the channel rack empowers producers to create and shape their musical compositions efficiently in FL Studio.
When you’re recording tutorials or explanations, clear audio quality makes your content easier to follow and more professional. A wireless lavalier microphone ensures your FL Studio tutorials have crisp, precise sound, allowing viewers to clearly understand each step you demonstrate.
FAQs:
Q1: How do I delete a channel from the channel rack?
A: To delete a channel from the channel rack, follow these steps:
Right-click on the channel you want to delete.
From the context menu, select “Delete” or press the Delete key on your keyboard.
Q2: Can I group channels in the channel rack?
A: Yes, you can group channels in the channel rack. Grouping channels allows you to organize and control them collectively. Right-click on a channel, go to “Group,” and select “Create new group.” You can then assign other channels to the group by right-clicking on them and selecting “Add to group.”
Q3: What is the channel rack in FL Studio?
A: The channel rack in FL Studio is a fundamental component of the software’s workflow. It is where you organize and manage your instruments, samples, and patterns. Each channel represents a sound source, such as a synthesizer, sampler, or audio clip.
Q4: How do I add channels to the channel rack?
A: To add channels to the channel rack, you can use the following methods:
Right-click in the channel rack area and select “Add” to choose an instrument or sample.
Drag and drop an instrument or sample directly onto the channel rack from the browser or file explorer.
Q5: How can I rename a channel in the channel rack?
A: To rename a channel in the channel rack, follow these steps:
Right-click on the channel you want to rename.
From the context menu, select “Rename” and enter the desired name.
Q6: Is it possible to hide or show the channel rack in FL Studio?
A: Yes, you can hide or show the channel rack in FL Studio. Use the F6 key on your keyboard as a toggle to show or hide the channel rack. Alternatively, you can adjust the workspace layout or enable the channel rack from the picker panel (as mentioned in a previous response).
Q7: Can I resize the channel rack in FL Studio?
A: Yes, you can resize the channel rack in FL Studio. Move your mouse cursor to the border between the channel rack and any other adjacent panel. When the cursor turns into a double-sided arrow, click and drag to resize the channel rack.
If you have any additional questions or need further assistance, feel free to ask in the comment section!


