.png)
iPhones are great tools for taking photos of all kinds, whether solo or group photos. Depending on the latest model, e.g., iPhone 15 Pro Max, iPhone gives you access to a variety of features that allow you to make the best images possible.
But here comes the twist. Sometimes, having your awkward arm stretch taken in a selfie is boring and unappealing. Also, your photos may miss the bottom of your face, especially in a group selfie when you are the photographer. How do we end this? Your iPhone timer can help you out. It is an awesome photo feature that makes you a star in every Photo. Follow along with this guide to learn how to do a timer photo on an iPhone.
Why do a timer photo on an iPhone?
When you do a timer photo on your iPhone, you enhance the quality of your photos and enjoy many advantages either as an individual or a group. Here are some of the benefits you will enjoy when you use a timer photo on your iPhone;
- Perfect group shots: When you use the timer photo feature for your iPhone, you can get everyone in position. Also, as the photographer, you can be part of the group without rushing after pressing the shutter button.
- Less photo shake: A timer photo ensures no photo shaking, hence shattering sharper images, especially in low-light situations. This gets to more perfection when a tripod is used.
- Clear and more detailed landscape photography: In the case of landscape photography, more accuracy, clarity, and detail is ensured as camera shakiness is eliminated. This increases landscape photography perfection even in challenging light conditions.
- Self-portraits with rear-facing camera: By default, rear cameras are better than selfie cameras in terms of image quality. When you do a timer photo, you have time to position yourself and capture a quality image without relying on front selfie cameras.
- Close-Up Shots: When photographing close-up subjects, such as flowers or intricate details, the timer and a tripod help stabilize the shot. This is crucial for achieving sharp focus and minimizing any motion blur, allowing you to capture fine details.
How to Do a Timer Photo on an iPhone; Step-by-Step Guide.
How you do a timer photo may vary slightly based on how latest your iPhone is. This guide will give you a step-by-step description of both scenarios. Please stay tuned.
A guide to do a timer photo for the latest iPhone versions.
For the latest versions of the iPhone, that is, from iPhone 12 moving forward, follow these simple steps to do a timer photo on your iPhone;
Step 1: On your iPhone device, click and open your camera app right away.
Step 2: Place your iPhone in the perfect position where you want the shot to be taken.
Step 3: As shown below, tap the upward-facing arrow at the top of your iPhone screen.
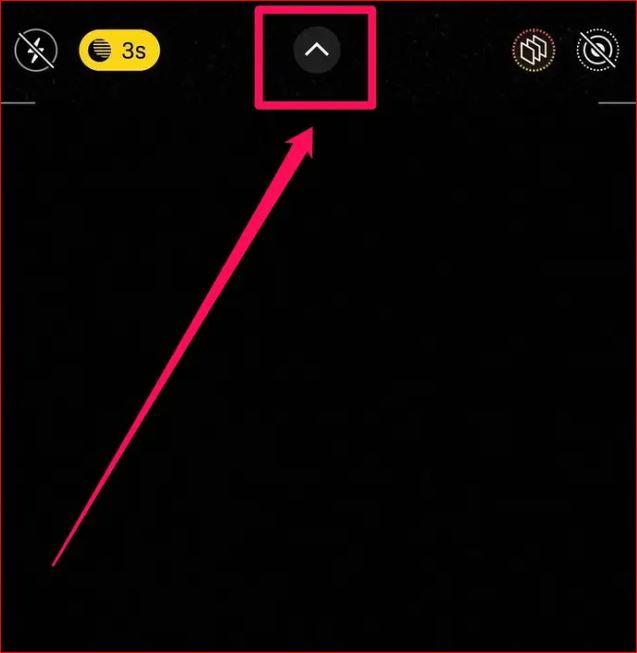
Tap on the upward-facing arrow.
Step 4: A menu appears below the camera frame. Scroll the menu to the left till you can see the timer photo icon (it appears like a clock icon). Tap on the icon.
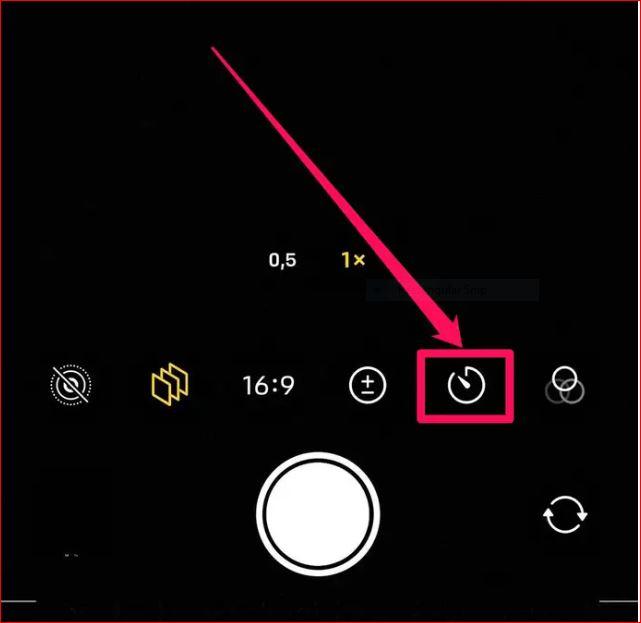
On the menu below the camera frame, tap the timer option
Step 5: Tap to select the countdown options you prefer for your timer photo. iPhone camera gives you two options: the 3-second and the 10-second countdown. Select one.
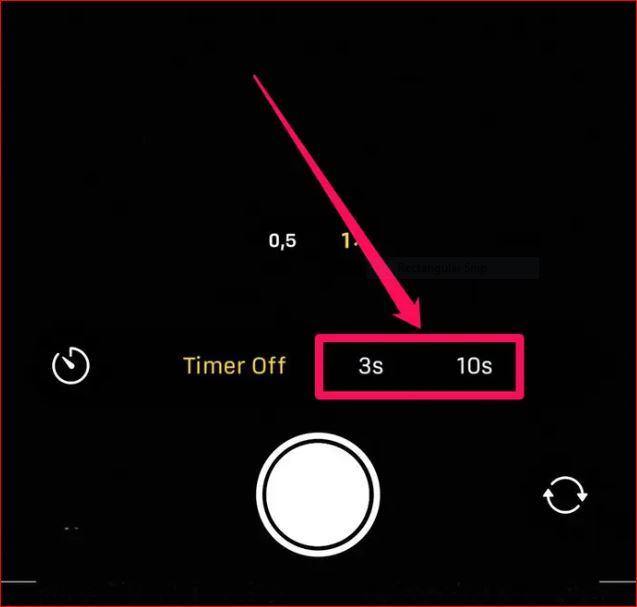
Select the countdown options you prefer for your timer photo and press the shutter button below the options.
Step 6: Now, press the shutter button shown above to begin the countdown on the self-timer.
Note: If you want to stop the timer, you just have to click the stop button at any point in the countdown.

To stop the timer, you just have to tap on the stop button
Step 7: Immediately after the countdown, the Photo will be taken. You can easily access it on the Photos app.
Step 8: On the Photos app, you can tap on the Photo taken with the timer to select it.
A guide to do timer photos for older versions of iPhone
You may not have the latest iPhone. This should not worry because, in old versions of the iPhone e.g., iPhone 11 and iPhone 11 Pro, the timer setting may be in a different location. Follow these few steps to do a timer photo on your older iPhone version;
Step 1: Once you open your camera, you will have to choose between the main camera and the selfie camera.
Step 2: Unlike in more latest versions of the iPhone, here the timer appears at the top of the screen. Be sure to click on it.
Step 3: Now you can choose the number of seconds to use; either 3s or 10s.
Step 4: Take the photo and access your photos on your gallery.
How to take multiple photos on a timer phot setting on your iPhone
By default, no matter how you set your timer countdown, a 3-second countdown, or a 10-second countdown, you will get 10 images in one timer photo shot. These images are known as burst images.
With the burst mode, you get multiple shots at the same time, saving time as you do not have to keep pressing the shutter button every time and then for every photo.
How do you confirm that the Burst mode is turned on? As we have discussed before, this is a default setting already available in your photo App. However, it may be unavailable and turned off when a live photo option or portrait mode is enabled.
To take burst images with an iPhone ensure the following;
- Once you launch your camera, ensure that the photo icon is not yellow. See it on the left side of the timer icon.
- Now you can follow the already discussed steps to get 10 photos which you can use to choose the best one on your gallery.
To select the desired images from the burst images, follow these steps;
Step 1: Access the Gallery on your phone and directly proceed to recent.
Step 2: Tap on Burst images (10 photos) to access your burst images.
Step 3: Click on Select just below the image.
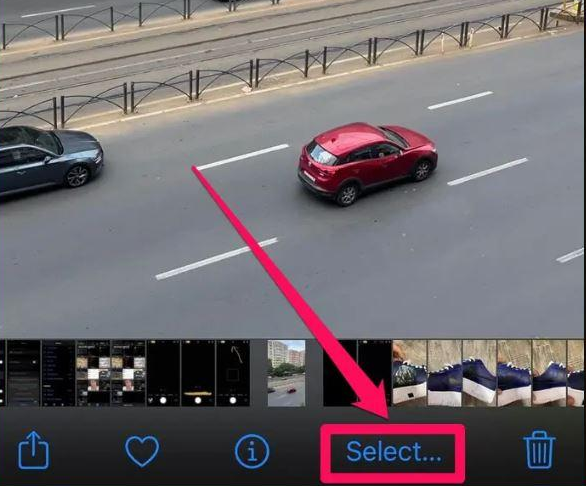
Tap Select to select the desired images.
Be sure to scroll through the images and choose those images to keep based on the quality.
- To keep all the images, tap on 'Keep Everything'.
- To keep only the photos you selected, be sure to tap on 'Keep Only # Favorites' in the pop-up box where # represents the number of photos you chose.

To keep all images, tap on Keep Everything, and to keep only the photos you selected, be sure to tap on 'Keep Only # Favorites.'
Timer photo on iPhone applies to all forms of photos you wish to take. This may range from selfies to landscape and portrait mode photos. Expect a much better result when you use a timer compared to taking photos the traditional way. With a timer, you'll get more into the frame, have a more advanced perspective, and have different angles for group and profile pics.
Must have tips when using timer photo on an iPhone
Using a timer photo on your iPhone can be a game changer as you can capture moments without needing someone else behind the camera. There needs to be more than the steps discussed above to transform timer photo quality into reality. It would help if you had a few tips for your photos to stand out in the crowd. These tips include;
- Use a tripod to ensure a stable setup: Sometimes, low-light environments may increase the chances for blurry and shaky images. Although the latest iPhones have features to combat this, a tripod is still crucial and time-saving to eliminate blurry images.
- Ensure optimal positioning: Always remember to place your iPhone strategically, especially when you are shooting outdoors. Avoid glare from the sun and do experiments in different positions to increase the accuracy of your Photo.
- Use live photos: Be sure to use live photos to capture pre and post-moments of the actual photos. This is effective for group and dynamic shots as it allows you to choose the perfect frame during playback.
- Apply the burst mode advantage: This feature allows you to take a burst of 10 or 3 photos in succession based on the depicted countdown. This gives you multiple options to choose from once the countdown is complete.
- Make edits and enhancements afterward: Past the capture, be sure to edit your Photo, and make desired advancements to increase the quality of your Photo.
When do you need an iPhone Camera Timer?
There are specific scenarios you must have an iPhone Camera Timer, otherwise, you may end up having an unpleasant gallery in your phone. Some of these scenarios include;
When you are taking photos for family and friends: You need to be part of this group and this makes the Timer an essential feature to use. A timer delay will give you time to join the group without much rush.
When you want to equip your gallery with better selfies: Are you tired of low quality and awkward arm stretches that appear on your selfie? Choose an iPhone camera timer and use your rear camera to delay camera shots for a more flattering angle, and utilize Portrait mode for a blurred background effect.
For Manual 'Slow Shutter' Photography: Use an iPhone camera timer to achieve a certain slow shutter speed effect by stabilizing the phone during the pre-shutter window. This is especially useful when using the iPhone's Live Photos feature.
When you are capturing macro shots: These shots are often sensitive to handshake blur and any form of motion. By utilizing burst shooting, you can be sure to shot stability.
When using third party apps: When using apps like Slow Shutter or Pro Camera by Moment, a timer helps stabilize the phone during the pre-shutter window, avoiding motion caused by the virtual shutter press.
Conclusion
Mastering your iPhone timer photo feature can take your photography game to the next level, as it allows you to capture moments with more creativity, accuracy, and precision. It does not matter what type of Photo you desire; be it solo selfies, group shots, or dynamic scenes. The timer photo feature is here to increase your confidence when taking photos.
Ensure your results are enhanced by applying all the steps and tips discussed in this guide. Embrace the timer, unlock new perspectives, and celebrate the art of self-captured photography.
While mastering timer photos on your iPhone, you might find yourself stepping further away from the device, making audio clarity in your videos a potential challenge. A wireless lavalier microphone helps capture crystal-clear sound even from a distance, perfectly complementing your hands-free, professional-looking iPhone photography and video setups.
Best Seller
Sale
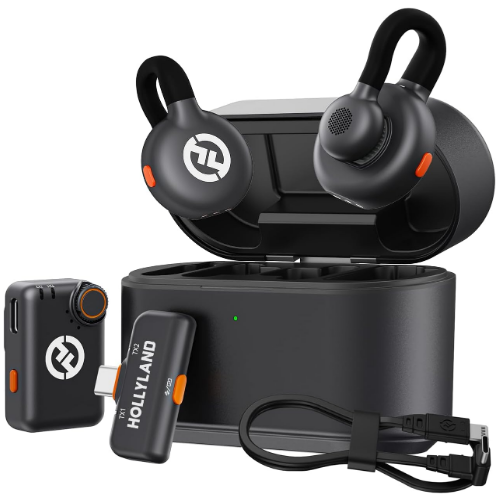
Hollyland LARK M2S - Wireless Clip-on Microphone
- 7g Lightweight, Titanium Clip, Discreet Design
- Clear sound with 24-bit/48kHz, 70dB SNR, 116dB SPL
- Noise Cancellation & 300m Long-Range Stability
- Works with Camera/iPhone/Android/Laptop
- Perfect for Content Creators, Online-Teaching, Streaming
$139
$159
FAQs
1. Can you set a timer for a video on the iPhone camera?
No, the official iPhone camera app does not allow you to set a time for a video. However, you can recreate the desired effect by trimming the video. Once you film your video, you can remove unwanted footage using the Photo's app or iMovie. On the Photo's app, follow these steps;
- Press your video.
- Tap on Edit in the top right corner.
- Press the left or right arrow and move the slider to where you want it to start or end.
2. Can the timer photo on the iPhone be used for night photos?
Absolutely! Using a timer for night photos helps reduce the camera shake caused by pressing the shutter button. This results in sharper and clearer images.
3. Are there third-party apps for iPhone that offer additional timer features?
Yes, you can explore third-party camera apps on the App Store for more advanced timer features. However, the native Camera app on the iPhone provides basic and user-friendly timer functionality.
4. Can I set the camera timer on an iPhone 4 or 5?
This feature might not be directly available to iPhone 4 and 5 but there is a way you can technically add them. The oldest version with the camera timer is iPhone 8. They upgraded the native app with the timer feature.
For access the timer feature on iPhone 5, be sure to upgrade the IOS to at least iPhone 8 and follow the above discussed steps to do a timer photo. For iPhone 4, you can try and find a compactible third-party app and try out the feature. Also note that if you have an iPhone 4S that runs on IOS 8 and above you’ll just follow the normal steps to use the camera timer.


![How to Clean iPhone Microphone with These Household Items? [No Experience Required]](https://www.hollyland.com/wp-content/uploads/2025/03/how-to-clean-iphone-microphone-with-these-household-items-no-experience-required.jpg)