.png)
Have you tried taking a photo on an iPhone and felt that your face looked crooked? Worry not; you’re not alone, as this issue has sparked numerous discussions in the Apple Community.
While this might sound like a photography issue that only the professional eye could fix, dealing with it is straightforward. In this guide, we will explain the potential reasons behind the issue and provide practical solutions to take photos you have always wanted.
Why Does Your Face Look Crooked on iPhone?
While a human face is rarely symmetrical, the subtle asymmetry isn’t noticeable in everyday interactions. However, if observed through photos or videos that capture static moments, it becomes apparent.
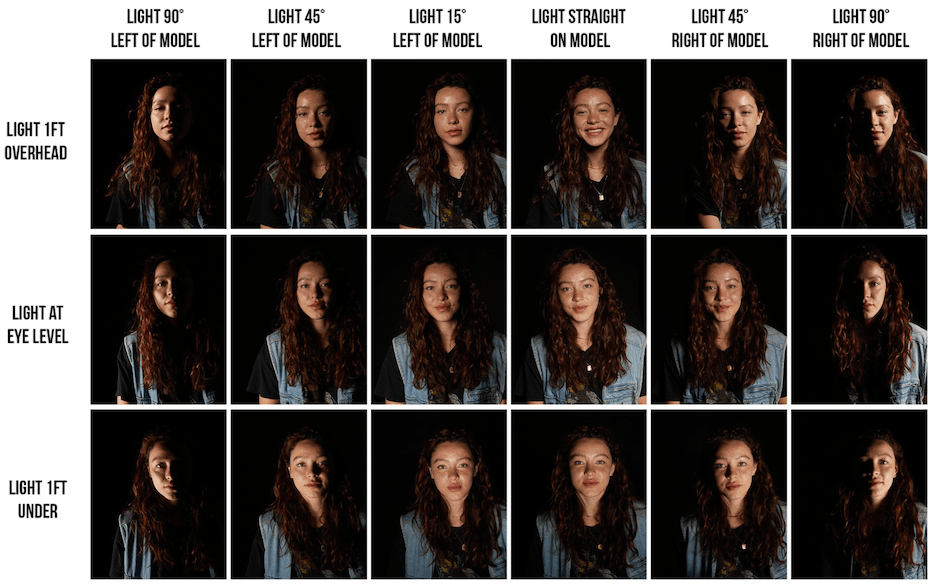
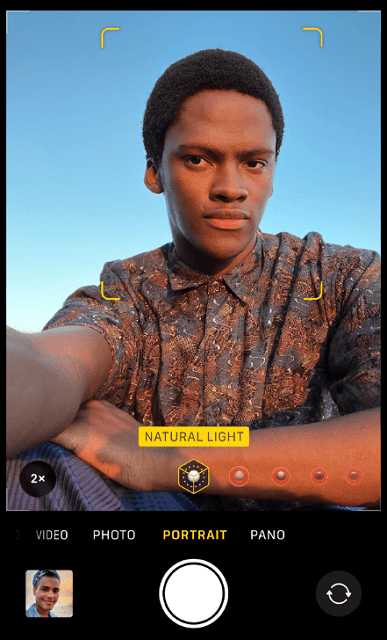
Imagine a situation where you focus a light on an object, and moving the light source can make it look different to the eye. Likewise, the angle and light source at which the photo is taken can significantly affect the perception of facial features, like the image below.
With this, the reason behind the iPhone’s crooked images becomes evident, which is the wider field of view of its lens. This wider view can exaggerate facial features, leading to crooked or unnatural-looking photos.
While the above is one strong possibility for the face to look crooked on the iPhone, the other reason is the advanced face detection algorithms the iPhone uses to identify and focus on facial features.
Considering these algorithms do a great job at enhancing the images, sometimes they fail to get it right in tough conditions, which can lead to exaggerating the asymmetry of the face or creating an unnatural look.
How Can You Fix It?
With the reasons behind the crooked face in the image shot on iPhone discussed, let’s get into the solutions and fix the issue.
Before you begin:
- We suggest turning it off portrait mode when the light source is poor, as most smartphones, including iPhones, fail to take a proper photo.
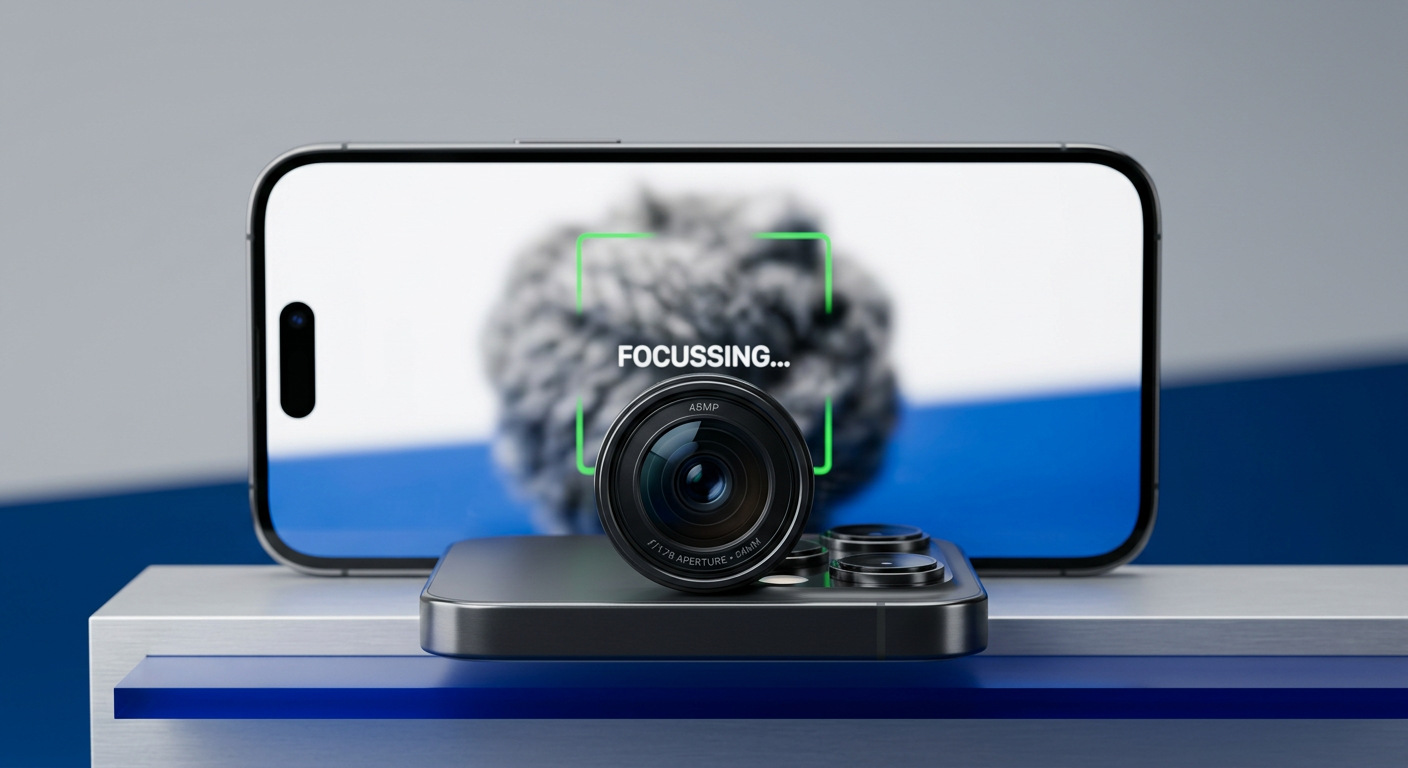
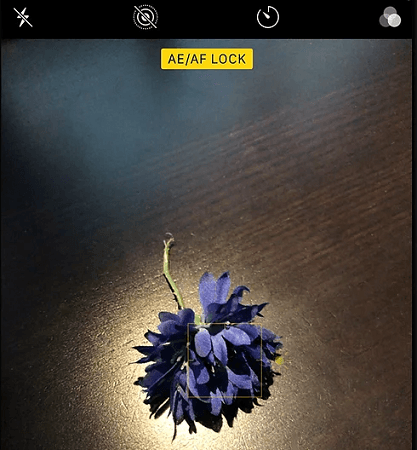
- While taking an image, tap and hold on the screen to lock the focus and exposure. This is recommended to maintain consistency and reduce distortions.
- Try taking photos in the best lighting conditions, and if you’re in poor lit conditions, use Night mode.
- Maintain a reasonable distance from the subject to prevent distortion caused by being too close.
- Experiment with different angles and perspectives to find the best where your face looks great without any crookedness. You should try holding the iPhone at eye level to avoid distortion, and for selfies, slightly angle the camera.
Start with Adjusting your Camera Settings
Note: The steps below might not be available on older iPhones, and if they aren’t available, skip them. Also, try taking multiple images before and after changing the settings suggested below, and if any make the images worse, disable them.
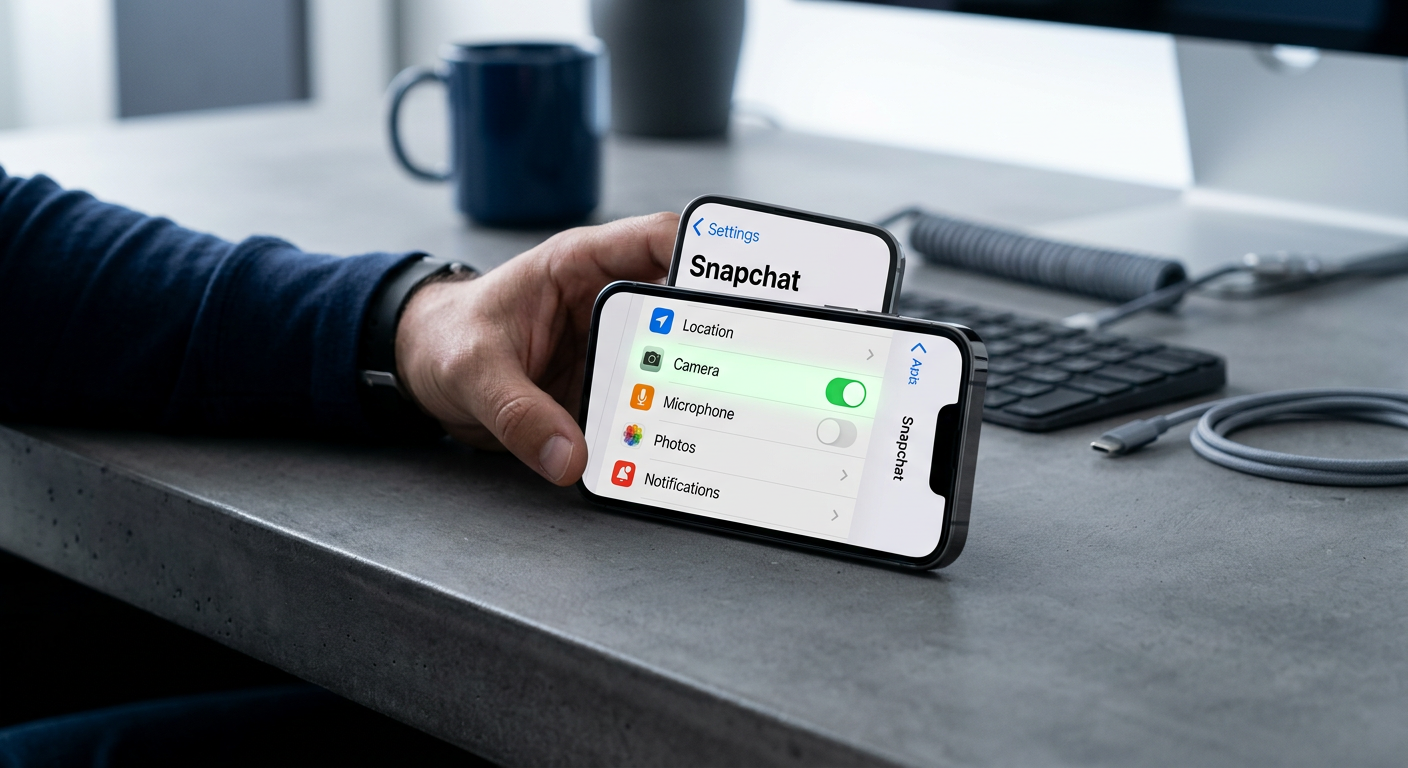
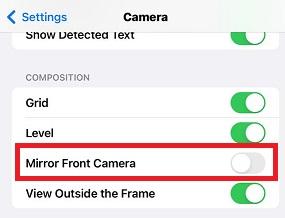
- The first and foremost thing to do is disable the Mirror Front Camera on your iPhone. Usually, this option is turned on by default, and as you’re used to viewing normal selfies, you might find your face crooked. To do this, open Settings > Camera > Turn off Mirror Front Camera.
- Turning on learning lens correction is the best fix for this issue as it adjusts photos taken with the front camera or Ultra Wide camera for more natural-looking results. To do this, open Settings > Camera > Turn on Lens Correction.
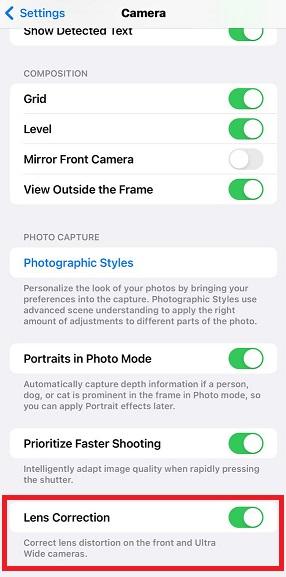
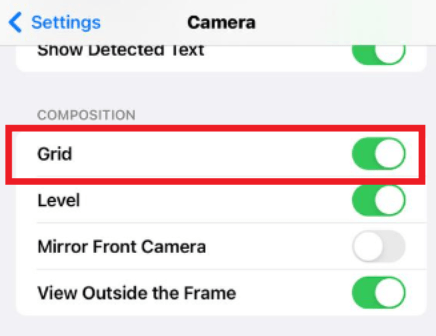
- Next, turn on grid lines on your iPhone to align subjects, get balanced compositions, and reduce distortion. To enable it, open Settings > Camera > Turn on Grid.
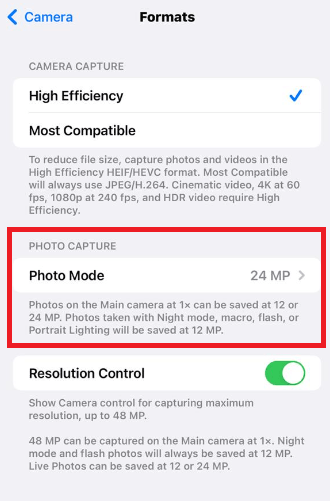
- Lastly, change the main camera resolution on your iPhone if you have accidentally set it to a lower resolution, which might result in poor images. To change it, open Settings > Camera > Formats > Photo Mode.
Use Third-party Apps
While the iPhone rarely gets the photos wrong, we recommend using these third-party apps to take better pictures and correct the existing poorly shot photos.
For Editing: Photoshop Express Photo Editor
While using the Photos app on iPhone to edit photos is arguably the ideal way to fix distortions or correct issues like getting crooked images, it can be difficult if you have no exposure to it.
To avoid the hassle of learning, check out Photoshop Express Photo Editor on iOS to enhance the image where your face is crooked. Here are steps on how to do so:
- Start by installing the Photoshop Express Photo Editor on iOS and logging in with your credentials.
- Once you’re in the app, import the image to open it on the editor.
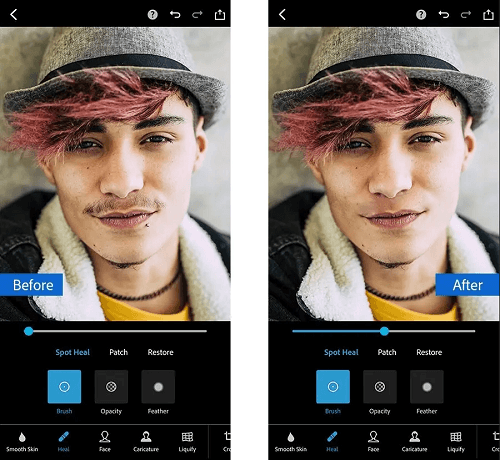
- Next, tap on Heal and fine-tune the image by adjusting the brush, opacity, feather, and blend tools.
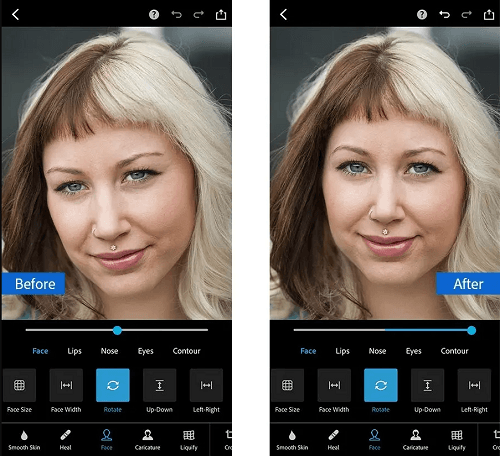
- Also, try tapping on Face next to Heal to change the rotation and angle of your head, modify any contouring, adjust smiles, shape features, and much more.
For taking better Selfies: Snapchat/Instagram
If you’re not happy with the selfie you take on your iPhone, we suggest using third-party apps as they are specially developed to take selfies. The below steps are generalized according to the app, and try experimenting with them until you’re happy with the image:
Snapchat:
- Start by launching Snapchat on your device, then swipe right from the main screen to access the camera interface.
- Next, tap the screen to apply diverse filters, effects, and augmented reality (AR) lenses.
- If you want more flexibility, explore different lighting effects by long pressing on your face.
- Once done, get creative by experimenting with various angles, perspectives, and framing to capture great selfies.
Instagram:
- Start by launching Instagram on your phone. Then, access the camera by swiping left from the main feed.
- Next, choose your preferred camera mode and add creative touches by tapping on the various effects at the bottom of the screen to use filters.
- Once done, experiment with exposure, focus, and white balance settings by tapping the screen to adjust them.
- After you’re satisfied with the preview, click on the shutter to capture a selfie and avoid crooked faces.
Wrapping Up
We believe that the above solutions should solve the issue. However, if the issue persists, it is highly recommended to update iOS to the latest version. If that doesn’t help, check the physical condition of your camera units, and if there is any damage, get it repaired to avoid getting photos with crooked faces.
If you’re struggling with distorted or uneven selfies from your smartphone, upgrading your video capture setup could help greatly. A dedicated streaming camera offers consistent, distortion-free image quality, ensuring you always look your best on video.