.png)
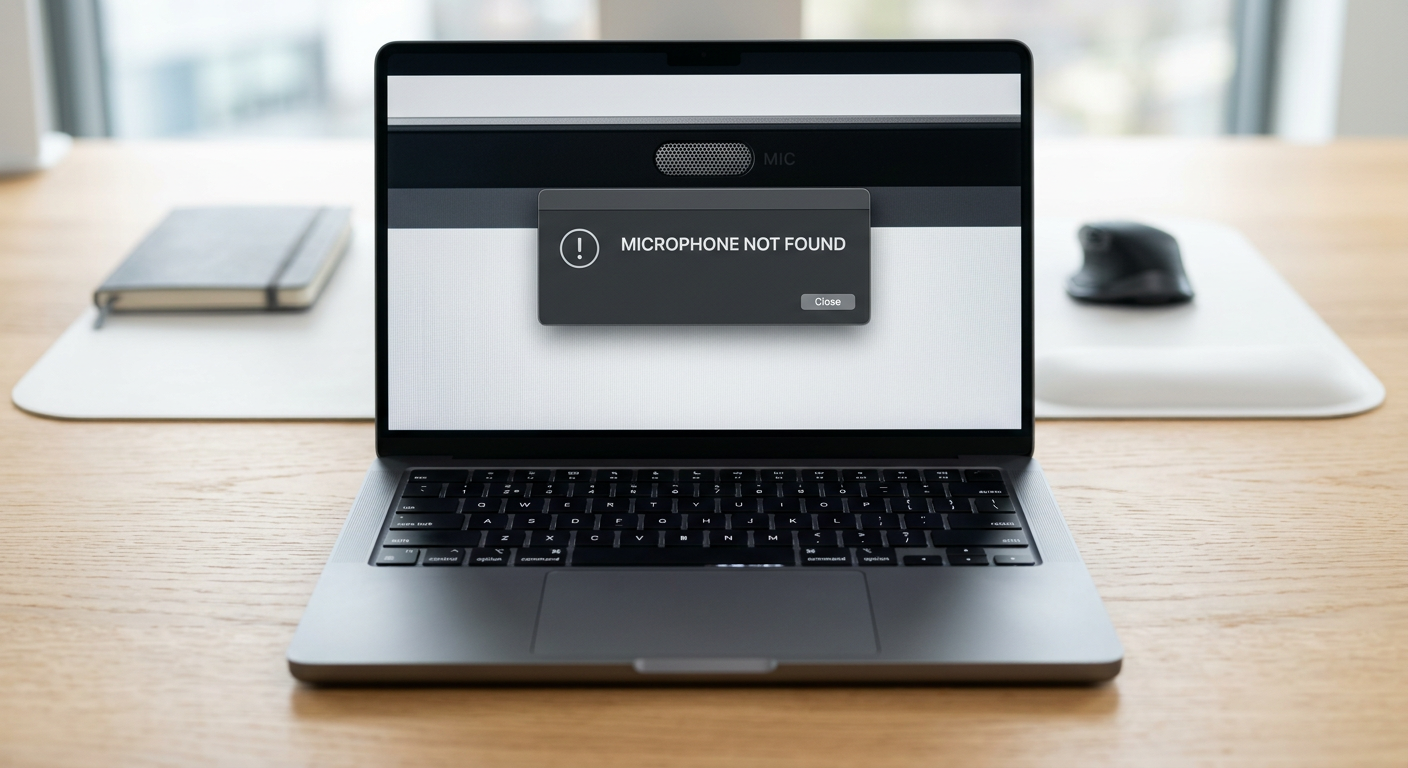
The disappointment and frustration are real when the computer cannot identify the microphone. It is possible that the device you have is faulty. However, in most scenarios, the problem is within the system.
So whether you have a wired or wireless microphone, if you want your PC to recognize it for seamless functionality, this article will help you fix this issue in 9 different ways. Additionally, you can check the FAQ section to get answers to the most common questions related to this problem.
Let’s get started!
1. Recheck Your Connection
a. Plug the Microphone in the Correct Port
If your computer fails to recognize the microphone, it is possible that the connection is not proper. Make sure that you have plugged the microphone into the correct port of your PC or docking station. What happens is that most of the time, the computer is unable to identify the mic because of loose connections.
For instance, if you have a If you have a wired USB mic, make sure it is plugged into the correct, functional port that is compatible with your device. Likewise, if you have a wireless microphone, like the Hollyland Lark M2, ensure the receiver (RX) unit is connected in the right spot. Similarly, if you want to connect a microphone with a standard 3.5mm jack, insert the connector into the right spot.

Hollyland LARK M2 - Mini Lavalier Microphone
An incredibly lightweight and compact wireless button microphone that captures high-fidelity audio.
Key Features: 9g Button Size | 48 kHz/24-bit | 40 Hours Battery
b. Try Plugging the Microphone into a Different Port
If the computer still doesn’t recognize your mic, it is possible that the current port is not receiving signals or there’s a technical issue with it. Also, the ports are sometimes damaged internally, but no one can see the inside. Therefore, the only way to confirm this is to use another port to connect the microphone.
For example, if you are plugging the mic into one of the front ports and the device is not recognized. Use the rear ports of the PC to connect it. If the PC shows your microphone connection, the previous port is either disconnected from the motherboard or faulty. So, this first tip helps figure out the problem.
2. Update or Reinstall Audio Drivers
a. Updating Audio Drivers
When was the last time you updated the audio driver on your PC? If you’re not sure, then the driver may have become outdated and is causing problems in recognizing the microphone. Remember, drivers connect your computer with hardware, permitting it to communicate effectively. So, by updating the audio drivers, you can resolve this problem.
Here’s how you can update:
Note: Windows 11 is used for this demonstration.
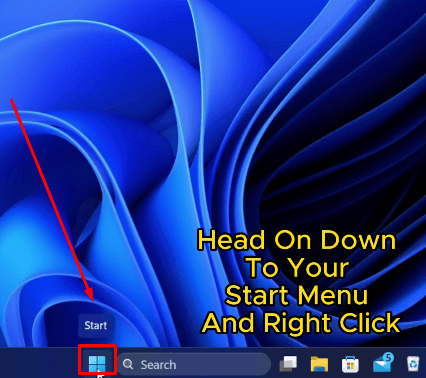
- Step 1: Click the ‘Start Menu.’
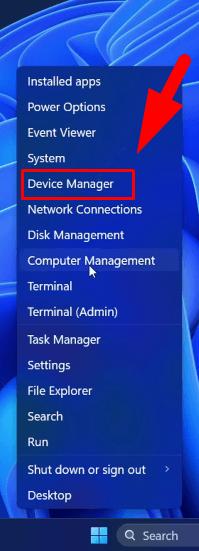
- Step 2: Click on the ‘Device Manager.’
- Step 3: Click the ‘>’ icon next to the ‘Sound, video, and game controllers.’
b. Reinstall Audio Drivers
If updating the drivers still doesn’t fix the computer’s problem of not recognizing it, reinstalling them may solve the issue. As established before, drivers make a bridge between your PC and devices, and sometimes, they get corrupt.
So, by uninstalling and restarting your PC, Windows will automatically try to install your audio driver after it boots up. It is just like cleaning your glasses after they get exposed to fog. You wipe them, and the view gets clearer. In the same way, reinstalling audio drivers refreshes the entire connection between your PC and microphone. However, before reinstallation, you have to uninstall the driver/device.
The process of reinstalling audio drivers is simple.
- Step 1: Choose ‘Start Menu.’
- Step 2: Navigate ‘Device Manager.’
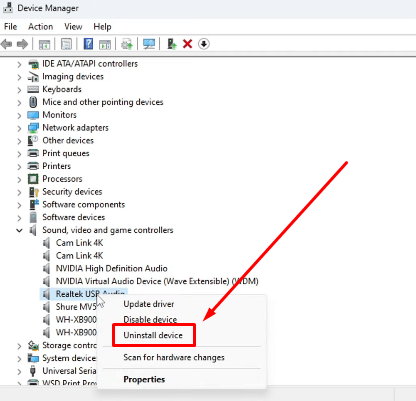
- Step 3: Click on ‘Sound, video, and game controllers’ section.
- Step 4: Right-click on your driver name and click ‘Uninstall Device.’
- Step 5: Once uninstallation is complete, close all programs and restart.

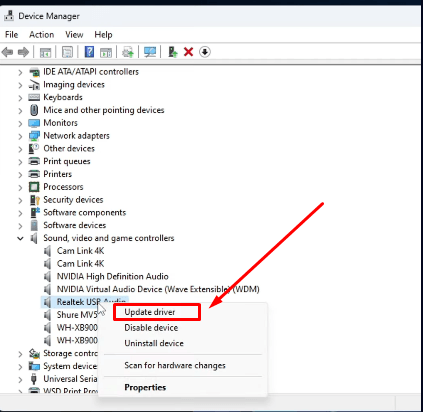
- Step 4: You will see different drivers in the list. Right-click on your audio driver and select ‘Update driver.’
- Step 5: Choose whether to update the driver using the Internet or by downloading the update file from your PC’s hard drive.
- Step 6: Restart the computer and connect the microphone again once the driver updation is complete.
This should solve the problem.
3. Make Your Microphone as Default Recording Device
This is an underrated hack, but it has worked for many people. Imagine you have a bunch of keys. But in all of them, only one particular can unlock your door. The same goes for your mic when set as a default device. You tell the PC, “Here’s the key I want to use to open the door.”
This lets your computer pick the right mic whenever you speak. If it’s not set to default, the computer will not be able to recognize the main microphones, especially if you have multiple devices in your setup.
So, follow these steps to set your default mic:
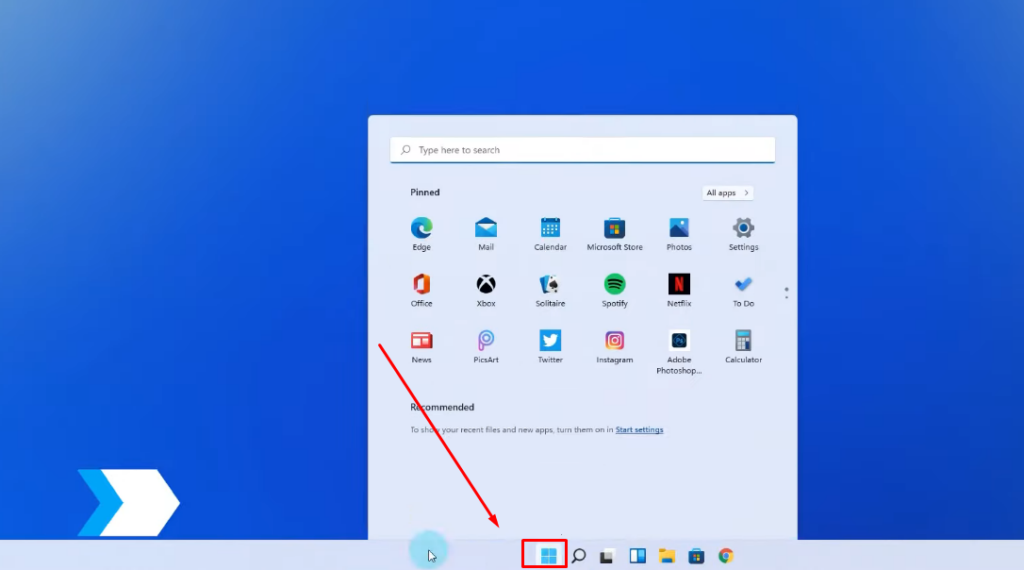
- Step 1: If using Windows 11, click the ‘Start’ icon.
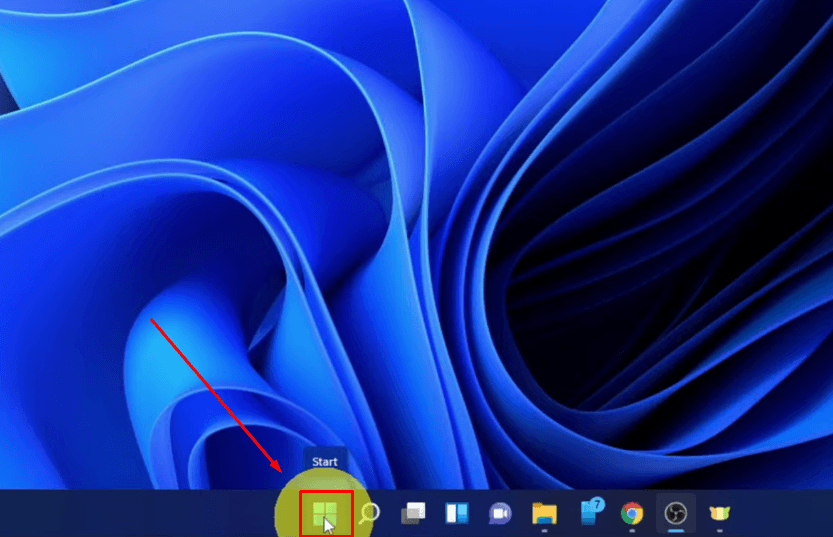
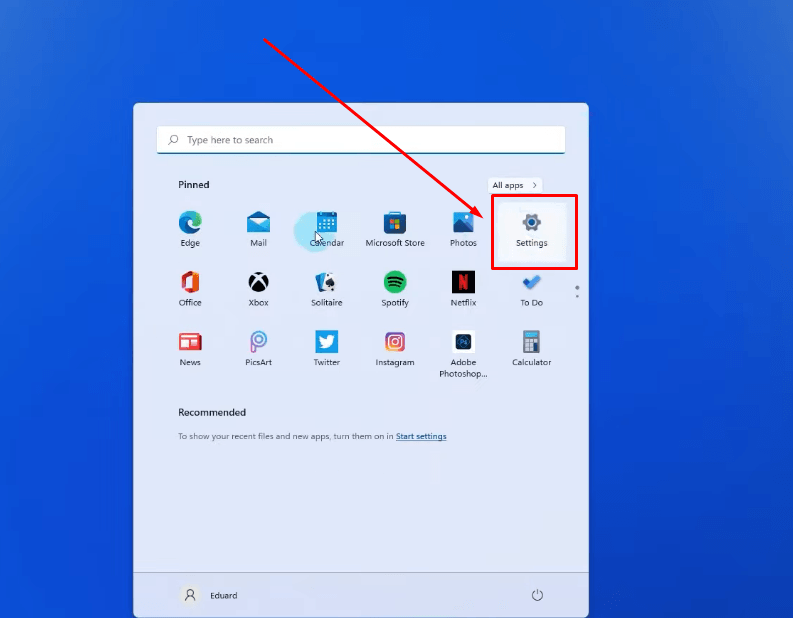
- Step 2: Click on the ‘Settings’ icon.
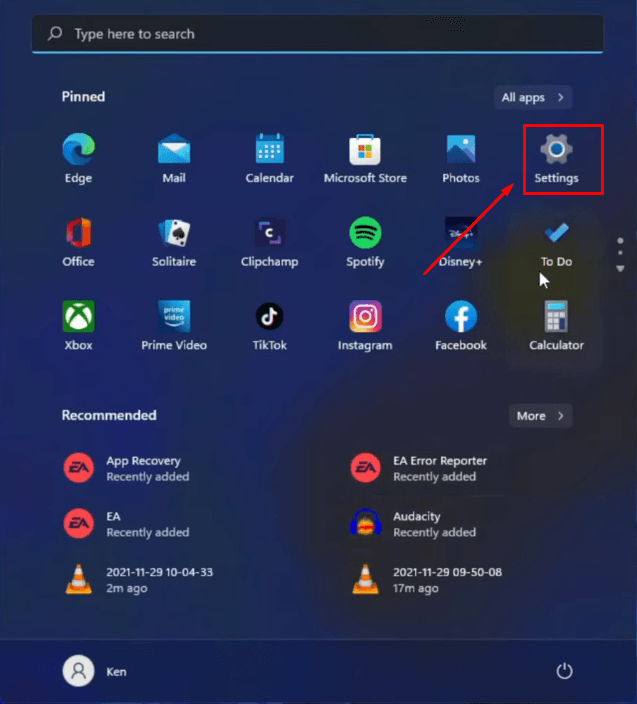
- Step 3: Click on ‘All Apps.’
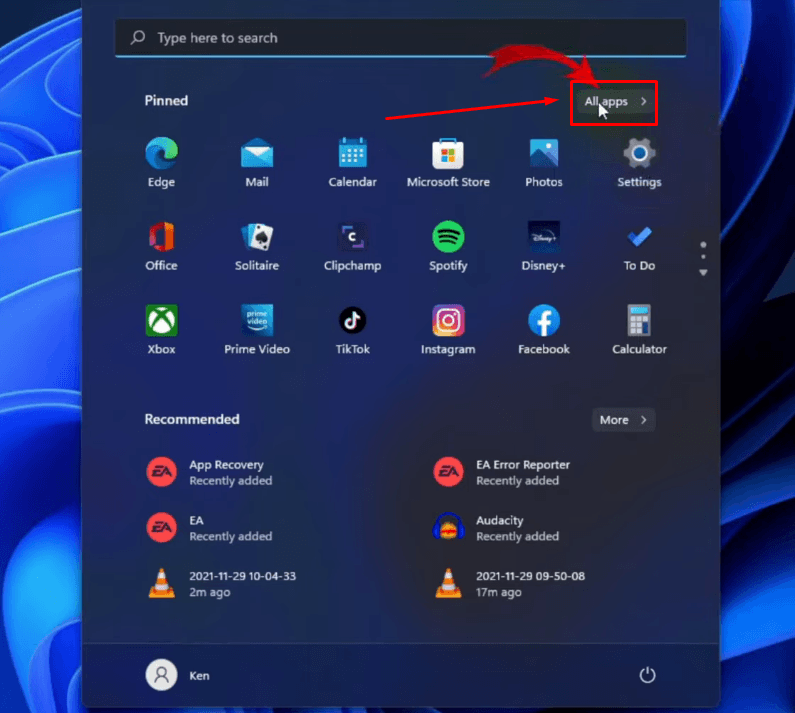
- Step 4: You will see a huge list of different options in alphabetical order. To quickly get to yours, follow the ‘S’ alphabet order and click the ‘Settings’ option again.
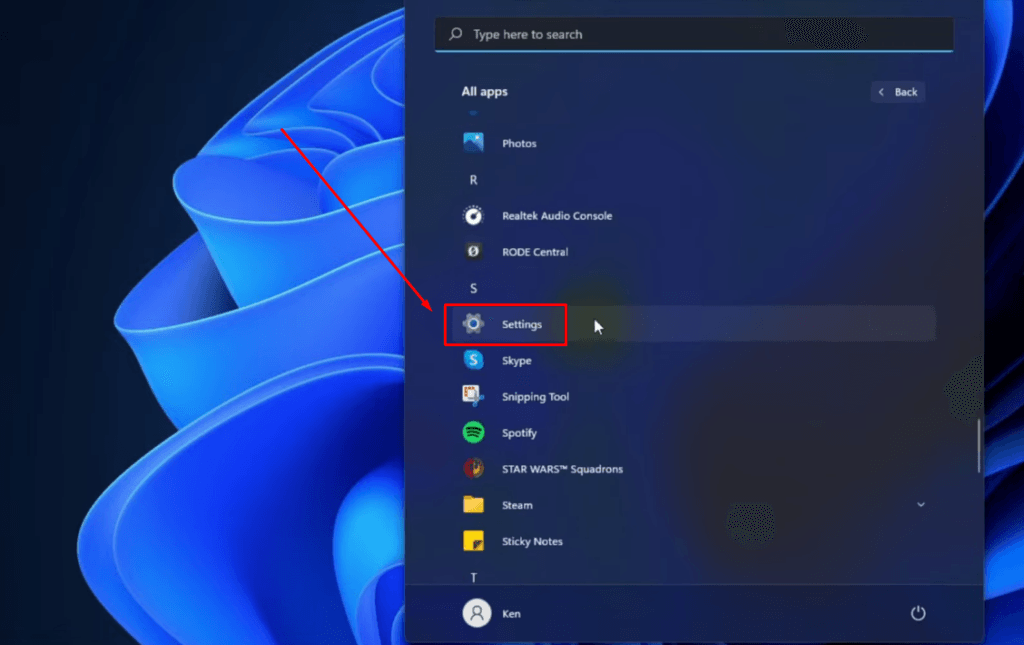
Remember, the settings discussed in step 2 are general, whereas the settings in this step allow you to make adjustments in individual apps. So don’t get confused.
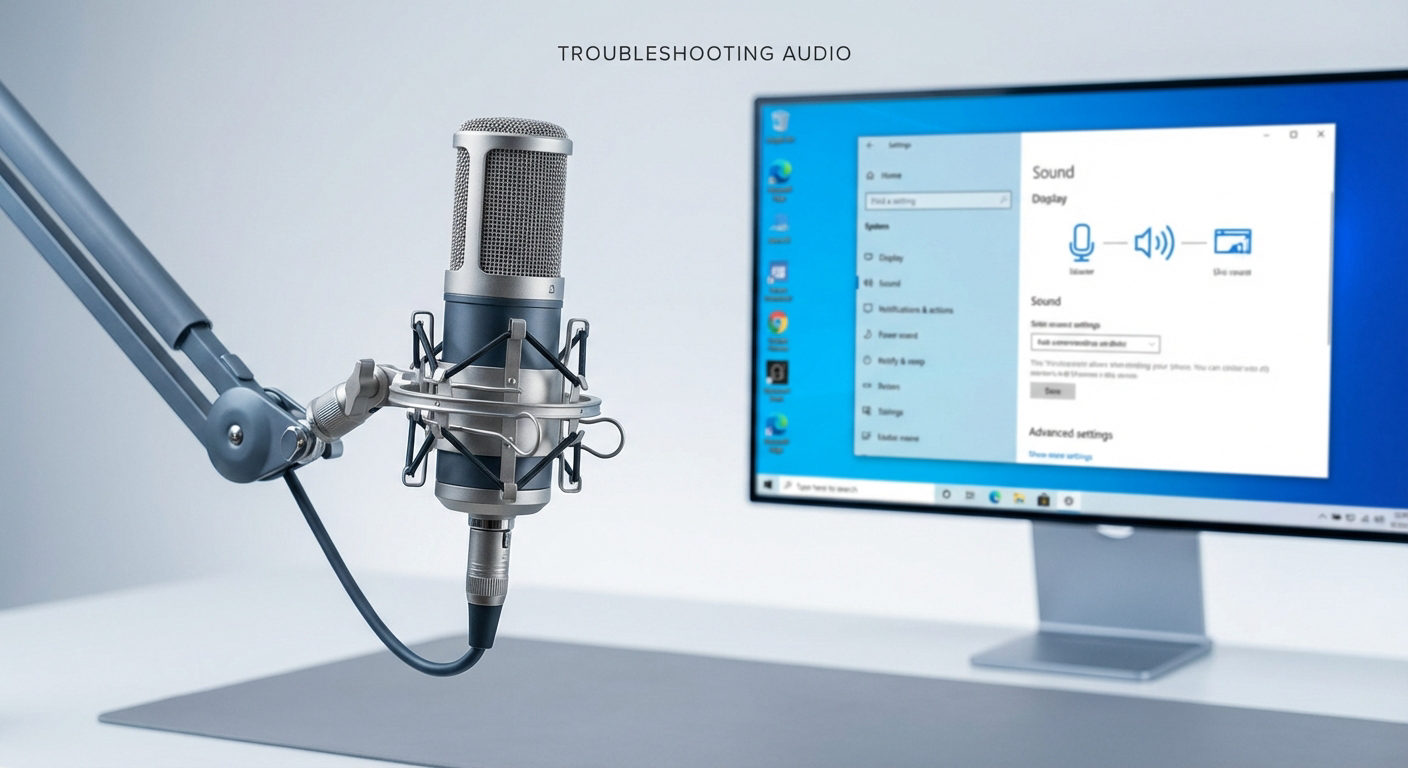
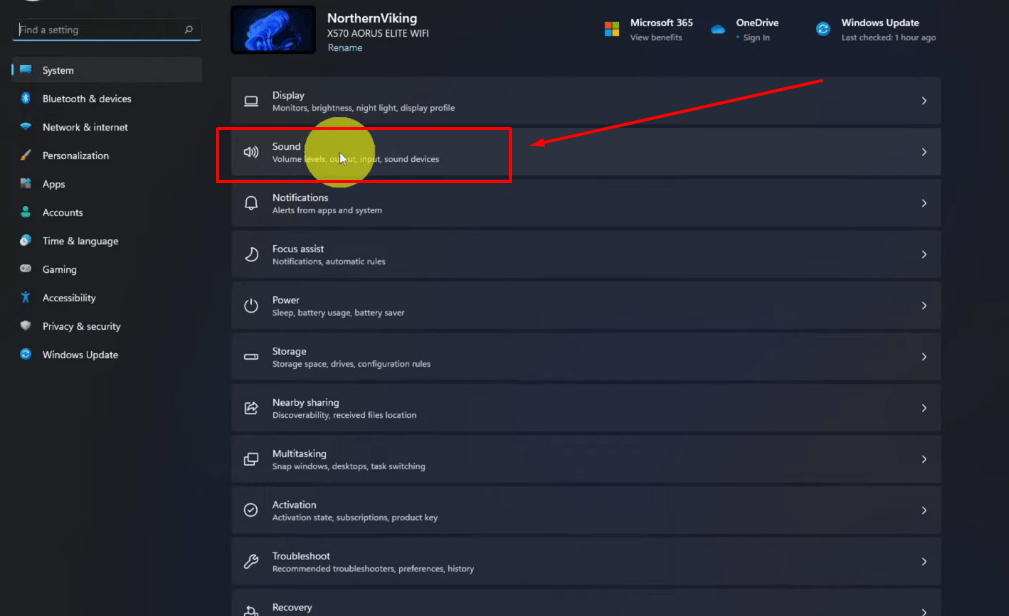
- Step 5: A new window with various options related to your computer’s functionality will pop up. So, click on the ‘Sound’ tab to enter the settings.
- Step 6: Scroll to the ‘Input’ section.
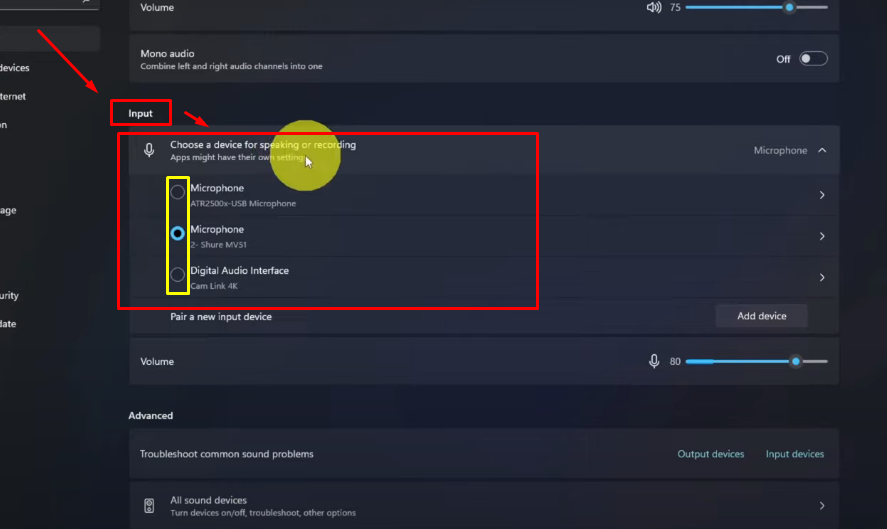
Here, you will see all the names of the microphones connected to your computer. If you have connected a single mic, you will also be able to see its name.
So, click on ‘rounded hollow circles’ (marked under the yellow box for your convenience) to choose your default mic.
4. Allow Apps to Access Microphone
It is essential to check the privacy settings when your PC does not recognize the microphone. Remember, whether you have Windows 10 or 11, privacy permissions are vital in allowing or disallowing the applications to use the microphone. If these settings are incorrect, your computer might block mic access for all the installed apps, causing recognition problems.
For instance, if the Zoom app can’t detect the microphone, the app may have been stopped from using the mic due to ungranted permissions. But the good news is that you can allow any desired apps to use the mic by following these steps.
- Step 1: Click the ‘Windows/Start Button.’
- Step 2: Select ‘Settings.’
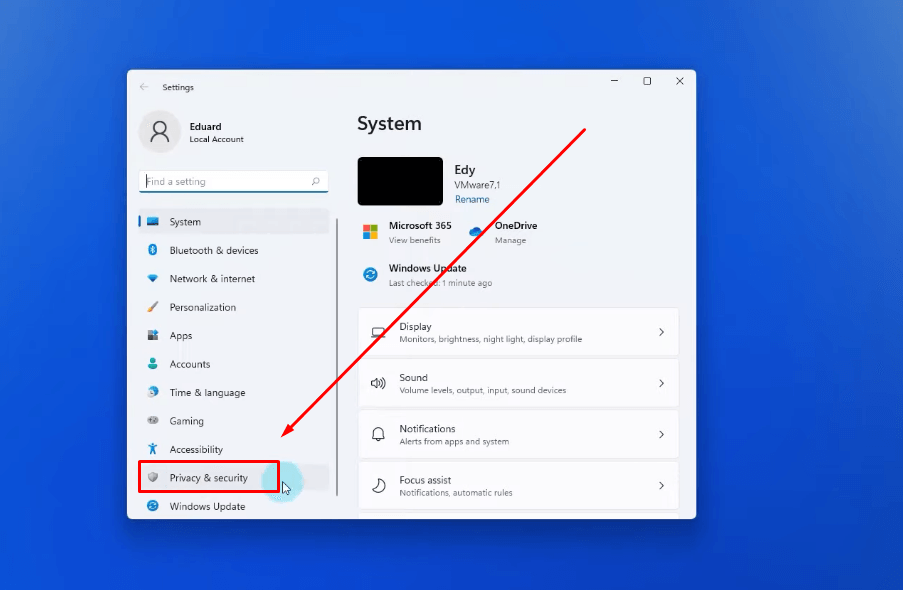
- Step 3: Now, look on the left side of the screen to see a list of options. You may need to scroll down a little to enter the ‘Privacy & security’ option, like this.
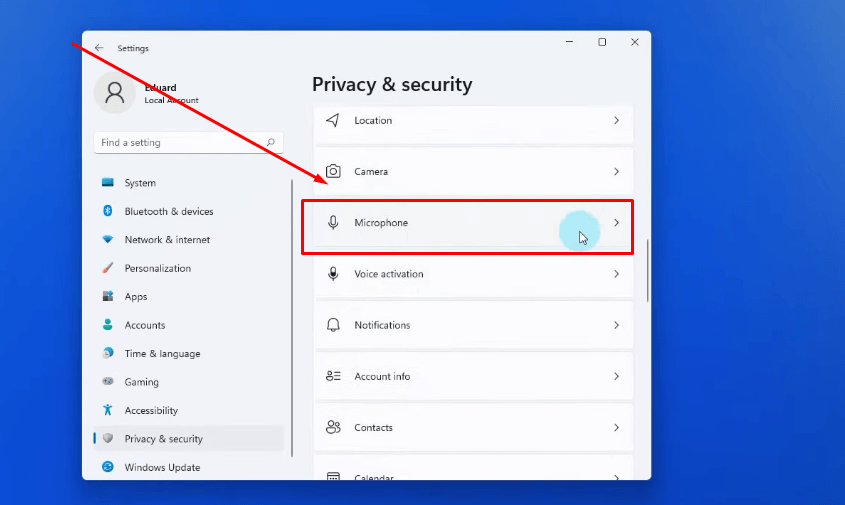
- Step 4: This option allows you to control the access to apps. Since you need to fix an issue related to the microphone, scroll down and click on the ‘Microphone’ option.
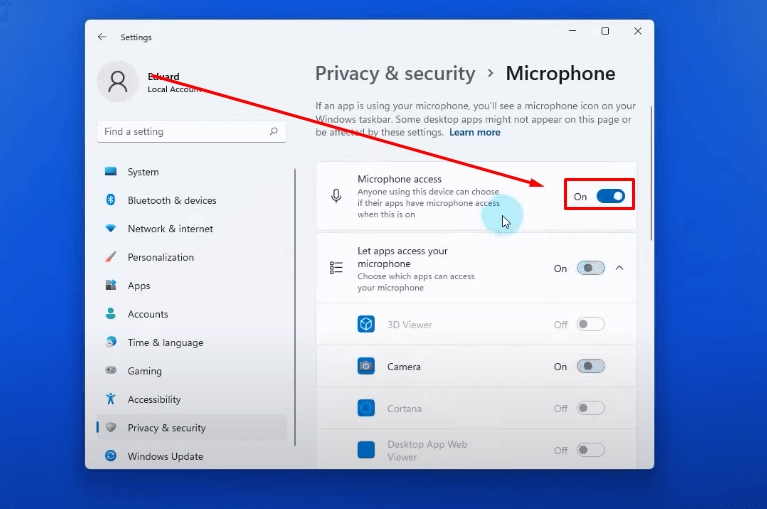
- Step 5: You will see the ‘Microphone access’ option with a toggle switch next to it. Make sure to turn it on to allow microphone access.
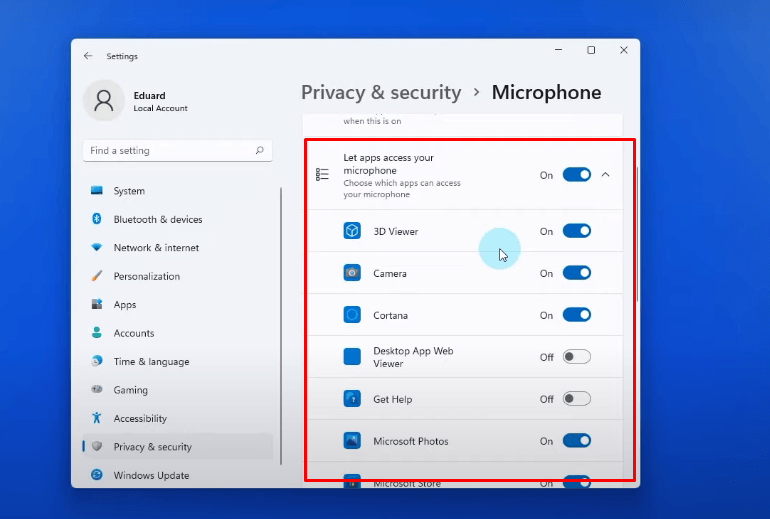
- Step 6: However, which apps should have mic access? So, while staying on the same page, look to the section below ‘Microphone access.’ You will find app names with a toggle switch next to each one. Feel free to turn the toggle on or off for your desired app to give it microphone access.
5. Rule Out Hardware Issues
a. Test Your Microphone on Another Computer
Simple troubleshooting steps can fix the problem, and the computer begins to recognize the attached microphone. To start with, the first thing you should do is test the same microphone on another computer. This will help you determine whether the issue lies with your PC or the microphone itself. For example, if the microphone works properly on another device or computer, it signifies that the problem may be with your computer’s software or hardware settings.
Remember, testing the microphone in the above way can quickly help you rule out any hidden hardware issues that are directly or indirectly preventing the computer from recognizing the mic.
b. Inspect for Damaged Wires
The next action to take is inspecting your microphone’s cable. Many times, users blame everything on the hardware or software of the computer, but the real issue occurs inside the cables. So when finding faulty cables, look for clues like frayed wires.
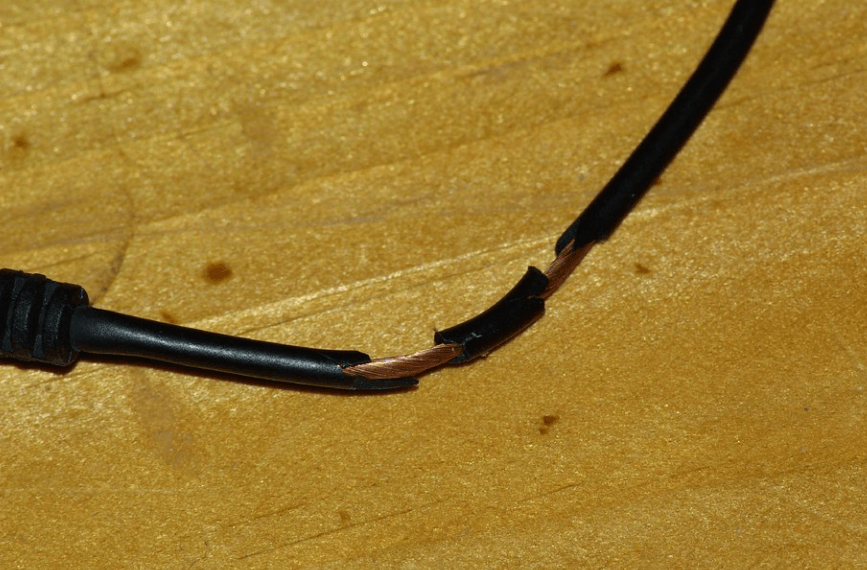
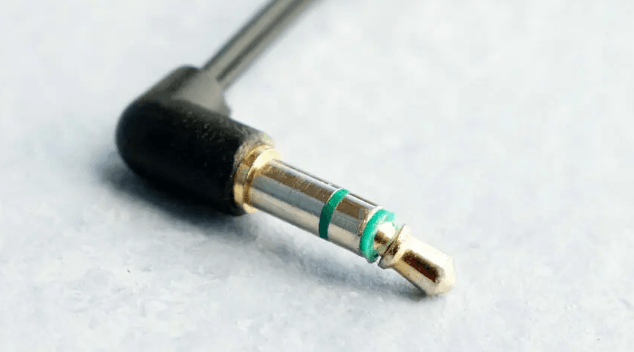
Sometimes, attaching and detaching the microphone can also damage connectors. Therefore, look for signs of broken connectors, especially if the mic has a 3.5mm jack.
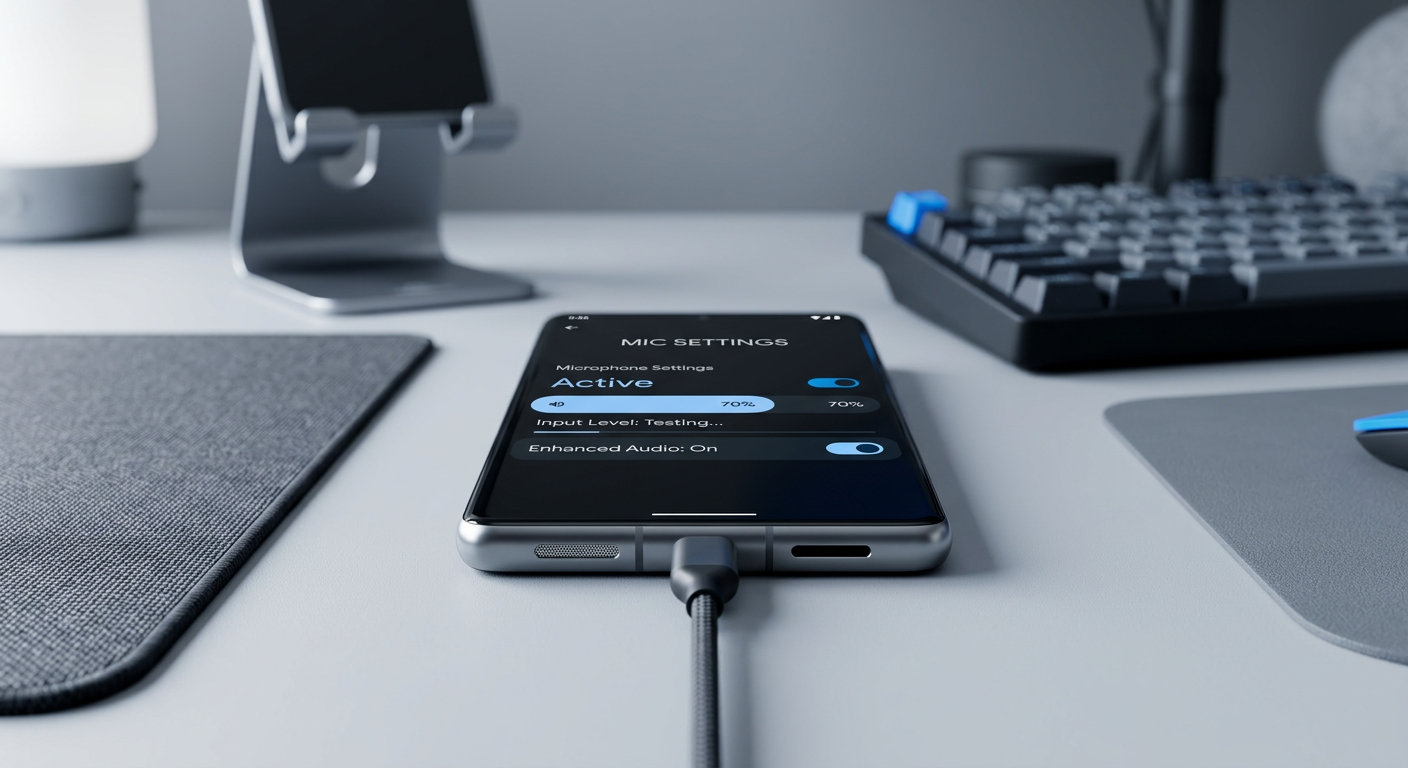
6. Adjust Microphone Levels
Did you try adjusting the microphone levels? If not, this is the right time to do it. If the levels are down, the computer may fail to recognize any connected microphone. This is because the sound card can’t detect any audio input, resulting in an unresponsive or malfunctioning microphone.
For example, if you are using a microphone to communicate with your friends on a Zoom call, but the people can’t hear you, and the PC is also not registering any sound from the connected mic, increasing the mic level can resolve the issue.
You can adjust the levels and increase the volume to amplify the audio input from the mic, making it more visible to your computer’s sound-identifying system.
Here are simple steps you can follow on Windows 7 to Windows 11.
- Step 1: Click the ‘Start’ button and choose ‘Control Panel.’
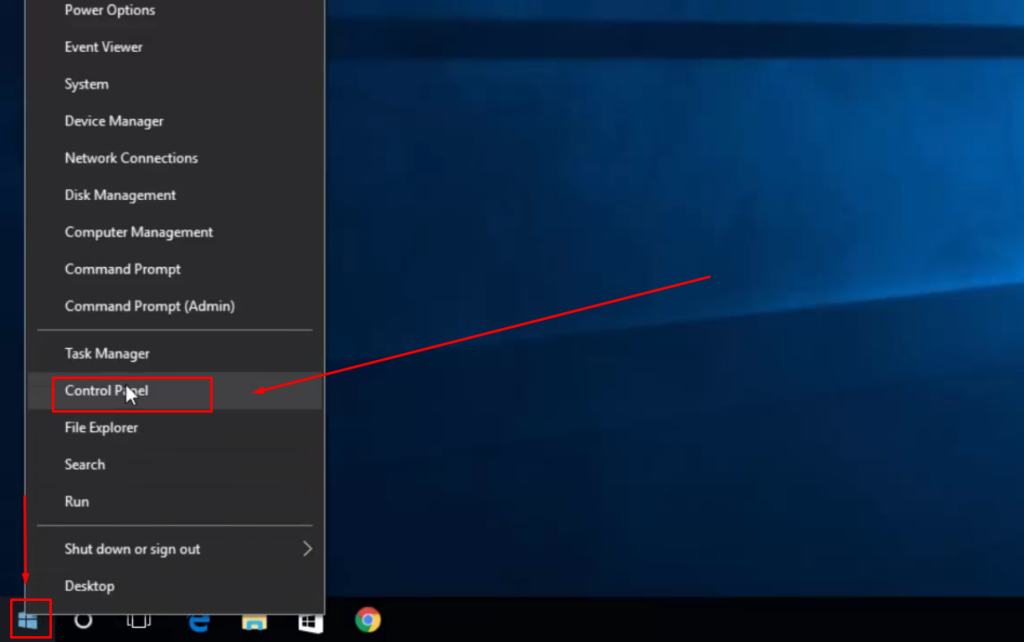
Doing so will show you all the options inside the control panel menu.
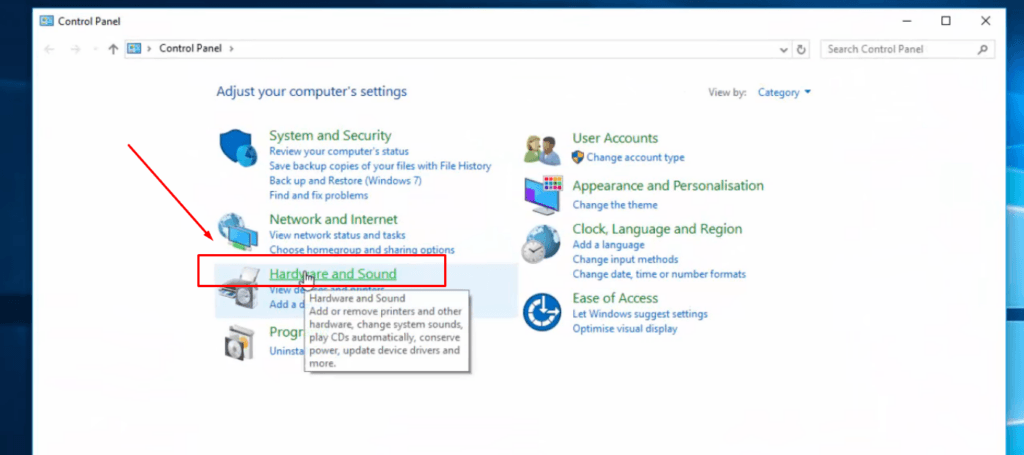
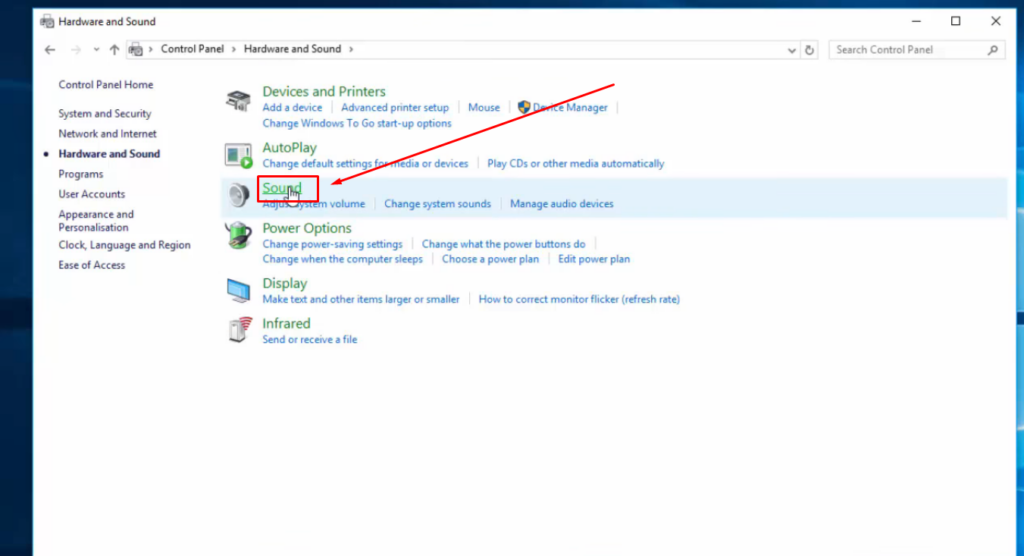
- Step 2: Look for the ‘Hardware and Sound’ title/option and click it.
- Step 3: Since you want to fix the microphone issue, click the ‘Sound’ option.
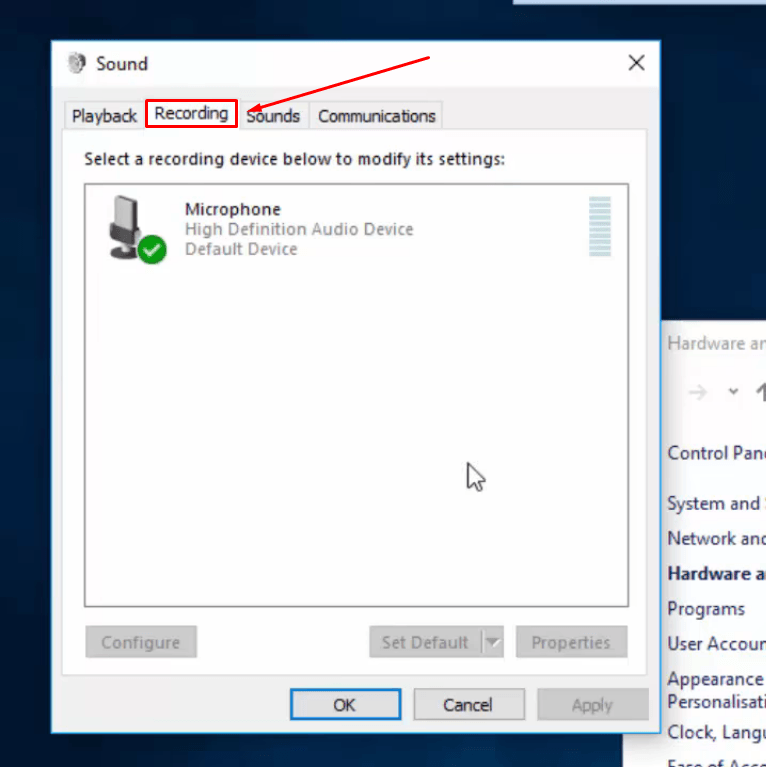
- Step 4: When you click ‘Sound,’ a new window with four different tabs will appear. Click the ‘Recording’ tab to enter mic settings.
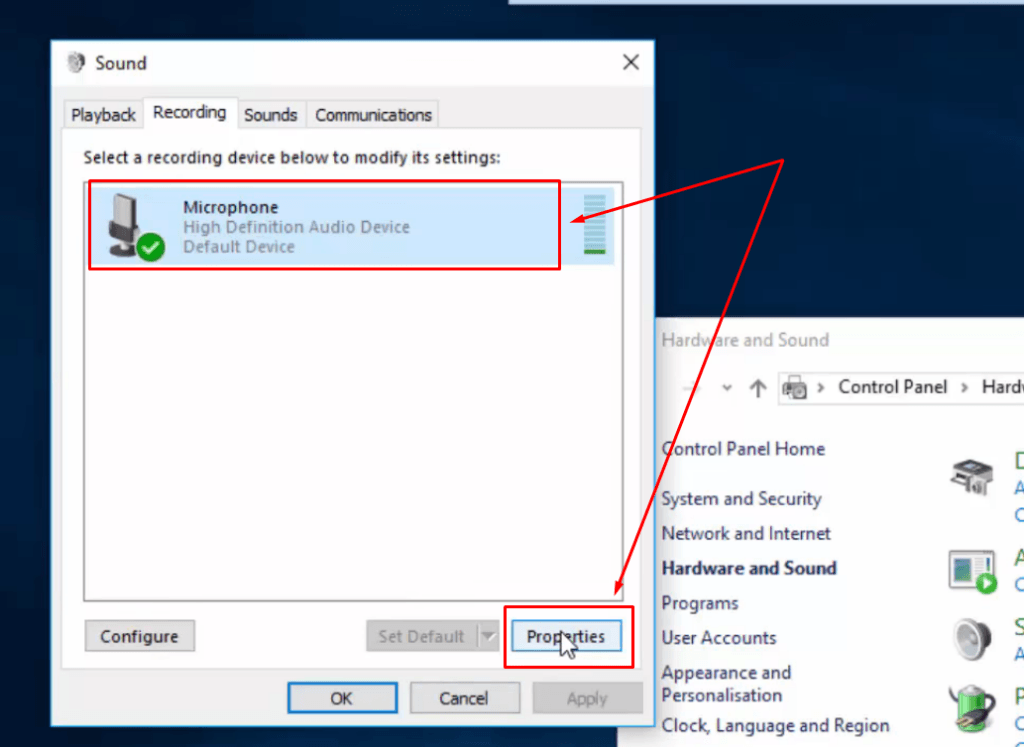
- Step 5: Select the microphone and click the ‘Properties’ button.
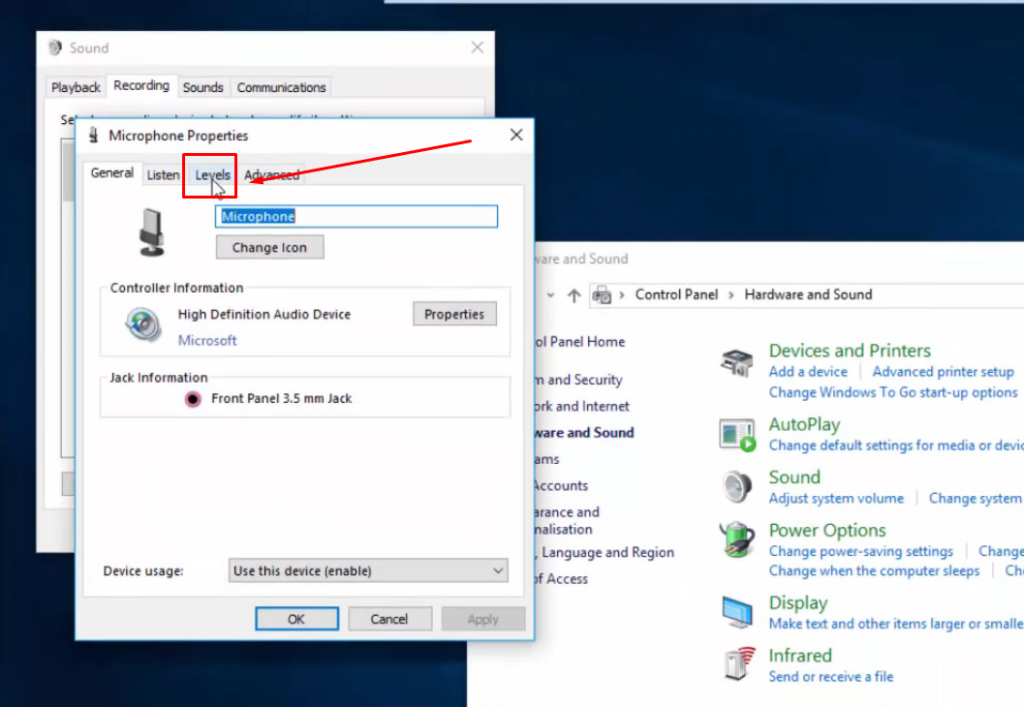
- Step 6: Once you enter the ‘Microphone Properties,’ choose the ‘Levels’ tab.
- Step 7: This is where you need to adjust the levels. Use your mouse’s cursor to move the slider by clicking and holding the mouse’s left button. Make sure the slider has increased the level to ‘100’, as seen in the screenshot below.
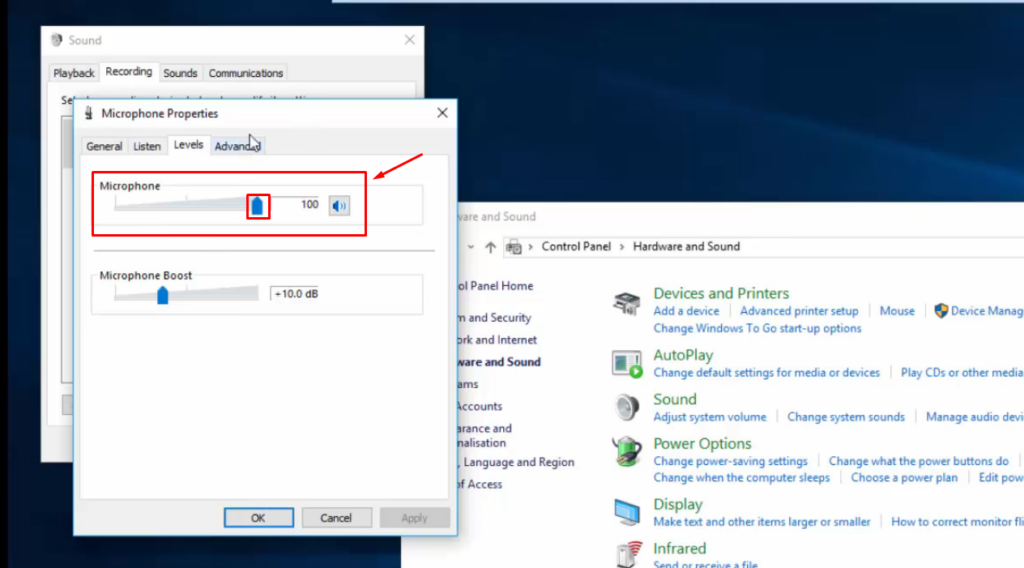
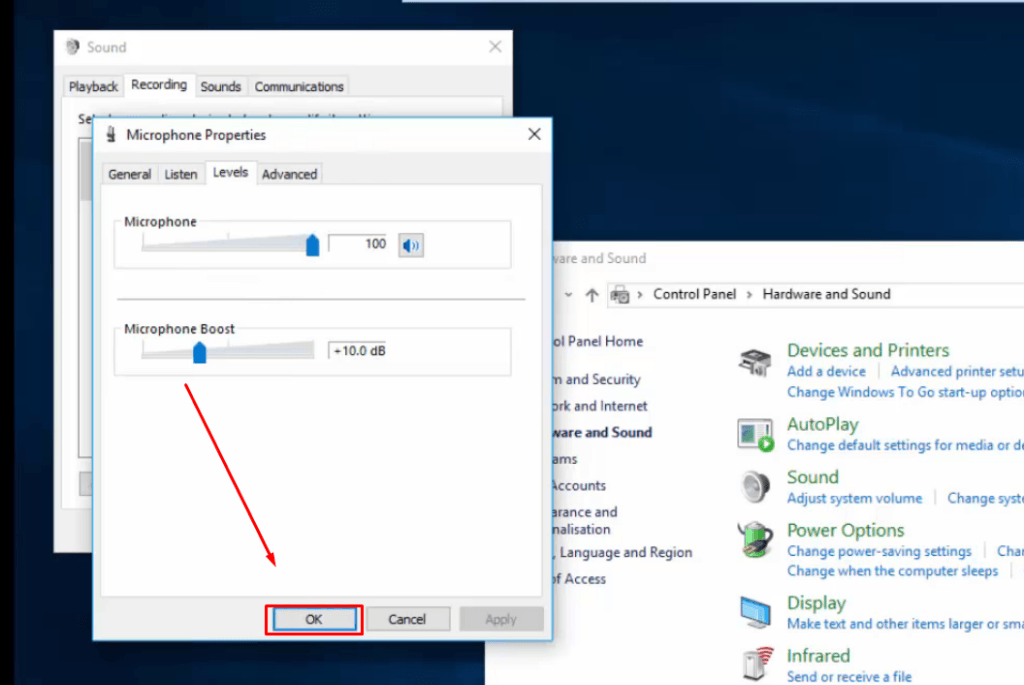
- Step 8: Once you have increased the levels, click ‘OK.’ Reconnect the mic to test the connection.
Tip: You can also try disabling the enhancements. To do that, click the ‘Advanced’ tab and uncheck ‘Enable audio enhancements.’ However, the option may not be available in all Windows versions.
7. Run Troubleshooter for Audio Recording
Most people are unaware that the Windows Troubleshooter feature can fix issues related to microphone unrecognition on your PC. This built-in tool is designed to find and solve common issues with various hardware and software components, including microphones.
By running this feature, Windows can automatically scan all the problems related to the mic on your computer. It will offer excellent solutions to fix the issue, from reinstalling the drivers to adjusting settings.
To understand how this tool can help you, imagine you plugged in your mic and the computer failed to detect it. You can run the Troubleshooter. To do that, go to the ‘Update & Security’ option to see the ‘Troubleshoot’ option. Click to open the list of hardware or software ready for troubleshooting.
However, there is another simple way to access the Windows troubleshooter, especially if you have Windows 10 or 11. Here are the steps to follow.
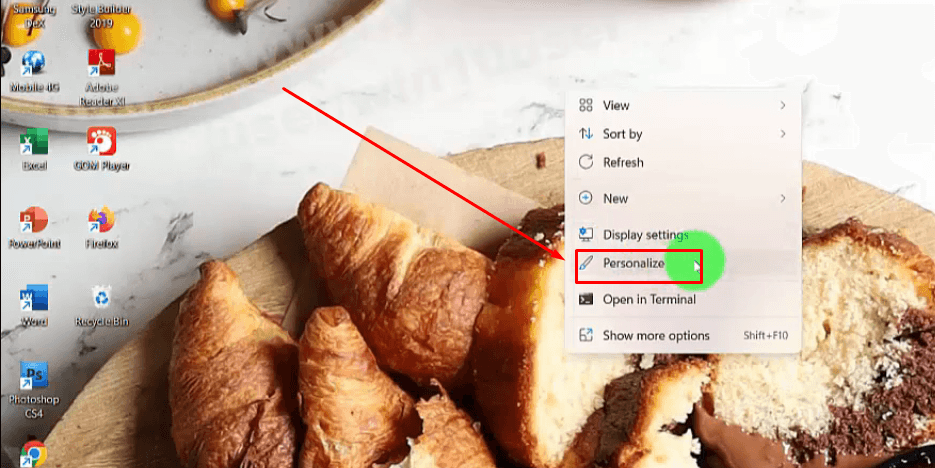
- Step 1: Plug in your microphone and left-click on your computer’s main screen. Then, click ‘Personalize’ from the list.
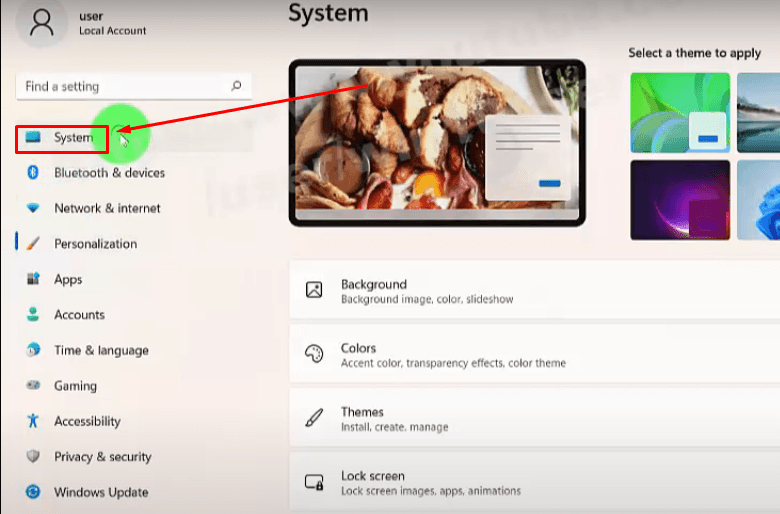
- Step 2: You will be taken to the Windows settings, which have several options on the left side of the screen. From there, choose ‘System.’
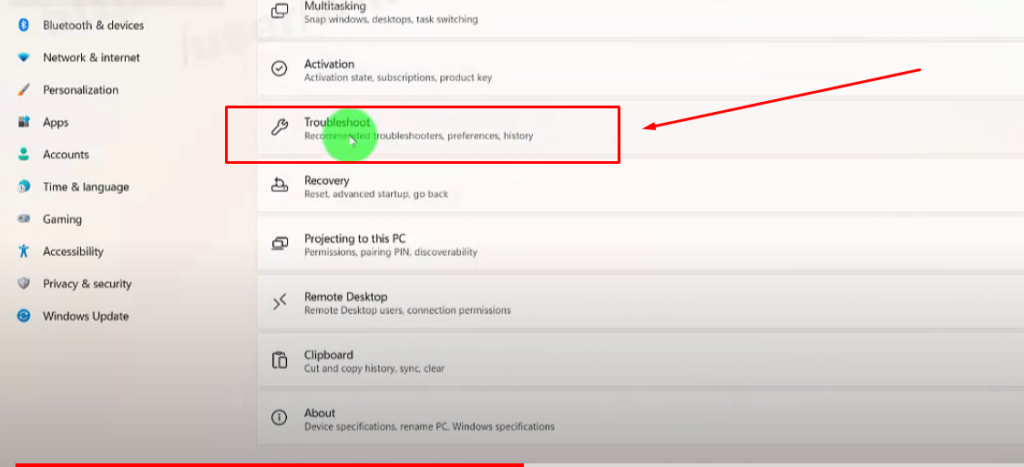
- Step 3: Now, look at the right side of the screen to see a list of options. Scroll down and click ‘Troubleshoot.’
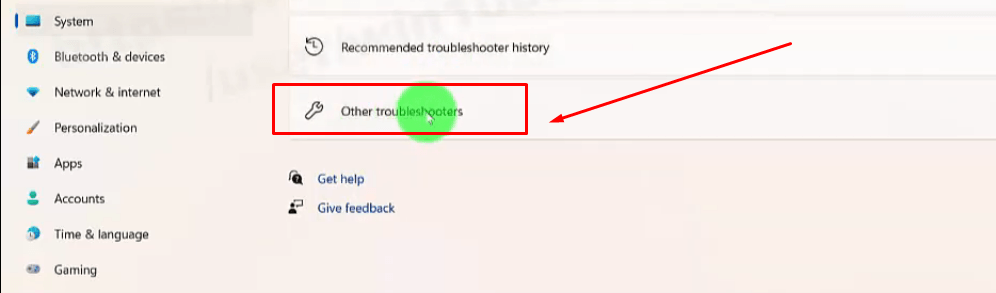
- Step 4: Scroll down and select ‘Other troubleshooters.’
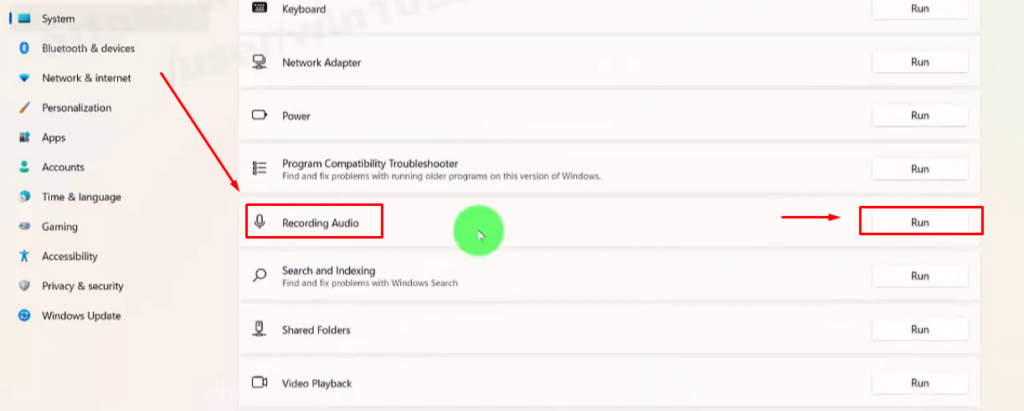
- Step 5: Search the list for the ‘Recording Audio’ option and click the ‘Run’ button next to it.
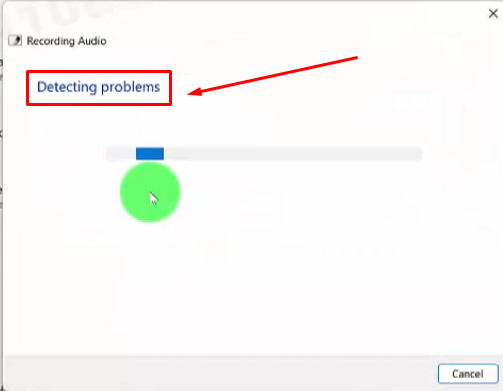
- Step 6: A new window will open with the message ‘Detecting problems.’ This means that the system is looking for faults related to audio recording.
- Step 7: Once the detection is complete, the Troubleshooter will ask you to choose the device/microphone you want to start the troubleshooting process. So, put a check on the device name and click the ‘Next’ button.
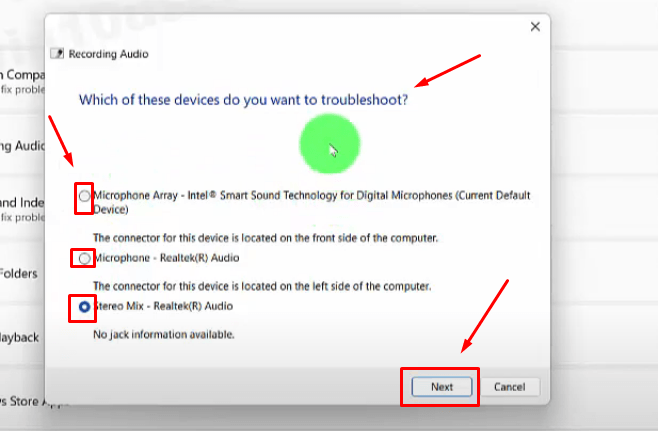
Within a few moments, the Troubleshooter will show you the main problem that’s making the microphone unrecognizable.
8. Disable Conflicting Applications
One of the reasons why your computer doesn’t recognize a microphone on a specific software or application is because of bugs or glitches. But the question is, how do you check which app is creating the issue?
The easiest way to figure it out is by checking the mic on another device and then connecting it to your PC while using a particular app. If the mic works on another computer but does not perform when the software runs on your PC, the application can be the main problem.
In another scenario, apps like Discord and Zoom might try to utilize your microphone simultaneously, causing a bigger mess. Assume this situation is one in which you are trying to talk, but someone else begins shouting—you won’t be able to concentrate on your conversation.
To fix this problem, you will need to disable them by following these steps:
- Step 1: Go to your taskbar and find the app’s icon (the one that’s conflicting).
- Step 2: Hover your cursor on the icon and right-click it.
- Step 3: Choose ‘Exit’ or ‘Quit’ (depending on the app) to stop them from diverting your mic’s attention.
However after disabling them, it is a good idea to delete those apps and reinstall them. This will give a fresh start, as it may fix any unusual glitches. So, once you have done it, restart your computer, and this should allow the PC to pick up your microphone.
9. Check for Windows Update
Lastly, ensure your computer’s operating system is updated. An outdated version can make the microphone unrecognizable due to the lack of essential patches or drivers required for device recognition and smooth operability. Updates mostly contain solutions for compatibility problems, including issues related to microphones.
For example, if your Windows PC is not detecting the mic even after applying all the tricks and tips, an update may fix it. Therefore, updating your OS permits the latest patches and drivers to correctly recognize and use your microphone.
Here’s a quick step-by-step tutorial for checking and updating the Windows system.
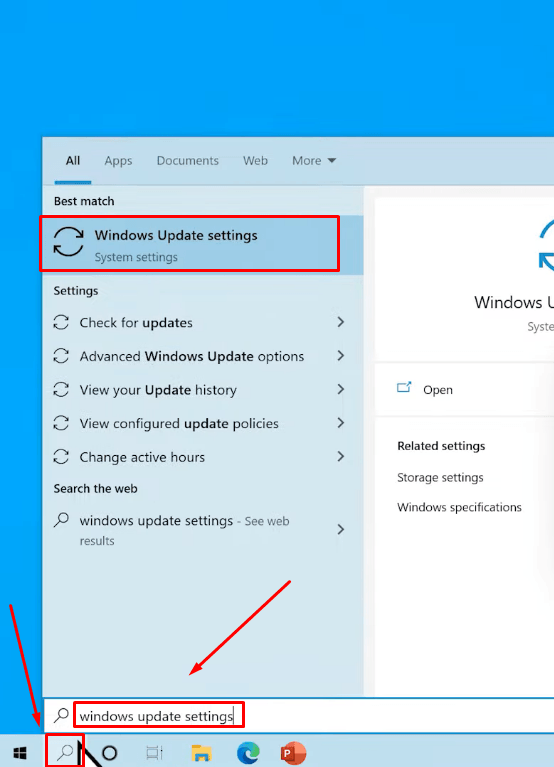
- Step 1: Click the ‘magnifying glass’ icon next to the start button. In the search bar, write ‘Windows Update Settings’. Look for the same application under the ‘Best match’ section and click it.
- Step 2: Click the ‘Check for Update’ button to see if a mandatory update is available.
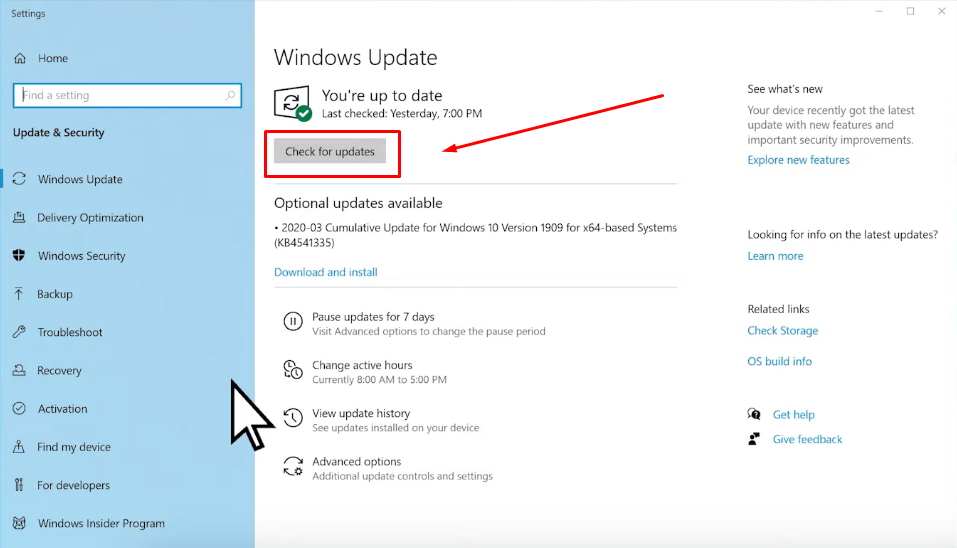
- Step 3: The updating process will automatically begin as soon as you click this button.
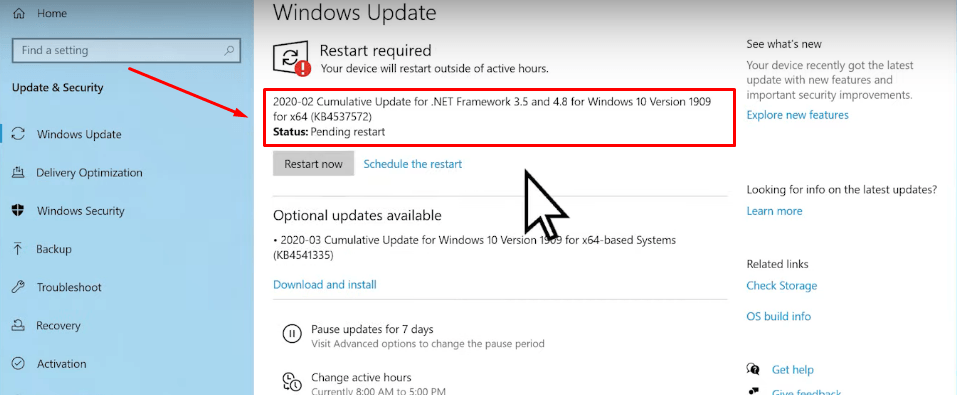
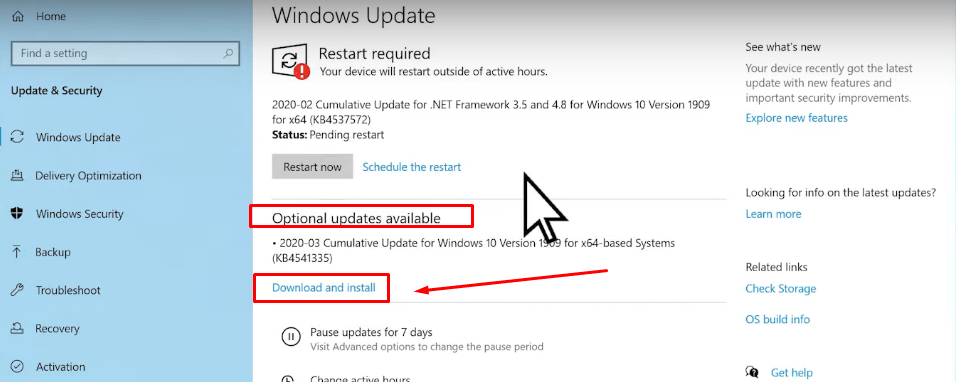
- Step 4: You can also download the optional updates (if available) by clicking the ‘Download and Install’ text under the ‘Optional updates available’ section.
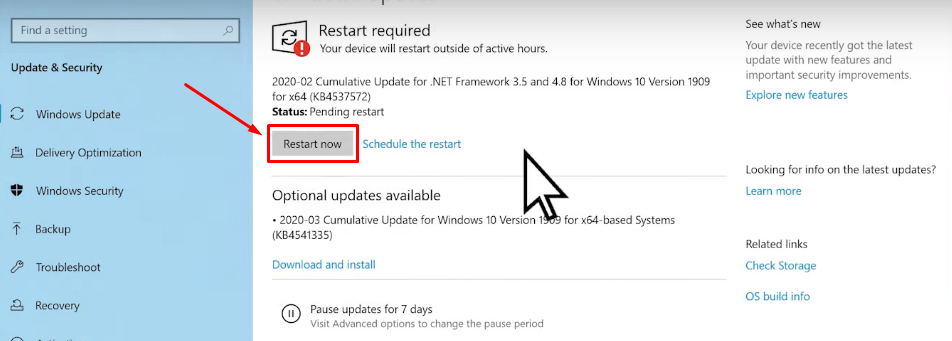
- Step 5: Once done, click the ‘Restart’ button.
Conclusion
There can be multiple reasons for the computer not recognizing the microphone. To fix this problem, you can try different solutions, like ensuring the mic is connected to the right port and the connection is not loose. Also, check if the wire or connector is in workable condition and not damaged.
Similarly, you can update the audio drivers. If the problem still exists, make the mic the default recording device. Also, you can check the privacy settings to ensure the app you use has access to the microphone.
The Windows Troubleshooter is also an excellent tool that helps you find the main cause of problems and can even fix minor problems. It is also a wise idea to keep your microphone levels to the utmost value. If the problem persists, disable the conflicting app and reinstall it. Besides, download and install the latest system updates, as they can fix compatibility problems.
Frequently Asked Questions (FAQs) about Computer Not Recognizing Microphone
Q1. Why is my microphone not working on Zoom?
Ensure the connector of your mic’s cable is fully inserted into the correct port. If Zoom still fails to recognize the microphone, unplug the device and reconnect it. If it is a Bluetooth mic, ensure it is turned on and correctly connected to the system. Also, ensure you have a Zoom-comtabile microphone.
Q2. How do I update my microphone drivers?
Go to the ‘Device Manager’ and open the ‘Sound, video, and game controllers’ option. Then, right-click on the audio driver and choose the ‘Update driver’ option.
Q3. What do I do if my microphone is not detected by Windows 10?
If you have updated to Windows 10 and the system isn’t detecting your microphone, you may need to allow the apps to use the device. Go to ‘Settings,’ click ‘Privacy,’ and choose ‘Microphone.’ Choose ‘Change’ and enable ‘Allow’ to let apps access the connected mic.
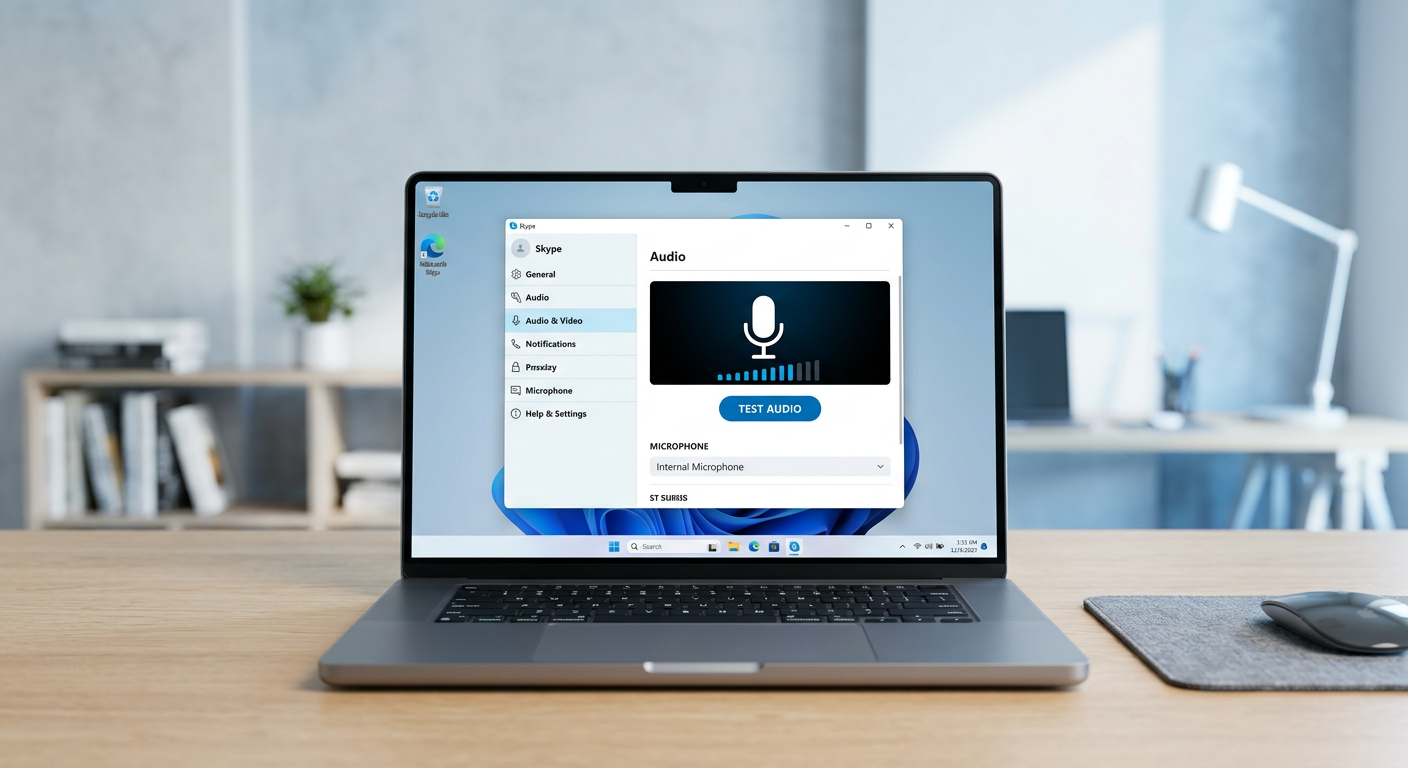
Q4. How do I test if my microphone is working properly?
Go to the ‘Sound’ settings to check your mic’s functionality. Navigate to ‘Input’ and analyze the blue bar in the ‘Test your microphone’ section. The bar should rise and fall as you talk into the microphone. The mic works fine if the bar moves according to your speaking intensity.
Q5. Why does my microphone work on one device but not on another?
If the microphone works on one computer but isn’t recognized on another, you may need to update the audio drivers to fix this issue. To do so, go to the Device Manager and update the driver.
Q6. How do I change microphone privacy settings on Windows?
Click ‘Start,’ choose ‘Settings,’ navigate to ‘Privacy’ and ‘Microphone.’ Under the ‘Allow access to the microphone on this device option,’ choose ‘Change’ and ensure ‘Microphone access’ for your specific device is enabled/turned on.
Q7. What are the best settings for a microphone in Windows?
Make sure the microphone levels are 100%. Keep the microphone boost at least 10 dB. Also, disable audio enhancement. Lastly, ensure the microphone volume is increased to at least 95%.
Q8. Can USB microphones cause conflicts with other USB devices?
You can simultaneously use a USB microphone and other USB devices, such as a webcam, on your PC/laptop, as they shouldn’t cause any conflicts. However, if you can’t find them functional together but individually they are working fine, then either the USB mic or USB webcam is at fault and should be replaced with another model.
Q9. Why is my external microphone not showing up in Device Manager?
Open ‘Settings,’ go to the ‘System’ option, and click ‘Sound’ from the left sidebar. Then, choose ‘Manage sound devices’ beneath the ‘Troubleshoot’ button. Scroll down and look for your external microphone in the ‘Disabled’ section and choose ‘Enable’ to fix this issue.
Q10. How do I fix microphone sensitivity issues?
In Windows, you can fix sensitivity issues by adjusting microphone levels. Go to ‘Sound’ settings and click ‘Recording.’ Next, enter the microphone’s properties and select the ‘Levels’ tab. From there, adjust the microphone levels and microphone boost to your preference.