


.png)
How to Copy Left Channel to Right Channel in Adobe Audition
For seamless audio recordings, copying the channels has become handy with the powerful technology of adobe audition. Duplicating the track to the right will enhance the audio quality and bring precision. Due to this, it’s desirable among musicians, podcasters, and sound engineers, and its understanding provides professional audio quality.
For the immersive audio experience, adobe audition provides greater audio control with improved stereo effects and compatibility. So, the enlisted guidelines will clearly explain how effectively you should copy the channels for an enriching experience.
What is Adobe Audition?
The comprehensive Adobe audio editing software brings revolution with its digital toolsets to record and edit audio efficiently and precisely. Its powerful, user-friendly interface provides a unique combination of waveform and multitrack for editing and enhanced audio quality.
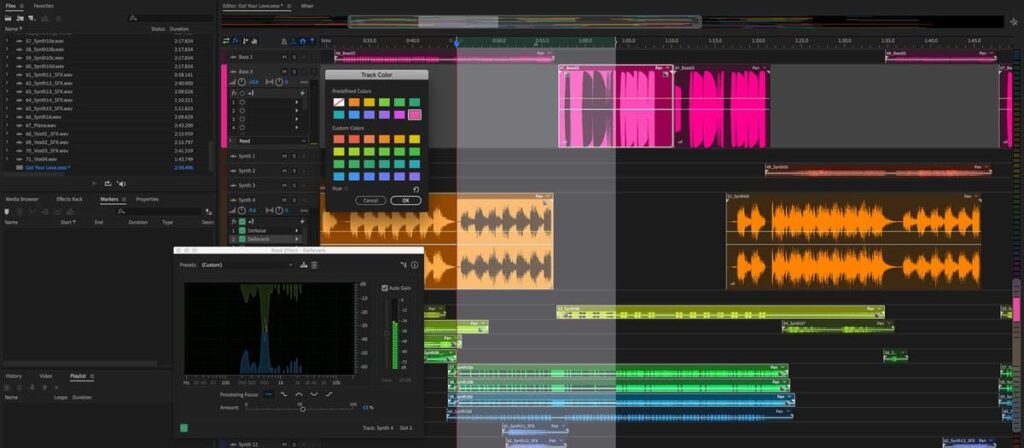
And the dynamic multitrack editing tool is essential for creating unique and seamless audio compositions. With this, adobe audition brings comfort and flexibility for the seamless production of films and podcasts.
Furthermore, it works seamlessly with other applications of Adobe Premier Pro and Adobe After Effects for seamless import and export of files. Besides this, real-time monitoring allows users to trim and shape the audio as envisioned.
Also, the professional digital audio workstation provides digital solutions to industries for quality audio production.
How to copy the left channel to the right in Adobe Audition?
With more comprehensive audio editing capabilities, adobe audition beautifies sounds according to personal tastes. For this reason, copying the channels is extremely important for correcting imbalances or balancing stereo or mono tracks. So, the enlisted step-by-step audio editing guidelines will provide the necessary knowledge to take your audio to the next level.
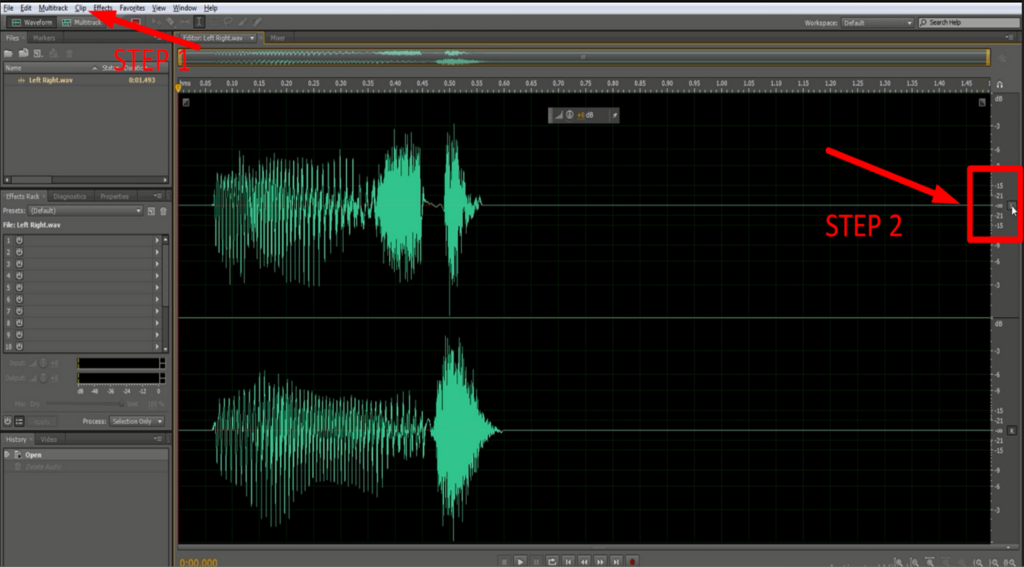
Step 1- Locate the multitrack view
- Start by importing the mono or stereo audio track into Adobe Audition. And you can navigate and select the audio track from the multitrack view, which also prepares the tracks for editing.
- You can also select the whole or part of the audio track for editing, in case the clips are short, and ensure the ways are in stereo.
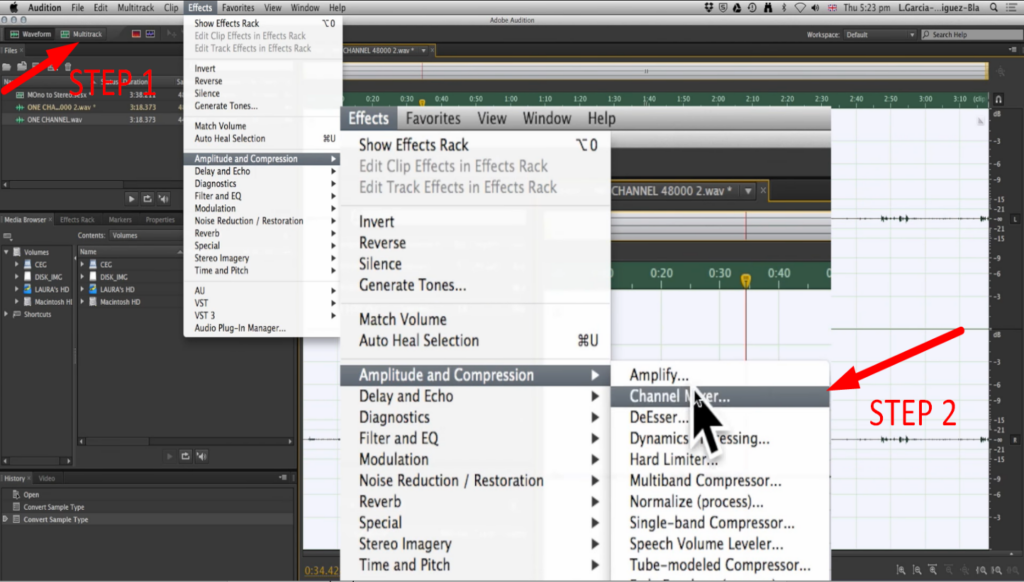
Step 2- Applying the Channel Mixer Effects
- From the drop-down menu of the home bar “effects,” you can easily access the “amplitude and compression” option for additional channel mixing effects.
- And select the channel mixer effect to adjust the edit settings for audio tracks.
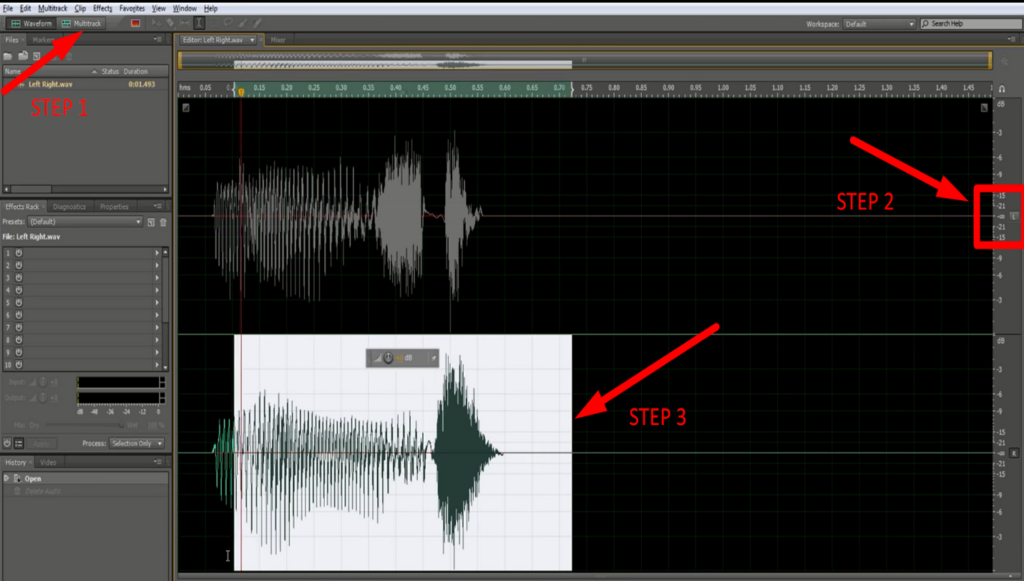
Step 3- Copying the Channels
- With the command “Ctrl¬ + A,” you can select the entire track to copy, and with “Left” or “Right” sliders, you can drag the channels to the left or right of the audio track.
- And to copy the left channel to the right, copy the left audio track to the right, and you can also place it in your desired location.
- After that, select “Fill the right with the left,” and it will copy the audio track to your desired location.
Step 4- Previewing the Audio Tracks
- Previewing is essential to observe the modifications and use headphones to analyze the changes.
- And in case of incorrect balances, adjust the sliders left or right to get the desired audio quality.
Step 5- Saving the Results
- After applying the modifications, you can save your unique audio recordings as a separate file from the home bar menu.
Besides this, the enlisted simplified method will provide a clear understanding when “copying the channels for dual mono tracks”.
- By clicking on the advance tab, turn off the right channel from the waveform view and select and copy all of the left channel audio tracks.
- Then turn off the left channel and paste the copy to the preferred location on the right track.
- This method has been essential in removing unwanted noises from the channels and also brings clarity and precision to the tracks.
A channel mixer is an essential tool that controls the audio tracks, and utilizing the potential will enhance the possibilities of efficiently designing the audio. And by following these guidelines, you can easily understand the art of duplicating the channels to improve stereo effects.
Bonus Tips:
How to select individual channels in adobe audition?
Selecting the individual channels allows you to work efficiently on specific audio tracks and provides greater control to edit and design as you have imagined.
Step 1- Selecting the Audio Channel
You can select the audio channels you want to edit from the multitrack view. And from the audition interface, click on the “Clip” menu to select the specific channel format.
Step 2- selecting the individual channels
The “Channel Format” allows you to select the individual channels, but you have simple rules.
- When selecting the left channel, turn off the right channel from the right-hand toggle bar, and ensure to turn off the left channel during that period.
- And the Adobe audition will provide a waveform view of the selected channels.
With these simplest methods, you can select the individual or multiple channels with “Command (Mac)” and “Ctrl (Windows)” key commands.
How to delete or move single channels?
Adobe Audition provides the necessary tools to remove unwanted channels or select the specific channels for cleaning the audio. It further enables you to rearrange the audio tracks for comfort and flexibility.
Step 1- Locating the channels
- First, choose the audio tracks you want to remove by selecting the edit from the home bar.
Step 2- Muting the Channels
- After that, select the left or right-hand toggle and mute the channels from the audio tracks, and the selected channels will turn grey.
Step 3- Delete the Channel
- You can quickly delete or copy the unmuted left or right channel from this.
- And from the home bar, select the file and paste the selected tracks to become new stereo tracks if you want to retain the original quality of your audio.
Step 4- Moving the channels
- Besides this, there’s an additional method to move the channels to and from the audio tracks. Choose the channels you want to move and drag them to the desired or multiple channels.
- And when moving a piece of audio from the track, it will overlap with new clips by crossfades.
Ripple Delete
- After selecting the piece of the track, right-click on the audition screen.
- And click the “Ripple Delete” button to remove the selected part.
- After deleting the audio parts, the ripple will automatically adjust the gap, and it will overlap with the existing audio track.
When moving or removing the channels, ensure that the other channels are muted or placed in a new location in the track. And the shortcut key “Shift + E” can remove the empty audio tracks from the audition.
How to Separate Stereo Audio into Dual-Channel Mono Clips?
Splitting the stereo audio channels into dual mono clips enhances the optimization and provides a better listening experience. You can easily separate the left or right channels by following the easy steps.
Step 1- Applying the Waveform Editor
- Import the stereo audio that needs to be extracted into adobe audition and double-click the channel to select the waveform editor from the popup menu.
- The editor provides a visual representation of sound frequencies to amplify the audio.
Step 2- Extracting the Channels
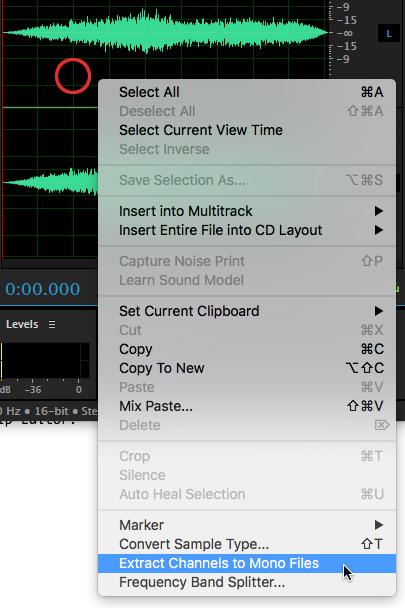
- And Right-click the waveform editor and select “Extract Channels to Mono-Files,” which will instantly add two or more mono files to the file menu.
- From this, you can quickly identify the “L” for the left channels and “R” for the proper channels, and it’s ready to mix with the original audio quality.
Note: when reversing the method, converting the dual mono channels into stereo, insert the clips to separate audio channels and pan them to the right and left of the audio track. Then, right-click and select “Group” to merge the separate channels.
How to reverse the Audio in Adobe Audition?
Reversing the audio produces special effects in the audio, and it provides real meanings to quality audio. It changes the multitrack audio waveform and plays the audio backward. So, follow the enlisted simple steps for the “Reverse” effect:
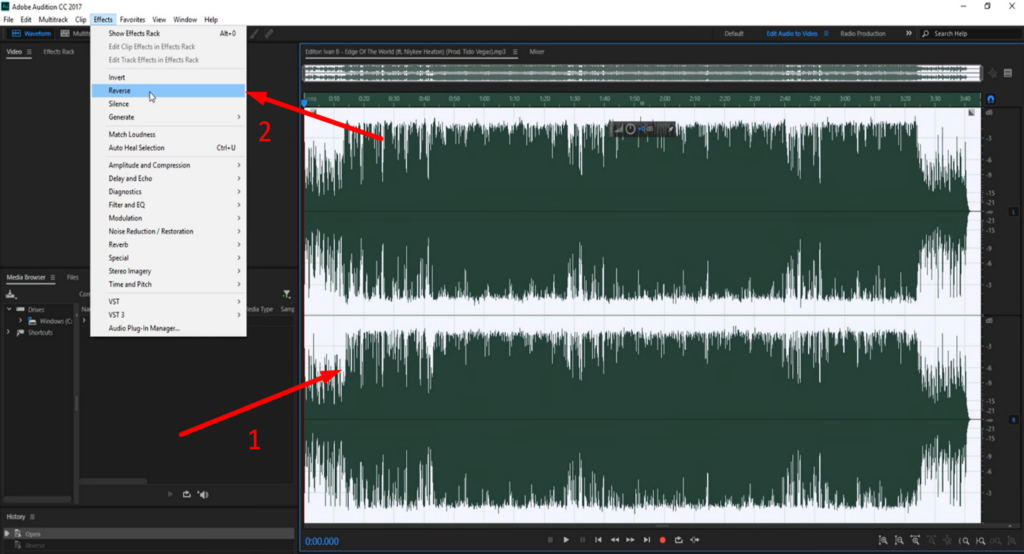
- Open the audition waveform audio track.
- Press “Ctrl/Cmd + A” to select the complete audio track and a specific part.
- Click “Edit” from the toolbar and select the “Reverse” button.
Note: You can zoom in on your waveform audio from the bar and mark the multiple areas in the recording for reverse.
How to improve audio quality in Adobe Audition?
When talking about improving the audio, remember the sequence of “ENCN” (Equalize, Normalize, Compress, and Normalize). Follow the step-by-step process to further your audio quality.
Method 1- Using Equalizer
1. From the audition toolbar, click on the windows and select the “Equalizer” button from the popup menu.
2. Adjust the “High Pass Filter” to improve the tracks’ pitch and quality.
3. You can also customize the frequency of different track parts.
Method 2- Normalize
1. Click on “Favorites” from the home bar and select the “Normalize” button.
Method 3- Compress
1. Click “Effects” from the toolbar and select “Amplitude and Compression” from the popup window.
2. The “Compressor” screen will make you edit the selected audio track.
Method 4- Normalization
1. The final normalization gives clear insight into the edited audio.
By accessing these, you can customize the audio track to improve the quality and bring clear, crisp sound to your projects.
If you’re regularly capturing audio, consider using a wireless lavalier microphone to ensure clean stereo recordings from the start. It simplifies audio post-processing and minimizes issues with unbalanced channels, enhancing your overall recording workflow.


Subscribe us
to get the latest news!


