.png)
Struggling to get that punchy kick drum sound that really cuts through the mix? Well, it’s a common challenge even seasoned producers face. More often than not, the culprit is poor mic placement.
When a kick drum isn’t miked properly, the result can feel muddy, flat, or lacking in presence. Conversely, a well-placed mic can completely transform your sound, ultimately delivering clarity and low-end impact that anchors the entire track.
In fact, nearly 80% of professional engineers agree that proper miking is essential for achieving a solid drum tone. Whether you’re working in a home studio or prepping for a live show, this guide will walk you through exactly how to mic a kick drum the right way.
Key Parts of the Kick Drum That Affect Mic Placement
Before you position a mic, it’s important to understand the anatomy of the kick drum. Each part shapes the sound and determines where and how you should place your microphone.

Shell
The shell is the core of the drum and plays a major role in shaping its tonal character. Thicker shells generally produce a punchier sound, while thinner ones offer more resonance. The material (e.g., maple, birch, acrylic, or something else) also influences the warmth, brightness, and overall projection of the kick.
Batter Head (Beater Side)
This is the head that the beater strikes. It’s the main source of attack in the kick drum sound. Miking close to the batter head emphasizes that click or punch, crucial for metal or modern rock genres.
Resonant Head (Front Head)
The front head helps control sustain and tone. Some drummers cut a porthole in this head to allow air (and sound) to escape, which also creates a common spot to place a mic for a balanced blend of attack and body.
Beater and Pedal
The beater’s material (felt, wood, plastic) affects the tone as well, harder materials give more click, softer ones offer a rounder hit. While it’s not part of the drum shell itself, it directly influences how the batter head reacts.

Port Hole
Often found on the resonant head, the port hole allows for direct mic placement inside the drum. This placement captures more low-end thump and reduces ambient bleed. No port? You’ll likely need to mic outside or from the batter side.

How Drum Size, Tuning, and Head Type Shape Your Kick Drum Sound
Getting the perfect kick drum sound starts with understanding how its physical design and setup affect its tone. Let’s break down the key factors:
Drum Size (Diameter and Depth)
Diameter: Larger diameters (22″–24″) produce deeper, more resonant tones suitable for genres like rock and metal. Smaller diameters (18″–20″) yield tighter and punchier sounds favored in jazz and pop.
Depth: Deeper shells (16″–18″) offer extended sustain and a fuller low-end, while shallower depths (14″ or less) provide quicker response and more focused attack.
Tuning (Balancing Batter and Resonant Heads)
Low Tension: Loosely tuned heads emphasize low frequencies, delivering a “boomier” sound ideal for certain styles.
High Tension: Tighter tuning increases pitch and attack, which results in a more defined “punch.”
Head Relationship: Tuning both heads to the same pitch maximizes sustain. Tuning the resonant head higher or lower than the batter head can introduce pitch bends and affect sustain.
Head Types (Single-Ply vs. Double-Ply)
Single-Ply Heads: Offer more resonance and sustain, producing a brighter tone.
Double-Ply Heads: Deliver a warmer, more focused sound with fewer overtones, making them ideal for controlled studio environments.
Pre-Muffled Heads: Incorporate built-in dampening to control resonance and overtones, offering a more focused sound.
Essential Microphone Types for Kick Drums
Selecting the appropriate microphone is crucial for capturing the desired kick drum sound. Below are the primary types used, along with notable models:
Dynamic Microphones
Dynamic microphones are the most common choice for close-miking a kick drum, thanks to their durability, high SPL handling, and ability to capture punch and low-end without distortion. Here are a few best ones:
Shure Beta 52A
Shure Beta 52A is designed specifically for kick drums and bass instruments. It features a frequency response of 20Hz to 10kHz and can handle sound pressure levels up to 174dB. Its supercardioid pickup pattern provides excellent off-axis rejection and allows for high gain before feedback.
AKG D112 MKII
Well known for handling sound pressure levels above 160dB without distortion, AKG D112 MKII features a large diaphragm with a low resonance frequency. This design delivers a strong low-end response below 100Hz, along with a subtle lift around 4kHz for added clarity.
Audix D6
Built with a cardioid pickup pattern, it offers a frequency response of 30Hz to 15kHz, highlighting punchy lows and a clear, defined attack. Audix D6’s VLM™ diaphragm is designed to deliver natural and accurate sound reproduction.
Condenser Microphones
Condenser mics are typically used as room or overhead microphones to capture the depth and space around the kick drum.
Neumann U87
The Neumann U87 is a versatile large-diaphragm condenser microphone featuring three selectable polar patterns. While it’s not commonly used for close-miking kick drums because of its sensitivity, it’s often chosen as a room mic to capture the full ambience and character of the drum kit.
AKG C414
With multiple polar patterns and a flat frequency response, the AKG C414 is highly versatile, well-suited for everything from drum overheads to room miking. Its ability to handle high SPLs also makes it a strong choice for capturing the ambient sound of a kick drum.
Boundary Microphones
Placed directly inside the kick drum, boundary mics are great for capturing a punchy signal with minimal bleed. They are ideal for live settings or tight studio mixes.
Shure Beta 91A
A half-cardioid condenser mic designed for placement inside the kick drum. It features a two-position contour switch to tailor the frequency response, enhancing attack and clarity.
Crown PZM-30D
Utilizing Pressure Zone Microphone technology, it offers a hemispherical pickup pattern and switchable frequency responses (flat/rising), providing flexibility in capturing the kick drum’s nuances.
Subkick Microphones
Subkick mics use speaker diaphragms to pick up the deep sub-bass tones that standard mics often miss. They are designed to capture ultra-low frequencies.
Yamaha Subkick (SKRM-100)
A low-frequency capture device that picks up frequencies between 100Hz–2000Hz, which standard microphones might miss. It uses a 6.5″ speaker diaphragm mounted in a drum shell, converting it into a microphone to capture the kick drum’s sub-bass.
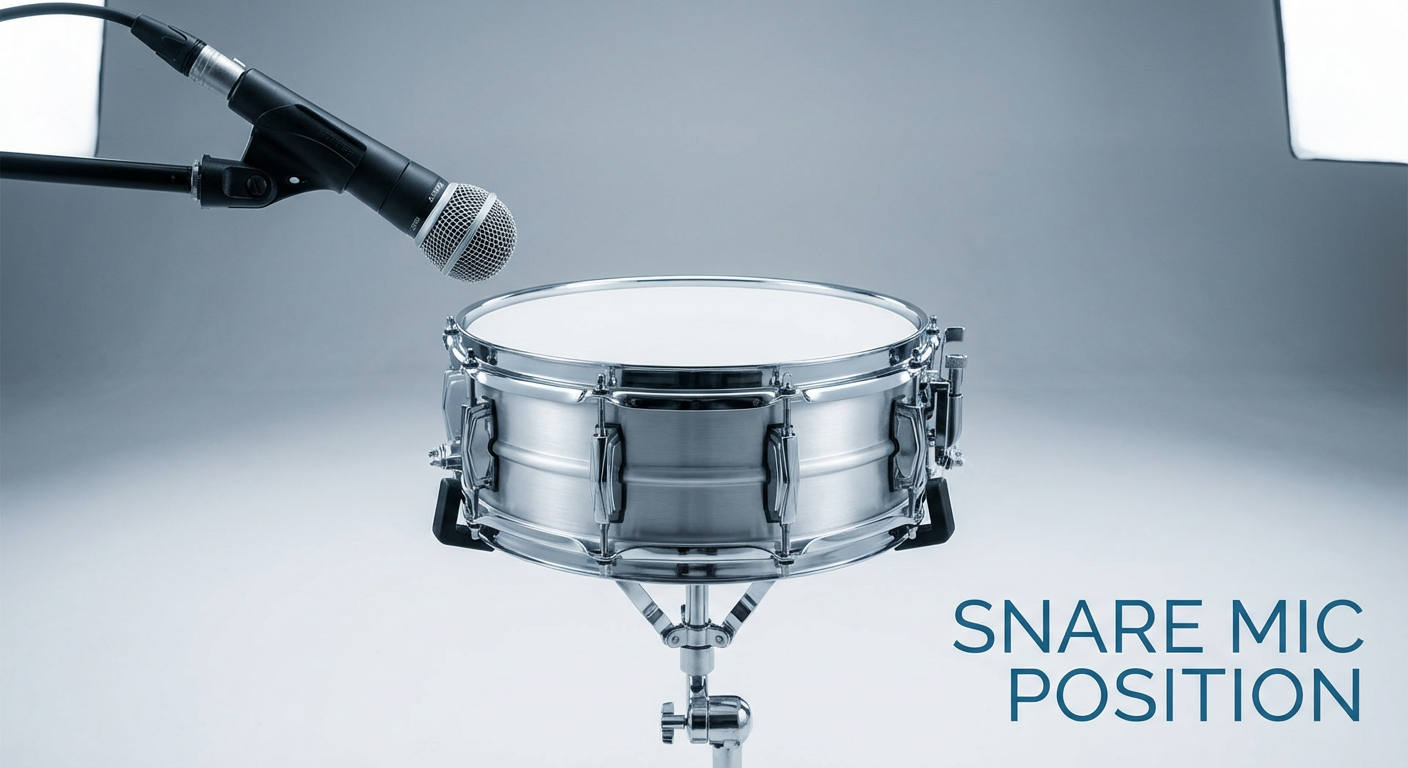
Microphone Placement Techniques for Kick Drums
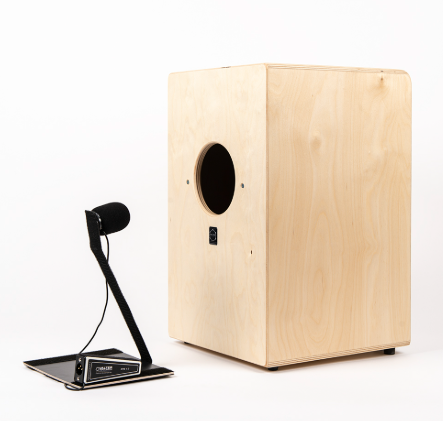
- Inside the Drum (via Porthole)
Placing a microphone inside the kick drum through the port hole captures a focused, punchy sound with pronounced attack. Positioning the mic closer to the beater emphasizes the “click,” while moving it towards the center yields a fuller tone.

- Outside the Drum (Resonant Head)
Miking just outside the resonant head captures the drum’s natural resonance and low-end thump. Placing the mic 3–5 inches from the head’s center provides a balanced sound, while angling it off-center can reduce air blasts and emphasize tonal qualities.

- Beater Side Miking (Batter Head)
For drums without a porthole, placing a mic near the batter head captures the beater’s attack. Positioning a dynamic mic close to where the beater strikes can yield a detailed “click,” though care must be taken to manage bleed from other drums.

Combining Multiple Microphones for Miking a Kick Drum
Utilizing multiple microphones on a kick drum can capture a more nuanced sound. But careful blending and phase alignment are crucial to avoid issues like phase cancellation.
Inside and Outside Microphones
An inside microphone, placed near the batter head, captures the attack and definition of the kick drum. An outside microphone, positioned near the resonant head, captures the low-end resonance and body.

These two signals altogether allow for a comprehensive kick drum sound that combines clarity with depth. Also, give multiple tries or experiment with the balance between these mics to achieve your desired tonal character.
Phase Alignment Techniques
When combining multiple microphones, phase alignment is critical to prevent frequency cancellations. Here are some techniques:
Polarity Inversion
Use the polarity invert switch on your preamp or mixing console to flip the phase of one microphone and listen for improved low-end response.
Time Alignment
In your DAW, zoom in on the waveforms of each mic track and align the transients so that they occur simultaneously. This can enhance the cohesiveness of the combined signal.
Physical Placement
Adjust the distance of the microphones to ensure that the sound reaches them at the same time, minimizing phase discrepancies.
Incorporating a Subkick Microphone
A subkick microphone is specifically designed to capture the ultra-low frequencies of a kick drum. When paired with traditional mics, it adds depth and weight to the overall kick sound.

For best results, position the subkick a few inches from the resonant head and blend its signal carefully with the others. Be sure to check phase alignment as well, using the techniques mentioned earlier to ensure everything works together cohesively.
EQ and Compression Tips for Kick Drums
Dialing in the right EQ and compression settings can make the difference between a flat-sounding kick and one that drives the entire mix.
EQ Tips
Before adjusting anything, keep this in mind:
- Take out what doesn’t sound good
- Bring forward what sounds right
- Make sure it fits with the rest of your track

Most of the kick drum’s energy sits in the lower part of the sound spectrum, but what you hear is shaped by more than just the lows. The way it sounds in a mix often depends on details in the mids and highs too. Here’s a breakdown of what to listen for:
25–50 Hz – Sub-Bass Range: This is where you’ll feel the lowest rumble. If your mix feels too heavy or unclear, this is a good area to reduce slightly. If the kick sounds too light, this range might need more support.
50–80 Hz – Full Body of the Kick: This is for the main low-end sound. A small lift here can make the kick feel deeper and more solid, especially in bass-heavy genres.
80–200 Hz – Punch and Weight: These tones give the kick its push or “thump.” If your kick feels too soft or weak, this range can help it sound more firm and present.
200–500 Hz – Muffled or Boxy Sound: This part often adds a muddy or hollow character. Cutting back here can help the kick sound cleaner and make space for other instruments.
600 Hz–1.2 kHz – Midrange Definition: These tones make the kick more noticeable on smaller speakers. A light touch here can help it be heard without taking over the mix.
1.2–6 kHz – Clicking or Sharp Edge: This range gives the kick its sharp snap, the sound of the beater hitting the drum. Adjusting this area makes the kick clearer in a crowded mix, but be gentle, too much can sound harsh.
Tip: Always listen to how the kick sounds with your full track. If your bass is strongest around 80 Hz, you might shift your kick slightly lower or higher so they don’t compete for space.
Compression Tips
Compression controls the dynamic range of the kick drum, balancing its presence in the mix.

Attack Time: Setting an attack time between 10–30 ms allows the initial transient to pass through, preserving the punch.
Release Time: A release time of 50–100 ms ensures the compressor recovers before the next hit, maintaining rhythm and preventing pumping.
Ratio and Threshold: A ratio of 4:1 or 6:1 with a threshold set to achieve 3–6 dB of gain reduction provides control without over-compressing.
Conclusion
Getting a great kick drum sound isn’t just about picking the right mic. You need to understand the drum, the room, and how each part of the setup affects the mix. From tuning the drum to choosing and placing mics, every step matters.
With some careful adjustments, you can get a powerful kick that fits your style. Take your time, trust your ears, and don’t be afraid to experiment different things, small changes can make a big difference.
Frequently Asked Questions (FAQs)
How do you mic a kick drum?
Place a dynamic mic inside or just outside the drum near the beater or porthole, and adjust for tone and clarity.
What kind of mic do you use for the kick drum?
A dynamic mic like the Shure Beta 52A or AKG D112 is most commonly used for kick drums.