.png)
Just got your hands on the Shure SM7B? Then you’re aiming for top-tier sound and you’ve picked a mic that delivers exactly that. It’s a go-to choice in pro studios and podcast setups for a reason.
But here’s the thing: getting the best sound out of it isn’t just about plugging it in. With its low output level, the SM7B needs the right setup to really shine.
In this guide, we’ll walk you through everything you need to know to set it up properly, even if you’re just getting started.
Technical Specifications of Shure SM7B
Understanding the technical aspects of the SM7B can help users optimize its performance:
- Type: Dynamic (moving coil)
- Polar Pattern: Cardioid
- Frequency Response: 50 Hz to 20,000 Hz
- Sensitivity: -59 dBV/Pa (1.12 mV) at 1 kHz
- Impedance: 150 ohms
- Connector: Three-pin XLR male
- Weight: Approximately 765.4 grams (1.69 lbs)
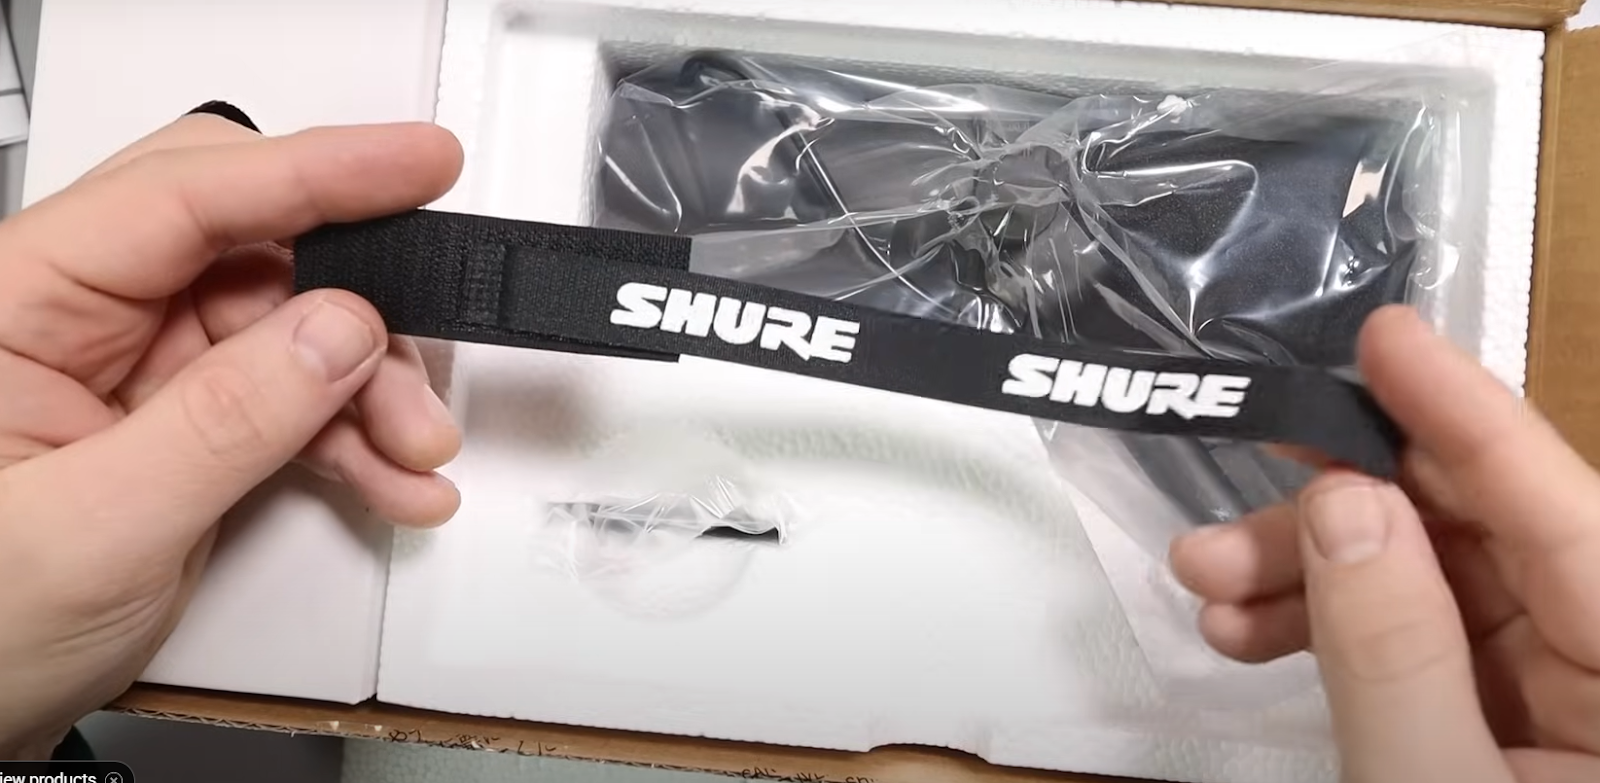
What Comes in the Box with the Shure SM7B?
When you open the Shure SM7B box, you’ll find the following components:
Shure SM7B Microphone
This is the main piece, an industry-standard dynamic cardioid mic known for its smooth, flat frequency response and superb vocal clarity. Whether you’re recording vocals, podcasts, or instruments, this mic is built to handle it with professional quality.

A7WS Large Foam Windscreen
The thick windscreen is designed for close-up voice recordings. It reduces breath noise, plosives (like “P” and “B” sounds), and helps produce a warmer tone, especially useful for podcasting and broadcasting.

Rear Switch Cover Plate
This metal backplate covers the two rear switches: bass roll-off and presence boost. It’s there to protect your settings once they’re dialed in and keeps the back of the mic clean and secure.

5/8″ to 3/8″ Thread Adapter
Included to make the mic compatible with a wide range of mic stands or boom arms. Most U.S. stands use 5/8″ threading, but the adapter lets you use it with European 3/8″ mounts too.

Cable Tie
It’s a small but handy addition. This helps you keep your XLR cable neatly wrapped and secured, which prevents tangling and minimizes strain on the mic input during long sessions.
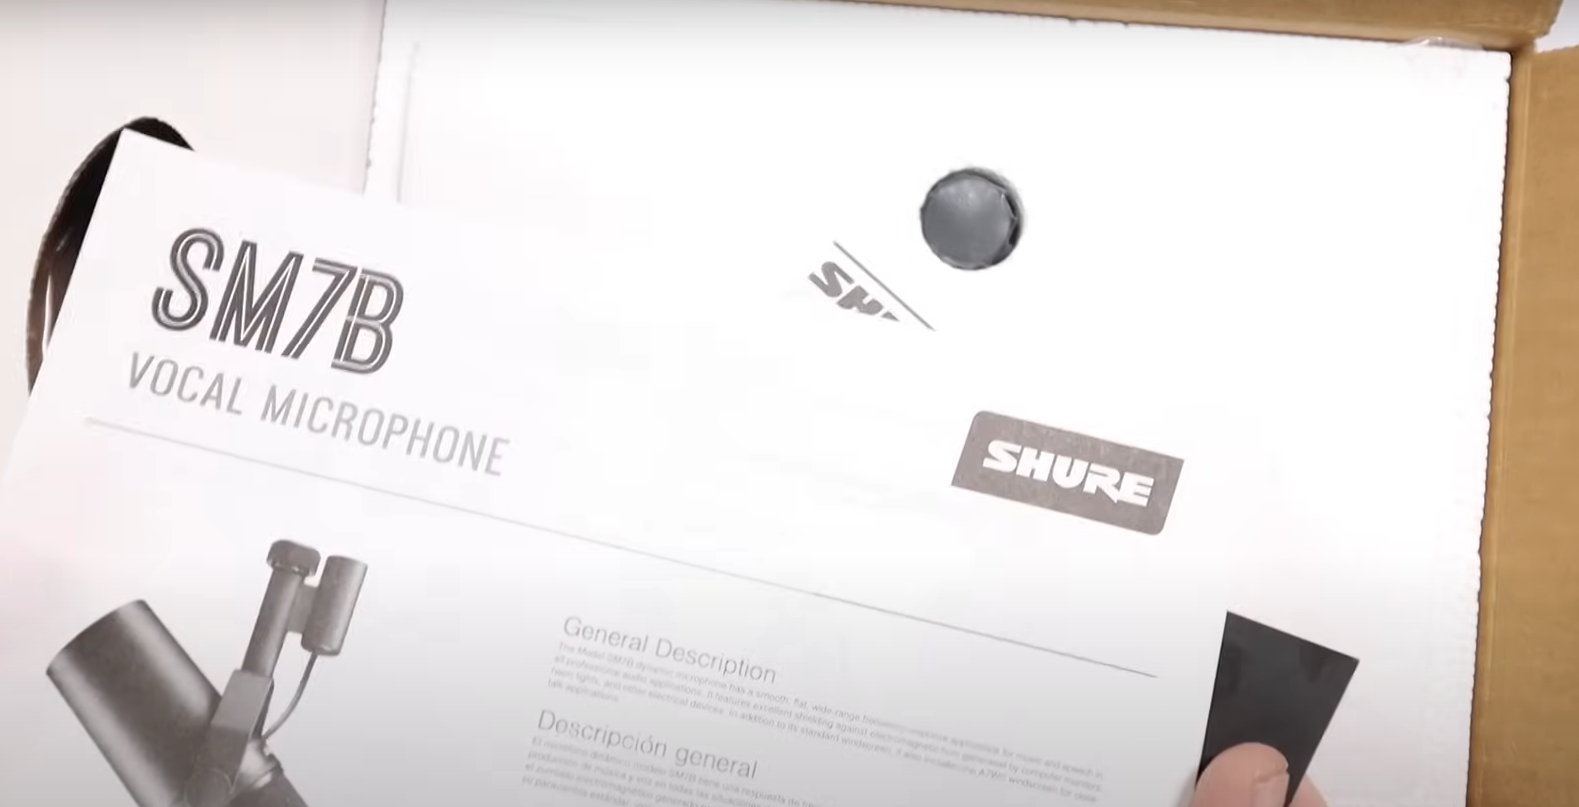
Documentation
You’ll find a quick-start guide and warranty details. While minimal, the documentation is helpful for confirming specs and understanding key features if you’re new to dynamic microphones.
Essential Equipment for Setting Up the Shure SM7B
Before you hit record, it’s important to pair the SM7B with the right gear.
- Microphone Stand or Boom Arm
The Shure SM7B is a substantial microphone, weighing approximately 765 grams. To ensure stability and precise positioning, a sturdy microphone stand or boom arm is essential.
A boom arm, such as the Rode PSA1+, offers flexibility and helps keep your workspace organized by allowing you to position the microphone optimally without occupying desk space.
- High-Quality XLR Cable
The SM7B utilizes a standard 3-pin XLR connection. Investing in a high-quality, balanced XLR cable is crucial for maintaining signal integrity and minimizing noise. Cables with star-quad designs and Neutrik connectors are recommended for their durability and superior noise rejection.
- Audio Interface or Mixer
To connect the SM7B to your computer, you’ll need an audio interface or mixer that converts the analog signal to digital. The Focusrite Scarlett 2i2 is a popular choice among content creators for its clean preamps and user-friendly interface.
However, it’s important to note that the SM7B requires a significant amount of gain, and some interfaces may not provide sufficient amplification on their own.
- Preamp or Mic Activator
Due to its low output level, the SM7B often benefits from an inline preamp or mic activator to boost the signal. Devices like the Cloudlifter CL-1 or the FetHead provide up to +25dB of clean gain, ensuring optimal recording levels without introducing noise. These activators are especially useful when paired with interfaces that have limited gain capabilities.
- Pop Filter or Windscreen
While the SM7B comes with a built-in windscreen, using an additional pop filter can further reduce plosive sounds and protect the microphone from moisture. This is particularly beneficial for close-up vocal recordings, ensuring clarity and prolonging the microphone’s lifespan.
How to Set Up the Shure SM7B
Once you’ve gathered the right equipment, it’s time to get hands-on. Let’s walk through each step, starting with mounting the microphone.
Step 1: Mount the Microphone
- The SM7B includes a built-in yoke mount with 5/8-inch threading, which fits most standard mic stands.
- If you’re using a stage-style tripod stand, simply align the mic’s mount with the stand and twist it on until secure.

- Desktop boom arms often use 3/8-inch threading, so you’ll need the included gold thread adapter.
- Insert the gold adapter into the microphone’s mount. Make sure the notched side faces outward, this lets you tighten or loosen it with a coin.

- Once the adapter is installed, screw the mic onto the boom arm the same way: align, twist, and secure.
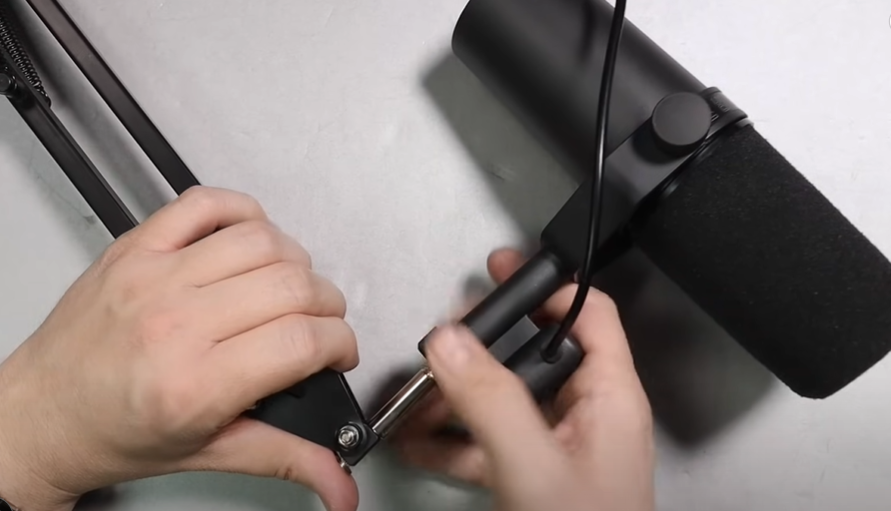
- Double-check that the mic is firmly attached and positioned properly for your recording setup.
Step 2: Position the Microphone Correctly
Positioning your Shure SM7B is just as important as the gear you use. Because the mic has a low output level, placement can dramatically affect sound quality. Here’s how to get it right:
- Keep the microphone within 3 to 6 inches of your mouth. Anything farther may result in weak, thin audio due to the mic’s low sensitivity.
- Three inches tends to be the sweet spot for most users, capturing full vocal tone while keeping background noise low.
- Although it might be tempting to place the mic farther away to keep it out of your line of sight or avoid bumping into it, that usually leads to poor audio with this specific mic.
- To minimize plosives (harsh bursts from “P” and “B” sounds), angle the microphone slightly off-axis, instead of speaking directly into it, aim the mic just to the side of your mouth.
- This small adjustment helps you speak past the microphone, so air doesn’t hit the diaphragm directly. Your audio stays clean, and the risk of unwanted popping noises or even diaphragm damage is greatly reduced.
Step 3: Connect the Microphone and Set Your Gain
Now that your mic is mounted and positioned, it’s time to wire it up and adjust your input levels for clean, balanced sound. This step ensures your recordings won’t come out too quiet, or worse, distorted.
- Start by connecting the female end of your XLR cable to the base of the Shure SM7B.
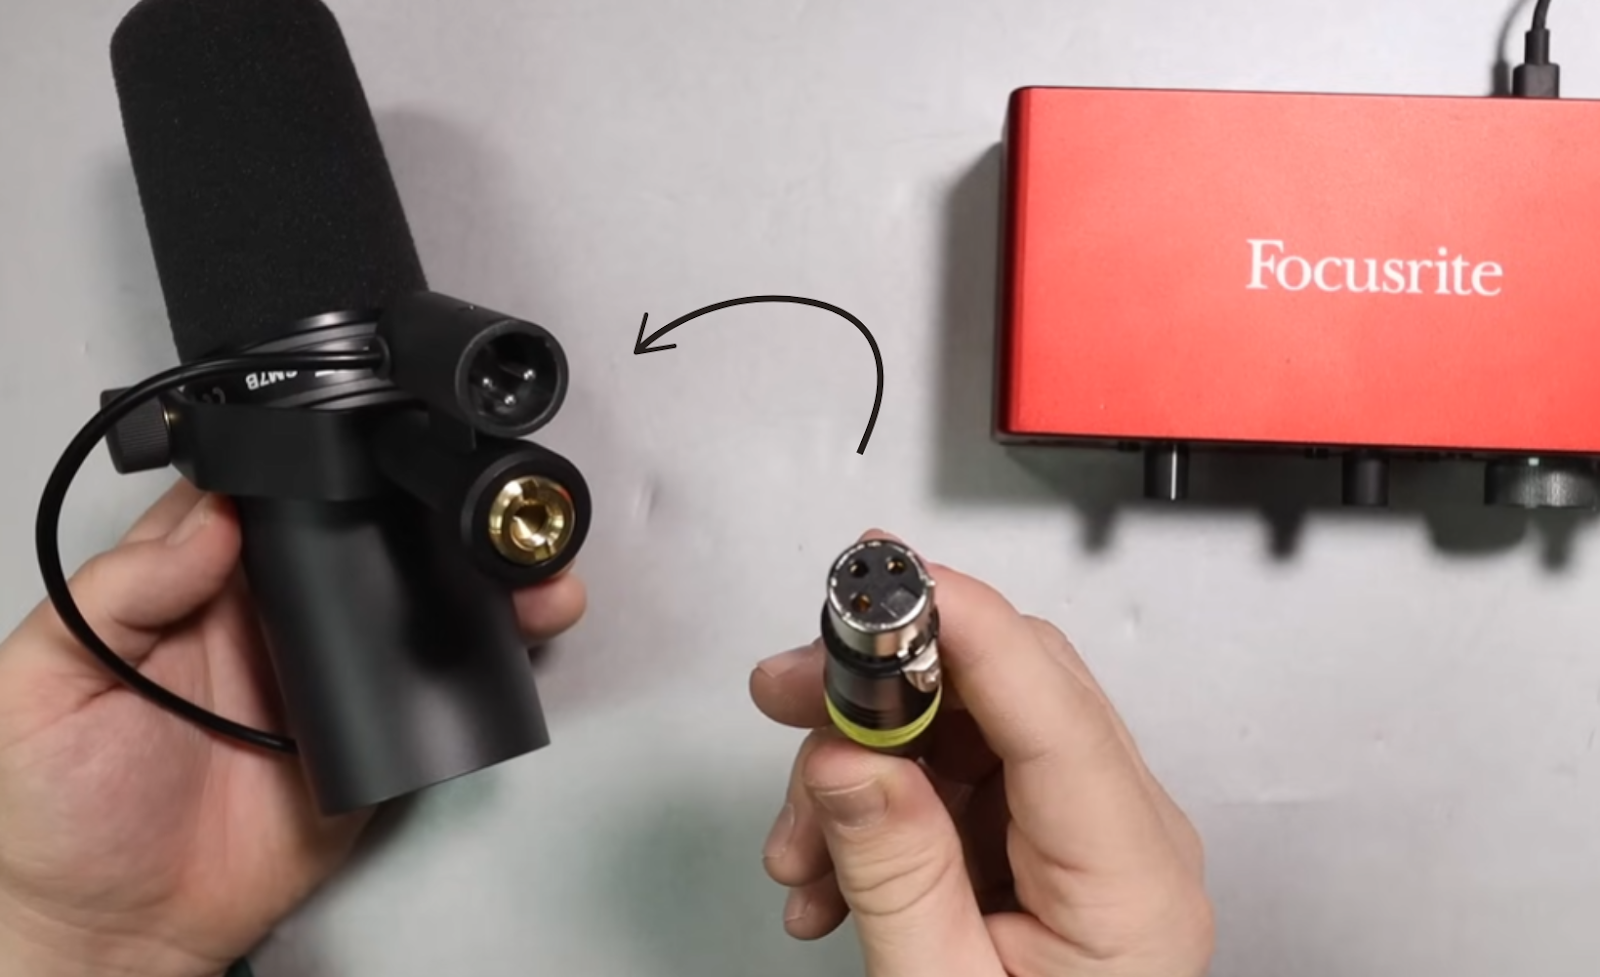
- Plug the male end of the XLR cable into the XLR input on your USB audio interface (like the Focusrite Scarlett 2i2 or GoXLR).

- Open your recording or streaming software, anything that shows a real-time audio level meter (like OBS, GarageBand, Audacity, etc.).
- Begin speaking into the microphone and gradually increase the gain on your audio interface.
- Your target is around -18 dB on the meter. This leaves enough headroom to avoid clipping if your voice gets louder.

- On the Scarlett 2i2, this typically means setting the gain knob somewhere between 3:30 and 4 o’clock.
- If you’re recording or streaming, you can always boost up levels in post, so there’s no need to crank gain too high on the hardware.
Note: If you’re in a real-time situation like a Zoom call or Discord chat and can’t adjust levels later, it’s acceptable to raise gain slightly higher (e.g., around -6 to -3 dB), but monitor your voice closely to avoid distortion during loud moments.
- If you’re using a Cloudlifter, FetHead, or similar mic activator, insert it inline between the mic and interface, then turn on 48V phantom power on your interface.
- The gain setup remains the same, still aim for that safe -18 dB level.
Step 4.1: Choose the Right Windscreen
The Shure SM7B comes with two foam windscreens, a thin standard one and a thicker A7WS version.
- The thin windscreen offers a brighter sound but less protection from plosives. It’s ideal if you’re good with mic technique or recording in a controlled space.

- The thicker windscreen darkens the tone slightly by reducing high frequencies but provides excellent plosive rejection. Use it if you’re prone to strong “P” and “B” sounds or recording in windy environments.

- For maximum clarity, some users remove both windscreens and use an external pop filter. This setup keeps the top-end sparkle while still blocking plosives effectively.
Step 4.2: Use the Rear Switches for Tone Control
The Shure SM7B has two tone-shaping switches on the back: a low cut filter and a presence boost.
- The low cut filter (also called a high-pass filter) reduces deep bass frequencies. If you’re speaking very close to the mic and it sounds too bass-heavy or muddy due to proximity effect, enable this switch for a cleaner, more balanced tone.
- The presence boost improves the upper mids and highs. If your voice sounds dull or lacks clarity, especially when using the thick windscreen, turn this on to bring back brightness and articulation.

- You can use either switch individually or together. For example, enabling both with the thick windscreen can give you a smoother sound without losing vocal detail.
Once you’ve finalized your switch settings and windscreen choice, recheck your gain level, the tone changes can affect output volume, so make minor adjustments as needed.
Why the Shure SM7B Is One of the Best Microphone Choices for Creators
The Shure SM7B is a dynamic cardioid microphone renowned for its versatility and high-quality sound reproduction. Its design and features make it a preferred choice for various professional audio applications:
- Flat, Wide-Range Frequency Response
Spanning from 50 Hz to 20,000 Hz, the SM7B delivers exceptionally clean and natural reproduction of both music and speech, making it suitable for a wide range of recording scenarios.
- Advanced Electromagnetic Shielding
The microphone is equipped with improved rejection of electromagnetic hum and is optimized for shielding against broadband interference emitted by computer monitors and other electronic devices.
- Internal Air Suspension Shock Isolation
This feature virtually eliminates mechanical noise transmission, ensuring that vibrations from mic stands or handling do not affect the recording quality.
- Effective Pop Filter
The built-in pop filter eliminates the need for any add-on protection against explosive breath sounds, even for close-up vocals or narration.
- Switchable Frequency Response Settings
The SM7B includes bass rolloff and mid-range emphasis (presence boost) controls with a graphic display of response settings, allowing users to tailor the sound to their specific needs.
Common Use Cases for the Shure SM7B
The SM7B’s design and features make it suitable for a variety of applications:
Vocals
Its flat frequency response and effective pop filter make it ideal for capturing clear and natural vocals in studio settings.
Podcasting and Broadcasting
The microphone’s ability to reject off-axis noise and its internal shock isolation make it a favorite among podcasters and broadcasters seeking professional sound quality.
Instrument Recording
The SM7B can handle high sound pressure levels, making it suitable for recording loud instruments like drums and guitar amplifiers.
Voice-Over Work
Its clarity and noise rejection capabilities make it a reliable choice for voice-over artists.
Conclusion
Setting up the Shure SM7B isn’t just about connecting a few cables, it’s what sets the stage for every great recording. When you understand how each part of your setup works with the mic, even small tweaks can make a big difference in sound quality.
Whether you’re starting a podcast, recording voice-overs, or capturing instruments, getting the setup right gives you the clarity and control you need. Take the time to do it properly, you’ll notice the difference every time you press record.
Frequently Asked Questions (FAQs)
What do you need to set up a Shure SM7B?
You’ll need a mic stand or boom arm, an XLR cable, and an audio interface with enough gain. Because the SM7B has low output, a mic activator like a Cloudlifter or FetHead is often recommended. A pop filter or windscreen can also help improve sound quality.
How do I make my Shure SM7B sound good?
Keep the mic close, about 3 to 6 inches from your mouth and slightly off to the side to avoid plosives. Use clean gain, avoid clipping, and apply light EQ if needed. Good mic technique and a quiet recording space go a long way.