.png)
Video editing sounds intimidating, especially if you’re just starting out. But CapCut? It’s like the cool, easygoing friend who makes everything less scary. This free, beginner-friendly video editing app has become a go-to tool for content creators, social media buffs, and anyone looking to jazz up their clips without diving into pro-level software.
Are you also trying to master Capcut? You’re in the right place! In this guide, we’ll take you through everything, from installing CapCut to mastering your edits like a pro.
Getting Started with CapCut
CapCut is a free one-stop video editing app developed by ByteDance, the company behind TikTok. No surprise then that it’s designed with social media content in mind. It’s available for both mobile and desktop, but it really shines on mobile, where editing on the go is super convenient.
Which is why this guide will also follow the mobile app interface.
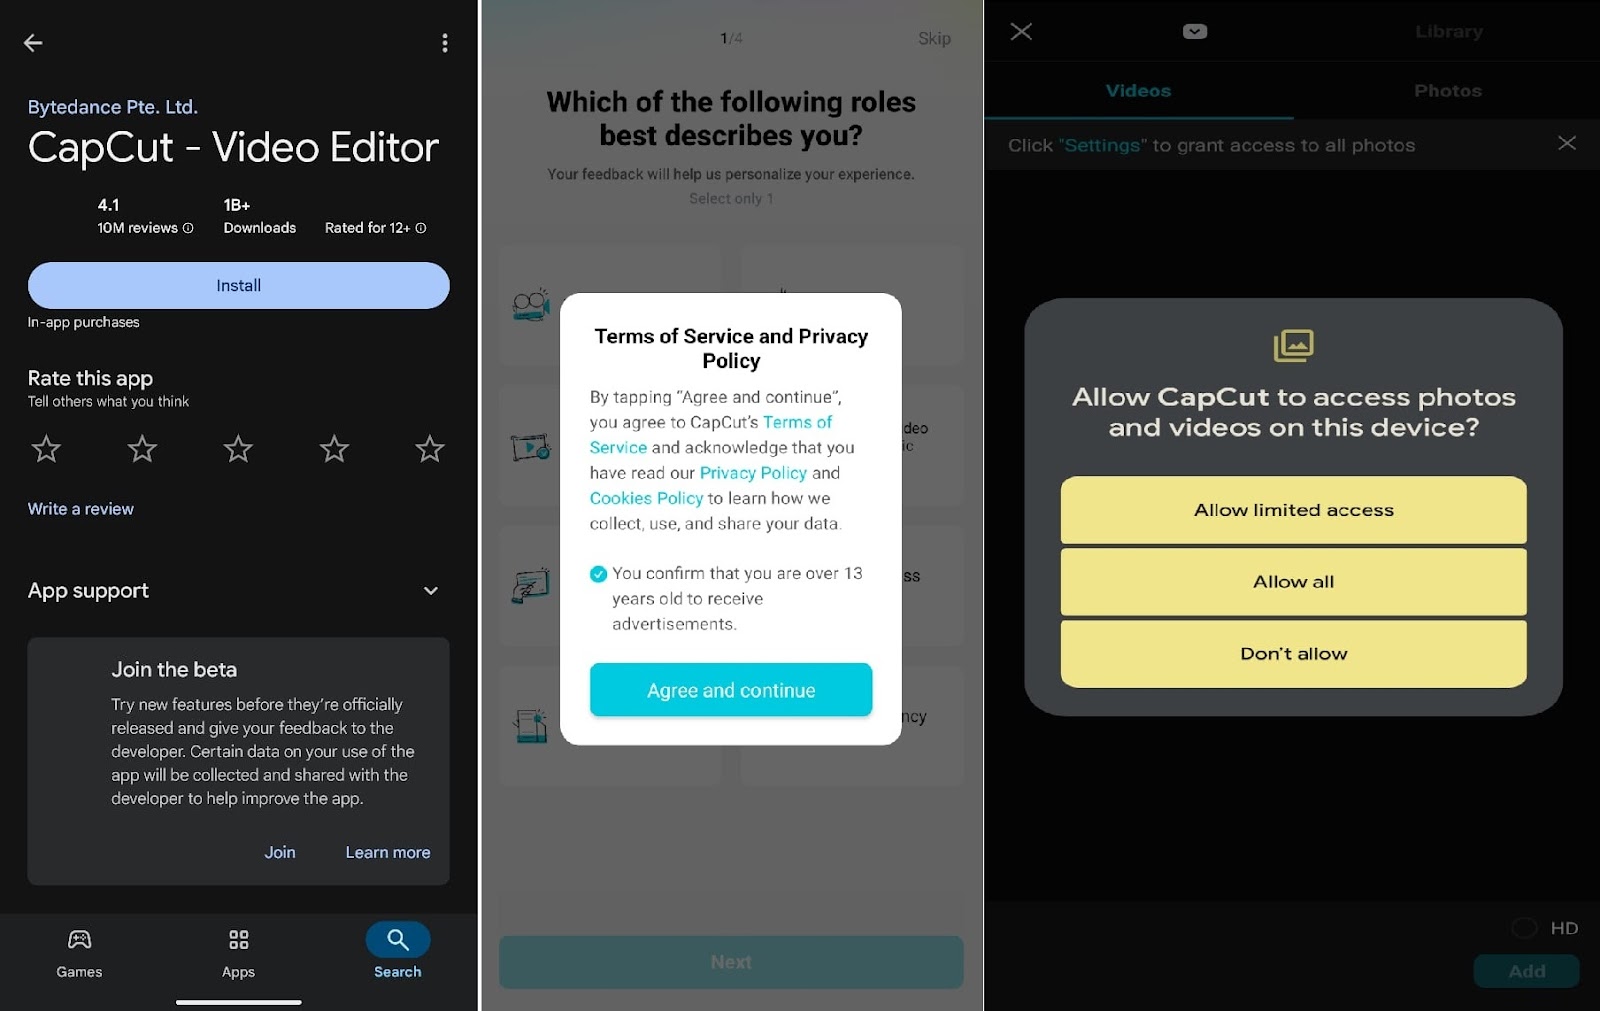
To install CapCut in your phone:
- Head to the App Store (iOS) or Google Play Store (Android).
- Search for “CapCut.”
- Tap “Install” and let it download.
- Open the app and allow the necessary permissions (camera, microphone, media access).
However, you can also get a compatible desktop app from CapCut’s official website or directly access CapCut’s online tool through your browser at CapCut Web Editor.
Once installed, open the app and sign in using your TikTok account, email, or other available options.
CapCut Interface Overview
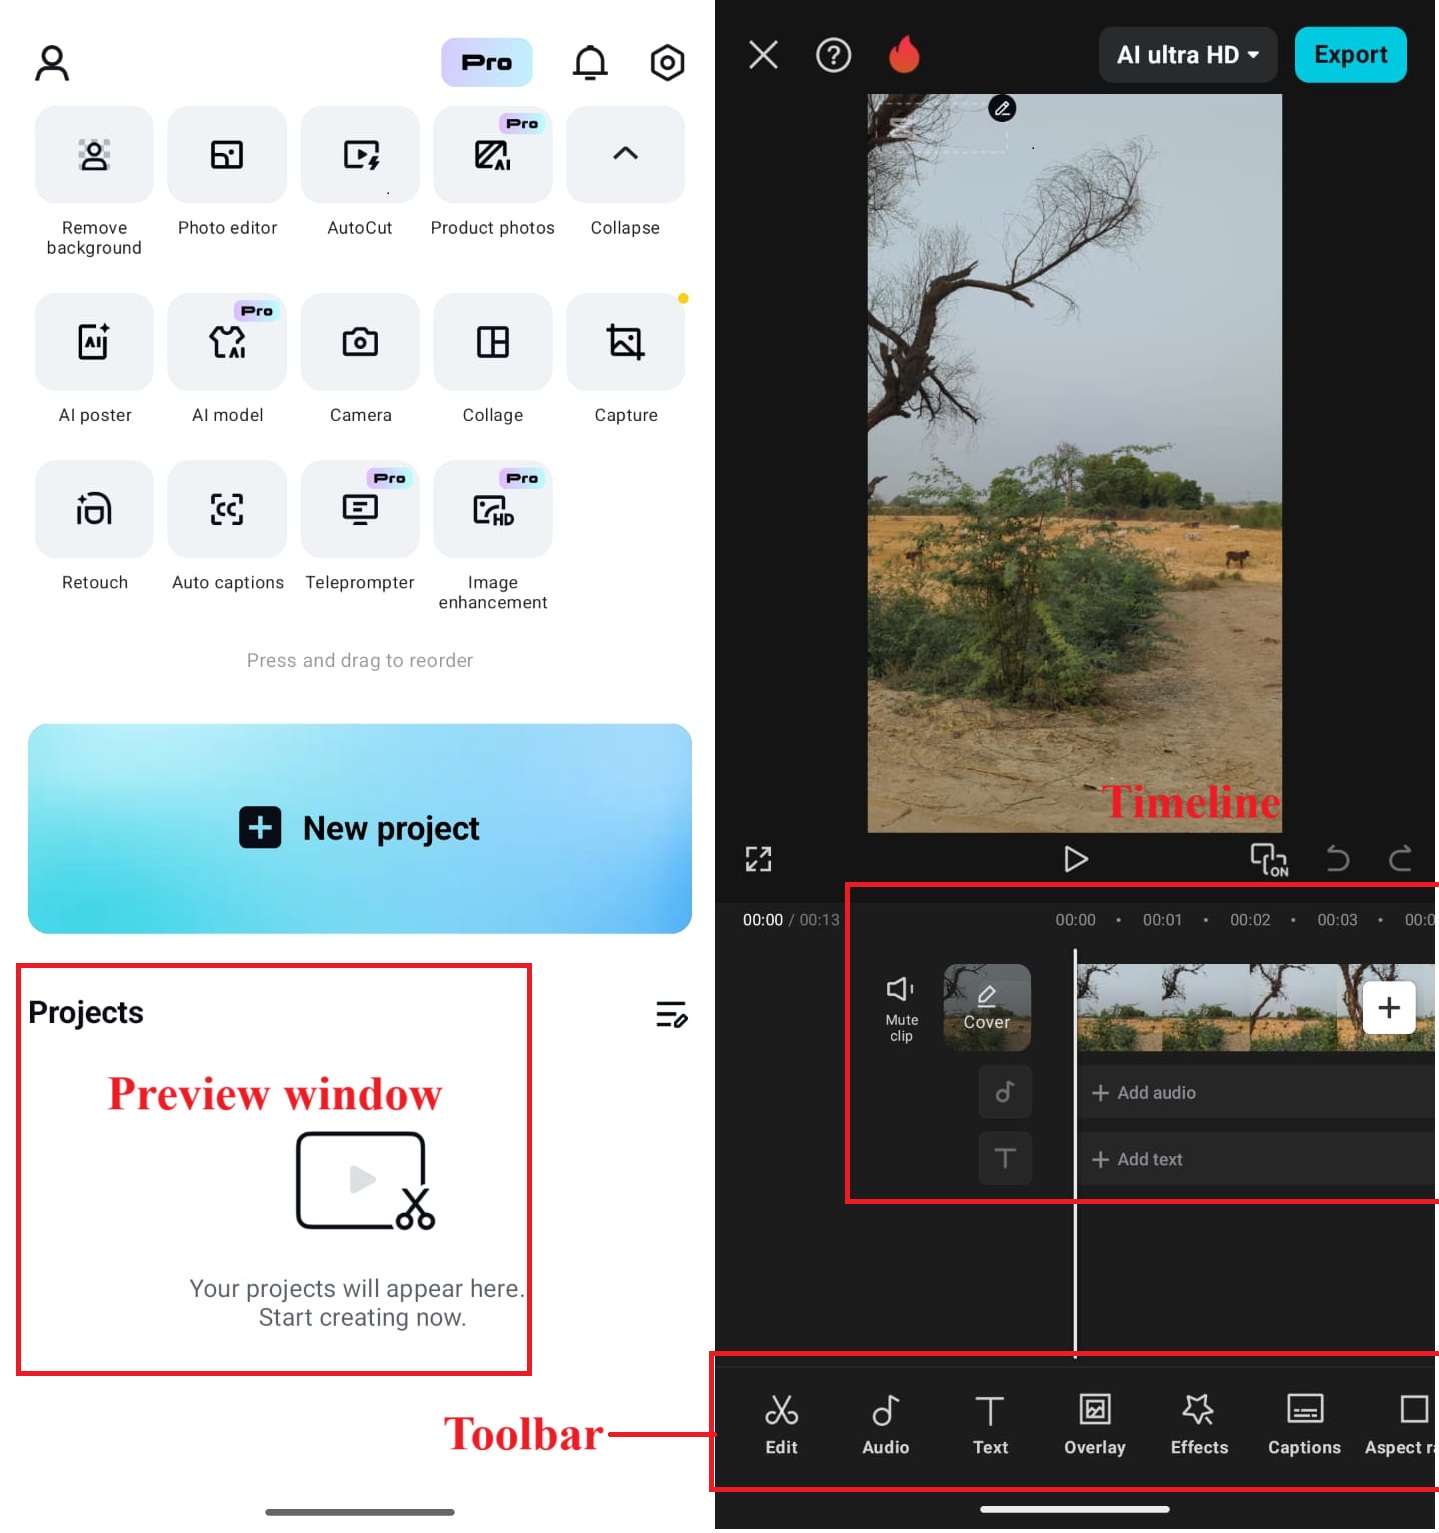
Once you’re in, you’ll see three main sections:
- Timeline: Where you arrange and edit your video clips, audio, text, and effects.
- Preview Window: It displays your video in real-time as you make edits.
- Toolbar: It provides access to essential tools like cutting, splitting, adding text, inserting effects, and adjusting audio.
Step-by-Step Basic Editing in CapCut
Let’s use the fundamental tools in CapCut to transform raw footage into an aesthetically polished video.
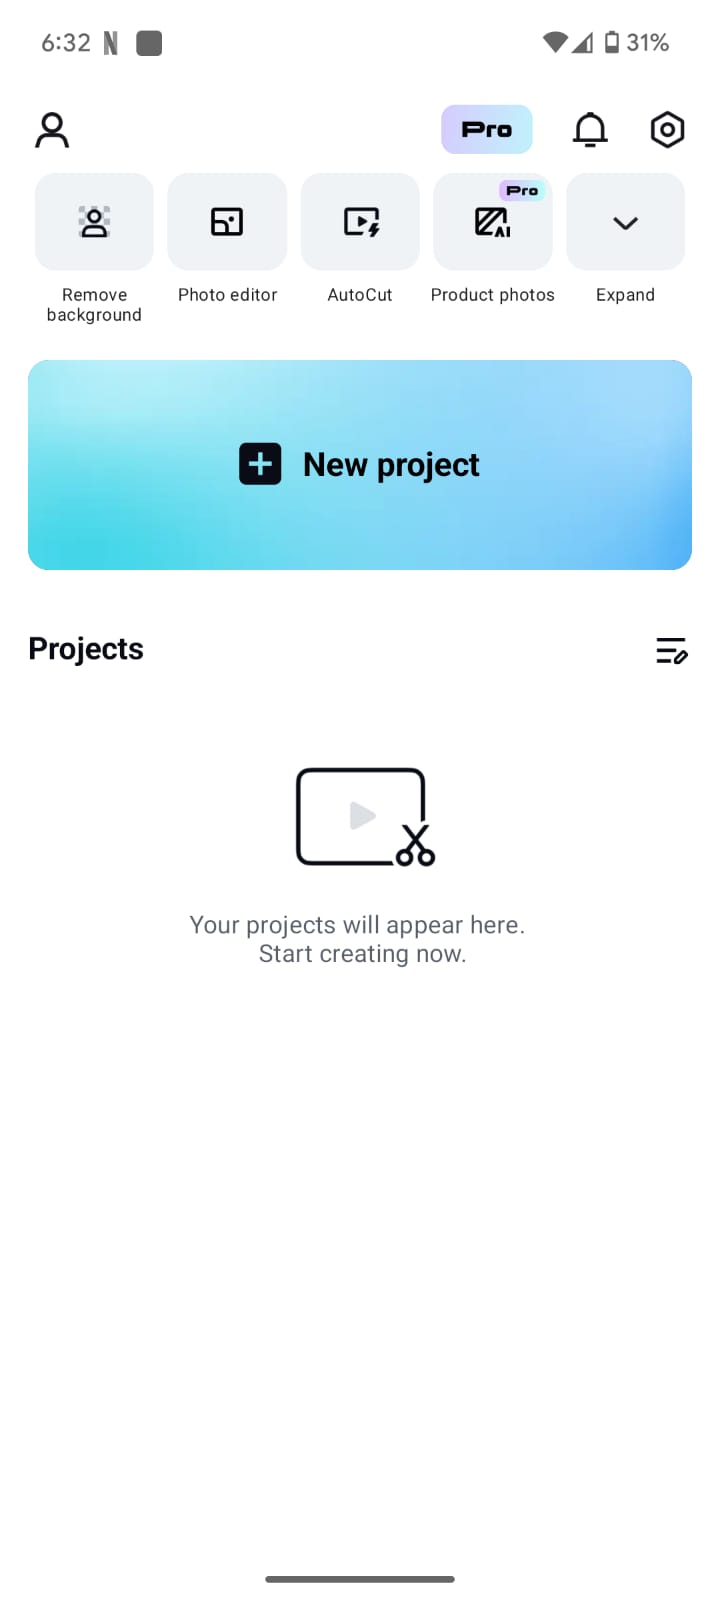
1. Creating a New Project
First, open CapCut and tap on “New Project.” This opens up your media library, where you can select the clips and pictures you need to edit. Press “Add” at the bottom-right corner. Your media will now be on the timeline. You can always insert more clips later by tapping the small “+” icon on the timeline.
Pro Tip: If you’re going to post on Instagram or TikTok, use the platform’s preferred aspect ratio from the beginning. It’s typically 9:16 for vertical videos, 16:9 for horizontal.
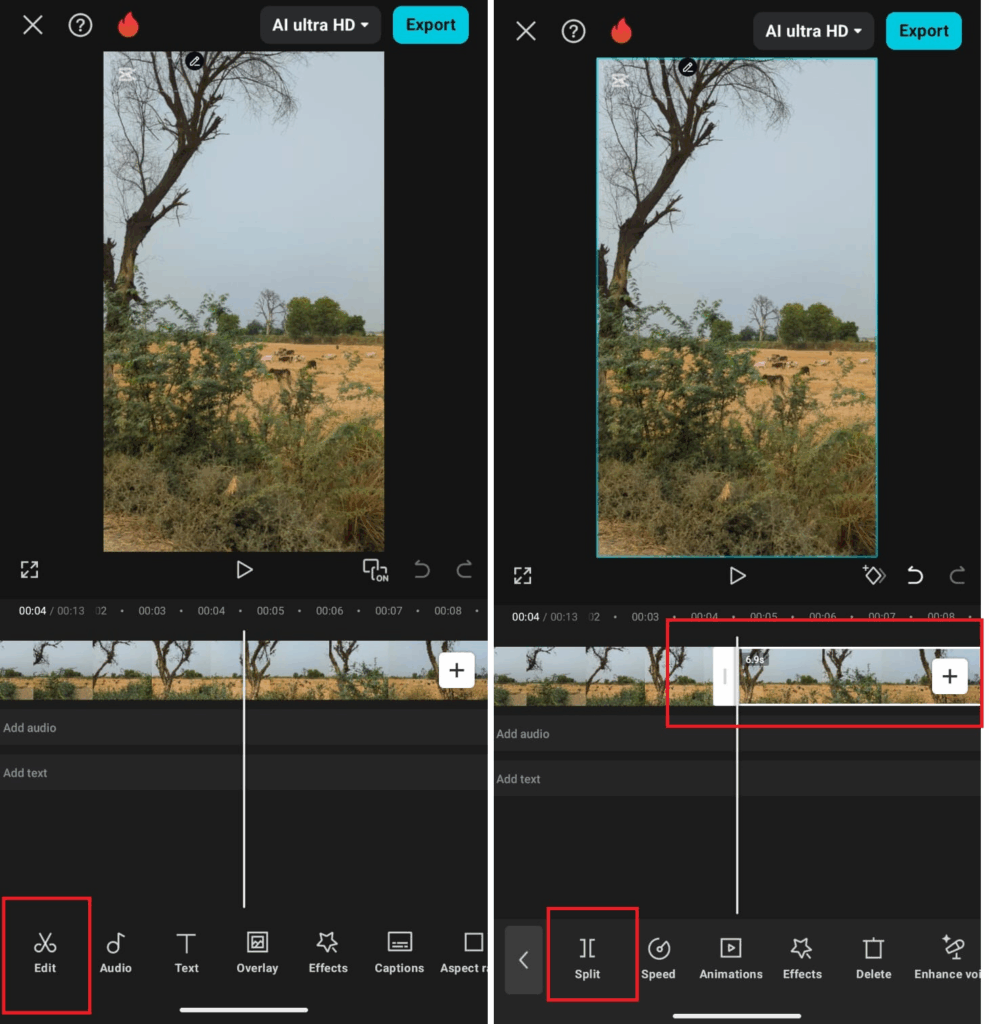
2. Cutting and Splitting Clips
This is where you fine-tune your footage, cut out that awkward pause, or isolate a perfect reaction shot.
To split a clip, tap on the clip in the timeline to select it. Move the white playhead to the exact point you want to split. Then tap “Edit” and “Split” from the toolbar below.
To trim, drag the edges to adjust the length and remove unwanted sections. Then delete or rearrange segments as needed.
Pro Tip: Use the zoom-in gesture on the timeline for precise cuts. And trim clips at natural pauses or action changes for smoother cuts.
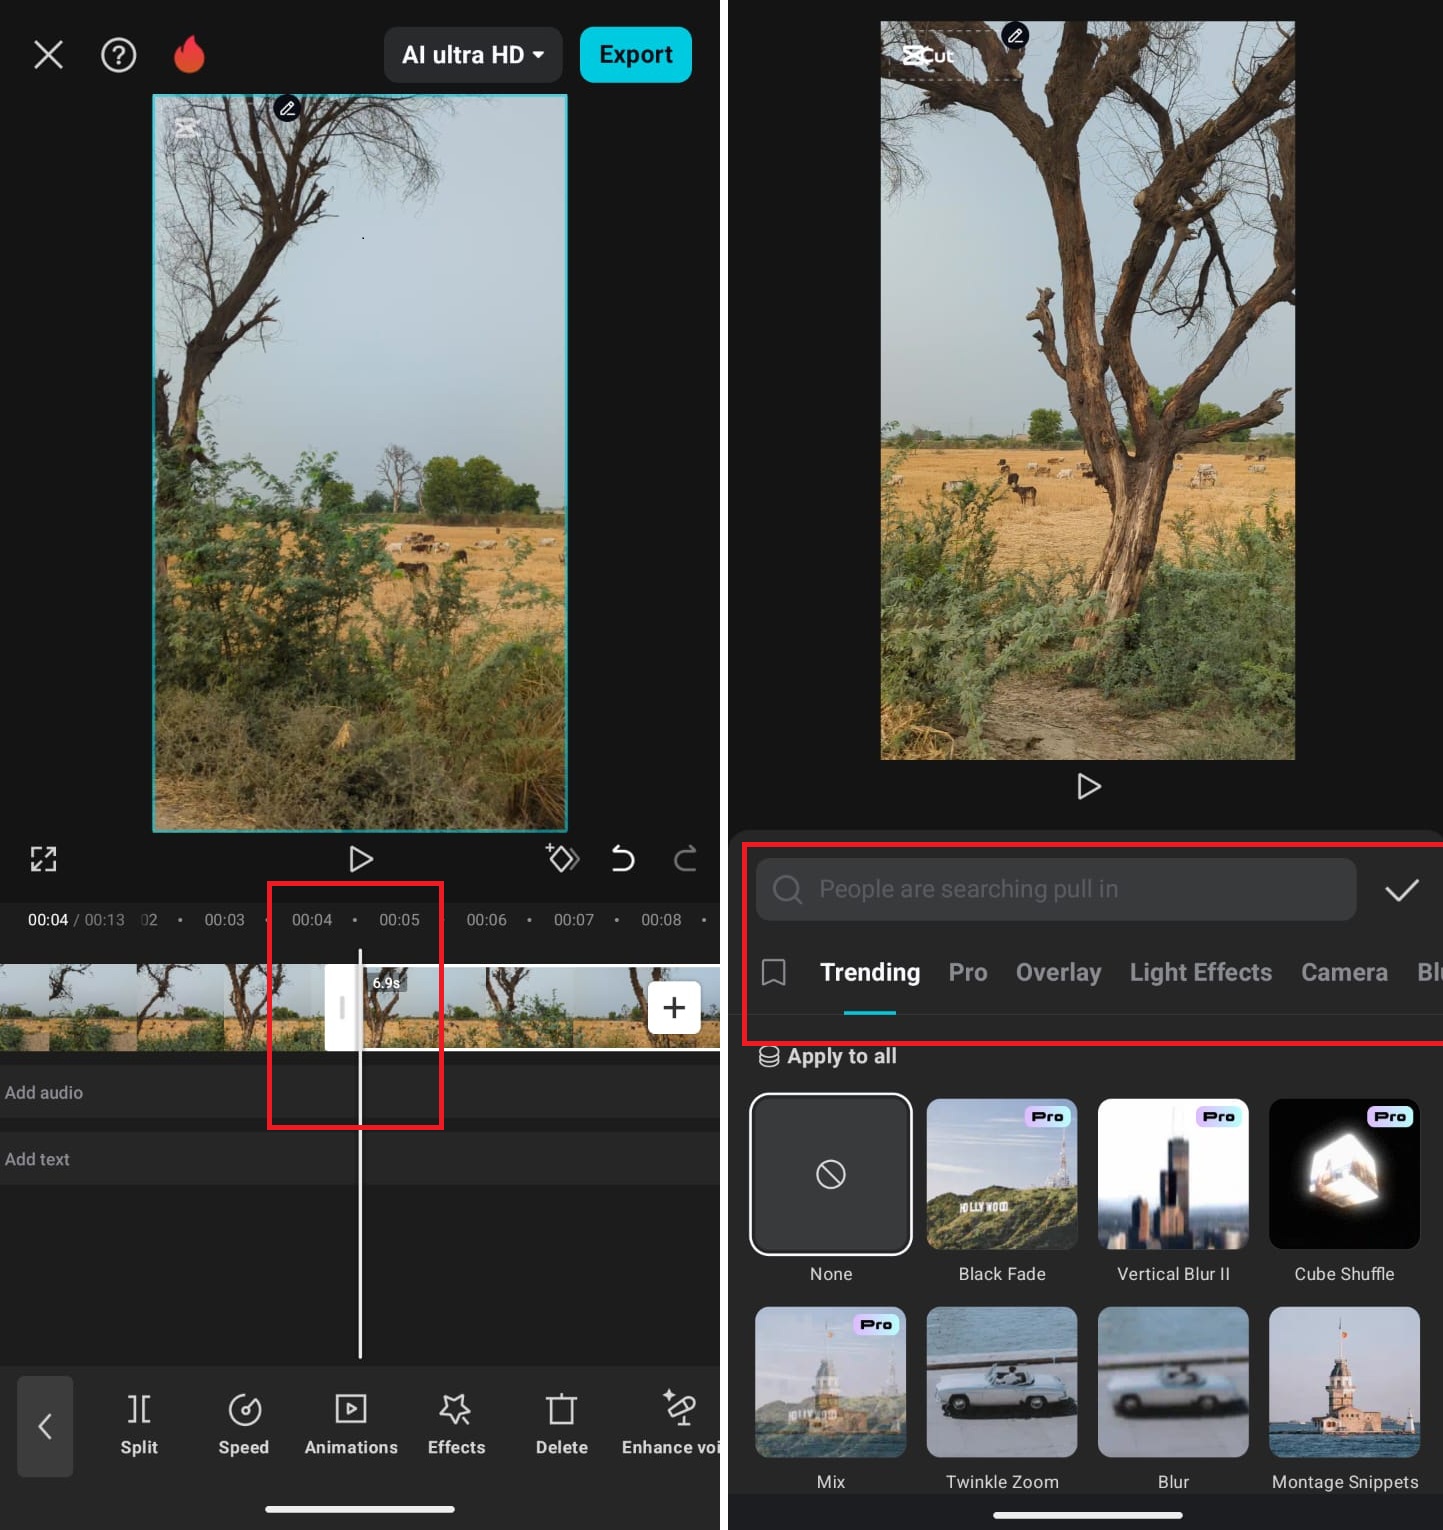
3. Adding Transitions
Transitions are used to smooth changes between clips, which is what makes your edit feel more professional.
After adding two or more clips, tap the small white box icon between them. Tap on this square to open its menu. Browse and choose from various effects like Fade, Slide, or Zoom. Adjust their duration and style to match your video’s tone.
Pro Tip: Don’t overdo it, stick to 1-2 types for a clean look to maintain viewer engagement without overwhelming the content.
4. Inserting Text and Titles
Putting in some text is a convenient way to contribute additional context to your video, highlight important details, or even just put some personality into your video. Select the “Text” option, then “Add text” and type your message. From there, you can experiment with styles, fonts, and animations to fit different style.
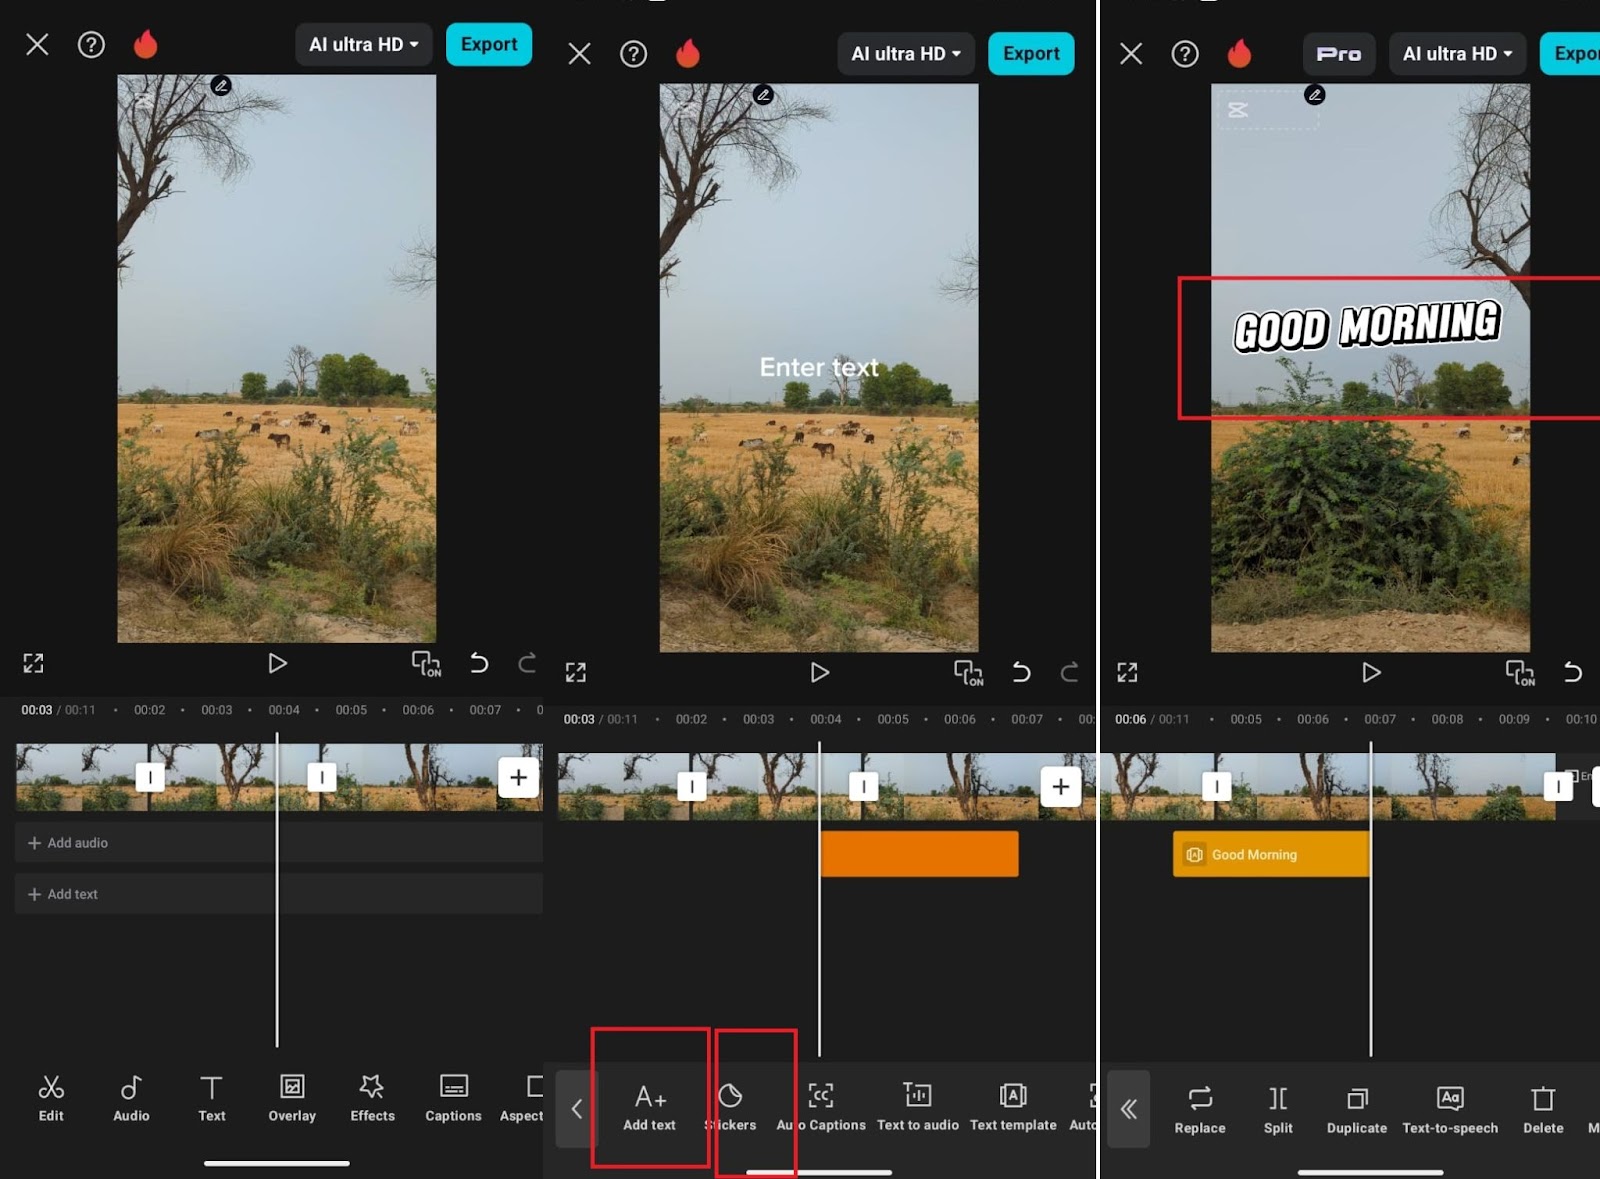
You can also drag the text wherever you’d like on the screen, pinch to enlarge, and determine how long it will appear on screen by shortening the text layer on the timeline.
Pro Tip: Because most viewers are viewing on phones, make your text large, bold, and legible. High-contrast colors—such as white text over dark—are usually what will be most legible.
5. Applying Filters and Effects
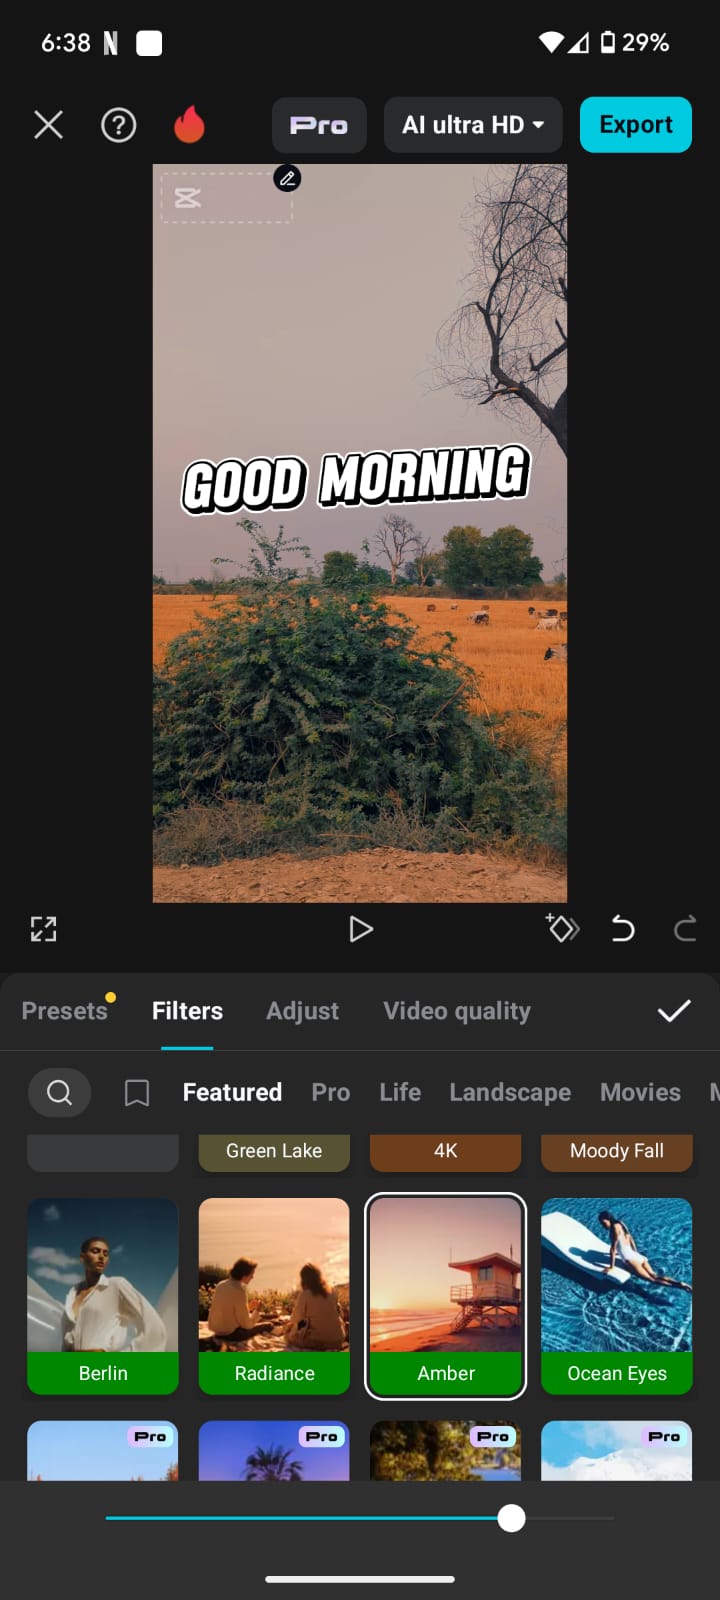
Effects help you set the mood of your video and are essential for the aesthetic looks everyone desire. Tap the “Filters” to browse options like Vintage, Cinematic, or Vlog. Apply them to clips and adjust the intensity to achieve the desired look.
To add visual effects (like glitch, blur, sparkle), tap “Effects” in the toolbar. Choose from “Video Effects” (applies to the whole clip) or “Body Effects” (follows the subject). Drag the effect onto the timeline and adjust duration.
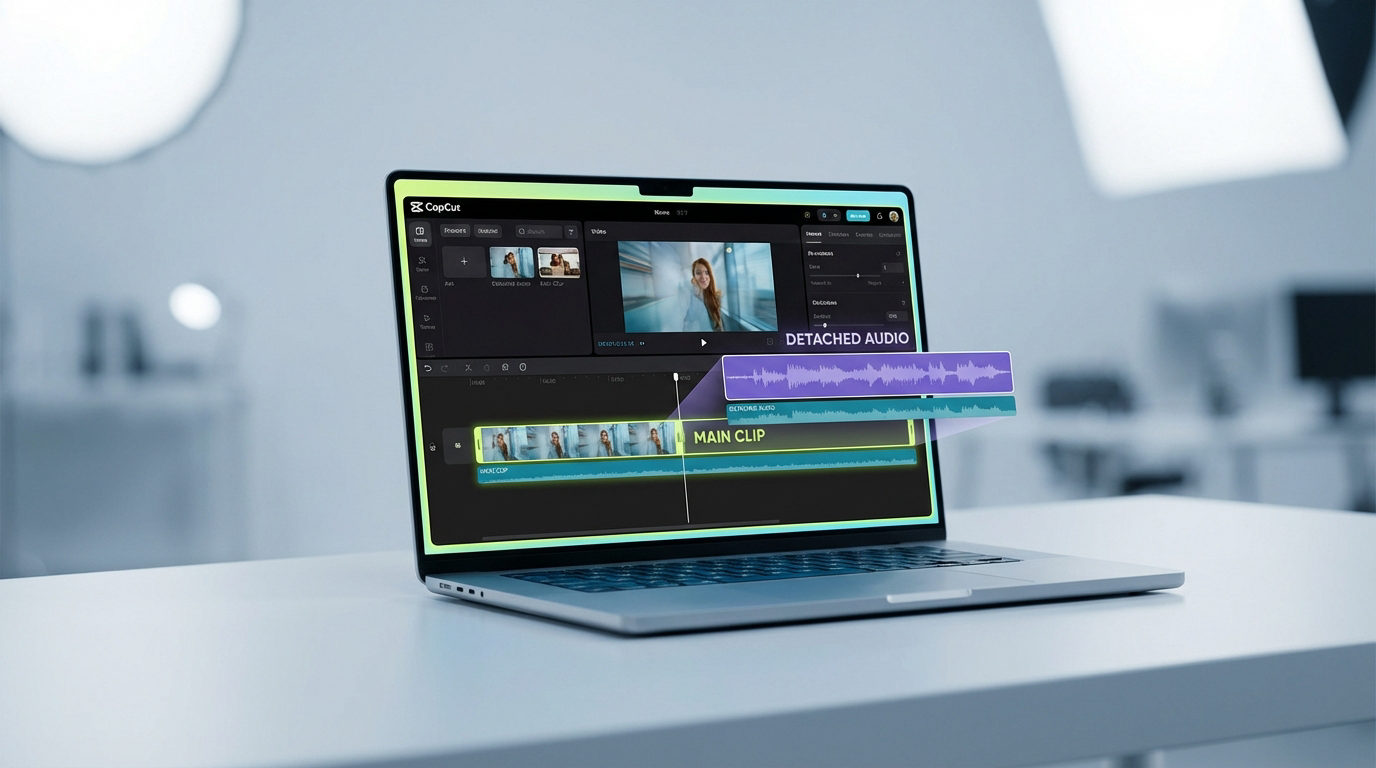
6. Adding Music and Audio
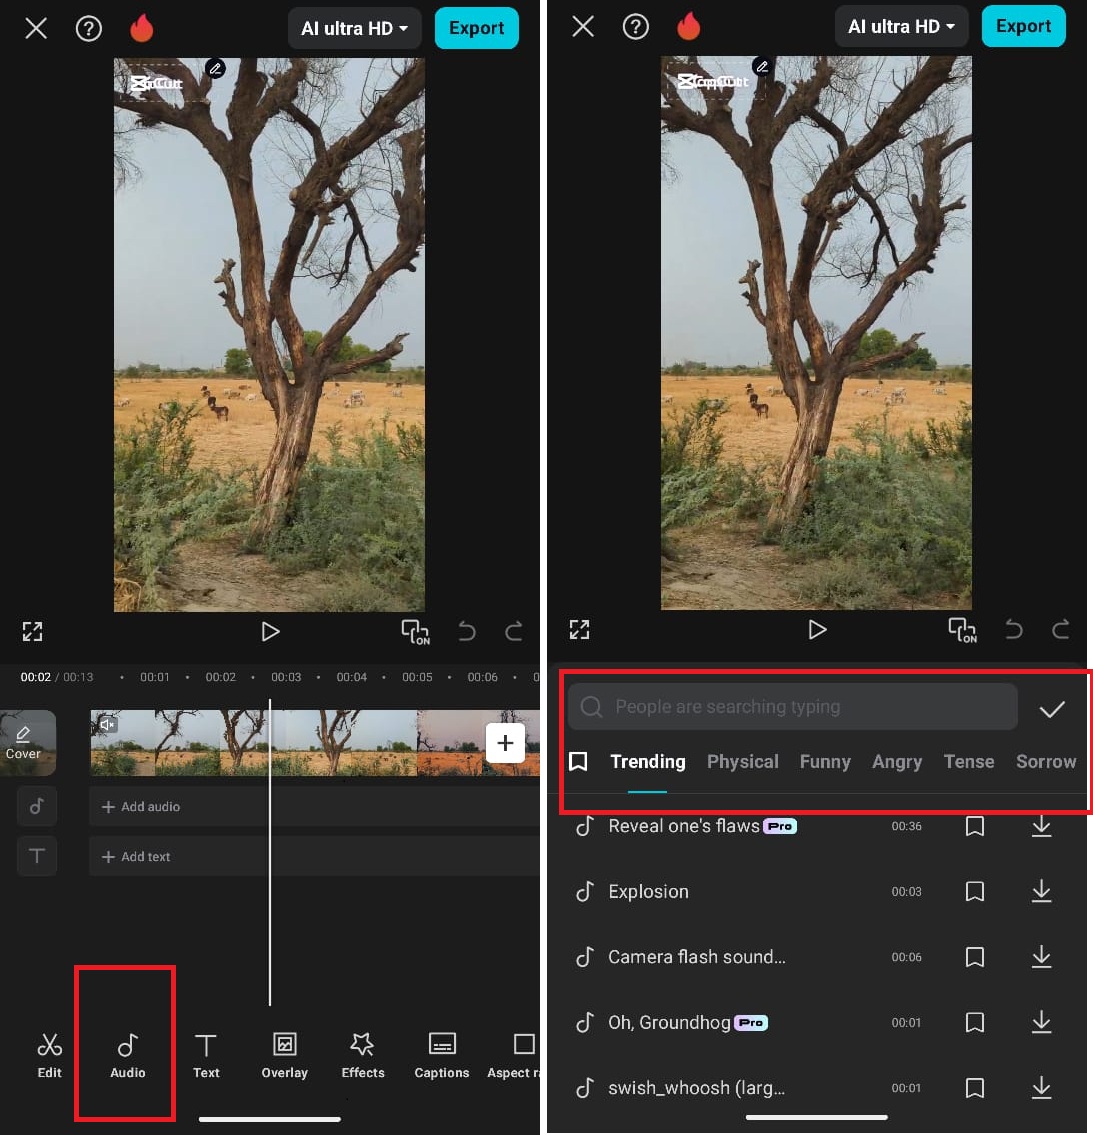
To add music, tap “Audio” > “Sounds.” Browse or search for background music. CapCut offers a free music library. Tap the “+” icon to add it to your timeline.
If you want to use your own audio, tap “Extracted” to pull audio from a video in your device. Or tap “Voiceover” to record your own narration. Use the Volume slider to adjust it.
Pro Tip: Use “Auto Beat Sync” or “fade in/out” options to match cuts with music beats.
7. Exporting and Saving
Once your scene looks the way you want, preview it to make sure everything’s lined up just right. When you’re happy, tap the Export icon (the little upward arrow in the top-right corner), pick your resolution and frame rate (1080p at 30fps usually works great), and save your masterpiece.

The app will process the video and save it to your gallery. Alternatively, you can also share directly to your TikTok, Instagram, or YouTube.
Alternative Editing Methods & Advanced Features in CapCut
Beyond basics, CapCut offers a whole new world of creative tools to add pro-level polish to your videos without the technical headache. Let’s explore a few most popular advanced tools on Capvut.
1. Using CapCut Templates (Especially for TikTok Trends)
CapCut has a built-in template feature that makes recreating popular styles ridiculously easy. They’re particularly popular for trending TikTok videos, a popular example would be the “Outer Banks” AI transformation filter.
To use templates:
- Preview ans select “Use template in Capsut” to apply your favourite templates.

- Or you can also go to capcuttemplate.co to browse templates or find one shared by the content creators with their posts (like TikTok challenges, vlog intros, or transitions).
- Select the media you want to apply it to.
- Replace the placeholder media with your own photos or videos.
- Once satisfied with your edits, tap on the “Export” button to save your video.

So essentially, you just plug in your media and CapCut handles all the editing, transitions, music, effects, and you’re done.
2. Auto Captions and Voice Effects
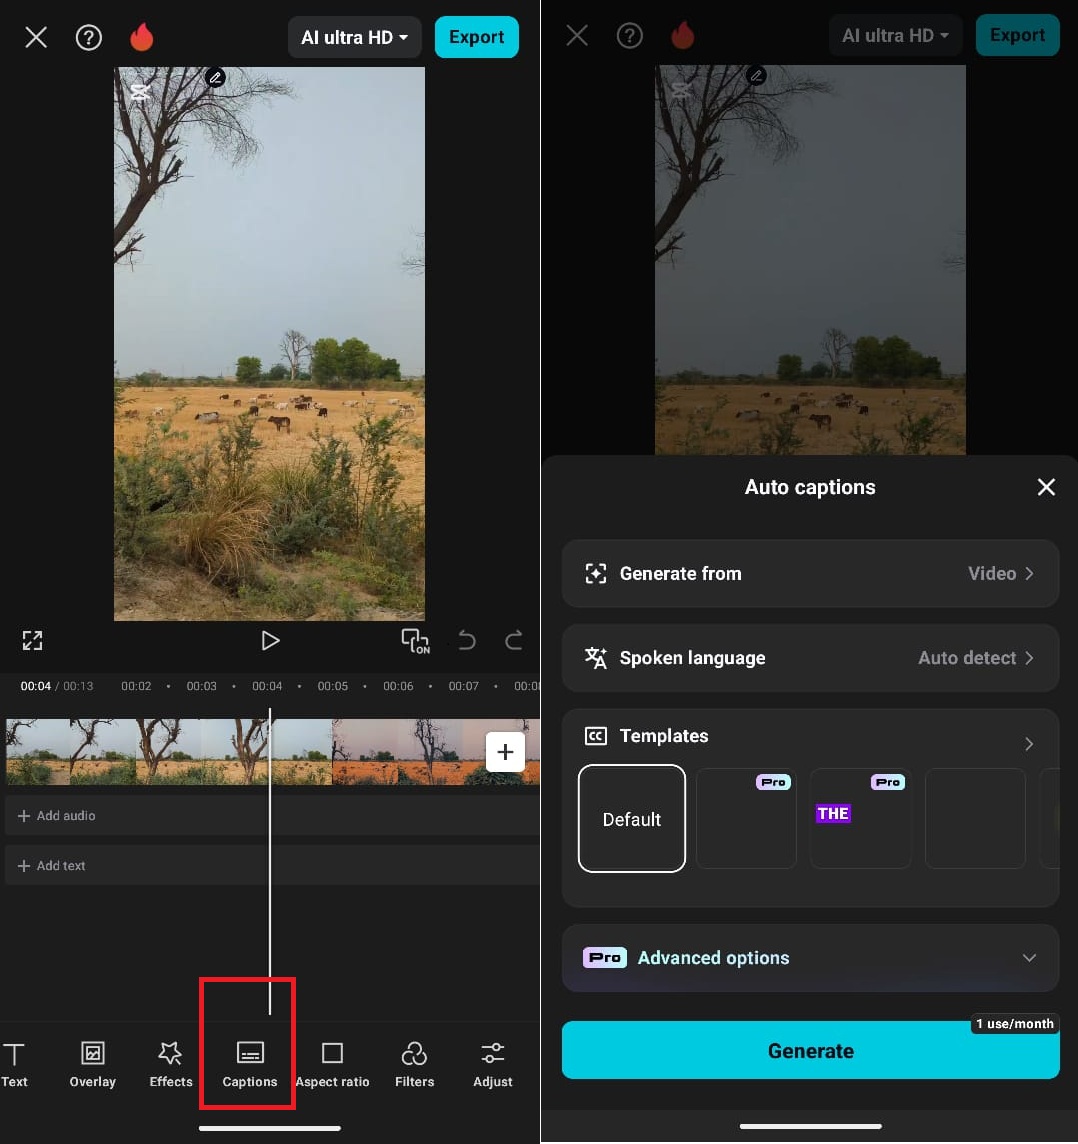
Auto-caption feature automatically generates subtitles for your videos, which is great for engagement on social media content since many people watch with the sound off. To add audio captions:
- After importing your video, tap on the “Text” tab.
- Select “Auto Captions” and choose your preferred language.
- CapCut will transcribe speech automatically.
Check the created captions and correct them if needed. Adjust the text, font, size, and location to make them visible bit not too overwhelming..
You can also include voice effects in your audio to provide drama or simply to enhance the overall viewing experience. To apply:
- Select an audio clip (voiceover or original recording).
- Tap “Voice Effects” and choose from options like:
- Robot, Echo, Chipmunk (for fun edits)
- Deep Voice, Megaphone (for dramatic effect)
- Select an effect to apply to your audio clip.

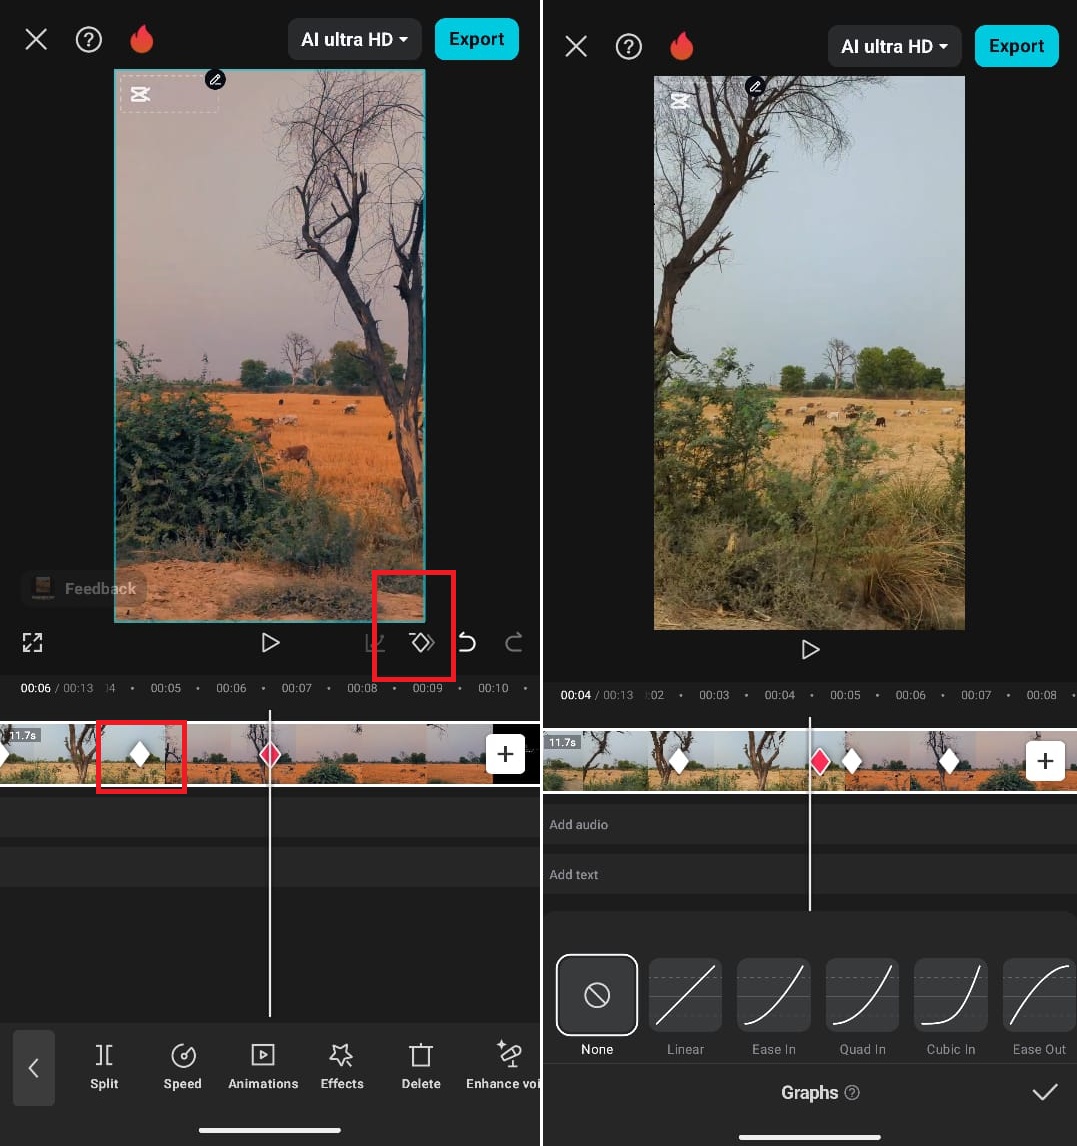
3. Keyframe Animation
Keyframes let you create smooth animations by controlling how a clip or element moves, grows, or fades over time, such as zoom-ins, pans, or making text “float” into view.. This technique is useful for animating text, images, or video clips. To add a Keyframe:
- Tap on the object (text, image, or video) you wish to animate.
- Move the playhead to your starting point and tap “Keyframe” (diamond icon).
- Move the playhead to the desired position and adjust the object’s properties (position, scale, rotation, etc.).
- Tap the “+” icon to add a keyframe.
- CapCut will auto-generate smooth motion between them.
- Repeat the process at different positions to create a smooth animation.
4. Smart Background Removal
Don’t have a green screen? No problem. CapCut’s Smart Background Removal uses AI to detect and remove backgrounds automatically, allowing you to replace them with new scenes or effects. Also, a great feature to create sticker-style cutouts of yourself. To use it:
- Import the video from which you want to remove the background.
- Select a clip and “Remove Background”.
- Tap “Cutout” if you want that.
- CapCut AI will automatically detect the subject.
- Refine edges with “Erase” or “Restore” tools if needed.
- Add a new background or effect to the clip as desired.
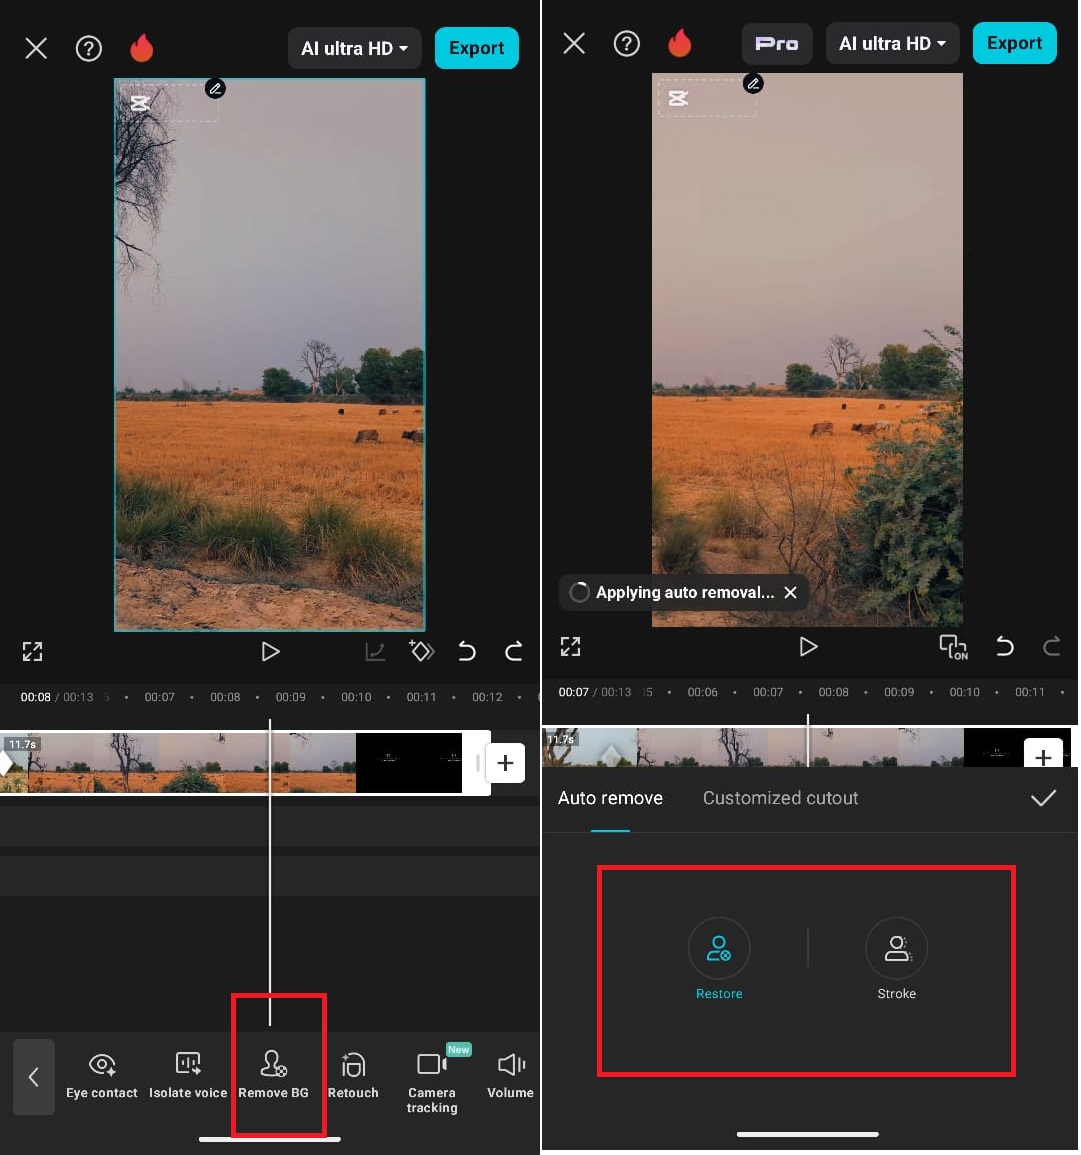
Background removal works best with high-contrast subjects (e.g., a person against a plain wall). If there are complex scenes, better to use manual cutout for precision.
5. Chroma Key (Green Screen Editing)
Chroma Key, aka green screen effect, lets you swap out a green screen—a solid color background with any image or video you prefer. It’s a favorite go-to tool for making entertaining content, from pretending to broadcast the weather or tele-transporting yourself to Paris in a blog.
- Add your base video to the timeline.
- Select the “Overlay” and add green screen video. (Evenly lit, clean, solid background usually gives the best result.)

- Select “Cutout” in the tool bar.
- Tab “Chroma Key” under Adjustments.
- Select the background color you want to overlap using an eyedropper tool.
- Fine-tune with intensity, offset, and edge feathering.
- Use “Blend” mode if edges look too harsh.

Essential Tips for Better Edits
More than just cutting and pasting, editing is about putting together a story, which needs a bit of practice. Here’s re a few quick pro tips to help you make better CapCut edits:
- Plan Before You Edit: Jot down a rough sequence of your video. This will save time and make your edits flow better.
- Trim Ruthlessly: Get rid of awkward pauses, extra fluff, or clips that drag. Keep it tight and engaging.
- Stick to a Color Theme: Use filters and overlays to create visual consistency throughout your video.
- Don’t Overdo Effects: It’s tempting to use every transition and sticker CapCut offers, but subtle edits usually look more polished.
- Watch the Sound: Make sure audio levels are balanced. Background music shouldn’t overpower your voice or key sounds.
- Preview Before Export: Watch your entire video once through to catch small mistakes or awkward cuts.
Bonus Tip: Take inspiration from your favorite creators. Notice how they pace their edits, use captions, or sync with music, and try to recreate that style with your own twist.
Conclusion
CapCut turns video editing into a fun little playground rather than a tedious task. Whether you’re crafting a meme-worthy TikTok or a sweet birthday montage, its easy-to-use tools let you do all those dramatic slow-mo entrances or a funky transition without touching a laptop.
So go ahead, experiment, try weird filters, add sparkle to your dog’s face, or drop that perfect slow-mo moment. The only limit is your imagination (and maybe your phone battery).
Frequently Asked Questions
1: Is CapCut free to use?
Yes! CapCut is completely free with tons of editing features. There is a CapCut Pro version with advanced tools and effects, but most users will find everything they need in the free version.
2: Can I use CapCut offline?
You can edit offline, but features like downloading music, using templates, or syncing with cloud projects require the internet. So it’s best to import your clips and download assets before going off the grid.
3: How to make TikTok edits on CapCut?
Start by using CapCut’s Templates or create your own using transitions, beat sync, and effects. Once done, you can export directly to TikTok or even access CapCut via TikTok’s video editor integration.
4: How to get clips to edit on CapCut?
You can import videos directly from your phone’s gallery, record within the app, or extract audio/video from existing files. Some creators also use screen recordings or downloaded stock footage.
5: Can I edit 4K videos on CapCut?
Yes, CapCut supports 4K editing and export. Just make sure your phone has the processing power and storage to handle large files without lagging.