.png)
Apple Music comes with built-in content filters, which are pretty handy when you’ve got kids around or want to keep things family-friendly. It’s great for road trips with little ones or when you’d rather not explain what that rapper just said. But let’s be real—you can’t live on clean versions forever.
Sometimes you just need the full, unfiltered experience, swear words and all. Whether you’re reclaiming your grown-up playlist or just tired of those awkward silences where lyrics should be, here’s how to turn explicit content back on different devices and let your music play the way it was meant to.
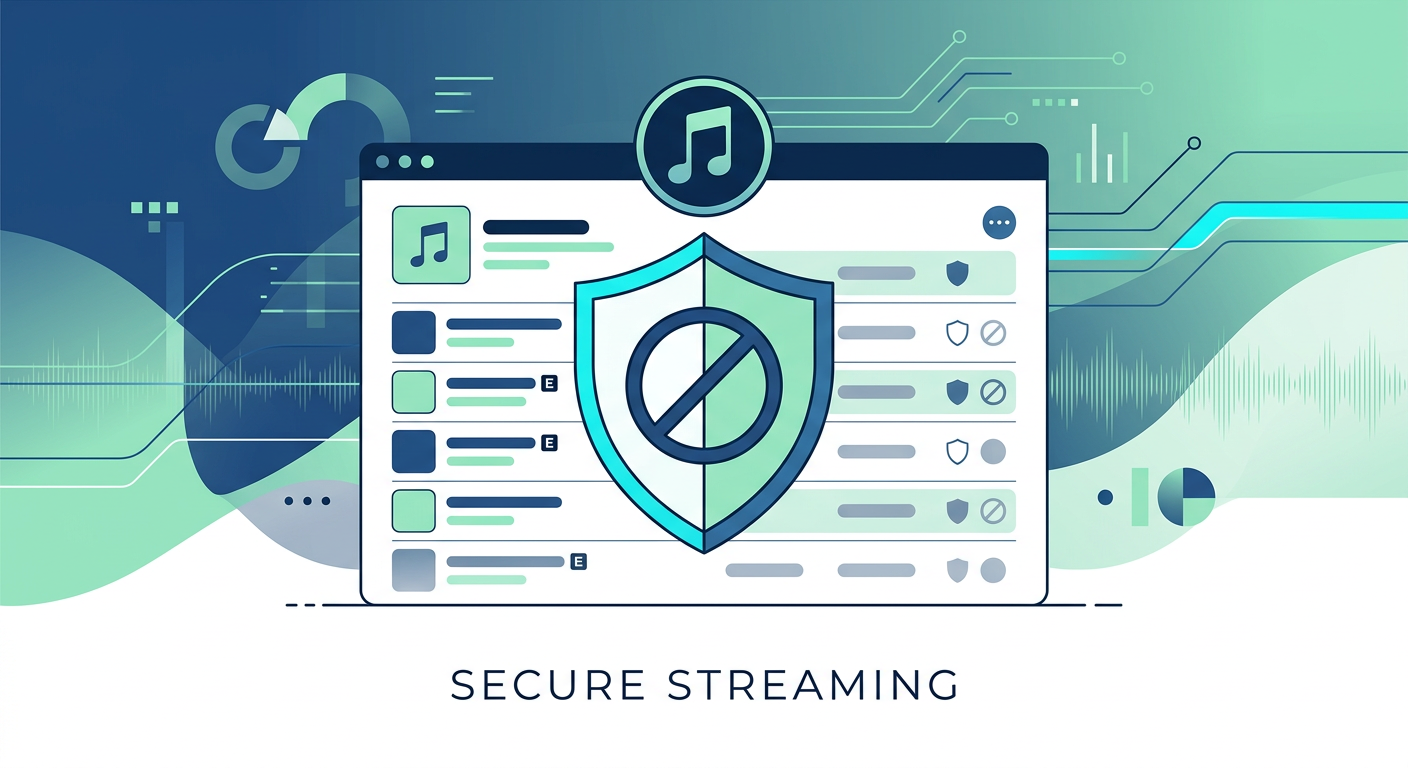
What is Explicit Content on Apple Music, and How is it Managed?
Any songs, albums, or playlists on Apple Music that have profane language, references to violence, substance use, or other mature themes are marked as explicit content. You’ll spot them easily—they come with a small “E” badge right next to the track title.
Apple uses three main settings to filter this type of content:
- Parental Controls: Blocks explicit music across Apple Music and other Apple media.
- Content Rating Filters: Restricts content based on age ratings.
- Device-Level Restrictions: Controlled through Screen Time settings on iOS or Parental Controls on Mac.
By default, some accounts (especially Family Sharing setups) may have these filters enabled. But don’t worry—you can easily adjust these settings.
Method 1: Enable Explicit Content Through Music Gallery
The most direct method to enable explicit content is through the Apple Music app itself.
1: Open the Apple Music app (works for iPhone, iPad, or Mac). Look for any song or album with the “E” label and play it.
If explicit content is presently blocked, you will see a notice asking whether you want to enable explicit content.
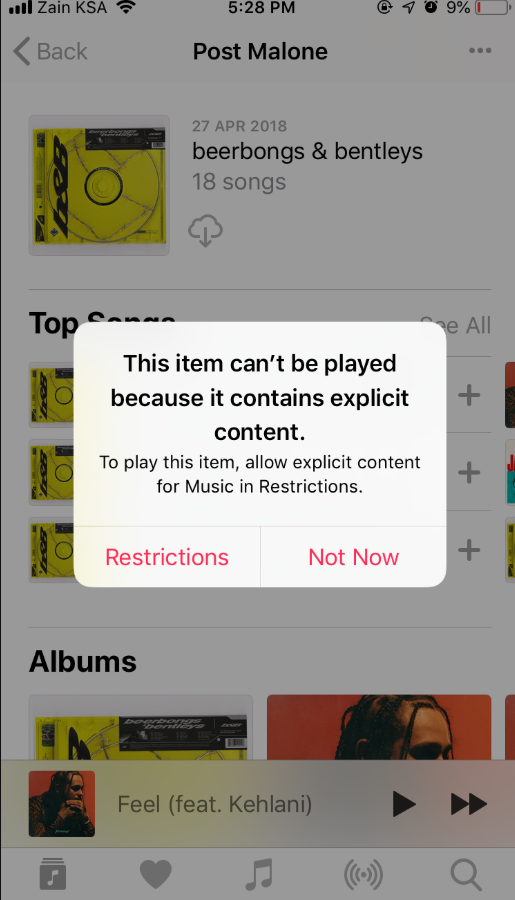
2: Follow the prompt and lift the restriction to open all kinds of content for you.
Why This Might Not Work?
There’s a small caveat to this quick method. The pop-up usually appears only when you’re using the app for the first time. Even then, it doesn’t work if your account has deeper restrictions, such as Screen Time or device-wide parental controls. Which means there won’t be any explicit songs available on your app, which you can use to prompt the setting.
In such cases, you’ll need to dive into your device’s settings and manually adjust the filters, which we’ll walk through next.
Method 2: Enable Explicit Content in Apple Music App Settings
The Apple Music app includes privacy settings where you can disable content restrictions directly. Once turned off, this change applies across all Apple Music apps that use your Apple ID.
Just keep in mind that this method only works if your Apple ID is under your individual control. The steps may differ slightly depending on the devices.
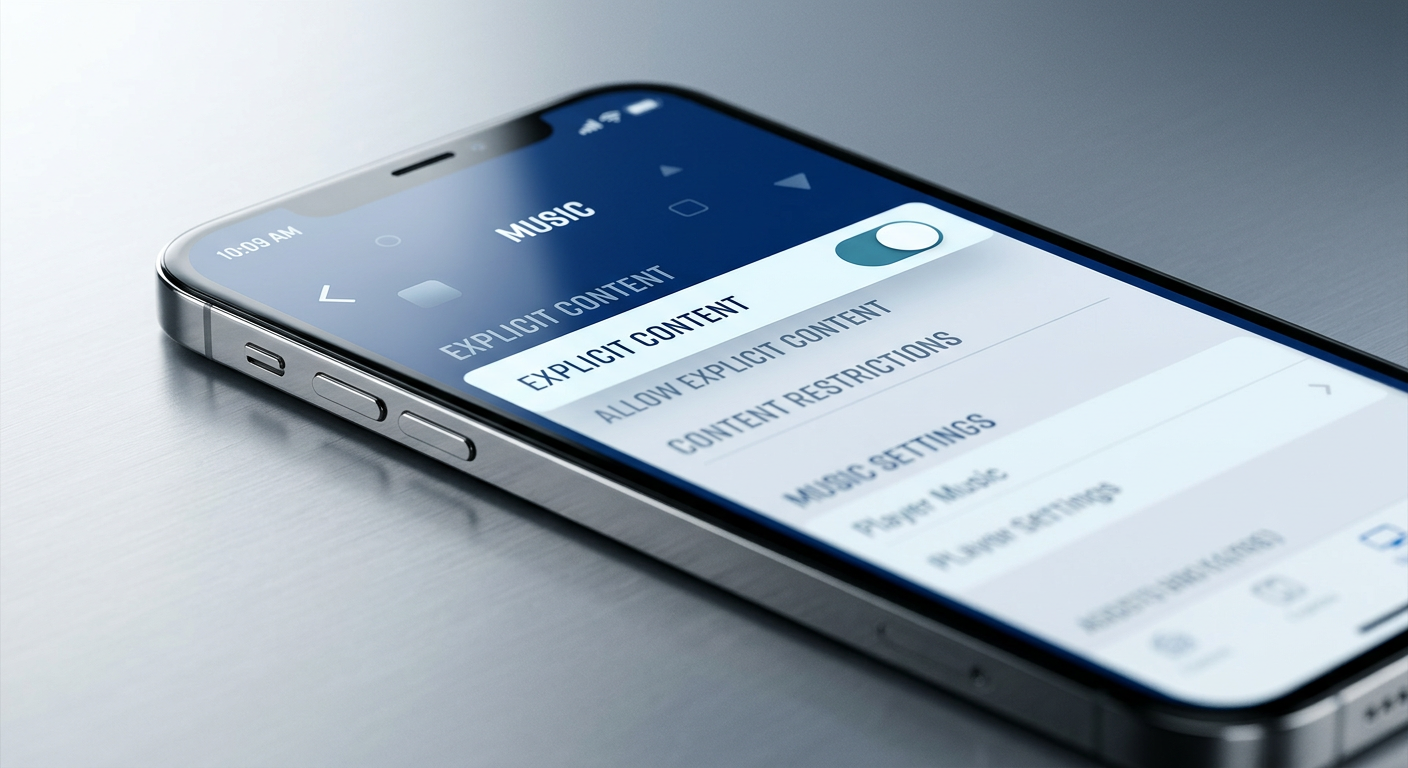
On iPhone or iPad
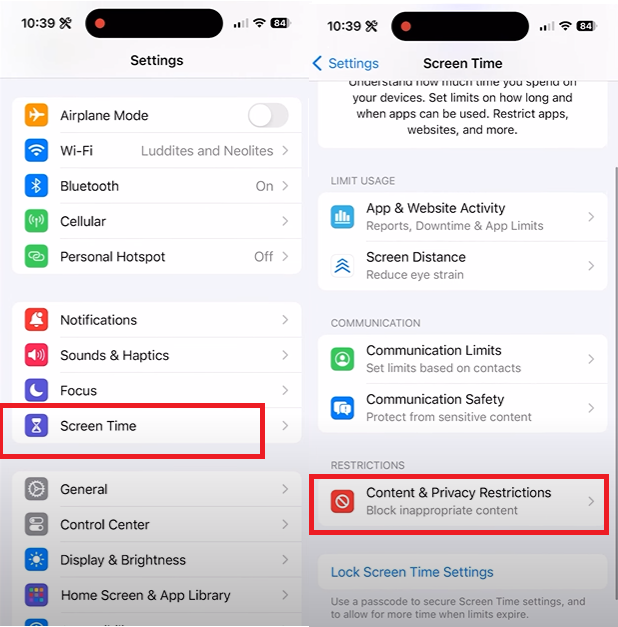
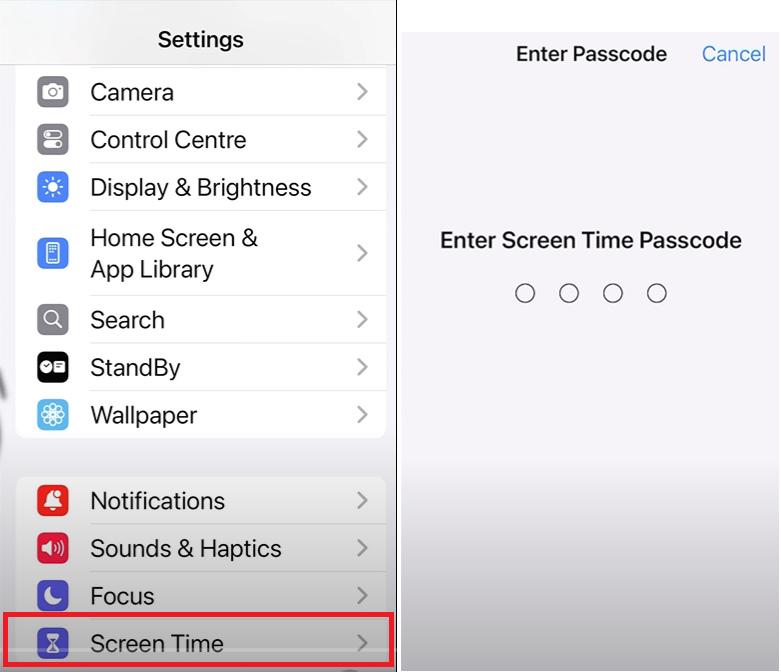
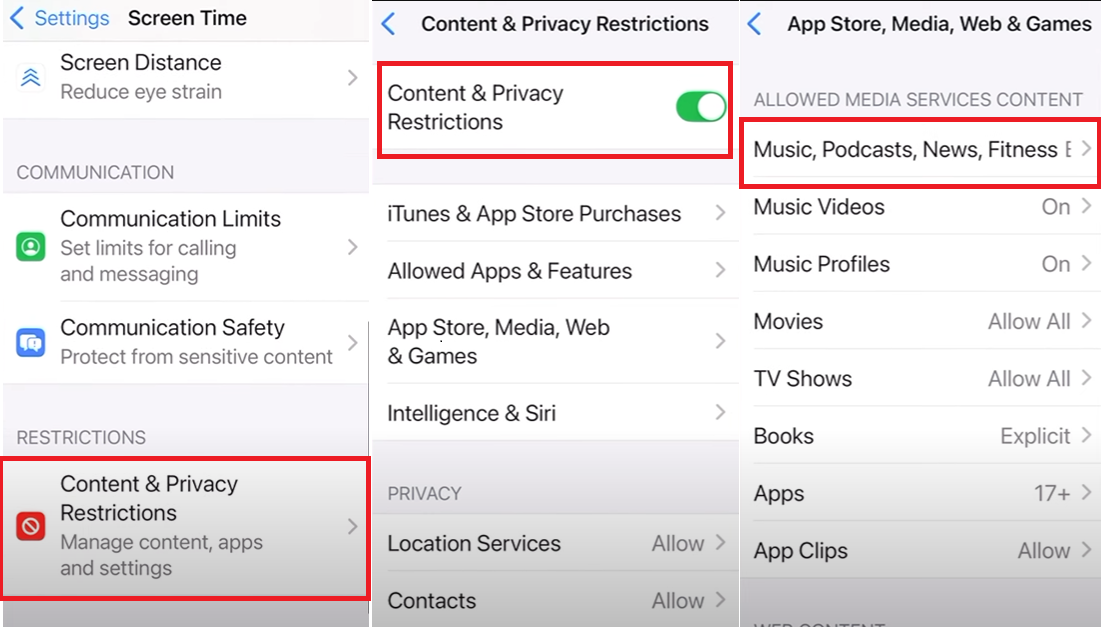
1: Launch the Settings app on your device. Scroll down and tap Screen Time. If you haven’t set it up before, you’ll need to enable it first.
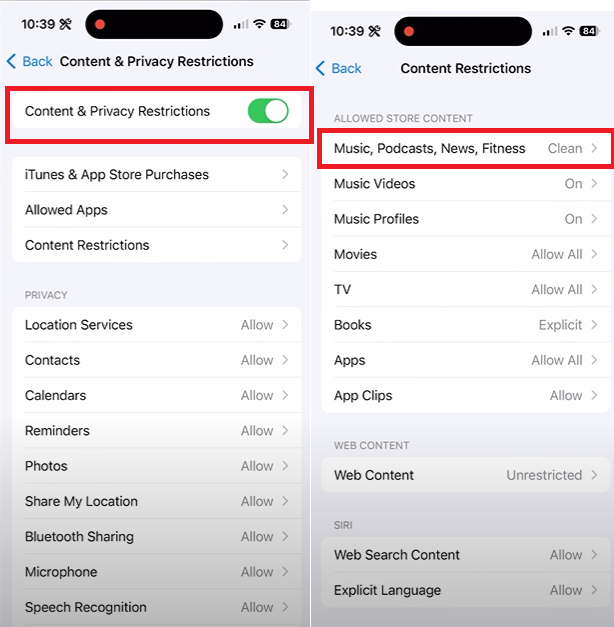
2: Click on Content & Privacy Restrictions. If it’s turned off, turn it on.
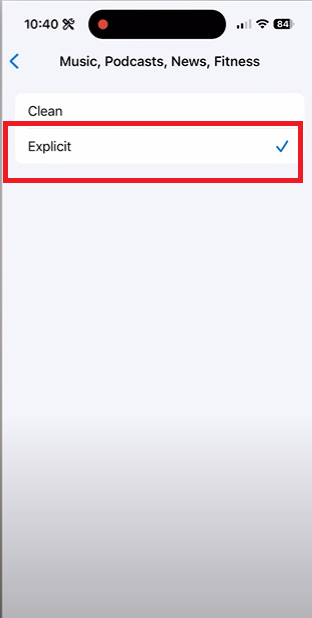
3: Go to Content Restrictions > Music, Podcasts & News.
4: Select Explicit instead of Clean.
On Mac (Monterey, Ventura, or later)
1: Open the quick menu bar, go to Settings (or Preferences in older versions).
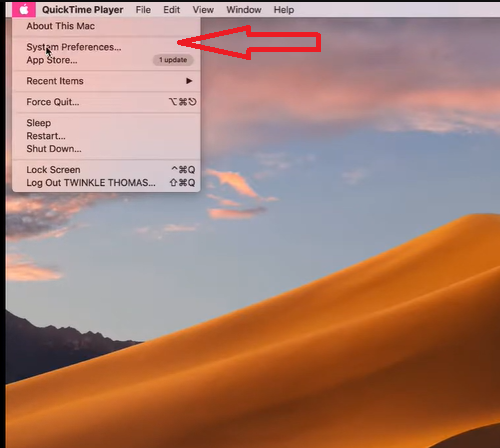
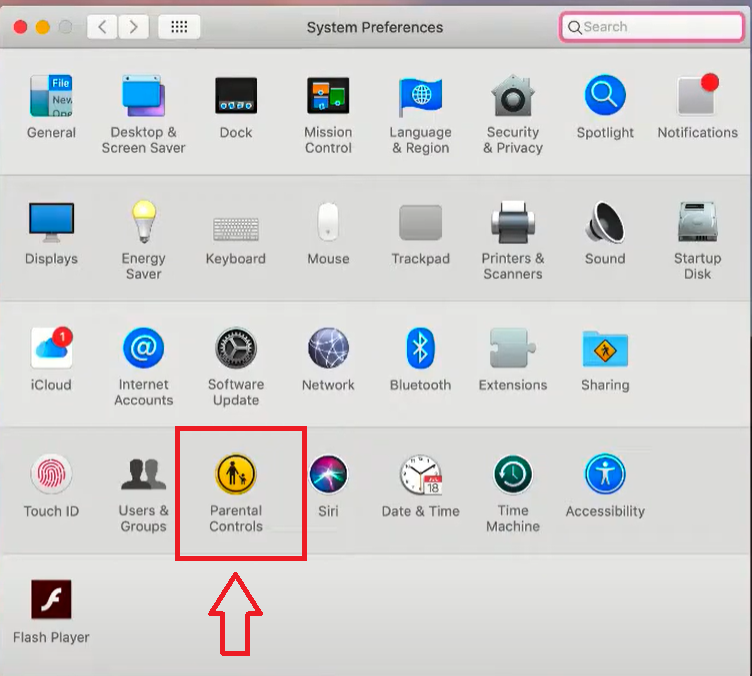
2: Go to the Parental Controls.
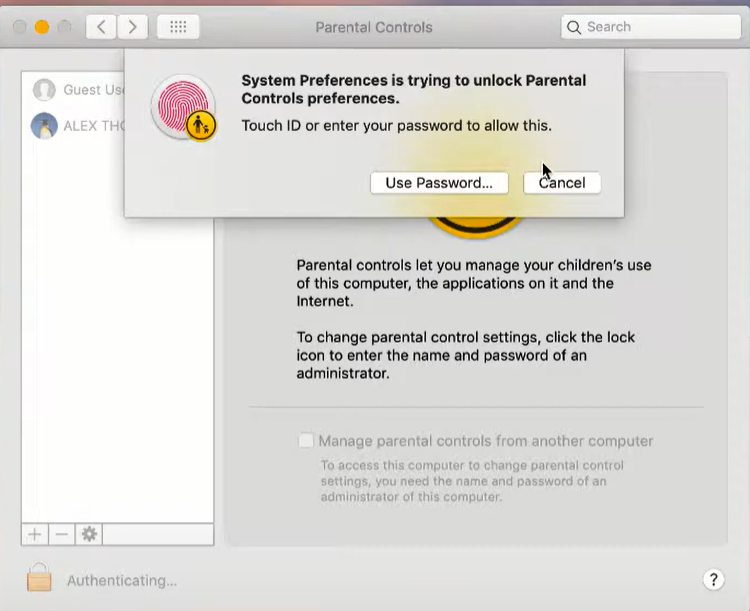
3: Enter your administrator password to allow changes.
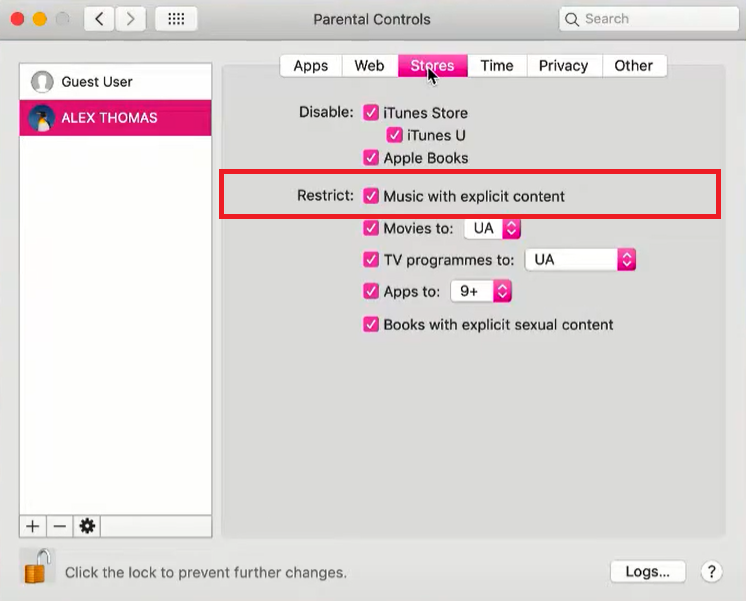
4: Go to Stores tab and deselect the Restrict music with explicit content (or turn on Allow explicit content, depending on your macOS version).
If you can’t see the “Restrictions” following this method, try going to System Settings, to Screen Time, to Content & Privacy, and adjust it there.
If the restriction setting is grayed out or not editable on your device (iPhone/Mac), it means your access is being controlled by another user (like a parent or family organizer). You’ll need to either disable the parental controls temporarily or enter the Screen Time passcode to make changes.
Method 3: Changing Content Settings on Apple Music Web
The web version of Apple Music offers fewer settings to customize, but you can still adjust content limits via your account settings. It’s a convenient feature if you’re accessing Apple Music via a browser.
1: Open your web browser and visit music.apple.com. Click on your profile picture or initials in the top-right corner to open your account settings.
2: Select Settings from the dropdown menu.
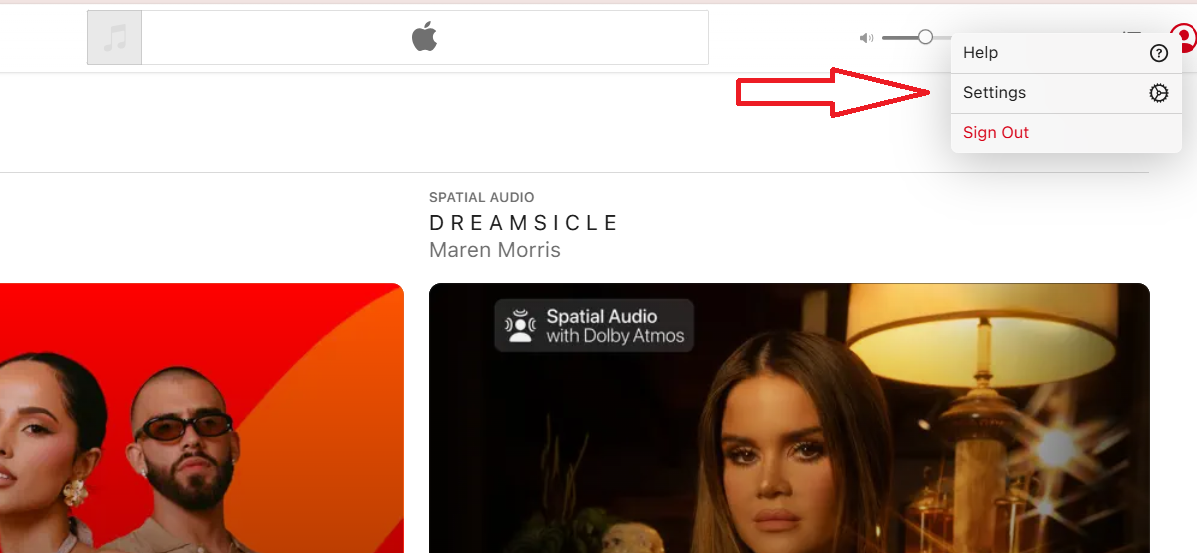
3. Scroll down to the Parental Controls area. If content restrictions are enabled, you’ll see a toggle switch labeled Content Restrictions. Turn it off. Enter your Apple ID password to confirm the change.
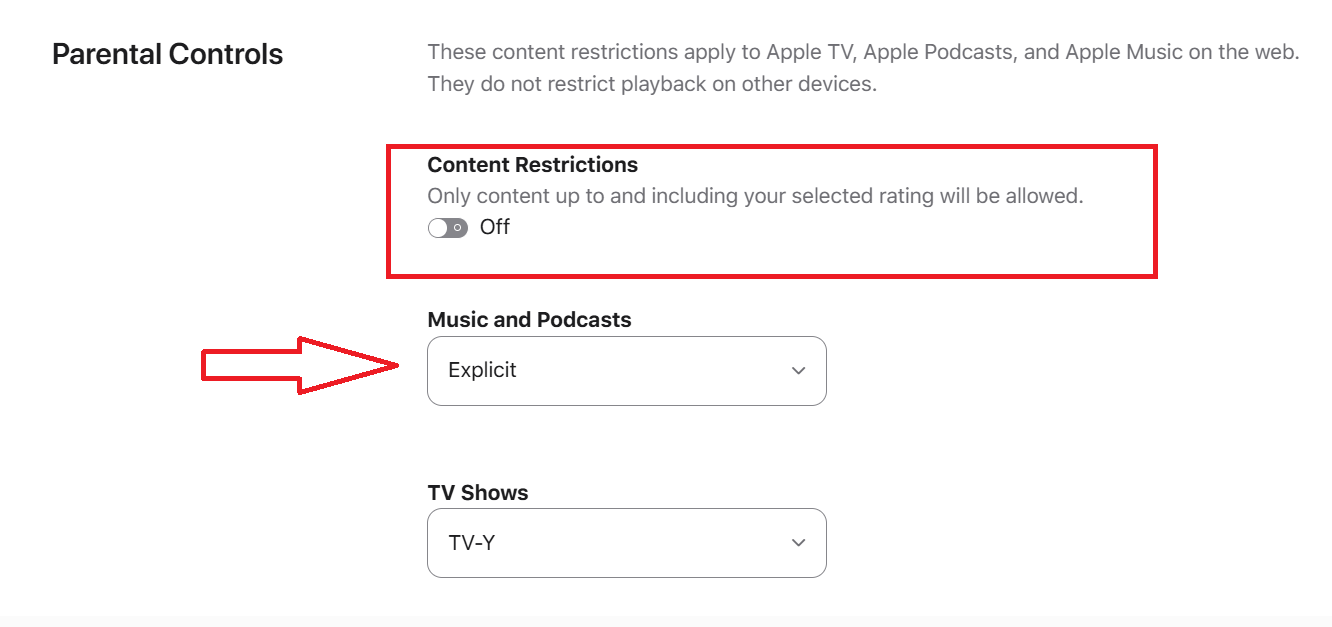
Once disabled, explicit content should be accessible, with the “E” label next to the title.
This time, the changes will apply only to the web interface of Apple Music. If you’re using the Apple Music app on other devices, you may need to adjust settings within those specific applications to ensure consistent access to explicit content.
Method 4: Managing Restrictions via iTunes on Windows
There’s a similar workaround if you’re listening to Apple Music on a Windows computer or an Android device via iTunes.
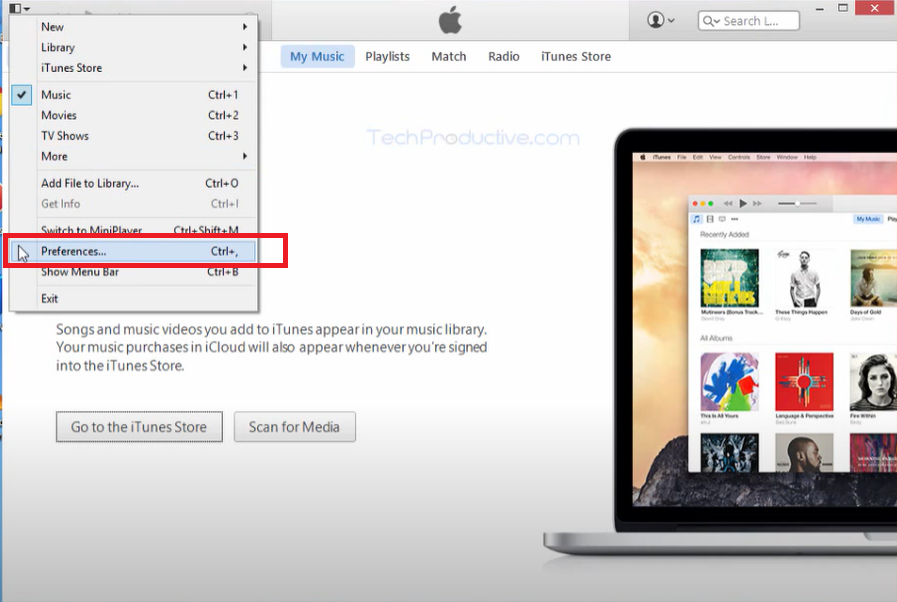
1: Open iTunes on your Windows PC. In the top menu bar, select Edit, and then Preferences.
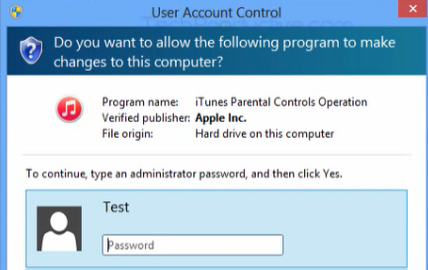
2: Click on the Parental tab. If its options are locked, go to the padlock icon in the bottom left of the screen and enter your administrator password to unlock.

3: Uncheck the box beside Restrict: Music with explicit label. This setting allows explicit content to be played. Click OK to save your changes.

4: Restart iTunes to ensure the new settings take effect.
Method 5: Managing Restrictions via Family Sharing
Family Sharing is when you share Apple services such as Apple Music, Apple TV+, and iCloud storage plans through a joint account. One adult, usually a parent, controls purchases, subscriptions, and content restrictions for all other members. If you’re part of such a group, your access to explicit content could be restricted due to the settings they have turned on.
These restrictions are usually managed through Screen Time enforced on your Apple ID. In this case, you’ll need the organizer’s permission to remove or adjust the filters—they’re the only ones who can do it.
1: Ask the family organizer to go to Settings on their iPhone or iPad. Select the name of the family member (you) under Family.
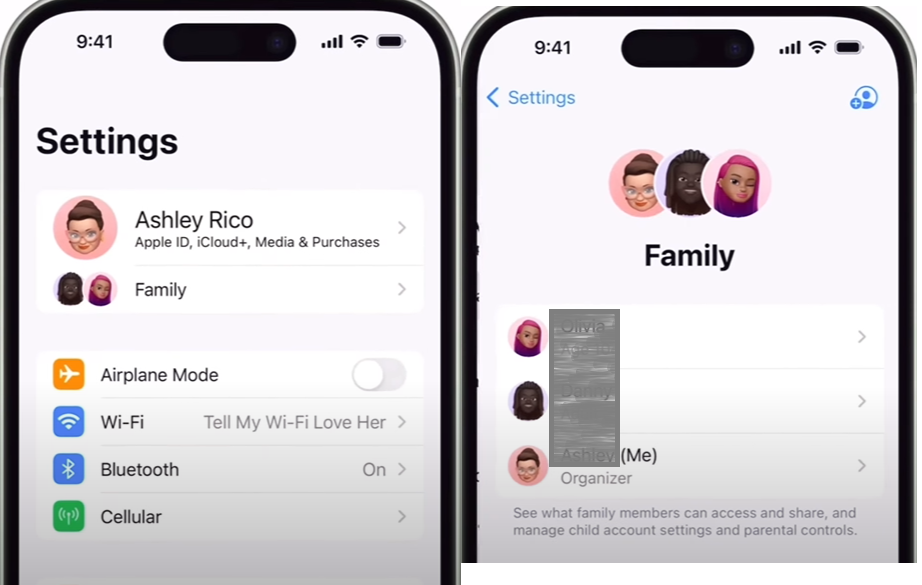
2: Tap Screen Time, and give the passcode.
3: Tap Content & Privacy Restrictions > Content Restrictions.
4: Go to Music, Podcasts & News and set it to Explicit. Confirm or enter the Screen Time passcode if prompted.

The changes will sync to your device almost immediately. If not, restart the device or re-sign in to Apple Music.
If you’re an adult in the group, you can also request permission from the organiser to manage your own restrictions in the future.
Method 6: Check Regional Restrictions
Sometimes, even after you’ve enabled explicit content through every available setting, certain songs still won’t play while others do. If that’s happening to you, the issue might be related to your location.
Mostly, it’s because the song or artist does not have distribution rights in your country. However, some nations, such as India or Belarus, have stricter content control too, which compels platforms like Apple to automatically take down some explicit content on any website, regardless of your settings.
Unfortunately, there is no setting on your device that can circumvent regional content limitations. The only true workaround is to switch the country or region tied to your Apple ID. But this is not a quick fix. To do so, you’ll need
- A valid payment method
- Billing address from the country you want to switch to.
This is how you can modify your Apple ID region:
1: Open the Settings app on your iPhone or iPad. Tap your name at the top, then select Media & Purchases.
2: Tap View Account and sign in if prompted.
3: Tap Country/Region, then tap Change Country or Region. Select your new country or region from the list.
4: Review and agree to the terms and conditions.
5: Enter a valid payment method and billing address for the new country. Tap Next to confirm the changes.
Keep in mind that altering your Apple ID’s country or region may impact your access to particular apps, subscriptions, and services. So, cancel your region-specific active subscriptions and use up any outstanding store credit before proceeding with the change.
Conclusion
Whether you’re tired of missing out on your favorite tracks or just want full control over your Apple Music experience, we’ve covered all the ways to break down the digital bouncer that’s been keeping explicit lyrics off your playlist.
Just remember: sometimes the issue isn’t the setting you can see, but the one hidden behind Screen Time or Family Sharing. Once you’ve flipped the right switches, your music library will be ready to drop all missing beats and words.
Frequently Asked Questions
1: Why can’t I search for explicit music on Apple Music?
It could be because Apple has restricted access to explicit content on your device because of Parental control filters. To fix this, go to your device’s Screen Time or Content Restrictions and allow explicit content. You’ll need the Screen Time passcode if restrictions were set by someone else.
2: Does enabling explicit content affect all devices linked to my Apple ID?
In most cases, yes—if the devices share the same Apple ID and don’t have individual Screen Time restrictions, changes should sync across devices. However, if Screen Time is enabled separately per device (like for child accounts), settings may need to be updated individually.
3: Will Apple Music still mark songs as “clean” or “explicit”?
Yes. Even with restrictions off, Apple Music keeps the “E” (Explicit) and “C” (Clean) labels, so you know what you’re playing.
4: Can I filter explicit content by playlist or album only?
Not directly. Apple Music’s content restrictions apply across the entire library, not on a playlist-by-playlist basis. You’d need to manually create playlists without explicit content or search for clean versions if you want to control content at that level.
5: Does turning on explicit content affect other apps like Podcasts?
Yes, it can. The setting that allows explicit music also applies to podcasts and news in the Apple ecosystem. So, if you enable explicit content for music, it will also allow shows marked as explicit in Apple Podcasts.