Media encoding is an essential process for content creators and professionals working in video production. It’s like packaging your content so that it can be shared or played on different devices. Adobe Media Encoder, a widely used tool, plays a crucial role in this workflow. However, encountering issues like the Media Encoder getting stuck at the end can be frustrating and disruptive.

In this guide, we’ll help you understand why this happens and how you can fix it. By the end, you’ll be able to keep your creative work flowing smoothly without any hiccups.
Understanding The Issue
Before getting into the fixes, it’s essential to understand why Adobe Media Encoder might get stuck at the end of an encoding process. Several factors can contribute to this problem, including:
- Resource Constraints
Encoding large or complex media files can consume a significant amount of system resources. If your computer lacks sufficient processing power, RAM, or disk space, it can lead to a slow encoding process.
- Corrupted Media Files
When the source media files you’re trying to encode are damaged or corrupted, it can lead to a problematic scenario where the encoder may freeze or become unresponsive during the conversion process.
- Outdated Software
Using an outdated version of Adobe Media Encoder can lead to a range of compatibility issues, especially when dealing with modern media formats or the latest operating systems.
- Software Bugs
As with any software, Adobe Media Encoder is not immune to occasional bugs or glitches, which can, in turn, have a noticeable impact on its overall performance. These unexpected software hiccups can disrupt the encoding process and cause unwanted delays or errors.
Troubleshooting Steps To Fix Media Encoder Stuck At End
Now that we’ve identified the potential reasons behind Adobe Media Encoder getting stuck at the end, let’s get into some effective fixes for resolving this issue. These fixes have undergone thorough testing and have a proven track record of successfully addressing the problem. So, let’s get started.
Fix 1: Ensure Sufficient System Resources
Before you begin encoding, check your system’s resource availability. Checking the system’s resource availability is important for Media Encoder because it ensures that your computer has enough processing power and memory to handle the encoding task effectively, preventing potential issues like freezing or slowdowns during the process.
Let’s check each of the resource individually.
- RAM Storage
Ensure you have enough RAM available for the encoding process. You can do it by following the below steps:
Step 1: For Windows: Press Ctrl+Shift+Esc to open the Task Manager. For Mac, Press Command+Space, type “Activity Monitor,” and press Enter to open it.
Step 2: In the Task Manager (Windows) or Activity Monitor (macOS), you’ll see a list of running applications and processes. Look for applications that are using a significant amount of memory (RAM) or CPU. You can sort the list by clicking on the “Memory” or “CPU” columns to identify resource-intensive ones.
Step 3: Click on the application you want to close and select it.
Step 4: Click the “End Task” button at the bottom-right corner of the Task Manager window. For Mac Click the “Quit” (X) button at the top-left corner of the Activity Monitor window and confirm by clicking “Quit.”
Step 5: Repeat steps 3 and 4 for any other unnecessary applications you want to close.
You can Adjust Adobe Media Encoder settings to allocate more or less RAM for encoding through Preferences > Memory Settings. Consider upgrading your computer’s RAM if you frequently work with large media files and experience consistent RAM shortages during encoding.

- CPU Capacity
Media encoding is a CPU-intensive task. Make sure your computer’s CPU is not already under heavy load from other processes. Here are the steps:
Step 1: Open Task Manager (Windows) or Activity Monitor (Mac) to monitor your computer’s CPU usage.
Step 2: Look for processes or applications that are using a significant portion of your CPU’s processing power.

Step 3: If you find any non-essential processes using a lot of CPU, consider closing or pausing them to free up processing power for the media encoding task.
Step 4: Ensure that Adobe Media Encoder has priority access to the CPU while encoding. You can often set this in the application’s settings or task manager.
- Disk Space
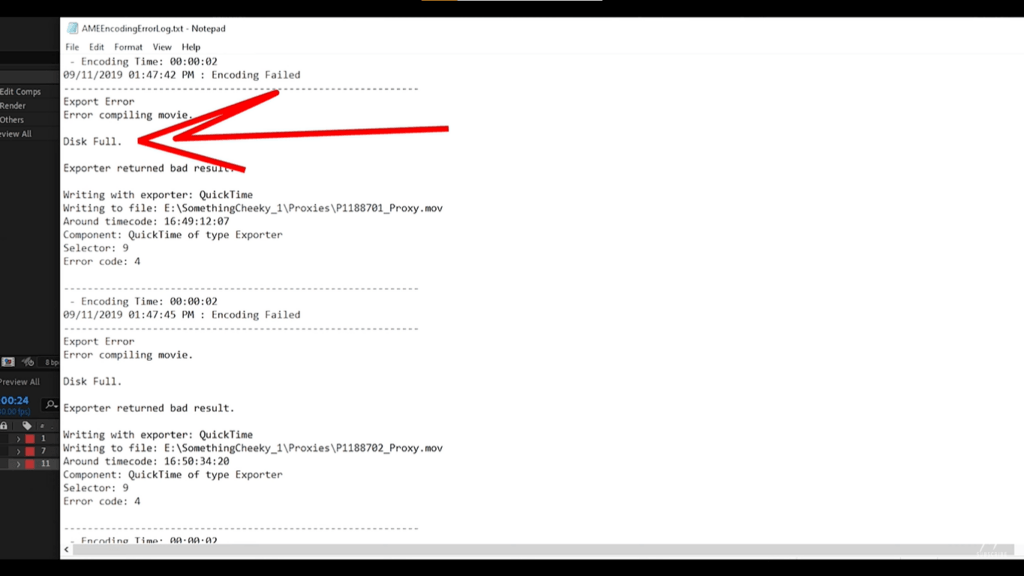
Ensure you have ample free disk space on the drive where you’re saving the encoded files.
Step 1: Go to “This PC” (Windows) or “Finder” (Mac) and locate the drive where you plan to save the encoded files.
Step 2: Right-click on the drive and select “Properties” (Windows) or “Get Info” (Mac).
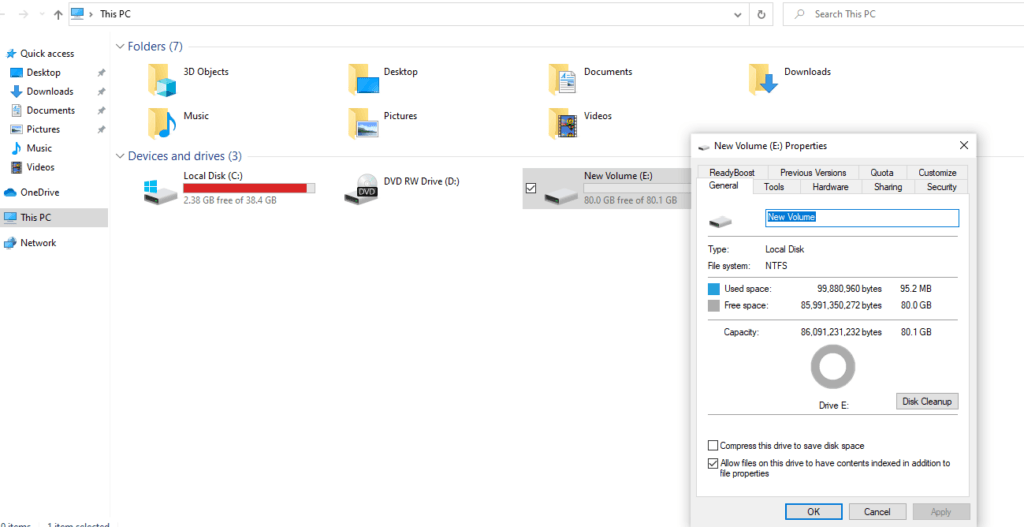
Step 3: Look for the “Free space” or “Available” section. Ensure there’s enough free space to accommodate the size of the encoded files.

Step 4: If you’re low on disk space, consider deleting unnecessary files or transferring them to another drive to make room for your encoded files.
If these steps prove effective, that’s great; but, if they don’t resolve the issue, you can move on to fix number 2
Fix 2: Check Source Media Files
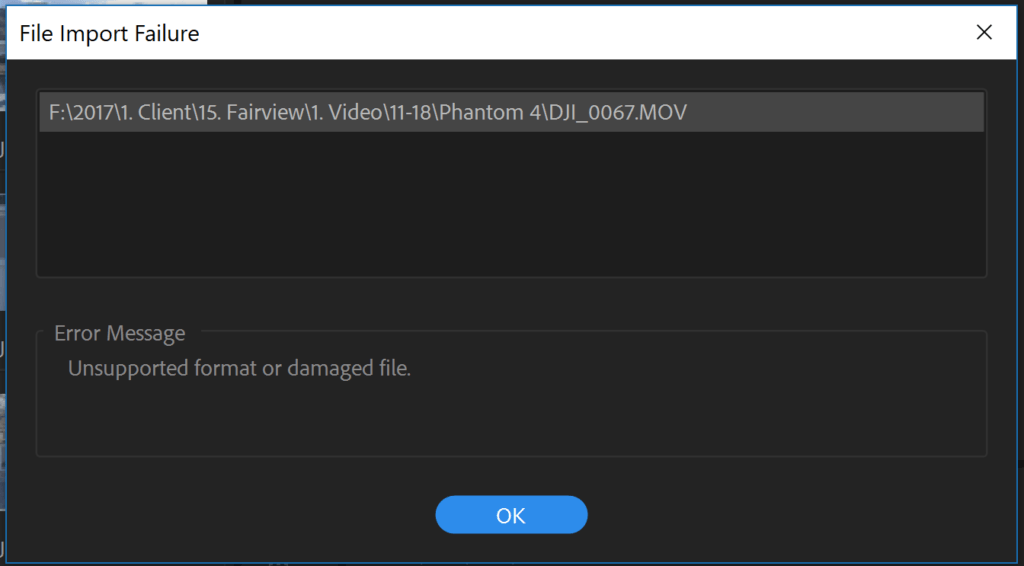
Sometimes, the issue may lie with the source media files. Here’s how to verify and address this:
- Confirm that the source files are not corrupted or damaged. Try playing them in a media player to check for any playback issues.

- Ensure that the source media files are in a format supported by Adobe Media Encoder. Refer to Adobe’s official documentation for the list of supported formats.

Fix 3: Update Adobe Media Encoder
Keeping your software up to date is crucial because it ensures that you have the latest bug fixes, security patches, and improvements. This enhances software stability, compatibility with new technologies, and overall performance, reducing the likelihood of issues like crashes or incompatibility with media files or operating systems. Here are the steps:
Step 1: Open Adobe Media Encoder and navigate to the “Help” menu.
Step 2: Select “Updates” to check for and install any available updates.
Step 3: Ensure that the version of Adobe Media Encoder you are using is compatible with your operating system and any other software you are using in your workflow.
We hope your issue has been resolved by now. However, if it persists, try Fix 4.
Fix 4: Adjust Encoding Settings
Sometimes, tweaking the encoding settings can help resolve issues:
- Codec Selection
Experiment with different codecs to see if the issue persists. Some codecs may be more stable than others for your specific media files.
Step 1: Launch Adobe Media Encoder on your computer.
Step 2: Import the media file you want to encode by clicking “File” > “Add Source” or a similar option in the software.

Step 3: In the Queue panel, select your desired output format from the “Format” dropdown menu. This is where you can experiment with different codecs.

Step 4: Next to the “Format” dropdown menu, you’ll often find a “Preset” dropdown menu. Click on it to access the codec settings. Here, you can experiment with different codec options to see if they work better for your specific media file.


Step 5: After choosing the desired codec and adjusting settings, click the “Start Queue” button to begin encoding with the selected codec.

Step 6: Observe the encoding process to see if it completes successfully without getting stuck at the end.
Step 7: If the issue persists, you can repeat this process with different codecs until you find one that works best for your specific media files.
- Output Settings
Check your output settings, such as the destination folder and file format. Ensure they are correctly configured.
Step 1: Open Adobe Media Encoder.
Step 2: Import the media file you want to encode.
Step 3: In the Queue panel, review and adjust the following settings:
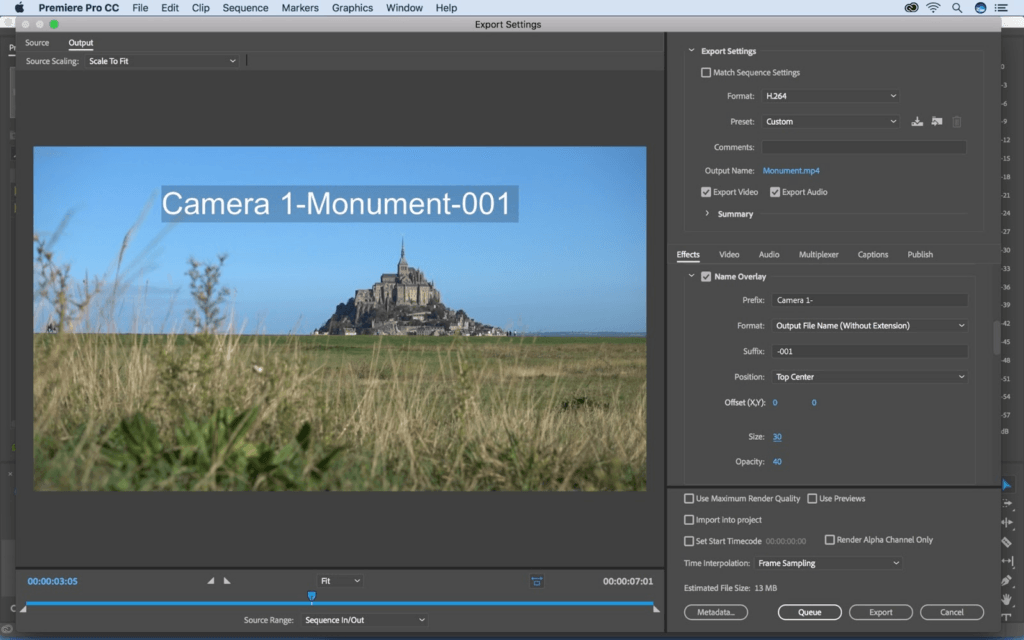
Step 4: Ensure the destination folder and file name are correctly set.
Step 5: Select the desired output format (e.g., MP4, MOV).
Step 6: Choose an appropriate preset for your output format, or customize settings as needed.
Step 7: Click the “Start Queue” button to initiate the encoding process.
Let’s proceed to fix number 5.
Fix 5: Repair or Reinstall Adobe Media Encoder
If you suspect that Adobe Media Encoder itself is causing the problem, try repair installation. Adobe software often includes a repair option in its installer. Use this option to attempt to fix any software-related issues.
Here are the steps to uninstall and reinstall the software:
Uninstall Adobe Media Encoder
- For Windows: Open Control Panel > Programs and Features.
- Select Adobe Media Encoder, then click “Uninstall” and follow the on-screen prompts.

- For macOS: Quit Adobe Media Encoder, drag it from the Applications folder to the trash, and empty the Trash.
Reinstall Adobe Media Encoder
- Visit Adobe’s Official Website: Go to Adobe’s website (https://www.adobe.com).
- Download: Find and download the latest Adobe Media Encoder version.
- Install: Run the installer and follow the on-screen instructions.
By following these steps, you can uninstall and then reinstall Adobe Media Encoder, potentially resolving any issues and ensuring you have the latest software version.
Fix 6: Monitor System Performance
During the encoding process, keep an eye on your system’s performance. This proactive approach helps prevent problems like freezing, crashes, or encoding failures, ensuring a smoother and more successful encoding process.
Use Task Manager (Windows) or Activity Monitor (Mac) to monitor CPU, memory, and disk usage. This can help identify if resource limitations are causing the encoder to get stuck.
Bonus Tip
If you’re working with high-resolution media, consider creating proxy files with a lower resolution for editing and then switching to the original files for final encoding.
Conclusion
Encountering the issue of Adobe Media Encoder getting stuck at the end of an encoding process can be frustrating, but with the right troubleshooting steps and fixes, you can overcome this issue. By ensuring your system has adequate resources, verifying the integrity of source media files, keeping your software up to date, and following the tips provided, you can optimize your media encoding workflow and achieve smoother, more reliable results.
If you’ve mastered encoding your videos but still struggle ensuring smooth on-location monitoring and streaming, a reliable wireless video transmitter can simplify your workflow significantly. Instantly check your broadcast quality on external displays without cable clutter, making your encoding process smoother and stress-free.
FAQs About Media Encoder Getting Stuck
Q: What is the impact of choosing different codecs on media encoding?
A: Choosing different codecs can affect factors like file size, quality, and compatibility. Experimenting with codecs can help you find the most suitable one for your specific media files.
Q: How can I allocate more RAM to Adobe Media Encoder?
A: You can allocate more RAM to Adobe Media Encoder by adjusting settings in the software preferences. This allows it to use more memory for encoding tasks.
Q: Are there specific codec settings that may prevent getting stuck at the end?
A: Experimenting with different codec settings can help. Some codecs may be more stable for your specific media files. Adjusting these settings can improve the encoding process.


.png)


