


.png)
The Davinci Resolve is instrumental in producing transparent images with videos to bring smoothness and clarity. And good photos are necessary because they can stack extensive data with stunning visual effects and provides fascinating depths to layouts.
But sometimes, after importing the PNG images in DaVinci Resolve, they suddenly lose their transparency. It happens because the Alpha Channel, required for interpreting the clarity of ideas, cannot identify thy pixels, leading to non-transparent images. So, it’s essential to understand the cause and apply the solutions effectively.
Does DaVinci Resolve Support PNG?
DaVinci Resolve supports PNG image files and is desired because they retain the original quality after compressing. And the Resolve alpha channel stores the file information and controls its transparency. The PNG image files are known for their best use in different project logos and other functions, so it’s most desirable.
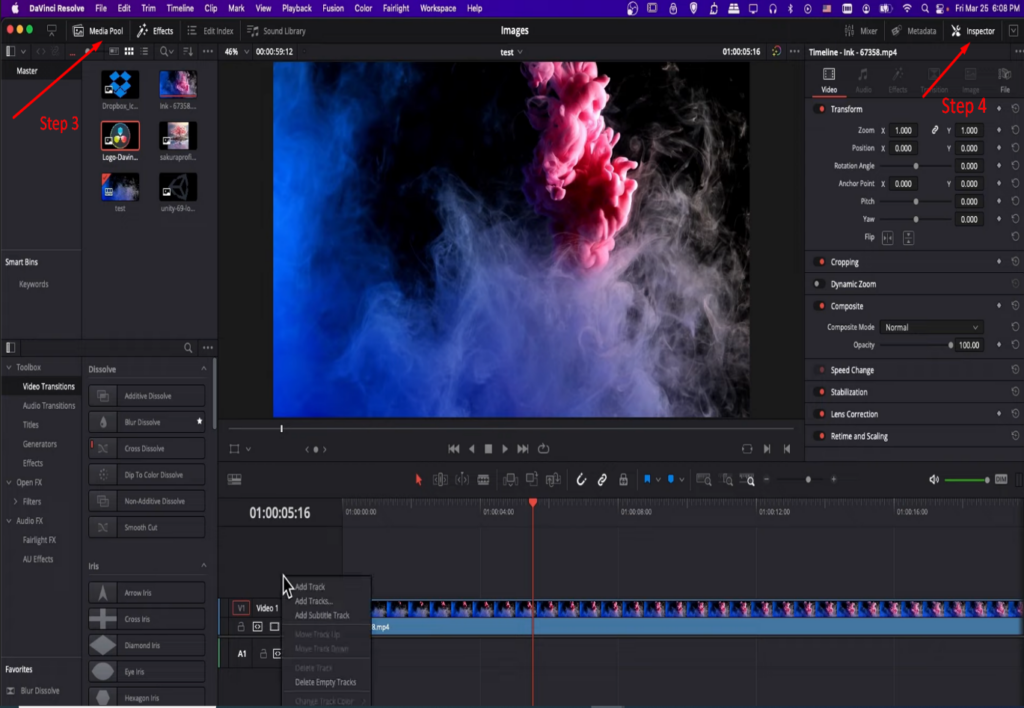
Following the easy steps, you can add images to Resolve.
- Open the DaVinci Resolve and Click on the “Media Page.” Go to the Media Storage from the home bar
- And from the three dots, click on “Frame Display Media.”
- From the Display bar, you can click on the individual or sequence of images
- After importing into “Media Pool,” you can edit the photos.
PNG files can store a lot of information, and their transparency makes them essential for smooth composition with videos. And the user-friendly interface enables adding colors and special effects to transparent images. Also, before importing the image file into Resolve, it’s essential to check its opaqueness from different editing tools, and you can also check this from its tools and applications.
Why are PNG Images not transparent in DaVinci Resolve?
After importing the PNG images, the non-transparency issue will halt the overall performance. When an alpha channel cannot read and interpret the images, it becomes opaque instead of transparent. There are two prominent scenarios when this happens.
- If you use the images on white or black backgrounds, they will appear opaque and lack transparency. And when photos are not becoming transparent because they are considered fake, the alpha will not read the image credentials.
- Another issue may be compatibility or import settings.
Understanding the issues beforehand is essential because it makes applying the solutions accessible. When PNG images are transparent, bringing smoothness to quality work becomes more accessible.
How to fix PNG image transparency in DaVinci Resolve?
Fixing the image transparency brings smoothness to your work, and mastering it will make it easy to compose seamless videos with utmost clarity. However, there are different significant methods for fixing image transparency:
For Case 1
Solution no 1-
By effectively using the color tab, you can bring transparency by removing the unwanted background parts using the color qualifier. Hereunder, the step-by-step guide will help in this regard.
Removing the unwanted background using a color page
Before going on, it’s essential to understand that removing the white or black background is called the Luma key. The qualifier allows for adjusting and removing the unwanted background, and here enlisted method will resolve the issue.
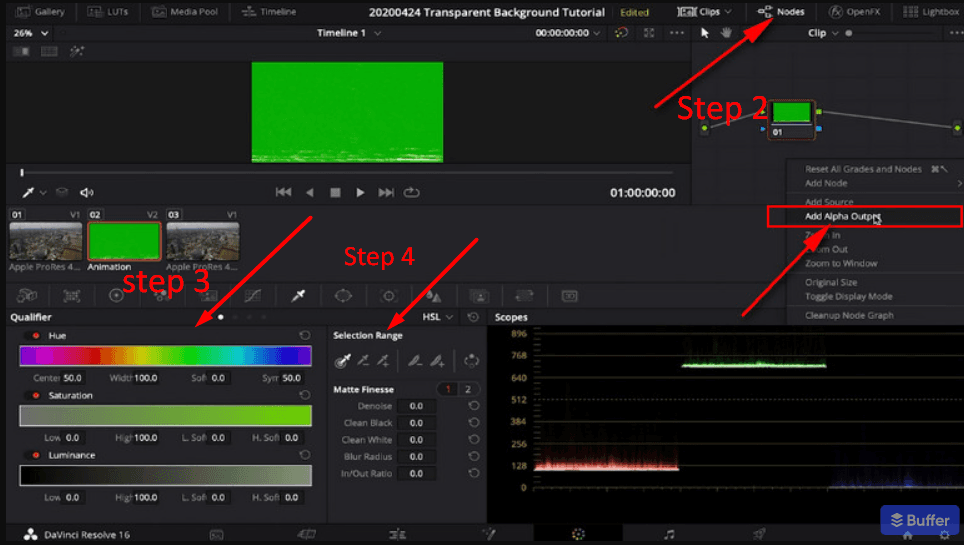
Step 1- Preparing the Timeline
- From the interface, you can locate and click on the color page leading you to grade and edit tasks.
- Select and Drag the clip whose background you want to remove and position it on the edit timeline.
Step 2- Attaching the Nodes
- Ensure the node workspace visible by clicking on the Node Icon
- And right click on media pool will provide alpha output
- And draw a line between the node circle and alpha output circle
Step 3-Open the qualifier
- From the top-right interface, you will see the color qualifier.
- And adjusting the prominent color qualifier Hue, Saturation, and Luminance settings will make images transparent.
- Changing the saturation will remove the unwanted color background.
Step-4 Using the Qualifier Tools
- The Range tool determines the length, and it is essential in removing the unnecessary parts
- Refine your transparency with Qualifier softness that will redefine the clip edges.
- And from the Hue and saturation, the color grading becomes easy
- Utilizing these tools will remove unwanted parts from images
After bringing transparency, you can merge the clips with the desired background to obtain smoothness and clarity. Reviewing the transparent images and ensuring they retain the original quality is essential.
Step 5- Using the Alpha Channel
You can also remove the background along with the methods mentioned earlier. For the removal of the black background from the transparent PNG images, there are easy steps to follow:
- Import the image files into the media pool penal
- Then right-clicking on the image file, the pop-up setting will appear
- Select the Alpha Channel Mode for transparency
- And change it to premultiplied for added color perceptions
Solution no 2
Another prominent solution is importing the files into any other photo editor tool, removing the unwanted background, and again importing it into Resolve.
Using the Photo Editor
Sometimes the image file becomes corrupted, and it becomes difficult for the Alpha channel to read the file information, which leads to this. For this purpose, delete the media from media storage and import it again after editing it from prominent photo editors.
For this purpose, Photoshop editors are commonly in use, and it’s easy to use by clicking the channels and locating the alpha channel. Follow the instructions to get this done:
Step-1 Open the Selection tools
- Open the image in your Photoshop timeline
- From the menu bar, you can easily navigate the selection tools
- And utilize the selection tools to border the areas of the image you want transparent
Step-2 Make color transparent by Channels
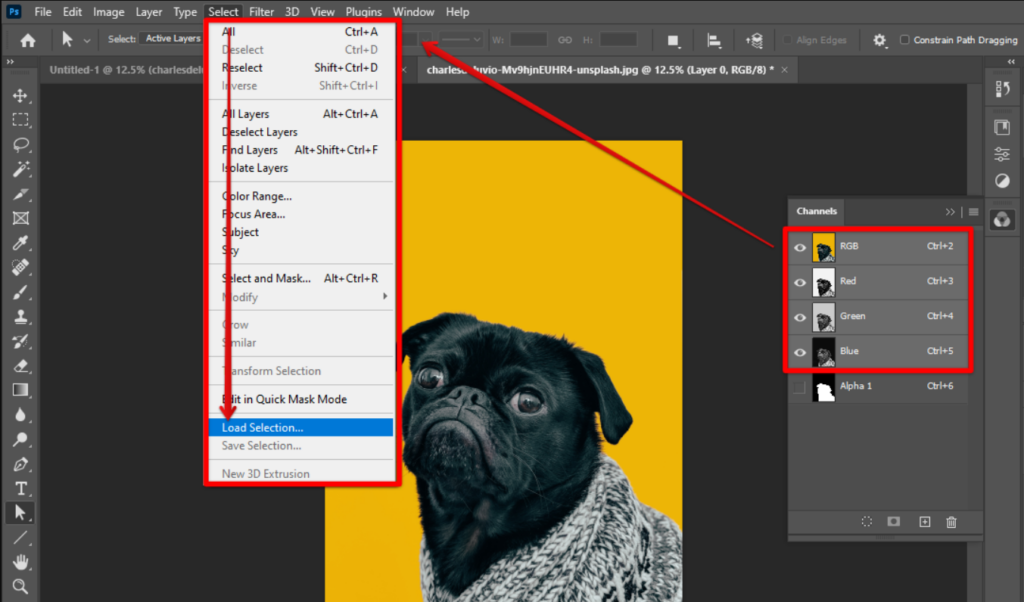
- Then move onto your channels tab and select all channels except the alpha
- From the top menu bar, click on Select and locate the Alpha Load Selection
- And from here, you can load the selection to Alpha 1 to merge the selected channels into one frame
- After that, right-click on the alpha and delete the alpha channel to remove the image’s background.
Step 3- Utilizing the Layers Panel
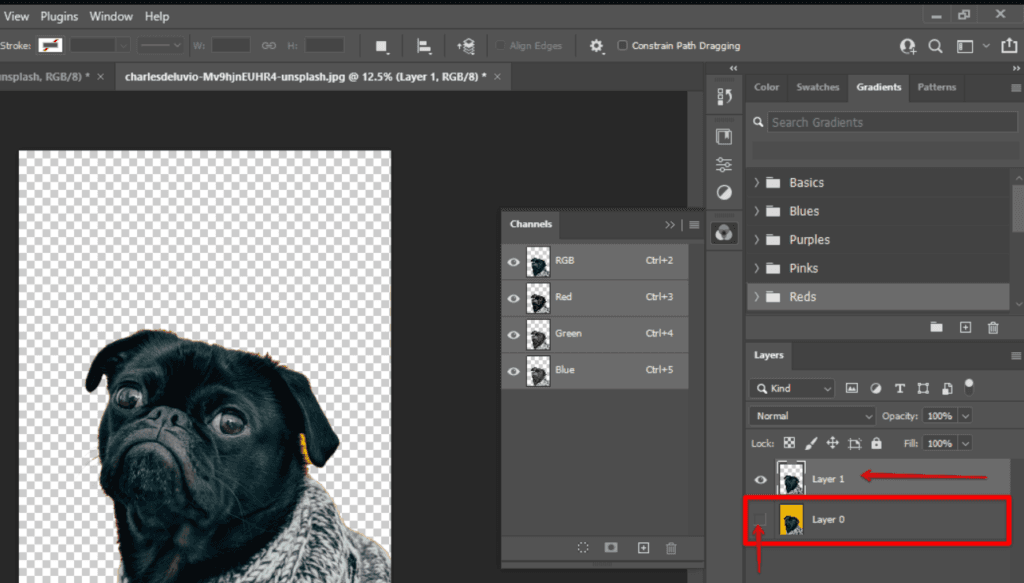
- The layers panel is an addition, and from the menu bar, click on the layers to select the “Add Layer Mask.”
- By clicking on the layer mask, it will border the unwanted areas as opaque while retaining the other areas as transparent.
- And it’s dependent on you to select and modify the transparency by moving the layers according to your need.
- At last, copy the layers from the layers tab and right-click on layers to see the image.
Step-4 Exporting the PNG Image
Once satisfied with image transparency, you can export the transparent file by clicking on the file and then save.
It’s important to note that, whatever the photo editor you are using, the steps remain the same, and mastering their utilization enables better composition.
After editing and exporting, it’s easier to import the transparent PNG image to the DaVinci Resolve, which can be used seamlessly for your project.
For Case 2
- Sometimes there are issues with the codec or import setting, and by effectively resolving the resolve settings, the alpha will quickly understand the image files. This issue is resolvable by following the general instructions or guidelines.
Step 1- Open Latest Version and Launch New Project
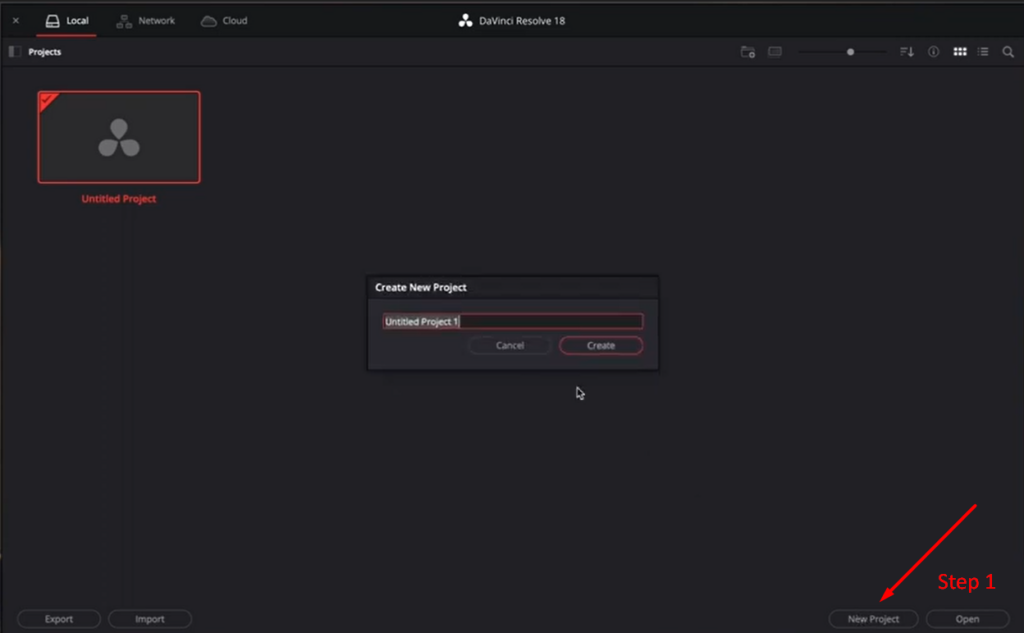
Open the DaVinci Resolve latest version because it’s essential for seamless composition and retains the original PNG image quality.
Step 2- Navigating Media Pool
From the bottom-right corner, you can access the Media Pool Panel, an editing hub for smooth functioning and composition.
Step 3- Import the Images
And for importing the PNG image, you can refer to any of the hereunder methods:
- You can quickly locate the media storage bar from the media page containing all the images for use. And after navigating the frame display from the top right corner, you can select individual photos or sequences of pictures for your project.
- Another method is to drag and drop the media from computer storage into media storage.
Step 4- Editing with Inspector Panel
Preview the image to check its transparency and how it’s working when dragged to the media pool timeline. And the Inspector Penal will edit and bring the desired modification for special effects or adjustments.
However, when customizing the settings, you can apply special effects to bring clarity and easily blend with significant work. Dragging the images cause the issue of transparency, so it’s essential to import from the media storage bar.
Another factor is compatibility; DaVinci Resolve’s updated version is essential for resolving this issue and using compatible image files.
To accurately preview transparency and evaluate graphics in Davinci Resolve, using a high-quality camera monitor can greatly enhance your workflow. A dedicated monitor helps you spot transparency issues immediately, ensuring your PNG graphics blend seamlessly into the final video.
Frequently Asked Questions
Why do PNG files have black backgrounds even though they are transparent?
Sometimes, the PNG image files act differently and lose their transparency. There are different reasons why black background appears in transparent files.
The prominent reason is that when you copy and paste the images from the internet, the alpha cannot understand the background information. So, when importing such photos, the background will turn black.
Solution: After importing the images, removing or changing the background from the methods mentioned earlier is necessary. And it’s also important to update with the latest version of the resolve system because of its enhanced capacity to understand the information.
Why is DaVinci Resolve PNG not working?
After editing the imported opaque PNG image file, Resolve will still be unable to pick up the alpha channel. And from the media pool, locate the Change Alpha Mode, and if the transparency doesn’t work, then the image file does not contain transparency. The Resolve will consider this image as opaque.
The only solution in this regard is deleting the image from Resolve and again uploading the image with its transparency.
Why is DaVinci Resolve unable to import the PNG files?
Sometimes, DaVinci Resolve cannot understand or import the PNG image files. And in this case, the prominent cause is either the file corrupted or the files contain incorrect format. It’s why you need to copy the images to different folders that are clean and not corrupted. Also, ensure that the image format is according to the PNG extension.
Also, removing the existing corrupted files or opening the image in different editors is best to ensure it’s error-free.


