.png)
It could be a one-time event or a rare live moment on Facebook you want to capture. The problem is that Facebook doesn’t allow you to record or download live videos. So, you do what most of us do: hit record on your screen.

In this guide, we’ll walk you through exactly how to do that, whether you’re on a Windows PC, Mac, Android, or iPhone. We’ll stick to the best screen recording tools and explain each step in detail on how to use them. No time wasting — just a straightforward way to save any Facebook Live stream for later. Let’s explore!
On Windows
Windows users are at an advantage; the tools they have access to in 2025 for screen recording can only be described as “legendary.”
1. Xbox Game Bar
Your Windows machine already comes with a solid screen recorder. Just press Win + G, and the Xbox Game Bar appears as a control center for your screen.

Once it’s up, you’ll see a few panels: Capture, Audio, and Performance. The one we care about is Capture. Press the Start Recording button, or use the shortcut Win + Alt + R if you prefer.

Now you’re rolling — anything happening on your screen (like that Facebook Live stream) is getting recorded. When it’s over, press the Stop Recording button. That’s it.

To find your video, bring the Game Bar back up and click See my captures under the Capture tab. It’ll show you a list of everything you’ve recorded.

Tip: Want to enable mic audio? Use the Audio tab to ensure your microphone is on. You can also adjust volume levels and tweak system audio here. The Performance tab is handy if you’re worried about lag or dropped frames.
2. Snipping Tool
If you’re on Windows 11, there’s another cool option: the Snipping Tool now supports screen recording as well. A serious upgrade, right?
To start recording, press Win + Shift + R. Your screen will dim slightly, and you’ll be prompted to draw a box around the area you want to capture, such as just the Facebook video window.

Once selected, hit Start, and it begins recording that portion of your screen. You’ll also see quick options to mute or unmute your system sound and mic.

When you’re done, hit Stop, and the recording gets saved automatically.
3. Clipchamp
If you’re on Windows 10 or 11, you already have a solid tool sitting quietly in your system — Clipchamp. It’s primarily a video editor, but it also supports screen recording.
Open the Start Menu, type “Clipchamp,” and then launch it.

Once inside, click Create a new video.

Then, click Record & Create. It’ll bring up a menu with four different recording options. Go with the Screen.

Then just click the big red Record button.

Next, you’ll see options to pick what you want to record. Choose the browser tab playing the Facebook Live stream, or click Entire Screen to grab the whole screen. Then, click Share.

Your recording starts immediately. Once the Facebook stream finishes, press the Stop button.

Now hit Save and Edit.

This drops you into Clipchamp’s full editing suite — trim the dead parts, clean up the audio, slap on a filter if you want. When you’re satisfied with your edit, click Export to save.

Clipchamp’s a great pick if you want to do more than just Record. It’s slower than Xbox Game Bar, but you get way more control over the final video.
4. OBS Studio (Available for Windows, macOS, Linux)
For those who want complete control, OBS Studio is the king of free screen recorders. It’s open-source, packed with features, and works across all platforms — including Linux.
Download it from obsproject.com, install it, and launch it.
When OBS first launches, the layout might feel like overkill, but stick with it — it’s easier than it looks.

First, peek at the Audio Mixer — here’s where you manage mic input and desktop sound. If you’re recording a Facebook Live stream, make sure your desktop audio is active.
Now let’s focus on the Sources box. Click the + icon, then choose Display Capture (for full-screen) or Window Capture (for a specific app, such as your browser tab running Facebook live stream).

Choose one, and another tab will open. Select the window tab running Facebook live stream, set the capture method to Automatic, and config other settings. Then, press OK.

Simply adding the display or browser window that runs Facebook Live is enough. Enable/disable mic and desktop audio from Audio Mixer. When ready, hit Start Recording.

Once the stream’s over, click Stop Recording. OBS will save the file in your Videos folder by default.

Want to fine-tune stuff? Click Settings in Control tab, then navigate to the Output tab.

Here, navigate to Recording and you can change the recording path, format (e.g., MP4, MKV), quality, bitrate, and more. After tweaking, click Apply.

That’s it — simple once you’ve done it once.
Tip: Before you hit record, close unnecessary apps, mute notifications, and free up some space. A high-quality, hour-long 1080p stream can easily eat up 5–10 GB of storage. It’s always better to prepare first than run out of space mid-recording.
On macOS
Mac users have a few reliable ways to record a Facebook Live stream. Below, we will explain how to screen record live Facebook streams and how to capture internal audio (which macOS doesn’t support by default).
1. QuickTime Player
If you’ve a Mac, you’ve access to QuickTime Player. It’s not fancy, but it gets the job done for a quick Facebook Live recording.
To use it, launch QuickTime from the Applications folder. From menu bar, go to File and click New Screen Recording or press Control + Command + N. A toolbar will pop up.

Then, hit the Record button. To change the recording settings, click the arrow button next to Record icon.

You can choose to record the entire screen or drag over the Facebook Live window for a tighter capture. When you’re finished, hit the Stop button in the menu bar at the top or press Command + Control + Esc. QuickTime saves the video as a .mov file.
There’s a problem, however. By default, QuickTime can’t record your mac’s audio. So if you’re trying to capture both video and audio of a Facebook live stream, you’ll need a little help.
Use BlackHole. It’s a free virtual audio driver that routes your Mac’s system sound to QuickTime (or any other app).
To set it up, download and install BlackHole from the official site. [here]

Once it’s installed, open Audio MIDI Setup (it’s in Applications > Utilities). Create a new Multi-Output Device and include both your Mac speakers and BlackHole.
Tip: Can’t find Audio MIDI Setup? Go to Finder > Applications > Utilities > Audio MIDI Setup.

Then, a new tab will pop up. Here, set the following settings:

Tip: Ensure Mac speakers are set as the master device and are listed at the top.
Now, you’ve basically told your Mac to split the audio—play it for you and send a copy to QuickTime. Without this, your screen recording will be silent (or just capture mic input, which isn’t great for livestreams).
Tip: After configuring BlackHole, remember to set the audio to BlackHole 16ch in QuickTime before you hit the record button.
2. OBS Studio
If you’ve used OBS Studio on Windows before, good news—you don’t need to relearn anything. The Mac version works almost identically. Download it from the official OBS site and follow the same steps we covered in the Windows section to set up your screen recording.
However, the same problem exists. Just like QuickTime, OBS can’t capture internal audio on macOS out of the box. Yep, you guessed it—you’ll need BlackHole here too.
Once you’ve installed and set up BlackHole (as you previously learned), go to OBS Settings. Click Audio and set Desktop Audio to BlackHole 16ch. Then, click Apply.

Final step is to open System Preferences and click Sound on your mac.

Then, go to the Output tab and set Multi-Output Device as the default output.

That’s it. This setup is tricky but you have to do this only once.
Tip: Always record a short 5-second clip to test your setup before recording a full livestream. Especially if you’re using virtual audio tools—one wrong setting, and you’re left with a silent video you can’t fix after the fact.
3. EaseUS RecExperts
We saved the best one for last. It’s the easiest method—but it’s premium, not free. It’s the best among a short list of tools that work out of the box and can record Mac’s audio—even from DRM-protected sources like Apple Music.
Download EaseUS RecExperts from the official EaseUS website. Install the app and register your account. Then, launch the app.

Next, choose an audio source. Click Sound, toggle on System sound, and click OK.

That’s it! You can now record your favorite Facebook Live streams with audio, without any issues.
There’s one more thing: to adjust the output quality of your recordings, open Settings in EaseUS RecExperts, configure the Video and Audio settings, and then click OK.

Once everything is set, click Full Screen or Region to start recording your Facebook Live stream.

In 2025, EaseUS RecExperts is a top-tier choice for Mac users. If you value your time and are open to using a trial version or purchasing the app, this is arguably the easiest method available.
On Android
Modern Android devices make it surprisingly easy to record a Facebook Live stream, thanks to built-in screen recorders and powerful third-party apps. Whether you’re using a Pixel, Samsung, Xiaomi, or another brand, here’s how to do it.
1. Android’s Built-In Screen Recorder
Android phones (especially those running Android 11 or later) come with a built-in screen recorder. It’s usually tucked away in the Quick Settings menu.
Swipe down from the top of your screen — you’ll see a bunch of toggles. Look for something called Screen Recorder. The icon may resemble a camera or a circle with a dot inside.

Once you spot it, tap it, then hit Start and wait a few seconds for the countdown to begin. Now, open the Facebook app (or browser) and let the live stream play — it’ll all be captured.
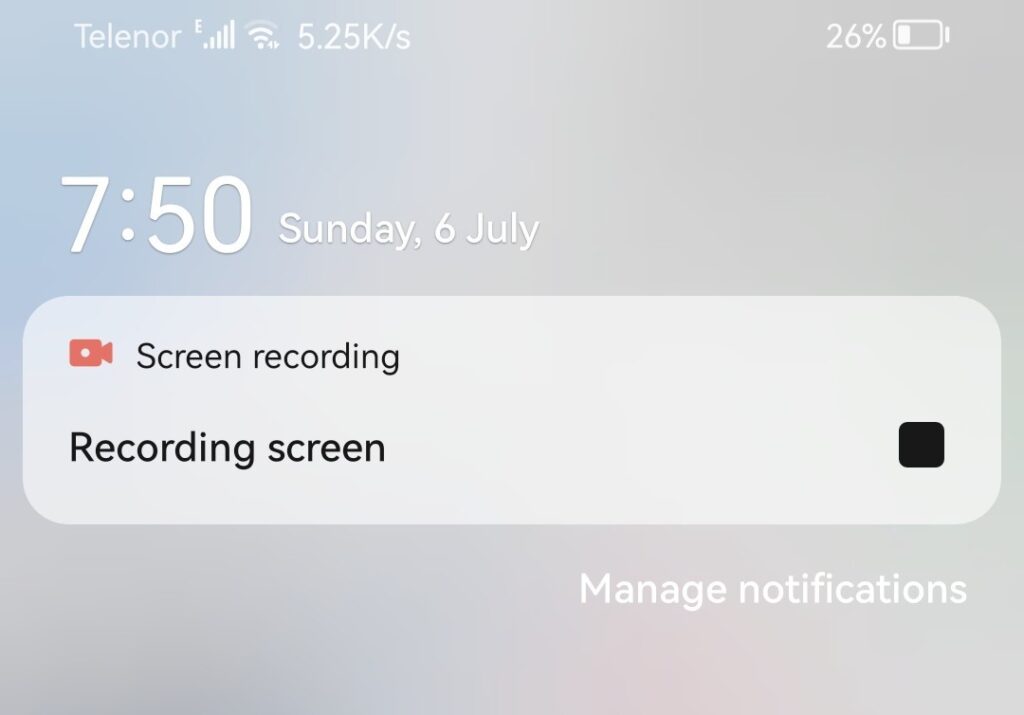
To end the recording, either tap the Stop button or swipe down again and hit stop from the notification bar.
Your video gets saved automatically, usually in the Gallery or Photos app. You can rename it or edit it from there.
A few things to know:
- Different brands handle this differently. For example, Samsung’s version lets you choose resolution, frame rate, and even enables you to record yourself with the front camera while the screen records. Handy if you’re reacting to a stream.
- For the cleanest video, opt for 1080p at 60fps and maximize the bitrate if your phone allows it.
Tip: Turn on Do Not Disturb before you start. One random WhatsApp call or notification can ruin your whole recording.
2. AZ Screen Recorder (from the Play Store)
If your phone’s screen recorder is missing or not providing enough control, third-party apps can fill the gap nicely.
The one we recommend? AZ Screen Recorder. It’s been around for years, constantly updated, and reliable.
Why it works:
- Simple UI (you won’t need a YouTube tutorial to use it)
- Supports internal audio recording (on Android 10+)
- Handles 1080p at 60fps like a champ
- Built-in video editor, countdown timers, overlays — the whole package
It’s free (with ads), but a premium version is available for those who want additional features.
Install it from the Google Play Store.

Once installed, open the app and grant it the permissions it requests.
A floating icon will appear on screen. Tap it and press the red Record button, switch to Facebook, and start recording the live video.

Once you have finished recording, press the Stop button.
We highly recommend to change the recording settings to your preference from the app. Go to Settings and under Video Configuration, change the video quality settings.

Other free, feature-packed, and frequently updated alternatives include XRecorder, Mobizen, and ADV Screen Recorder.
Tip: Screen recording can quickly drain your phone’s battery. If it starts to lag or feel too hot, remove the phone case, close any background apps, and avoid recording in hot environments.
On iPhone
iPhones have a reliable, built-in screen recorder that works well for capturing Facebook Live videos. It’s easy to use, doesn’t require extra apps, and records both video and internal audio in most cases.
1. iPhone’s Built-In Screen Recorder
Recording a Facebook Live stream on your iPhone (or iPad) is super simple—no app installs needed. Simply, open Control Center, swipe down from the top-right corner of your screen.
Look for the gray circle-in-a-circle icon. That’s the screen recorder. Tap it, and after a quick 3-second countdown, your phone starts recording whatever’s on screen—including that live stream you’re watching.
To stop recording, open Control Center again, tap the red Screen Recording icon, and hit Stop. That’s it. The video will automatically save.

Now, head over to your Photos app, and you’ll find the recording in your Library, just like any other video.
Would you like to use a third-party screen recorder? Okay, so here’s the thing—Apple doesn’t let third-party apps honestly record your screen natively. What apps like Record It! do instead is offer bonus features after you’ve recorded. Stuff like:
- Adding a Facecam video
- Voiceover commentary
- Trimming
- Basic editing
- Creating reaction-style content
It’s not bad, especially if you want to turn your recording into content later. Also, don’t expect better quality just because you’re using an app. These tools still rely on Apple’s built-in screen recording under the hood. They add extra flair, not better performance.
Tip: Want to capture in full HD (or even better)? Plug your iPhone into a Mac using a Lightning cable. Open QuickTime Player, choose New Movie Recording, and select your iPhone as the video source. Boom—now you’re recording directly from your phone to your Mac, skipping iOS’s resolution limits. It’s an old trick, but still gold if quality matters.
Conclusion
No matter if you’re on a PC, Mac, Android, iPhone — even Linux — there’s a solid way to record live Facebook. Built-in tools have come a long way, and apps like OBS continue to hold their ground for anyone seeking clean, high-quality recordings.
A disclaimer, however, is to always respect the privacy and copyright of others while recording their streams. Recording for personal use is fine, but avoid sharing without permission. With the proper setup, you’ll never miss a live moment again.
FAQs
Q: Is it legal to record a Facebook Live video?
It’s generally legal for personal use, but sharing or redistributing may violate copyright or privacy laws.
Q: Why does my screen recording have no sound?
You likely didn’t enable internal audio or had your device on silent. Check audio settings and test before recording.
Q: What format are recordings saved as?
Most recorders save in MP4 or MOV, which are widely supported. You can convert formats if needed using tools like HandBrake.
Q: How do I reduce the file size of a recording?
Lower the resolution or bitrate, trim the video, or compress it using software like HandBrake or an online tool.
Q: Any tips for recording long Facebook Live sessions?
Plug into power, free up storage, use stable internet, and consider splitting the recording into shorter segments.