.png)
Want to stream on YouTube with OBS? Excellent choice.
OBS is a favorite software among YouTube streamers because it puts them in complete creative control—from designing the appearance and aesthetic of their stream to handling audio, scenes, overlays, and more.
But to go live, you have to link OBS to your YouTube channel. In this article, we will discuss this in detail, so you can start streaming immediately.
Step-by-step guide to stream on YouTube with OBS
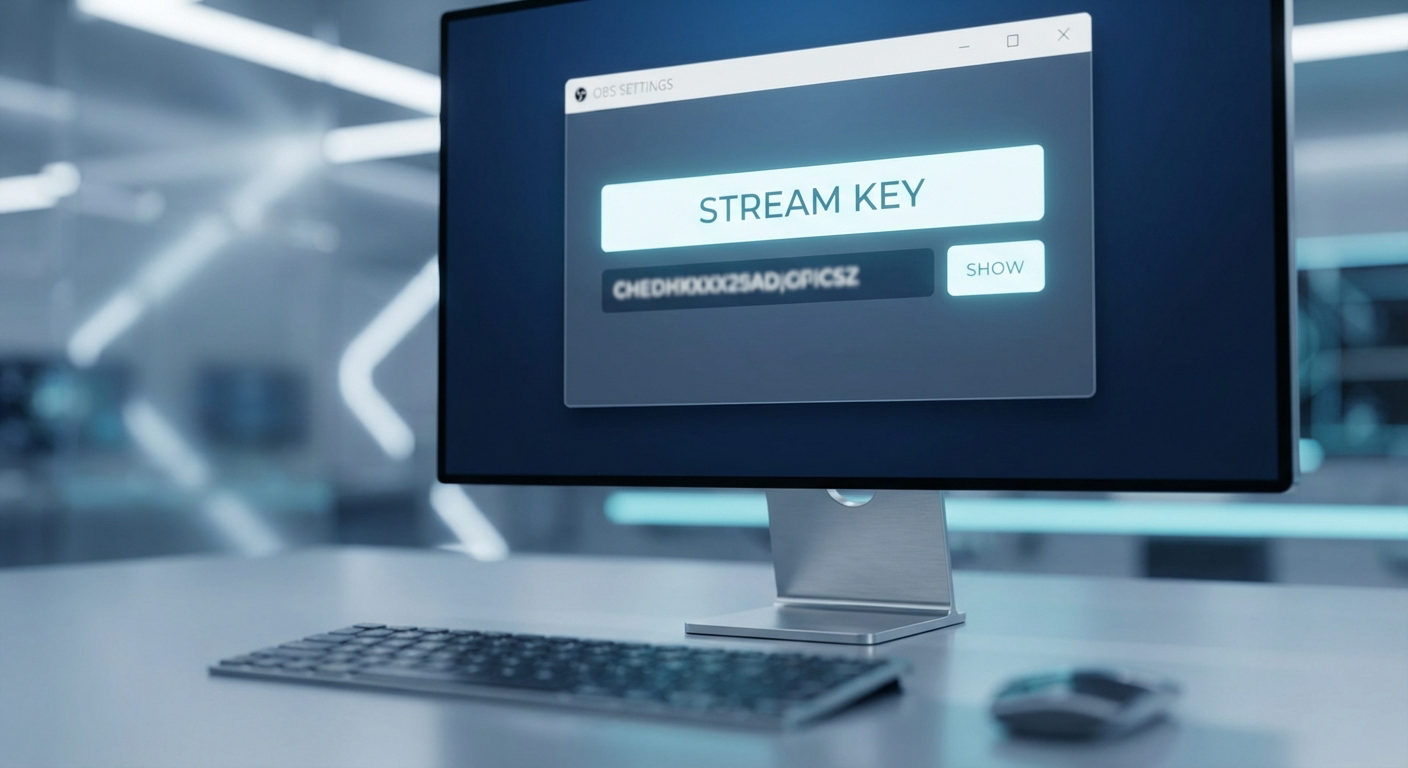
Getting started with connecting OBS to YouTube is easy, but it might be a bit complicated for first-timers, particularly when you’re working with YouTube’s “Stream Key,” RTMP, and keyframes. Below are some steps to take:
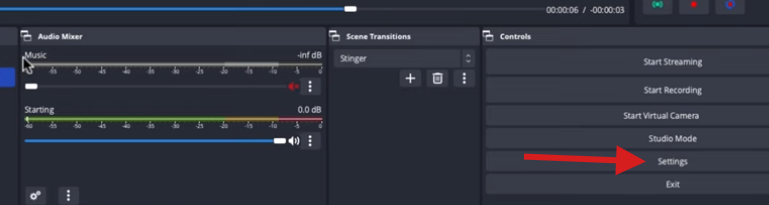
1. Configure OBS Studio
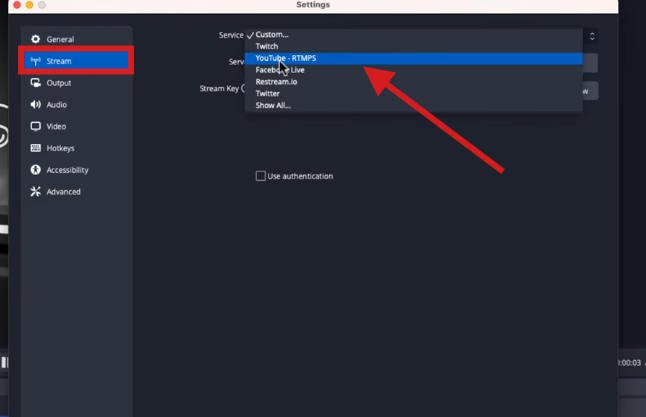
Before beginning the livestream, you would have to tweak a few settings in the OBS Studio. To do that, simply head over to the OBS Studio and click settings.
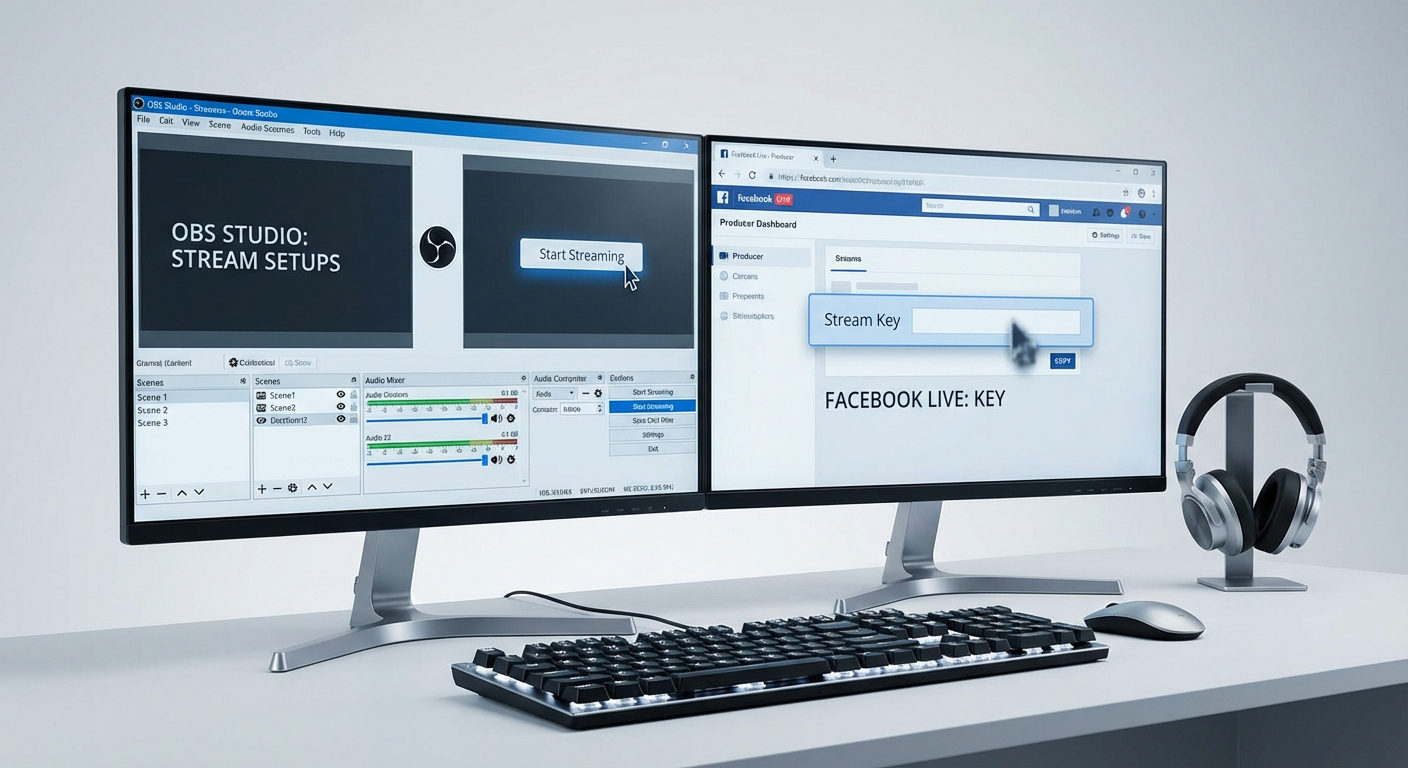
Now, go to the “Stream” from the menu on the left side. From there, head over to services and select YouTube RTMPS.
Note that if it’s your initial time streaming YouTube on OBS, you’d first have to enable livestreaming for your channel and obtain consent from YouTube.
2. Enabling Live Streaming on Your YouTube Account
To Broadcast to YouTube using OBS, you must first turn on live streaming for your account before you can begin streaming on YouTube. To do this, visit youtube.com and log in.
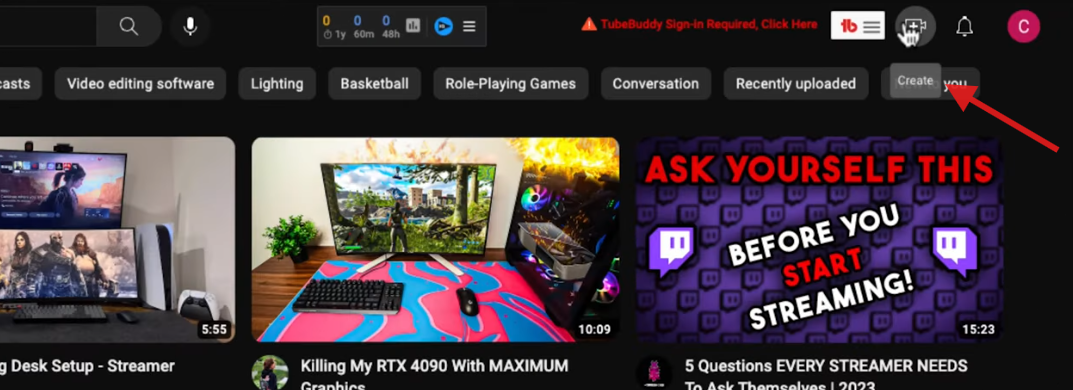
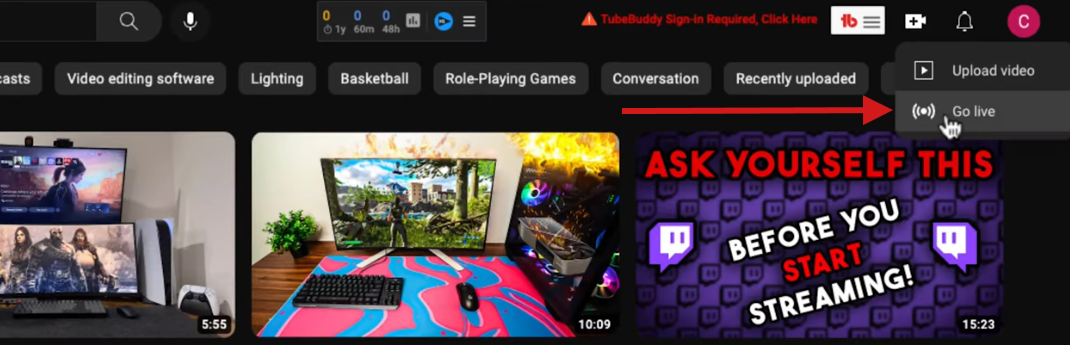
Click on the plus sign and camera button at the top-right corner and click on “Go Live.”
If you are streaming for the first time, you will be presented with the “Request Access to Streaming” page.
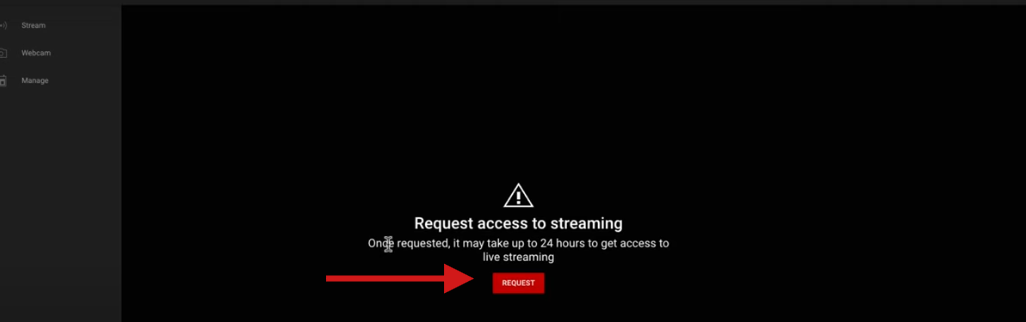
Once confirmed, YouTube will take up to 24 hours to enable live streaming on your account. It is a one-time process, and once done, you can go live whenever you wish.
3. Click Connect Account on OBS Studio
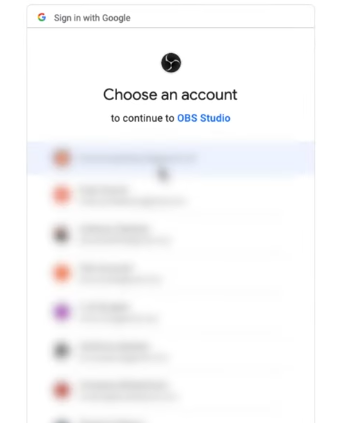
Now, return to the “Stream” menu in the OBS Studio and click Connect Account.
You will get a list of accounts to be connected to, choose an account that is connected to your YouTube channel, and authorize it.
You will get a list of accounts to be connected to, choose an account that is connected to your YouTube channel, and authorize it.
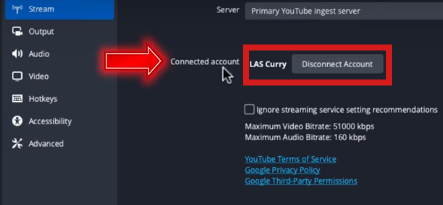
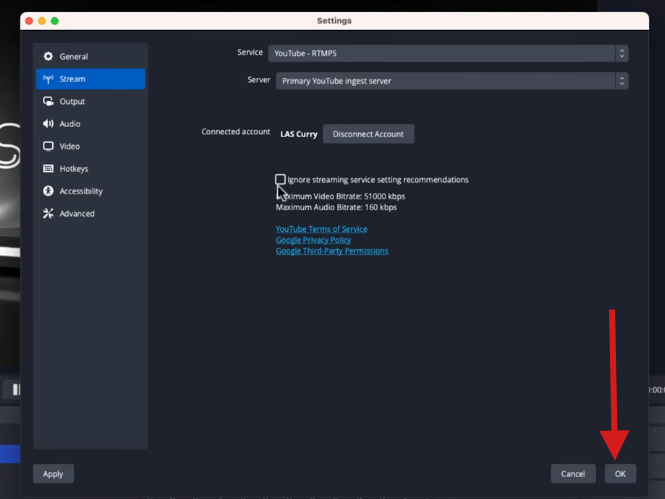
Once your authorization is complete, cross-check if the connected account shows your YouTube channel name.
If you have connected the wrong channel, disconnect the account and redo this step. Once everything is done, click OK.
Since OBS has been integrated with YouTube, you will now be able to monitor your YouTube chats within OBS.
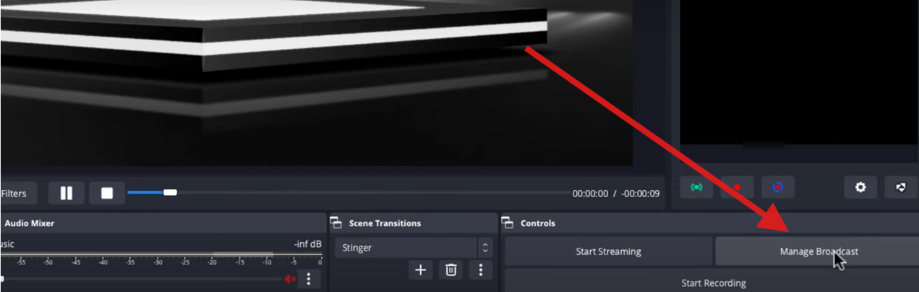
4. Head to Manage Broadcast
On the same page, click on the “Manage Broadcast” option. This section is where you organize your live streams before going live.
Here, you either start a new stream or select a scheduled one. During new broadcast creation, you are able to input crucial information such as your stream name, description, category (such as gaming, education, or entertainment), and thumbnail.
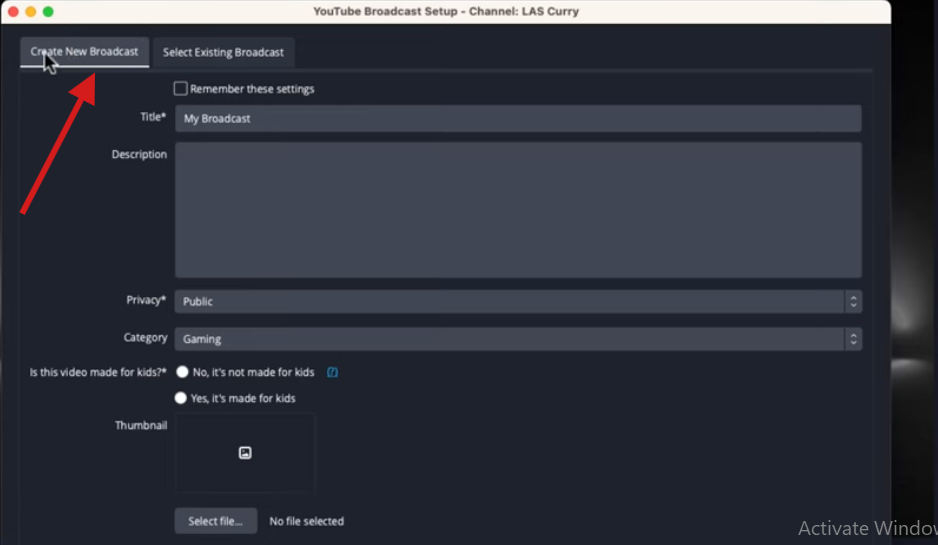
If your Broadcast is not for children, select the option “Not Made for kids.”.
5. Create a Broadcast
After basic settings, it’s time to set the Additional broadcast settings. To get the best quality on your livestream, it’s recommended to keep latency at a normal level.
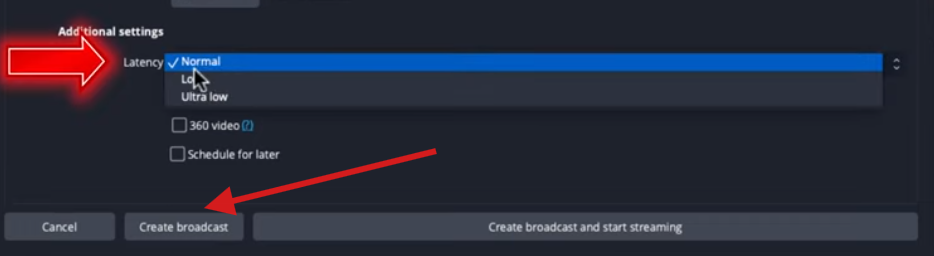
Now, you will be able to see two options, namely “Create Broadcast” and “Create Broadcast and Start Streaming”. If you want to take a look at your stream’s preview, click on the “Create Broadcast” option only.
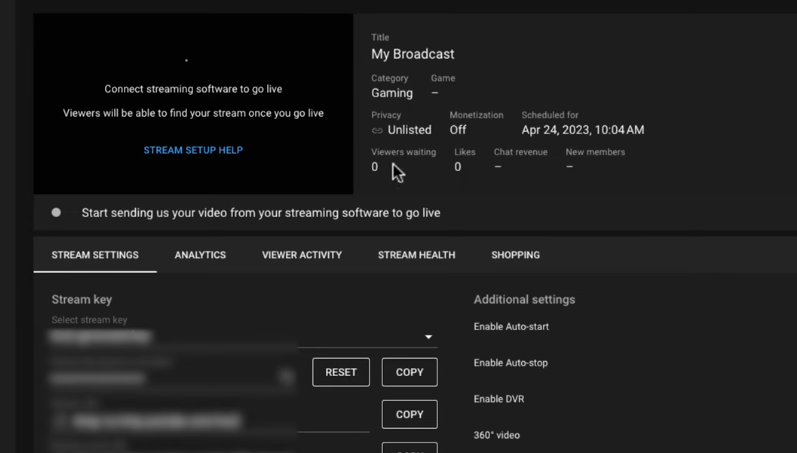
As soon as you create your Broadcast, you will see that your chat menu has been set up on one side of the screen. Remember that your Broadcast is not streaming yet.
7. Check YouTube Settings
Go to your YouTube channel’s profile icon and click on “My Account”.
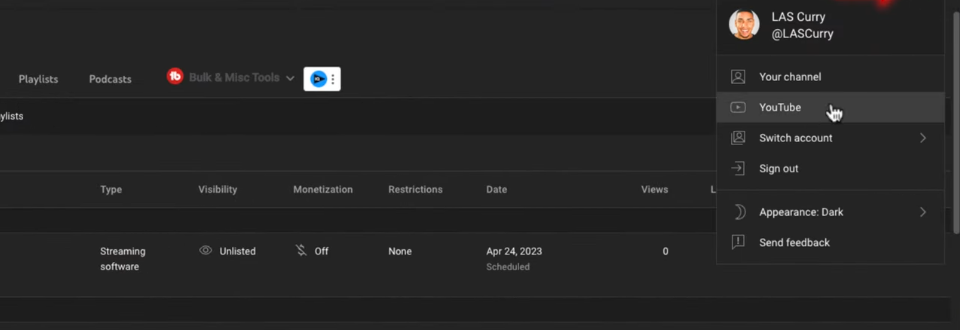
Now, YouTube will direct you to a menu page.
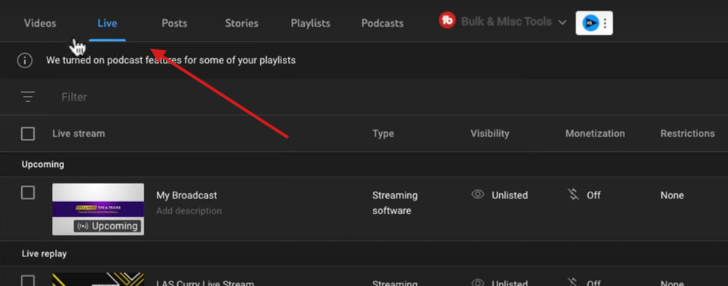
From this menu, click on the “Content” option and then click on “Live”.
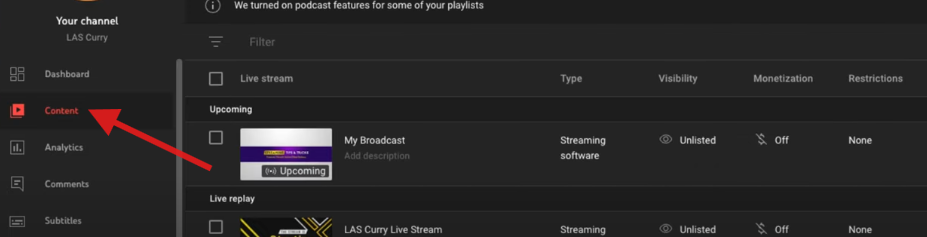
Under the “Live” section, find the Broadcast you created under the “Upcoming Broadcast” section. Cross-check if the thumbnail is correct.
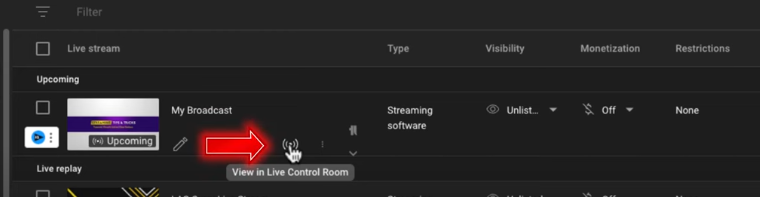
Now, select the broadcast icon to view your livestream in the control center to check if your live has been created or not.
8. Configure OBS Studio Settings
In order to ensure that your livestream doesn’t look choppy or lag, a few settings have to be made on your OBS Studio. Let’s talk about them one by one.
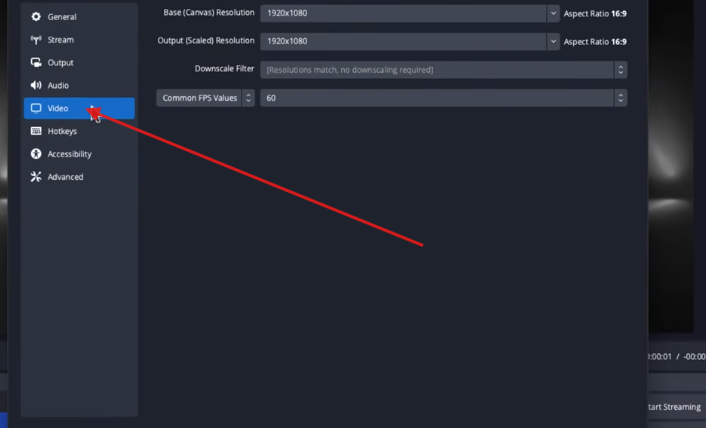
Click on OBS to set the stream settings for YouTube>Video.
Set your base and output scale resolution to 1920×1080 and keep the Common FPS Value
between 30-60 FPS as per your quality requirements.
Go to the “Output” tab in the menu. On top of your screen, change the output mode to advanced.

After these steps, change the encoder to x264.

In the encoder menu, find options like “Rate Control” and “Bitrate”.
But how would you find an ideal rate for your stream? Well, for that, you need to check your internet speed on any online tool and note down the upload and download speed.
Open this link to find the ideal bit rate for your stream.
Since we have kept our FPS at 60 and resolution at 1080, select 1080p@60fps and note down the bit rate, i.e., around 4500-9000 Kbps.

Fill in the highest number (9000 Kbps) in your encoder settings. Keep the keyframe interval up to 2s in this case, and set Profile to “High”.

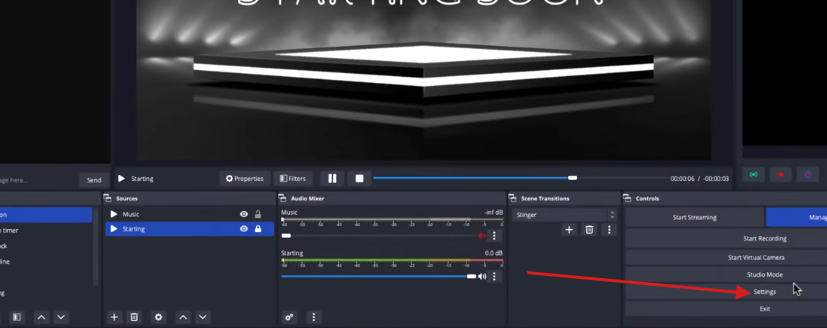
9. Hit Start Streaming
Now you simply hit the “Start Streaming” button, and your live stream will start.

To verify if your stream is live, go to your YouTube channel and check for the red colored “Live” tag on your video preview.

Conclusion
That’s how you can stream on YouTube with OBS Studio. During the setup of the stream settings, it is necessary to change keyframe intervals, resolution, and bitrate depending on your internet speed. Furthermore, incorrect settings can cause lag and impact viewer engagement. Lastly, it is suggested that you test your stream privately before going live to catch any technical issues, and keep an eye on stream health in YouTube’s control panel to ensure a stable broadcast.
FAQs
1. How do I reduce stream delay in OBS when streaming to YouTube?
Set latency to “Low” or “Ultra Low” in OBS broadcast settings and YouTube. Lower latency improves real-time interaction but may reduce stream quality or add buffering.
2. Why is my OBS stream lagging even with a strong internet connection?
Lag may result from CPU overload, a wrong encoder, or high resolution. Lower the output resolution, switch encoders, or adjust the bitrate, and check performance in OBS stats.
3. Can I stream to multiple YouTube channels with OBS?
Not simultaneously using the built-in YouTube integration. You’ll need third-party services like Restream or multiple OBS profiles with manual stream key switching for each channel.
4. How do I enable YouTube Live Chat in OBS?
After connecting your YouTube account in OBS, add the Live Chat Dock via the View > Docks menu to monitor and interact with your chat directly inside OBS.