


.png)
The Rode NT1 could be the best condenser microphone for podcasts, gaming, and acoustic nights to date. With its wide frequency response, I’ve never sounded clearer and brighter.
Verdict ⭐⭐⭐⭐⭐
Pros
- Captures natural and warm vocals
- Superb sound quality
- Very well made with authentic studio design
- Comes at a good value
Cons
- May come with a flimsy nylon pop filter
Being a content creator, it has always been my dream to make my home studio. Of course, it starts with a good capacitor microphone. With a tight budget and high demands, I fortunately came across the Rode NT1.
The Rode NT1 isn’t just a vocal mic but also works as an instrument mic. It’s built with high-grade electronics to provide a low-level noise that’s as good as higher-end microphones. Keep reading if you want to learn more about its performance.
Specifications
- Acoustic Principle: Pressure Gradient
- Polar Pattern: Cardioid
- Frequency Range: 20 Hz to 20kHz
- Output Impedance: 100 ohms
- Maximum SPL: 132dB SPL
- Output Connection: XLR
- Equivalent Noise Level: 4.5 dBA
- Sensitivity: -29.0dB re1 Volt/Pascal
- Weight: 440 grams
- Dimensions (H x W x D): 187mm x 50mm x 50mm
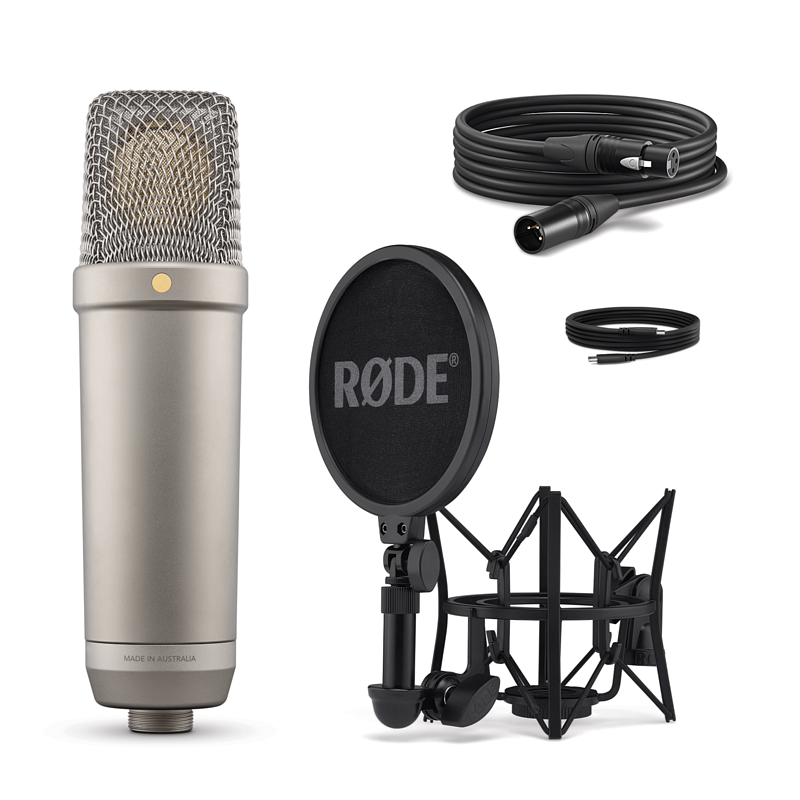
- Included Accessories: SM6 Shock Mount, pop filter, dust cover
Price And Availability
The Rode NT1-Kit costs about $219. It includes essential accessories such as a dust cover for protection and a shock mount to adjust the mic’s angle easily. Fortunately, there’s a pop filter on the mount to help reduce wind interference and prevent my saliva from spraying into the mic.
The latest Rode NT1 5th Gen model costs around $249. It also includes the same components such as a dust cover, shock mount, and pop filter. Unlike its 4th Gen predecessor, the 5th Gen includes a USB cable to allow you to connect the mic directly to the computer.
NT1 is easy to find. You can purchase the mic at Amazon, the brand’s website, and other electronic online stores.
Unboxing And First Impressions
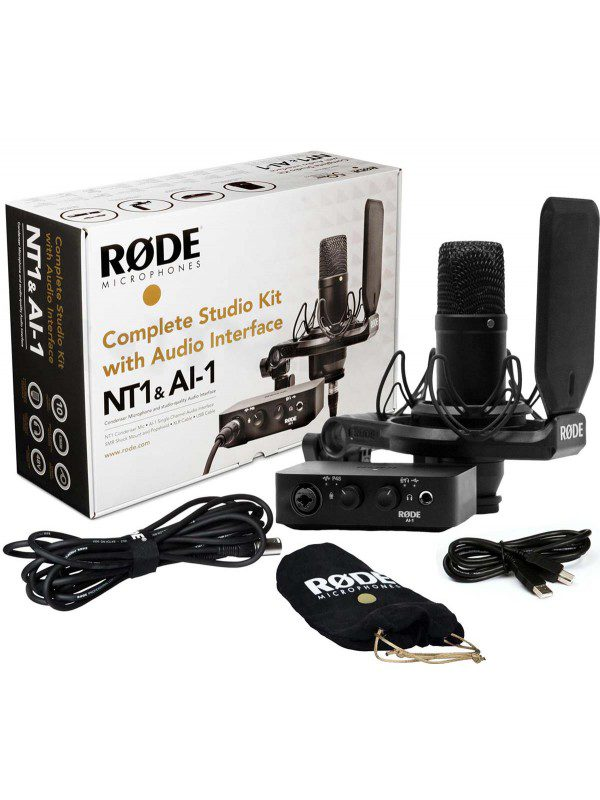
My NT1 arrived in good condition, thanks to the sealed box packaging. I like that the components are stored in different boxes. It looks organized and helps prevent the accessories from damaging the mic.
The mic has a nice hefty feel while the shock mount looks sturdy with its metal construction. As much as I love the pop filter with the RODE logo, I think the sheer material won’t last long.
The 6-meter cable is nicely tucked inside a long box. It has three openings on one end and three prongs on the other for connection. Other accessories I found include a helpful quick-start guide, XLR blue rings, and stickers.
Build Quality And Design
The most appealing factor about Rode NT1 is its well-made design. The mic seems tough, thanks to its high-grade aluminum body with nickel coating. Even when I accidentally bump the mic with a sharp object, it won’t make any scratches because it’s coated with military-grade ceramic.
I particularly love the mic’s appearance which looks similar to the classic Neumann U87 that I always see in old recording studios. Instead of a metal finish, NT1 features a creamy gray enamel which gives a vintage look. Another design that I appreciate is the small gold inlay of the mesh basket because it helps me locate where to point my sound source.
As for the accessories, the shock mount seems helpful in canceling vibration with its double-Lyre suspension. The nylon pop filter offers adequate protection but it’s a bit flimsy. It shouldn’t be a dealbreaker because changing the pop filter is affordable.
Setup And Use
The setup of the Rode NT1 is quite easy. First, prepare your NT1 mic, the pop filter, and the shock mount. Here are the steps in setting up the mic with the mount and pop filter into your computer.
- Attach the pop filter to the L-bracket of the shock mount. Turn clockwise until firmly secured.
- Adjust the position of the pop filter to your preference using the telescopic arm. Tighten the knob underneath the pop filter to prevent it from flapping.
- Place the mic inside the shock mount. Turn the mic clockwise until it’s tightened at the base. Make sure that the gold dot is facing the filter.
- Once mounted, plug the female end or the side with the three holes of the XLR cable under the mic.
- Connect the other end with the three prongs to your audio interface. Before you do that, make sure to turn the volume down.
- To connect the mic to your computer, connect the audio interface’s USB cable to your computer’s USB port.
- Now, set the audio interface to 24V or 48V phantom power to start using the mic.
For Rode NT1 5th Gen, the setup is easier. You don’t need to use a mixer or audio interface because it directly connects to your computer via a USB-C cable.
To start recording, here are the steps.
- Select Rode NT1 as an audio input in the device settings in your computer and audio software.
- Start recording. Make sure that your voice or sound source is facing the pop filter.
- To listen to your recording, use a pair of headphones. Select headphones as your audio output and start monitoring your recording.
Performance And Audio Quality
When I put the Rode NT1 to the test, I was impressed with the fact that there was very low noise. The new HF6 capsule is effective in reducing external vibrations and enhancing the detail of my voice. My voice sounds crisp, warm, and velvety smooth during my podcasts.
In terms of technicality and frequency response, the NT1 uses an ultra-neutral frequency canvas to sound almost similar to the U871ai.
True enough, the NT1 isn’t just a vocal mic but it also works as an instrument mic. I tried to play my acoustic guitar and the recording produced excellent results. Take note that the mic has no pad, so using loud instruments like drums might be too loud when you put the sound source close to the mic.
Battery Life And Charging
Rode NT1 uses no batteries to work. Instead, the active circuitry of the mic uses 24-volt or 48 volts phantom power to work. You can set up your audio interface to supply the said power when you use the XLR setup.
If you use the NT1 5th generation, the connection is via USB-C. As long as your computer or laptop is on, your mic will be working.
Alternatives To Consider
If you like to try other options aside from Rode NT1, here are some good alternatives you can consider.
- Lark Max: If you want the convenience of a wireless microphone, Lark Max might be a good alternative. This unit features an innovative MaxTimbre Mic technology to deliver a crisp sound similar to NT1. With an 8-gb memory, you can enjoy 14 hours of podcasting and other recordings.
- LARK M2: If you want something smaller than Rode NT1, Lark M2 might be a better alternative. This button-size mic can be fastened to your shirt while recording your vlogs and podcasts.
- Shure SM7B: Another vocal mic that you can consider is the Shure SM7B. This professional mic features an air suspension shock isolation setup to reduce breathiness when recording podcasts and other voice-related recordings.
FAQs
- Is Rode NT1 worth it?
Rode NT1 uses the same 1-inch gold diaphragm construction as the brand’s switchable pattern mics. At a lower price, you’ll have the same output quality with very low noise. The sound quality is even close to more expensive brands like Neumann U87, so NT1 is worth it.


- Is Rode NT1 good for singing?
Yes. This condenser microphone enhances the quality of your voice with a bright top-end, warm bass, and detailed mid-range. Coupled with an acoustic guitar, your voice recording will sound professional.
- Which one is better: NT1 or NT1-A?
It depends on your preference since both Rode mic models are versatile and can record with low self-noise. If you want a warmer tone, go for NT1. If you want your recording to sound more bright, try the NT1-A.
Conclusion
Rode NT1 is truly a versatile mic when it comes to vocals and instruments. This wired mic is suitable for podcasts, gaming, and even singing with guitars. You can expect fantastic audio output with very low noise, detailed mid-range, and warm bass.
If you like to try wireless microphones, you can try Hollyland’s Lark Max and Lark M2.
