


.png)
MuseScore is one of the most powerful and crucial tools available today for musicians, composers, and arrangers looking to notate music digitally. And the best part? It is free. MuseScore lets you showcase your musical creativity in multiple ways — you can create, edit, play, share, and print sheet music conveniently. Moreover, one of the fundamental skills that can streamline your workflow is knowing how to select multiple measures.
This article will enlighten you on how to select multiple measures, helping you adjust time signatures, add repeats, and even change properties within measures. But beyond that, it provides practical images that guide you, ensuring you do not make mistakes throughout the process. Moving on, here are the steps to follow:
Step 1: Ensure Note Input is Turned Off
Before you can select one or more measures in MuseScore, you need to be in the selector mode. As the name implies, selector mode allows you to select, move, edit, or delete measures and other elements. To get into selector mode, you need to turn off the note input mode.
By default, the note input mode is turned off when you launch the app. However, you need to confirm if it is turned off; this allows you to select single notes or multiple measures at once. But note that once this function is turned off, you won’t be able to input new notes.
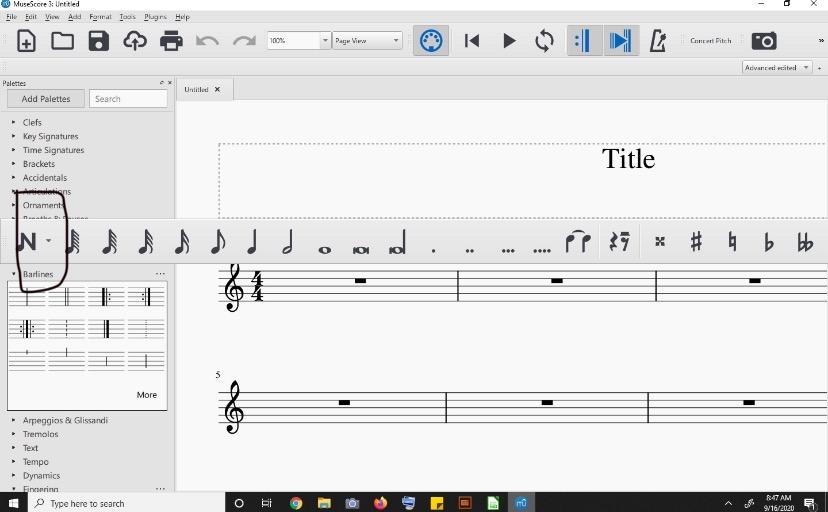
Click on the N-shaped icon highlighted in the image above to turn on or off the note input mode. Alternatively, you can press the letter “N” on your keyboard to do it.
Step 2: Adjust Page View Percentage
You also need to ensure the size of the page view is accurate to avoid making mistakes. This is because selecting measures is a delicate process that requires precision. Hence, you need to adjust the size of the page, either by increasing or decreasing the page view percentage to fit your preference.
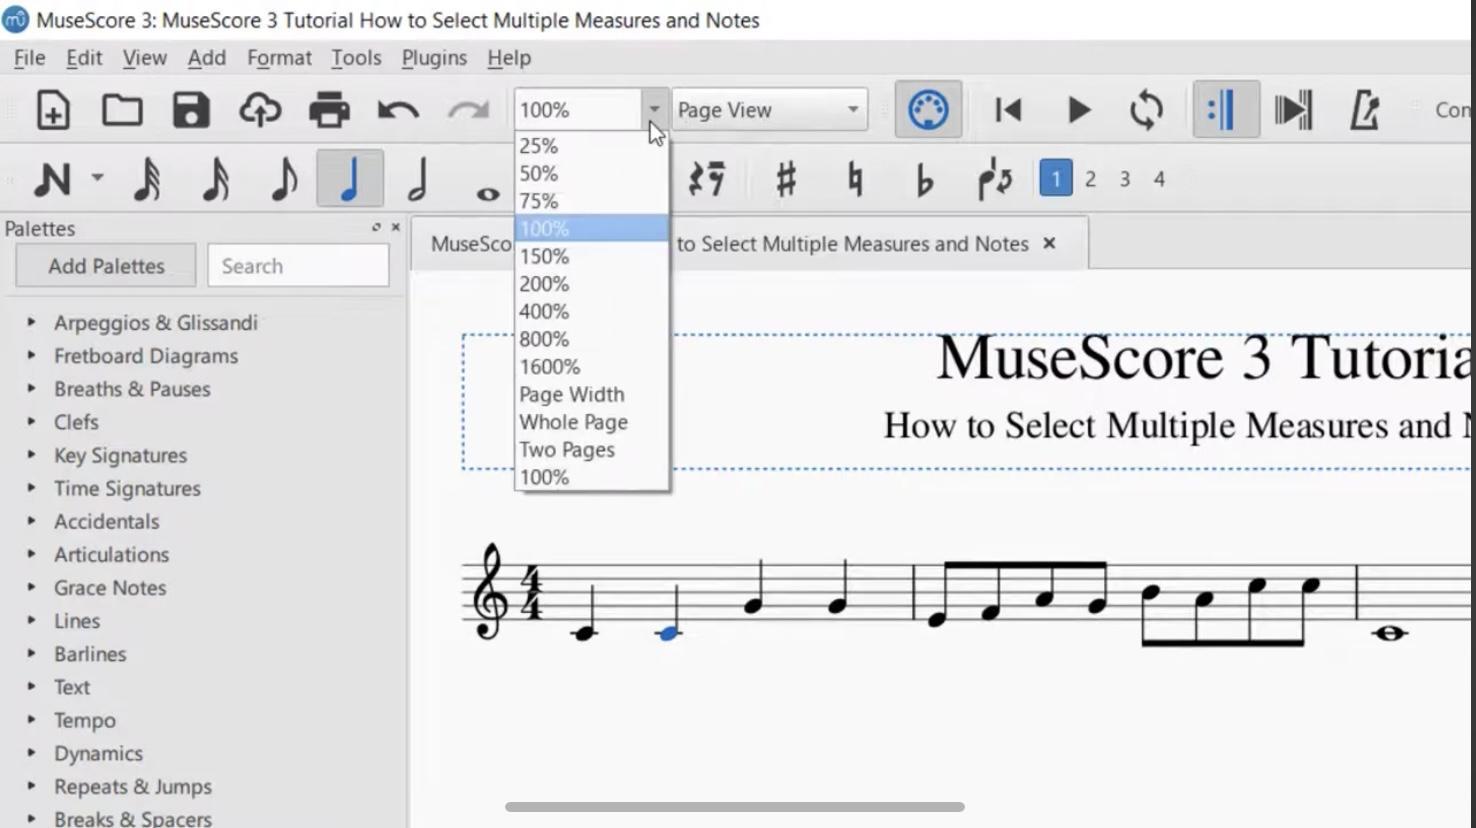
You can also adjust the page size by holding the Ctrl key and scrolling with your mouse ball. This way, you can manually adjust the size of the page.
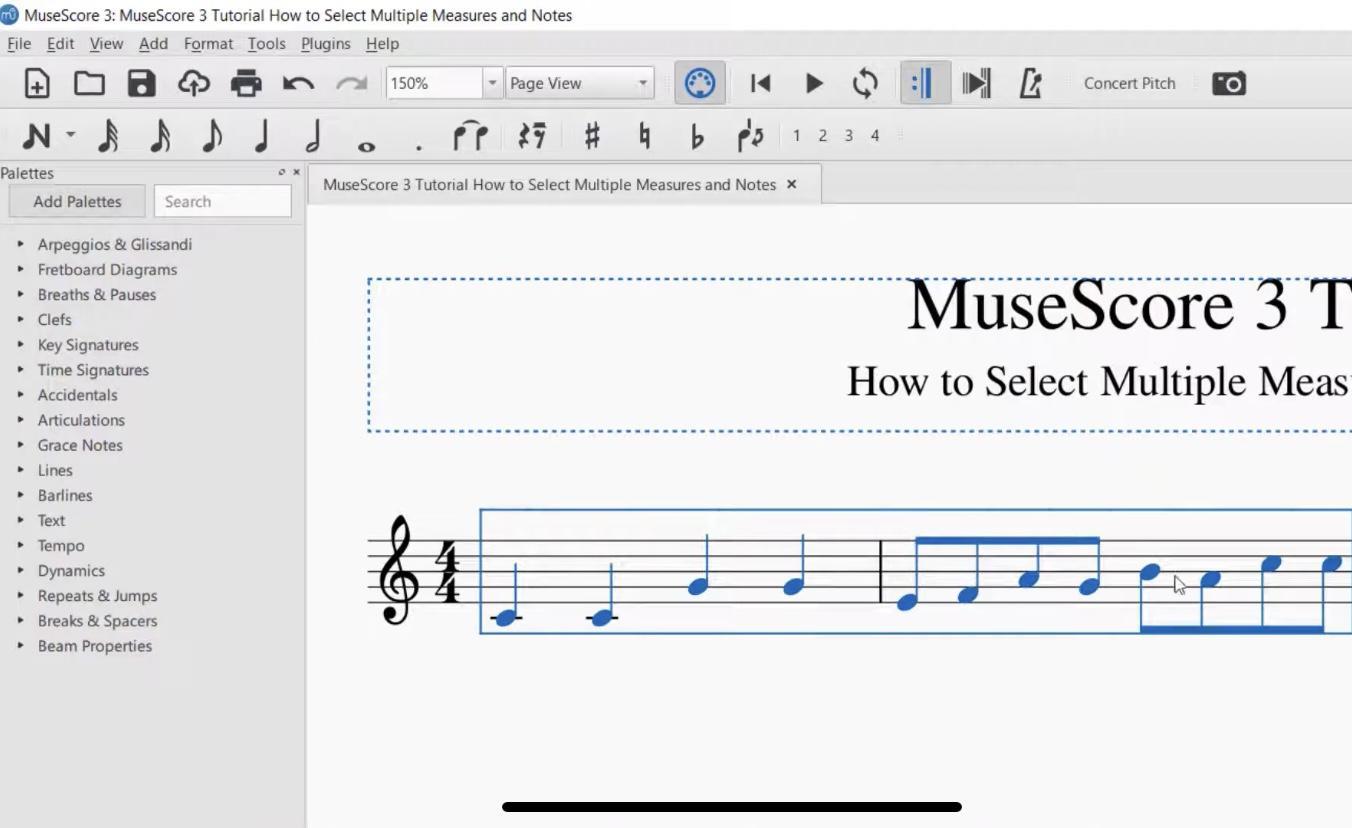
Step 3: Select a Measure
Once you are in selector mode and the page view has been adjusted to suit your preference, click anywhere within the measure you want to select — preferably in the middle, away from notes, lines, or any other elements, to select it. Immediately after you select the measure, a blue box appears around it.

The blue box simply shows that your preferred measure has been selected. You can then proceed to select multiple measures.
Step 4: Select Multiple Measures
This step is quite similar to the preceding step. You have to click and hold the Shift key on your keyboard and click the following measures you want to select. For instance, if you want to select two measures; after selecting the first one, hold the Shift key and select forward or backward, depending on where the measure is located. Another blue box will appear around the second measure, indicating it has been selected.

Step 5: Selecting All the Measures
You can also choose to select all the measures at once — that is, the entire score. However, the mode of selection depends on the type of PC you are using. On a Windows laptop, you need to press the Ctrl key and the letter A on your keyboard to select all the measures. Meanwhile, if you use a Macbook, simply click the Command key or Cmd while holding the letter A on your keyboard.
Why Do You Need To Select Measures?
By selecting one or more measures in MuseScore, you can easily edit everything inside them. It allows you to copy, delete, or move notes around to improve the sound quality. Also, selecting the right measures in MuseScore makes it easier for you to determine and correct errors within the score when you use your palettes.
That’s not all. Selecting measures allows you to apply time signatures to specific measures. This helps you to establish a rhythmic structure and define the number of beats.
Conclusion
Selecting multiple measures using the MuseScore tool might sound simple. Yet, it’s central to a wide range of tasks you will be executing. For instance, you can use it in duplicating sections, transposing passages, formatting a page, or applying expressive markings across parts of your composition. In fact, this skill becomes increasingly valuable the more complex your music becomes.
This article has given a step-by-step guide on how you can select multiple measures in MuseScore. Follow the instructions, and you might be on your way to unlocking new musical techniques.
Frequently Asked Questions
Does the note input mode need to be turned off?
Yes, it does. Turning off the note input mode automatically takes you to selector mode, where you can edit notes and measures. To turn off the note input mode in MuseScore, click on the “N” shaped icon in the toolbar or simply press the letter “N” on your keyboard.
Can I edit notes and rests after selecting measures in MuseScore?
Yes, absolutely. Once you have selected a measure, you can easily edit the notes, rests, or any other element within the measure. This makes it easier for you to improve and refine your sound.
Can I deselect measures in MuseScore?
Yes, you can. By holding the Shift key and clicking backward, the blue box around the selected measure disappears. To exit all the selected measures, simply click outside the note.
How do I select Notes?
To select notes, simply click on the note you want to select, and it will turn blue automatically. For more notes, select the first one, hold the Shift key, and then press the right or left arrow key.
