


.png)
Want to share your screen, host a study session, or stream a game to friends in real time? Discord makes it easy. Originally built for gamers, Discord has grown into a platform for communities, study groups, and remote teams. Over 259 million people use it each month (as of 2024) to chat, collaborate, and stream live.
With powerful Go Live and screen share features, you can present projects, run meetings, or simply enjoy games together, without any complicated setup. This guide will walk you through how to stream on Discord step by step, from preparing your setup to going live smoothly on both desktop and mobile.
How to Go Live on Discord from Your Laptop (Step-by-Step)
Before you hit “Go Live” on Discord, it’s worth taking a few minutes to prep your setup. A couple of simple checks can save you from lag, choppy visuals, or audio dropouts during your stream.
Here’s a quick checklist to make sure you’re ready:
- Keep your Discord app up to date to avoid glitches and missing features.
- Use a fast and stable internet connection with a minimum upload speed of 5 Mbps for smooth video streaming.
- If you’re streaming games, close unnecessary apps so your system can focus on performance.
- Pick a quiet and well-lit spot so viewers can see and hear you clearly.
- If you want to stream with your webcam and include audio, you must have Windows 10 or later, or macOS 10.13 or later.
- Use external gear, such as a quality microphone, camera, or headset, for improved streaming quality.
Steps to Stream with Video on Discord (Laptop/Desktop)
Streaming with your webcam is a great way to add a personal touch and connect face-to-face with your audience. Here’s how to start streaming with your video on a desktop or laptop:
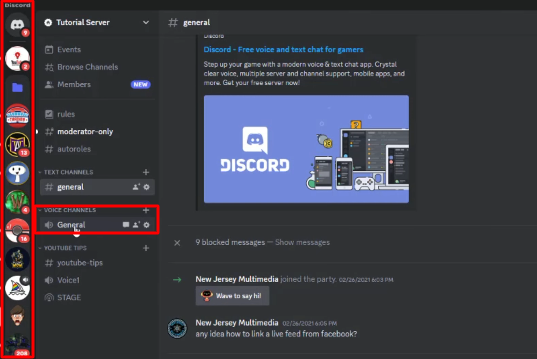
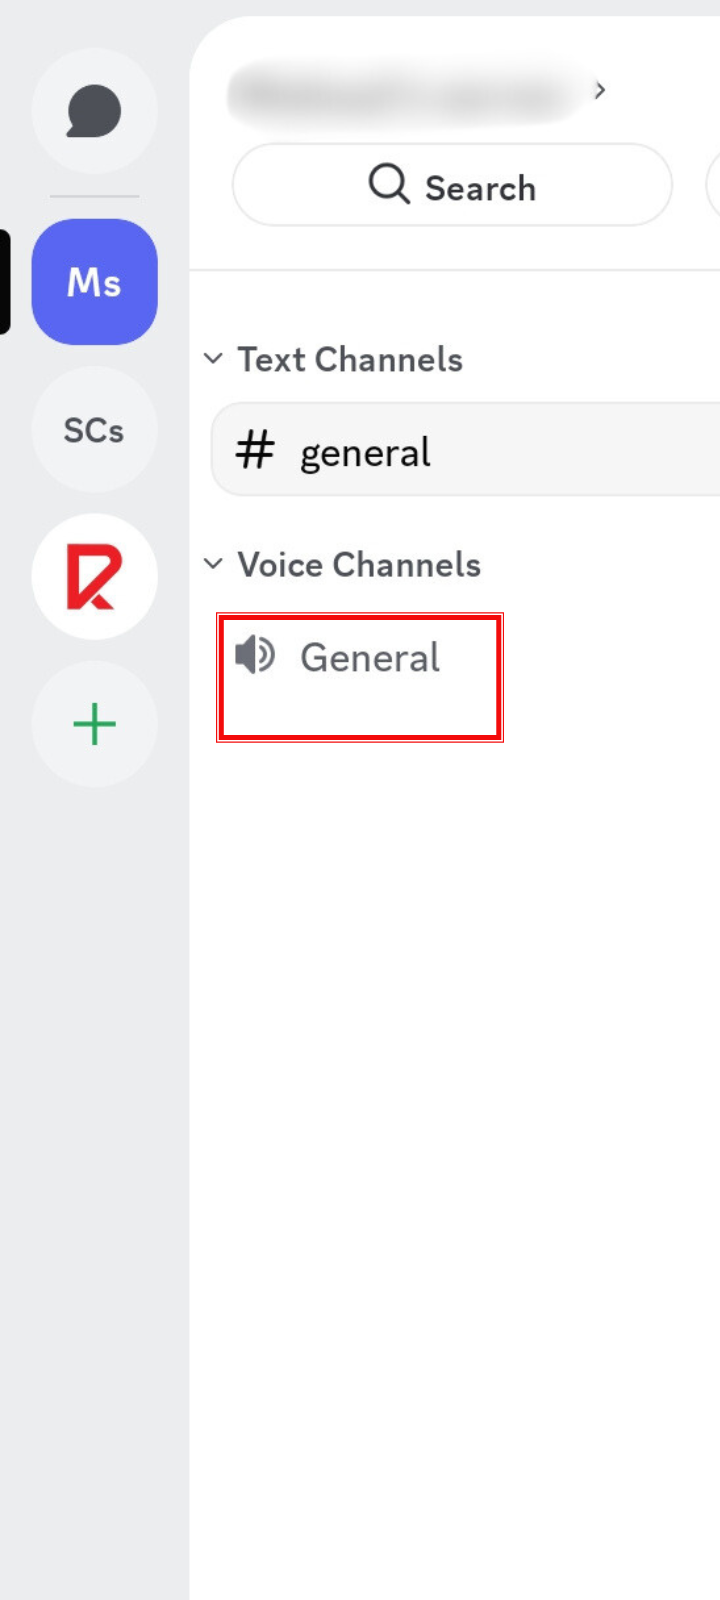
- Open the Discord app and select your server from the left sidebar.
- Click on the voice channel where you want to start streaming.
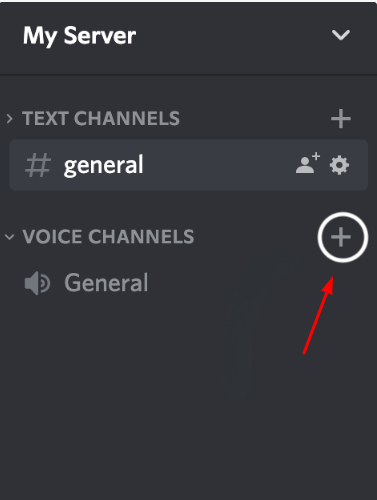
If you don’t have a voice channel or want to make a new one:
- Click the “+” sign next to Voice Channel.
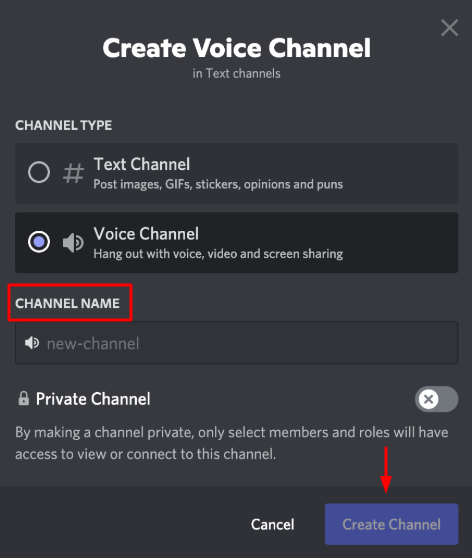
- Type the channel name and select the channel type (public or private).
- Click Create Channel to finish.
- In the call controls bar at the bottom-left of the Discord window, click the Video icon to start streaming your webcam to everyone in the voice channel. For clearer 4K 30 fps video and stable 24/7 streaming, you can also use an external camera such as the Hollyland VenusLiv Air.

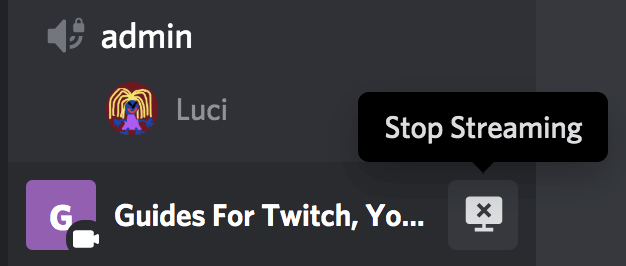
- When you’re done, click Stop Streaming at the bottom-left corner of the screen.
Steps to Stream with Screen Share on Discord
Screen sharing on Discord allows you to broadcast your desktop or a specific app window to others in a voice channel, making it perfect for gaming, presentations, tutorials, or watching videos together.
It works similarly to turning on your webcam, but instead of capturing your face, Discord captures your screen. Here’s how:
- At the bottom of the Discord window, there will be a screen icon on the bar next to the video button. Click on it for screen sharing.
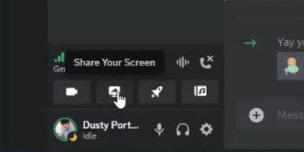
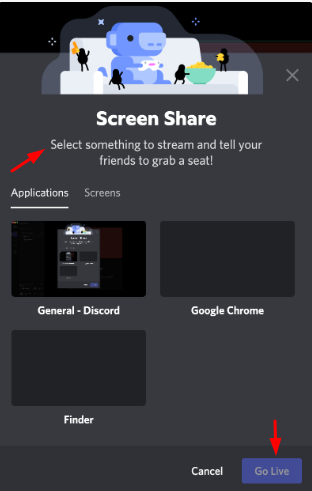
- A pop-up window will appear. You can now:
- Choose a specific application window (like a game, browser, or PowerPoint)
- Or share your entire screen
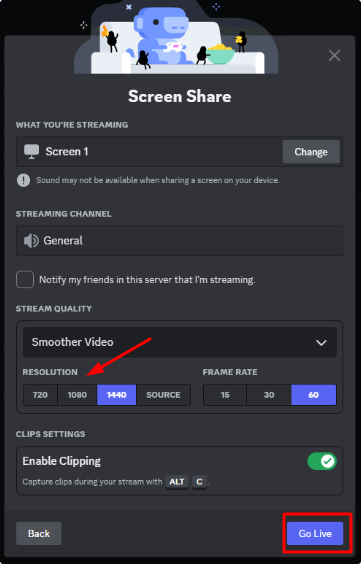
- After selecting what you want to share, you’ll see options to configure:
- Resolution (480p, 720p, 1080p, or Source)
- Frame rate (15, 30, 60 fps, higher for smoother video)
- Click Go Live to begin streaming your screen to everyone in the voice channel.
How to Stream on Discord from Your Mobile (Step-by-Step)
Discord’s mobile app is good for streaming games, sharing your screen, or going live with your camera anytime, anywhere. Follow these quick steps to start streaming on the go.
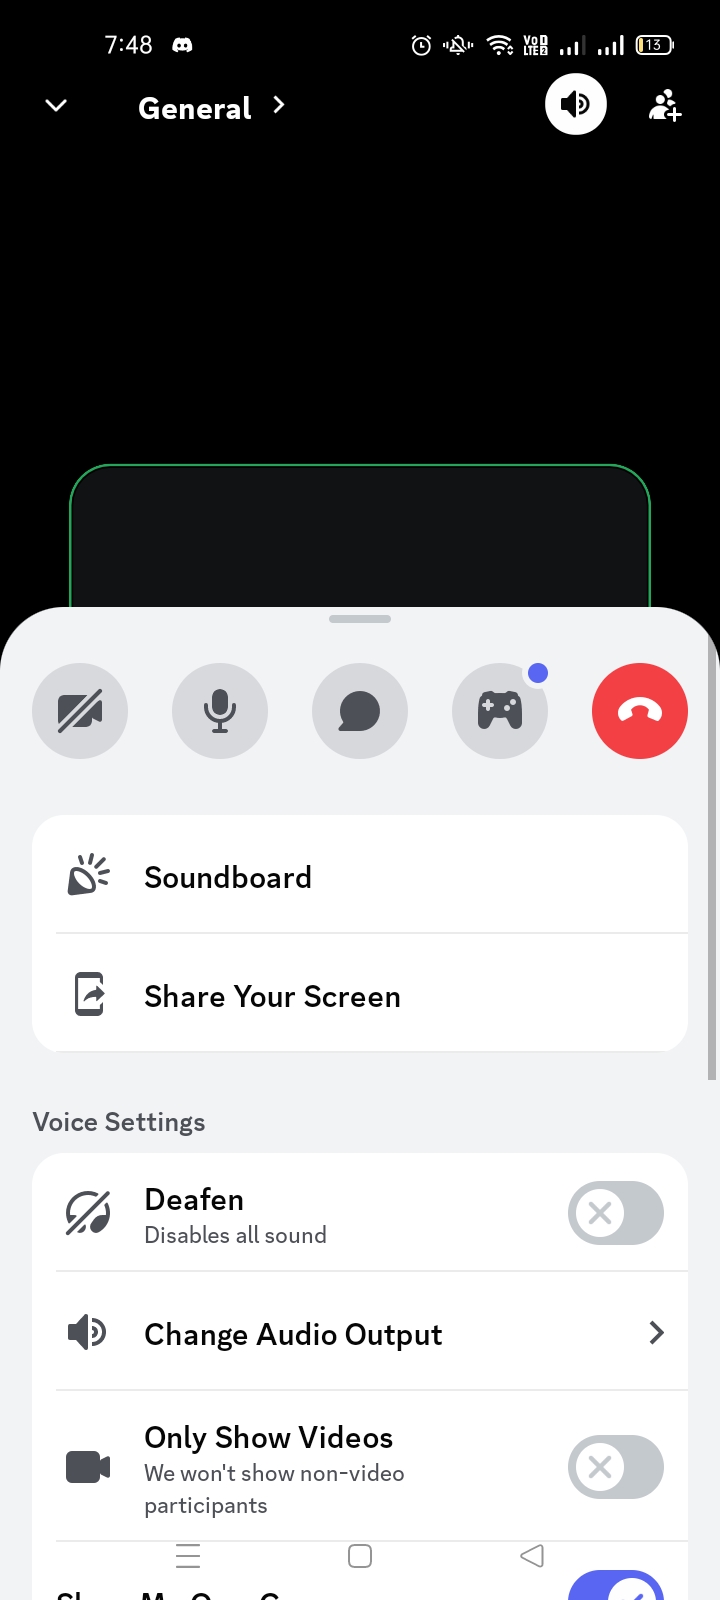
- Open the Discord app on your smartphone, select the server from the left sidebar, and tap on the voice channel where you want to stream.
- At the bottom of the screen, a control panel will appear. Tap Join Voice to enter the channel.

- It will show you the options for streaming, like video, screen sharing, or sharing only audio.
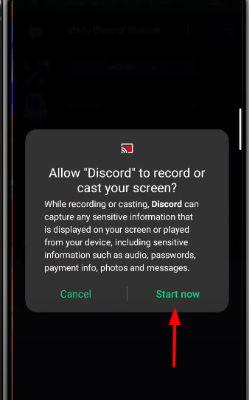
- After selecting, Discord will ask for permission. Tap Start Now, and you’re streaming.
Conclusion
Going live on Discord is simple once you learn the steps. Set up your server, pick the right channel, and share your video or screen. With practice, you’ll stream smoothly and keep your audience engaged. Open Discord, hit Go Live, and start connecting with your community today.
FAQs
Why can’t I share my screen on Discord?
If you don’t see the screen share option, it’s usually because you lack the required video permission in that server. Ask the server admin to update your role permissions. Once granted, you’ll be able to use the screen share feature without any issues.
Is Discord 100% free?
Yes, Discord is free and includes voice, video, and text chat. You can host video calls with up to 25 people without paying. If you want extras like bigger file uploads, custom emojis, and HD video streaming, you can upgrade to Nitro Basic ($2.99/month) or Nitro ($9.99/month).
How do I watch a Discord stream?
To watch, join the voice channel where someone is streaming. Look for the “Live” badge next to their name. Click their username or the “Watch Stream” button, and the stream will open in a new window.
Will people know that I’m streaming on Discord?
Yes, anyone in the same voice channel will see a “Live” badge next to your name when you start streaming. This helps other members know you’re sharing your video or screen, and they can click your name to join and watch your stream.
How many people can join my live stream on Discord?
Up to 50 people can watch your live stream at the same time. This limit applies to Go Live streams in voice channels. It makes the feature ideal for gaming with friends, small events, or team sessions without needing a large professional streaming setup.


