.png)
One of the biggest charms of sticking to the Apple ecosystem is how seamlessly everything just clicks together. But that pleasant harmony can hit a snag when fickle Bluetooth gets involved. Even the “meant to be together” pairs—like your AirPods Pro and MacBook—sometimes require a little encouragement to find each other.
So if your AirPods Pro aren’t pairing as smoothly as you’d prefer, or you’re trying to pair them for the first time, don’t worry. This guide will walk you through all the methods to get them talking, whether new or old.
macOS Required for AirPods Pro and More
Since Apple frequently updates the hardware and software, not all AirPods are compatible with every version of macOS, especially the feature-rich ones with spatial audio or head tracking.
In terms of Airpods Pro:
- The 1st generation (2019) work with macOS Catalina (10.15.1) or later.
- The 2nd generation (2022) work with macOS Ventura (13.0) or later.
Here’s more detailed compatibility info on different types of AirPods:
| AirPods Model | Release Year | Minimum macOS Required | Key Features Supported |
| AirPods (1st generation) | 2017 | macOS Sierra (10.12) | Original AirPods |
| AirPods (2nd generation) | 2019 | macOS Mojave (10.14.4) | Wireless Charging Case version |
| AirPods (3rd generation) | 2021 | macOS Monterey | Spatial Audio, Adaptive EQ |
| AirPods Pro (1st generation) | 2019 | macOS Catalina (10.15.1) | Noise cancellation, Transparency mode |
| AirPods Pro (2nd generation – Lightning) | 2022 | macOS Ventura | Personalized Spatial Audio, Dynamic head tracking |
| AirPods Pro (2nd generation – USB-C) | 2022 | macOS Ventura | Same features as the Lightning version + dust resistance |
| AirPods Max | 2020 | macOS Big Sur (11.1) | Over-ear headphones |
| AirPods 4 | 2024 | macOS Sequoia 15.0 | Open-ear design |
4 Methods to Connect AirPods Pro to MacBook?
There are a couple of ways you can connect your AirPods to your MacBook, depending on how you’ve used them before and your current setup. Below, we’ll cover the easiest way—automatic pairing via iCloud—and what to do if it doesn’t work.
Method 1: Automatic Connection via iCloud
If you’ve ever paired your AirPods with another Apple device (iPhone/iPad) that shares the same Apple ID as your MacBook, they should automatically register this new device as one on the same network, and connect thanks to iCloud and Apple’s Continuity features.
To make sure this works:
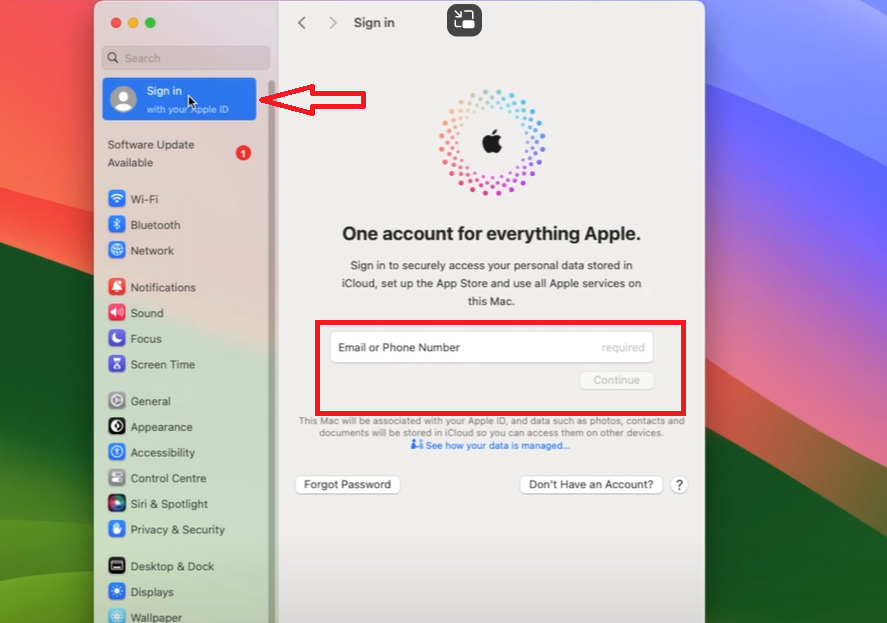
Step 1: Use the same iCloud ID on MacBook: On your Mac Click on setting menu in the top left corner and select System Settings. Then go to Apple ID menu and log in using the same Apple ID as the previous device your Airpods were paired with.

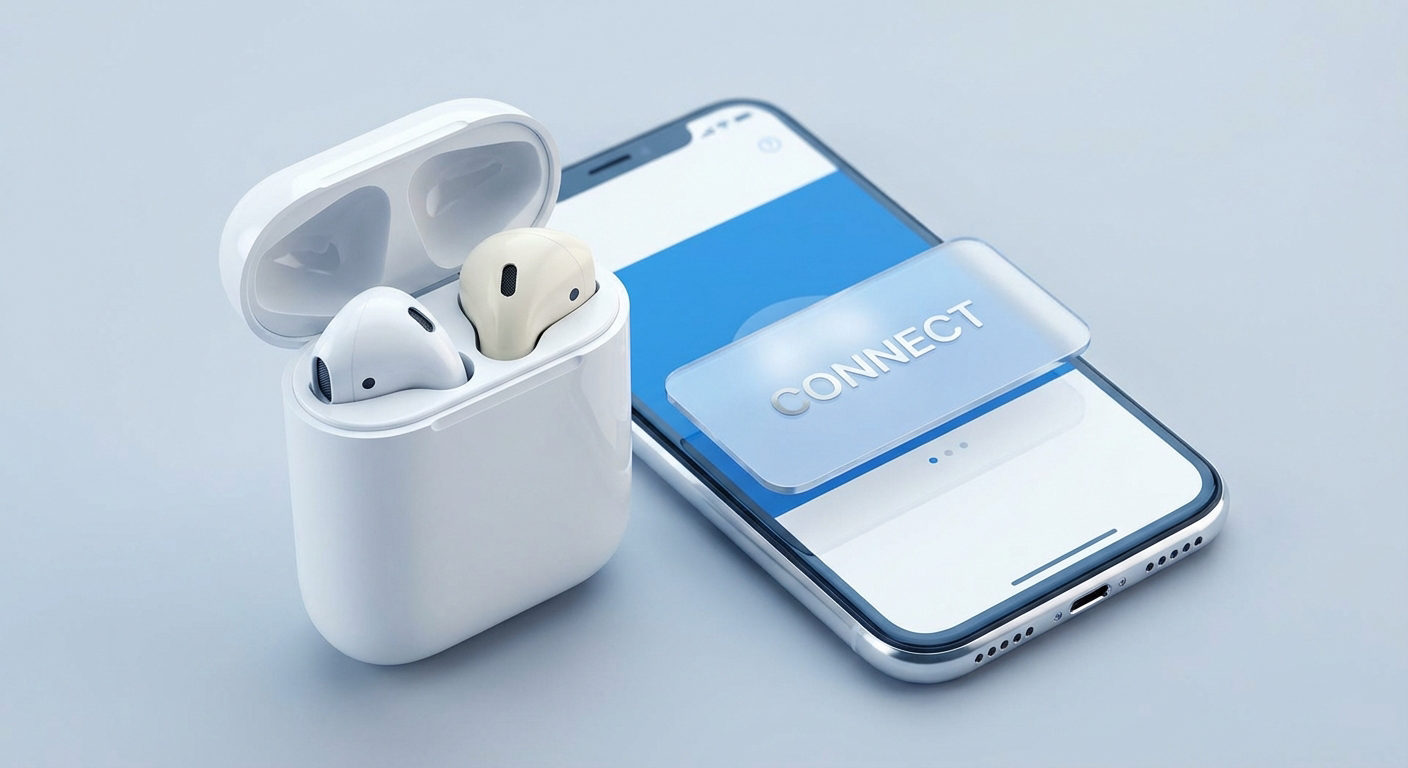
Step 2: Open the AirPods case near your Mac: Make sure the Bluetooth is activated on the Mac so it can locate other devices and be discovered. To activate AirPods, open the case close to your MacBook, with Airpods still inside.
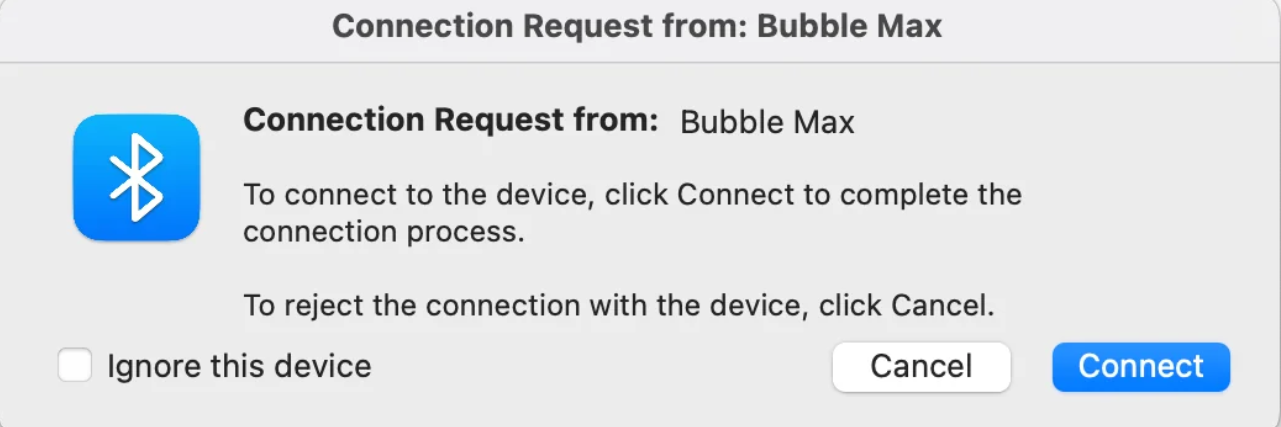
Step 3: Wait for the pop-up prompt: Your Mac will soom identify the AirPods and pop up a message to ask you if you wish to pair.
Step 4: Tap “Connect”: Once connected, you can view your AirPods Pros listed in the Bluetooth menu.
Step 5: Select preferred device: If you have multiple sound sources connected with Mac, like a speaker, a wired headset, and Airpods, switch between them through the volume icon in the menu bar. Select your AirPods Pro from the list for audio output.
Note: Automatic connection often not work when another Apple device using the same Apple ID, such as your iPhone, is present nearby and has Bluetooth activated. Your AirPods might auto-connect to that device first. And if you had previously removed these AirPods from your known devices list, you will have to reconnect them manually, addressed in the following method.
Method 2: Manual Connection via Bluetooth Settings
Manual pairing is the best when your AirPods refuse to appear automatically or if you’re borrowing someone else’s AirPods for a while. It also comes in handy for users who don’t use iCloud syncing between devices or have an older MacBook that lacks automatic pairing support.
This method doesn’t care whose Apple ID the AirPods are paired with.
Step 1: Open Bluetooth Settings:
- On macOS Ventura or later:
Go to Apple Menu > System Settings > Bluetooth. - On older versions of macOS:
Open System Preferences > Bluetooth.
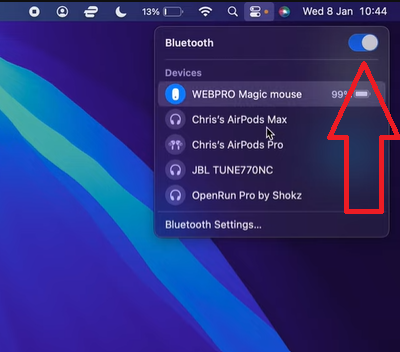
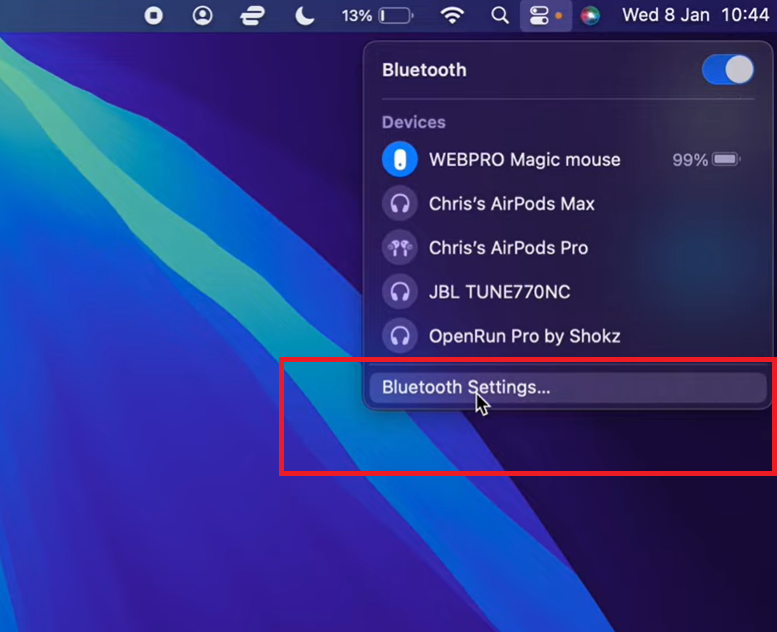
Or simply open Control Center (top-right corner of your Mac). Click the Bluetooth icon > Bluetooth settings > Check if AirPods are listed there. If visible, select them and choose Connect.
Step 2: Put AirPods in Pairing Mode: While both AirPod Pros are in the case, open the cover and press and hold down on the setup button at the back of the case until the LED light begins flashing white. That means the AirPods are in pairing mode.
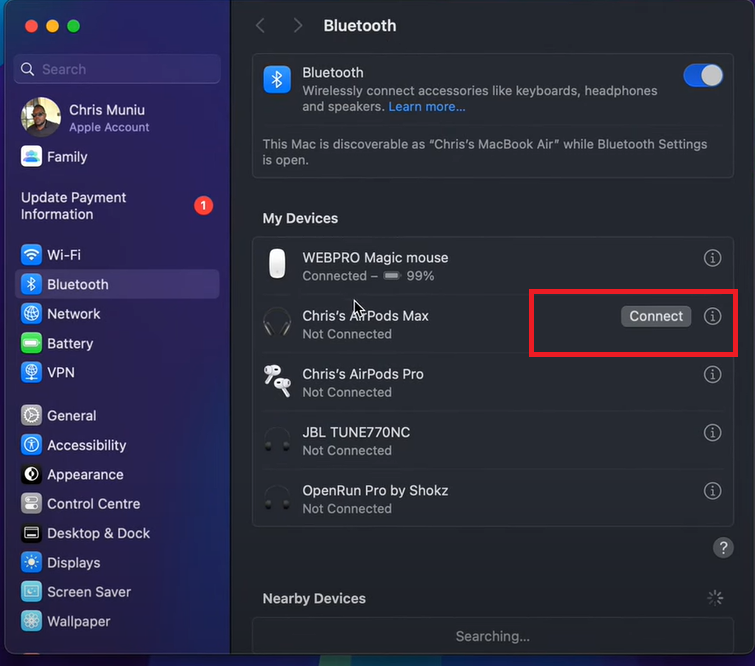
Step 3: Pair Mac with to Your AirPods: Your AirPods should show under Devices in the Bluetooth menu (e.g., “Chris’s AirPods Pro”). Select the deice and then Connect to the right of the device name.
If they still don’t appear, switch Bluetooth off and on, or restart your Mac and try the steps again.
Step 4: Verify Connection: Once the pairing has been done, the status to the right of your AirPods will indicate as “Connected.”
Method 3: Connecting as a New Device (Previously Used with Another Apple ID)
If you were using the AirPods Pro previously with another Apple device on a different Apple ID, they may not automatically connect to a new ID and may prompt you to enter the that user’s password. In this case, you’ve to manually reset the AirPods and then try pairing as a new device.
Step 1: Reset the AirPods: Place the AirPods in the case with the lid open. Press and hold the setup button on the back until the LED flashes amber, then white—Amber indicates factory resetting; white signals that the AirPods are once again in pairing mode.
Step 2: Open Bluetooth Settings on Your MacL: On macOS Ventura or later: Go to System Settings > Bluetooth. On earlier versions: Go to System Preferences > Bluetooth.
Step 3: Find AirPods Under “Nearby Devices”: Wait a few seconds for your AirPods to be listed. Click Connect when they appear.
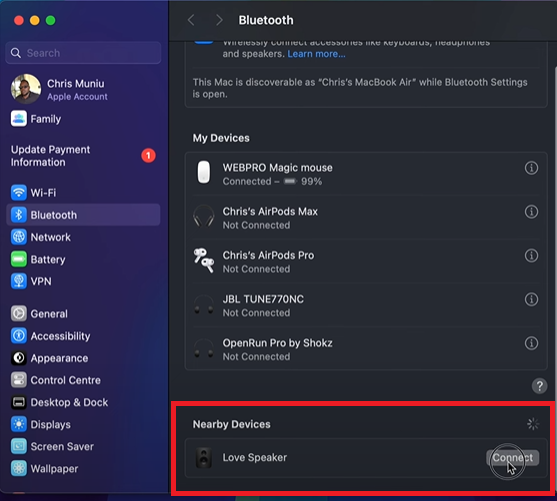
Step 4: Rename Your AirPods (Optional): Once paired, tap the (i) icon to the right of your AirPods in the Bluetooth list. From there, you can rename them for easy identification.
Tip: If Activation Lock remains turned on the AirPods, you may be asked to enter the original Apple ID password. This feature is more common with AirPods Max but occasionally with AirPods Pro too—if they were already paired to an iCloud account before a reset.
Method 4: Using Third-Party Tools
Native Apple methods (Methods 1-3) are sufficient for most users to connect AirPods with a MacBook. Howeve, if you desire more control over your Bluetooth connections, or if you’re working on an older MacBook that isn’t cooperating with AirPods, third-party tools can offer more flexibility, convenience, and even debugging features.
A few popular suggestions include:
- AirBuddy – Adds iOS-style popup animations & battery widgets
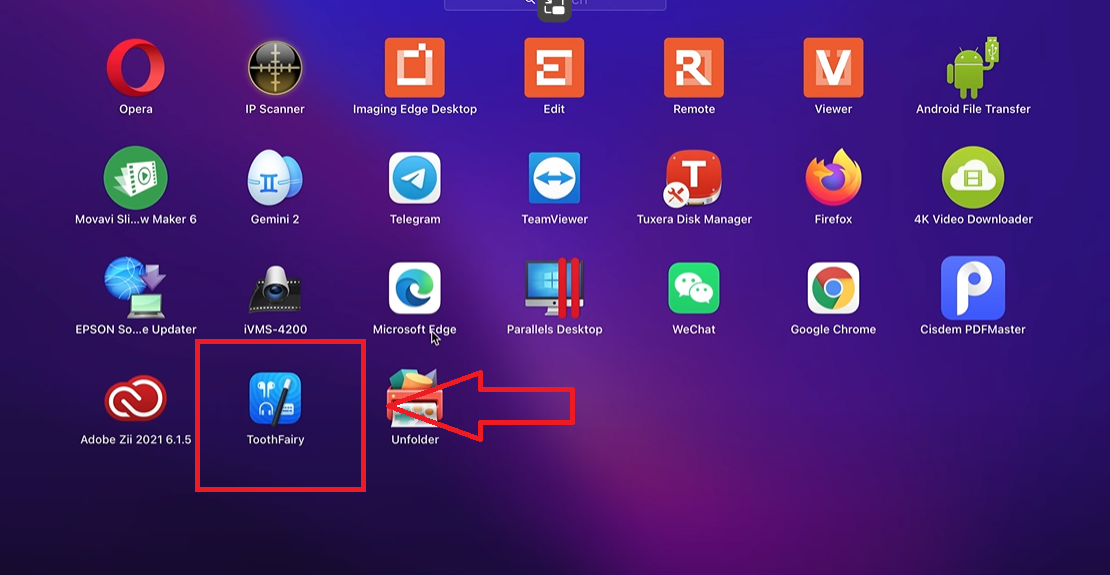
- ToothFairy – Lets you bind AirPods (or any Bluetooth device) to a function key or shortcut for one-click connections.
- Bluetooth Explorer (part of Apple’s developer tools) – Advanced debugging for Bluetooth issues
These tools can help reconnect dropped devices, display battery levels more reliably, or even allow switching between audio sources with a single click. Heres brief overview on how ToothFairy work:
Step 1: Install the App: Install ToothFairy from the Mac App Store or directly from the developer’s official website. Grant any permissions when prompted.
Step 2: Add Your AirPods: Launch the app and scan for available Bluetooth devices. Choose your AirPods when they show up on the list.
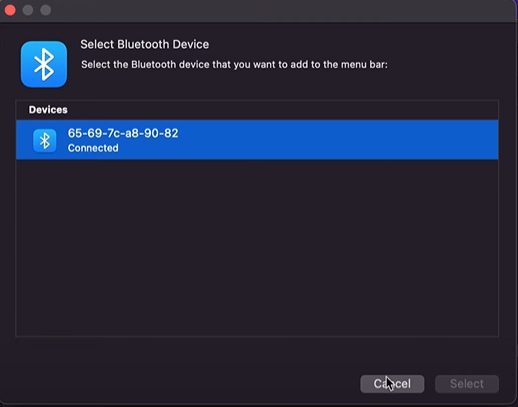
Step 3: Tailor Access: Assign a menu bar icon or set a keyboard shortcut. This allows you to connect or disconnect your AirPods with the push of one button or key combination—no need of Bluetooth settings.

Next time use this assigned icon or shortcut to quickly connect your AirPods any time you need them.

These tools are ideal for frequent users who switch between devices or need faster control. However, for deeper, hardware-level issues, third-party tools won’t replace proper troubleshooting or a system-level fix.
Troubleshooting Tips When Connecting AirPods and MacBook
Even when things are set up correctly, AirPods don’t always behave. Here are a few common problems—and how to fix them:
- AirPods Not Connecting or Showing Up
Restart your MacBook. Then attempt placing the AirPods in the case, close the lid, wait 15 seconds, and try again. - AirPods Connected But No Sound
Head to System Settings > Sound and ensure your AirPods as an output source are chosen. Manually change from Control Center if necessary. - Rename and Reset
Sometimes renaming your AirPods may solve glitches. Under Bluetooth Settings, tap the “i” next to your AirPods and change name. If the issues persist, reset them with the long press option on the case button. - Forget and Reconnect
If you’ve tried everything, go to Bluetooth settings, click the “i” next to the AirPods, select Forget This Device, then pair them again from scratch.
Conclusion
The quickest method to connect AirPods Pro and a MacBook is through mutual iCloud linking. But you must have the same Apple ID on both devices for it to work. If it doesn’t work or you prefer not to sync iCloud, manual Bluetooth pairing is just as reliable. You can even reset and pair them with any device when needed.
But if you’ve a large Apple collection and need more advanced control in the ecosystem, third-party software is great option for adding tremendous flexibility.
Frequently Asked Questions
1: Can I pair AirPods Pro to more than one Apple device simultaneously?
You can, but not actively. AirPods Pro can remember multiple Apple devices and switch between them. For example, you can quickly swicth to take a call on your iPhone while pausing watching a film on your MacBook. But all the devices have to be logged into the same iCloud account.
2: Why won’t my AirPods Pro connect to my MacBook?
It could be due to several reasons: May be you macOS is out of date and not compatable with the AirPods firnware, your Bluetooth may be disabled, or your AirPods may be still paired with some other device. If you’re trying to use a new Apple ID, you may also need to reset them.
3: How do I switch AirPods between my iPhone and MacBook?
You can easily switch Bluetooth connection by using the Bluetooth menu on either device or by choosing AirPods from the audio output options in the Control Center. Typically this type of switching is enabled by default but, you can also turn it off in Bluetooth settings.
4: Which macOS version do AirPods Pro support?
The 1st Generation AirPods Pro (2019) need macOS Catalina or later while 2nd Generation AirPods Pro (2022) need at least macOS Ventura becasue of updated features such as personalized spatial audio and dynamic head tracking.
5: How do I update AirPods Pro firmware?
You can’t manually update AirPods firmware. To make sure they update, put your AirPods in their case, charged, and close by an iPhone or iPad with running Wi-Fi. The firmware will automatically update in the background.