.png)
.png) Français
Français .png) Deutsch
Deutsch .png) Italiano
Italiano .png) 日本語
日本語 .png) Português
Português  Español
 Is your mic acting weird? Relax! Sometimes, all it needs is a quick driver update. New drivers often bring tiny performance boosts that help your computer talk better to your audio gear. That means less lag and smoother sound. But here’s the thing.
Not everyone knows where to click or what to download. This guide will help with that. You’ll learn how to update microphone drivers without any confusion. Mac users won’t be left out either. There’s a quick fix for them as well.
How to Update Microphone Drivers? [Windows 10/11 OS]
Method 1: Update Drivers Automatically from Device Manager
- Step 1: Turn on your PC and make sure the mic and internet are connected
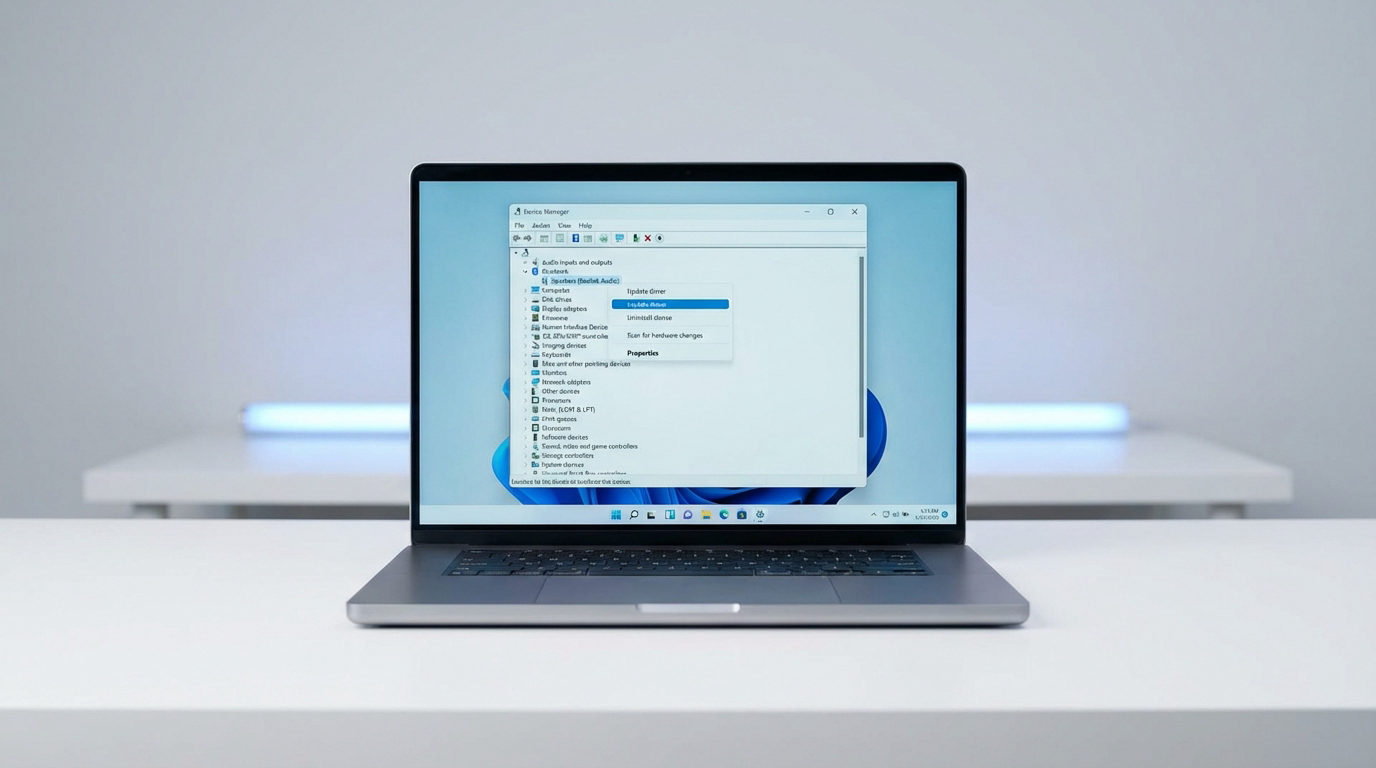
- Step 2: Open “Device Manager” by clicking on the “Start” menu button, searching for the device manager app. Double-click on the application to view the main contents


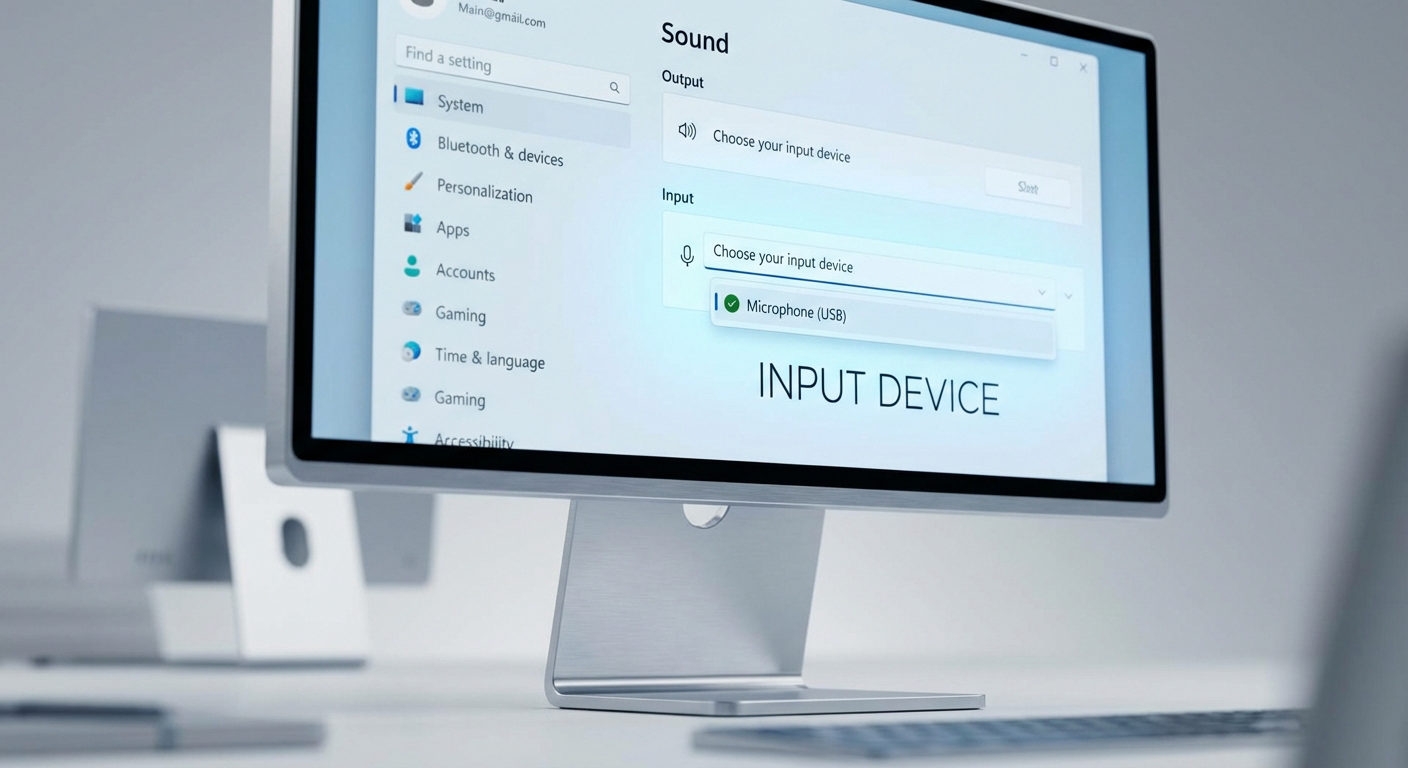
- Step 3: Double-click the “Audio inputs and outputs” option and then double-click your microphone name


- Step 4: When the microphone properties window pops up, click on the “Driver” tab at the top of the interface

- Step 5: Then, click on the “Update Driver” button

- Step 6: In the dialog box, click on the “Search automatically for drivers”

If there are any drivers available, Windows will automatically update them after selecting this option.
In case the drivers are already updated and installed, you will see the following message “The best drivers for your device are already installed”

You can leave updating your drivers at this stage. Or, alternatively, command the system to look for drivers in the Windows update by choosing the “Search for updated drivers on Windows Update” option

- Step 7: After completing the last step, return to the device manager, and look for the “Sound, video, and game controllers” option

Double-click on it to expand, and then double-click on your mic’s name

- Step 8: Click on the “Driver” tab and select the “Update Driver” button to update any available drivers for your microphone so it can also work smoothly during games or other activities

NOTE: If, after updating the driver, your microphone is having any issues, you can always revert to the previous driver version by choosing the “Roll Back Driver” option

Method 2: Download the Driver from Your Microphone’s Official Site
The other way to update your microphone’s driver is to download it from the brand’s official website and then install it on your PC.
However, we always recommend avoiding downloading drivers from third-party websites, as this can be unsafe and compromise your privacy and security.
- Step 1: Search for the microphone drivers on Google by entering the name and model of your mic
- Step 2: Click on the official website link and choose your model

- Step 3: If any drivers are available, you will see the download option. Otherwise, the source may inform you about the unavailability of any new drivers, as seen in this screenshot below

Can You Update Microphone Drivers on a Mac?
Unlike Windows, Mac doesn’t have a direct option to update drivers. Therefore, to ensure you have updated microphone and audio drivers, you will have to check and install the latest software update.
- Step 1: Power on your Mac, connect your mic, and ensure it has internet access
- Step 2: Click on the “Apple” menu on the top-left corner of the screen and select “System Settings” (or System Preferences in older Mac versions)


- Step 3: Select “General” from the left sidebar menu

- Step 4: Look on the right side of the screen and click on the “Software Update” option

- Step 5: Make sure the “Automatic updates” option is turned on

Then, click on the “Update Now” button (if any new software update is available)

- Step 6: “Agree” to the next prompt that appears on your screen

- Step 7: Enter your Mac password and click the “OK” button

Let the progress bars complete and don’t interfere or interact with your Mac during this process


- Step 8: Once the software update is done, log back into your Mac system to use it
Pro Tip: Some microphones don’t require drivers to function on your Windows or Mac system. And Hollyland Lark M2S is one of the finest examples!
Lark M2S is a plug-and-play wireless microphone kit. Known for its outstanding logo-free design and robust titanium clip-on mechanism, this omnidirectional mic records audio at 48 kHz/24-bit. With numerous modern features, like Environmental Noise Cancellation, 1000ft wireless range, and 9-hour battery life, it connects most cameras, smartphones, computers, and tablets without needing special drivers.

Hollyland LARK M2S - Wireless Hidden Microphone
An ultra-discreet wireless microphone featuring a clip-on transmitter for an “invisible” fit.
Key Features: No-Logo Fit | Ti+ Design | 48 kHz/24-bit
Conclusion
How to update microphone drivers might sound boring, but it’s worth it. It keeps your sound crisp and your setup running smoothly. Keeping your drivers fresh is always a smart move. It helps your gear run smoother and keeps strange bugs away. Plus, it plays nicely with new software updates. Windows users have two simple ways to do it. You can use Device Manager or get the driver from the official site. Both work well if done right. Mac users, things work a little differently there. Just updating your system will handle the drivers. No extra steps needed.
Frequently Asked Questions about Updating Microphone Drivers
Q1. Will my drivers update by themselves?
Yes, Windows can handle that for you. It uses Windows Update to find and install recommended drivers for your devices. This makes sure your hardware stays in sync and works as it should. Keeping drivers fresh helps avoid random issues and improves how everything runs. While it happens quietly in the background, it plays a key role in system performance and stability. So yes, automatic updates do a lot more than most think.
Q2. What is the way to reinstall audio drivers?
Start by opening Device Manager from the Start menu. Find your audio device under sound settings. Right-click and choose to uninstall the driver. Then, restart your computer and let Windows reinstall it for you. If that doesn’t happen, return to Device Manager and update the driver manually. This process helps reset any audio-related bugs and often improves sound output after the fresh install. It’s pretty simple and doesn’t take much time.
Q3. Why is my device missing from Device Manager?
If a device was once connected but is now unplugged, it becomes hidden. The system installs its driver the first time it sees the device. Once removed, the driver stays, but the device no longer shows up. You can still find it if needed by enabling hidden devices in Device Manager. It’s a way Windows keeps things tidy unless that hardware is actively connected again.
Q4. Why can’t I open Device Manager if I own the PC?
Sometimes, access is blocked if admin rights are turned off. Use the Windows key with X to bring up the quick menu. Choose Device Manager from there. If that fails, open Command Prompt as an administrator. Type this command: net user administrator /active:yes and press Enter. After reboot, try again. You can also launch it by typing devmgmt.msc in the Run window. One of these should work without much hassle.
Q5. Are Windows 10 and 11 Device Managers different?
No, not at all. Device Manager looks and functions the same in both systems. It shows all connected hardware, current drivers, and lets you manage updates or troubleshoot. Whether using Windows 10 or 11, the process and layout are identical. So you won’t feel lost when switching between versions. The tool remains familiar, which is helpful for handling hardware tasks easily.