.png)
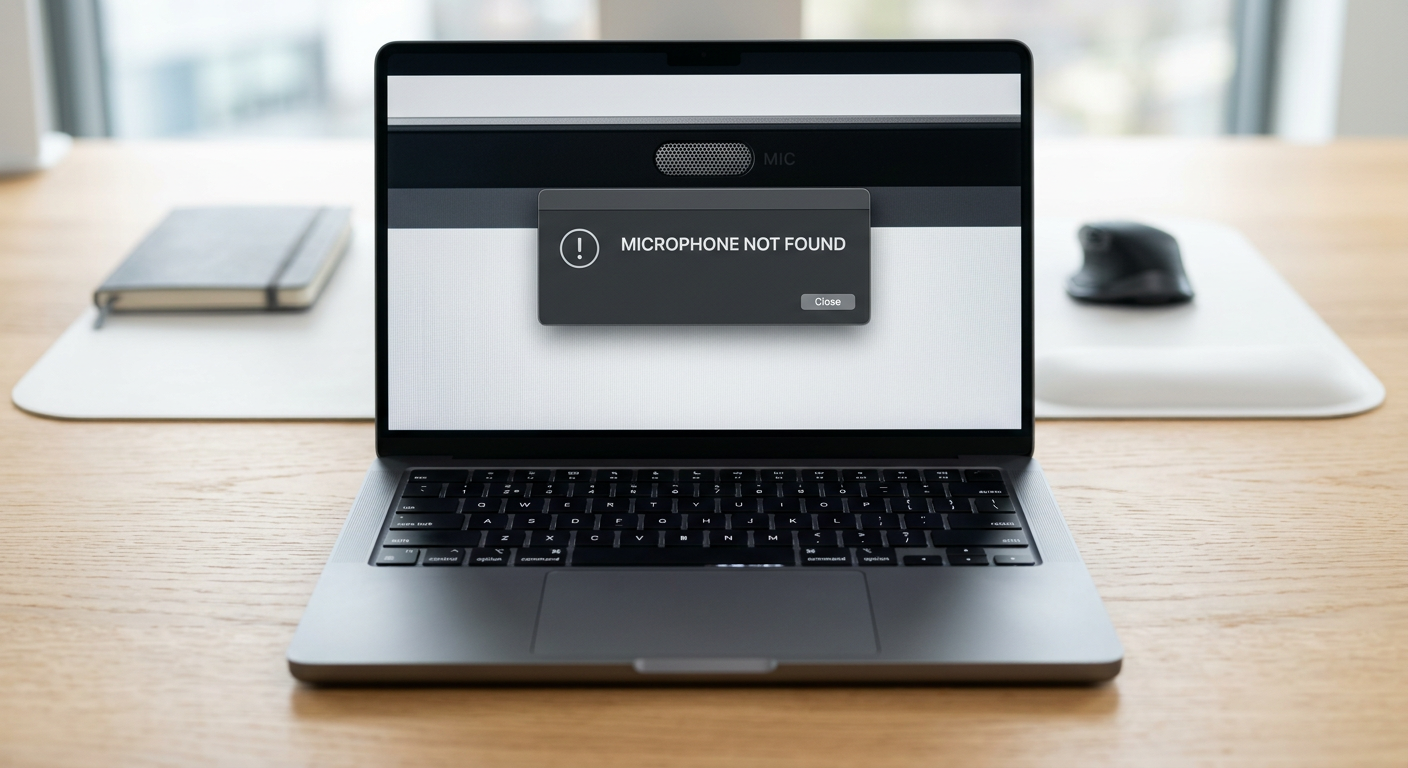
Microphones are helpful for many things on Windows 10. You can record, join calls, or even use voice typing. But sometimes, Windows displays a strange message. It says the microphone is not plugged in. That can feel confusing, especially when everything looks okay. If this has happened to you, then guess what? You’re not alone!
A lot of users run into the same issue. Luckily, it’s usually not a big deal. There are a few easy ways to sort it out. This guide will show how to fix the microphone not plugged in Windows 10 without any stress. Try the fix one first. If it doesn’t help, you still have two more options.
3 Ways to Fix the Microphone Not Plugged in Issues in Windows 10
Below are three solutions if you’re experiencing the mic not plugged in problem in your Windows 10 desktop or laptop.
Fix 1: Choose the Correct Microphone in RealTek Connector Retasking
NOTE: You can also apply this fix in Windows 11.
- Step 1: Turn on your PC and click on the search option (represented by a magnifying glass) on your taskbar, next to the “Start” button

- Step 2: In the search field, type “Realtek Audio Console” and click on the program when it appears on the screen

Once the console opens up, you will notice the main “Playback Devices” menu on the right side of the screen. Whereas, a shorter menu is on the left sidebar.
- Step 3: Locate the “Device advanced settings” at the bottom of the left sidebar menu

- Step 4: Now, on the “Connector Settings” page, click on the toggle button to turn it on in order to enable the audio popup dialog whenever a new device, such as a microphone, headset with mic, or speakers, is plugged into your system
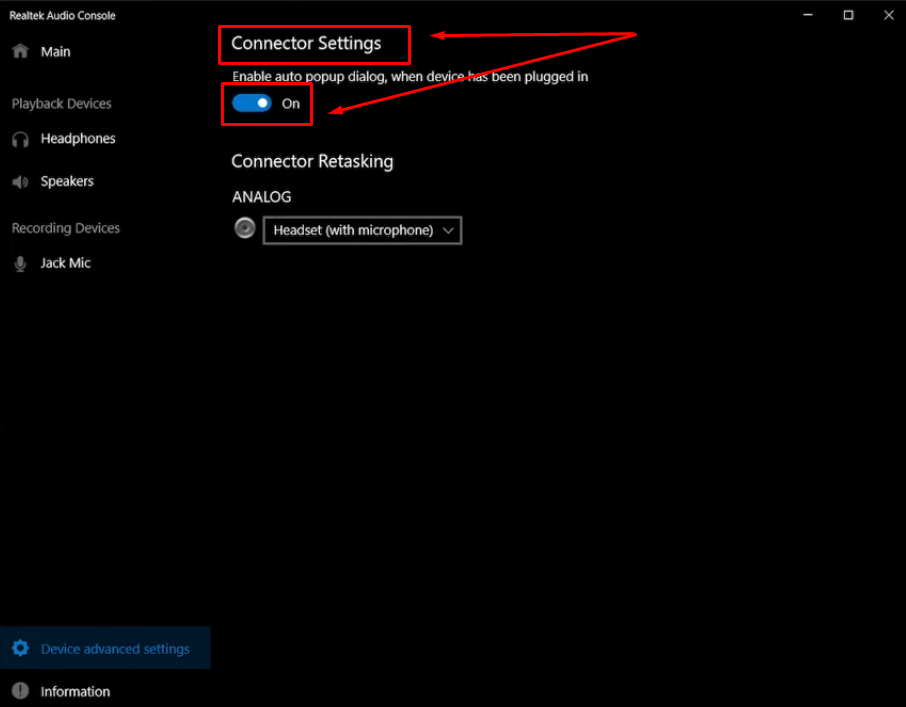
- Step 5: Next, under the “Connector Retasking” section, check if your microphone or headset with microphone is selected in the “ANALOG” dropdown menu
If some other device is chosen here, you will likely encounter the microphone not plugged in issue. For instance, here in this screenshot, “headphones” are selected instead of “Mic In” or “Headset with microphone.”

- Step 6: Click on the ANALOG’s dropdown menu, and select “Min In” (if it’s a separate microphone) or “Headset (with microphone)
And as soon as you do that, you will notice that your microphone name will appear under the “Recording Devices” section in the left sidebar menu

- Step 7: Restart your PC, and now the problem should be resolved
Fix 2: Allow System-Wide Microphone Access
It is quite possible that you haven’t allowed system-wide microphone access. And, as a result, Windows perceives that no microphone is plugged in. Therefore, it mistakenly reports this error.
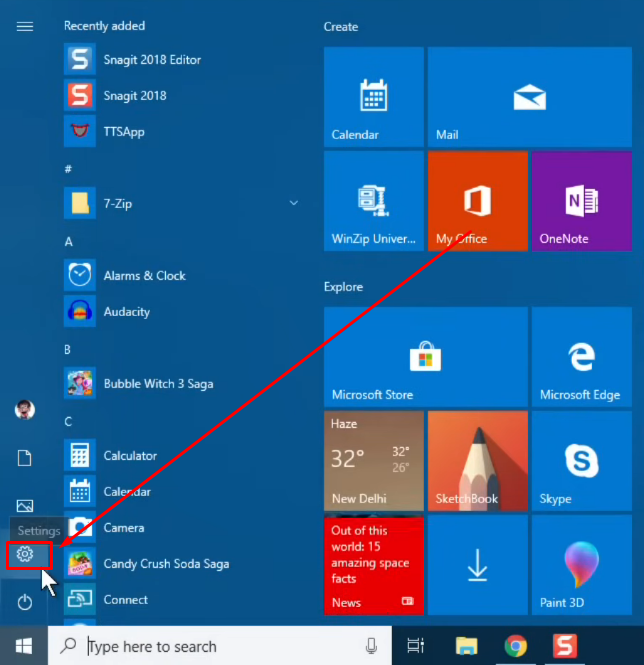
- Step 1: Click on the “Start” button and click on the “Settings” option (represented by a gear icon)

- Step 2: Once you are on the “Windows Settings” page, scroll down until you find the “Privacy” tile and click on it
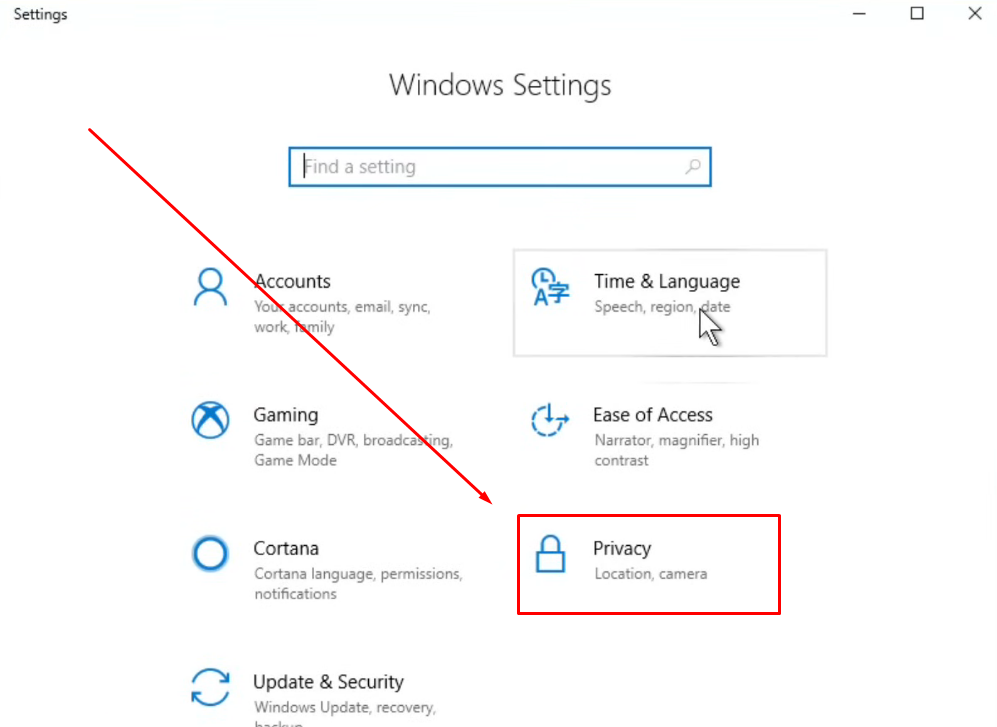
- Step 3: Look at the menu that appears on the left sidebar, and under the “App permissions” section, locate and select the “Microphone” option

- Step 4: Once you do that, the “Microphone” menu will show up on the right side of the screen.
Now, go to the “Allow apps to access your microphone” section and click on the toggle button to turn it on

- Step 5: Then, scroll a bit down to the “Choose which apps can access your microphone” section. Make sure the toggle is on for the application you want to use

- Step 6: Disconnect your microphone, restart your computer, and plug the mic back in to check if the issue still exists
Fix 3: Enable Microphone from Device Properties
Even if the microphone or headset is physically connected to your PC, but it has been disabled from the device properties, Windows may not recognize it as being available.
So, here’s a quick way to enable the mic on your system:
- Step 1: Click on the “Settings” option from the “Start” menu

- Step 2: From the “Windows Settings” page, select the “System” tile

- Step 3: Then, navigate to the “Sound” option on the left side menu and click on it

- Step 4: Now, on the right side menu page, navigate to the “Input” section. Click on the dropdown menu under the “Choose your input device” section and make sure to select the correct microphone from the list

- Step 5: Once done, click on the “Device properties” option below the dropdown menu

- Step 6: When the “Device properties” page appears, uncheck the “Disable” option by clicking on the checkbox to enable the mic to be used by your computer

- Step 7: Restart your laptop/desktop computer and plug in the mic to check if this fix works for you
Pro Tip: If none of the fixes are working for you, it’s possible that your microphone is experiencing a compatibility issue or has become faulty. Most users prefer switching to a microphone that offers universal compatibility, such as the Hollyland Lark M2.

Hollyland LARK M2 - Mini Lavalier Microphone
An incredibly lightweight and compact wireless button microphone that captures high-fidelity audio.
Key Features: 9g Button Size | 48 kHz/24-bit | 40 Hours Battery
Lark M2 is shaped like a button. It is small enough to be held in your palm, like a small coin. But this tiny wireless microphone can do big wonders for remote employees, creators, streamers, and artists. It is known for its universal compatibility with Windows laptops, cameras, and Android smartphones. Besides, it’s an MFi-certified audio recording device for iOS. With its 1000ft wireless range, up to 10-hour battery life, and Environmental Noise Cancellation (ENC) feature, Lark M2 shines when it comes to providing crystal-clear audio across multiple recording devices.
Conclusion
Knowing how to fix the microphone not plugged in Windows 10 can be easier than it seems. Sometimes fixing the microphone issue is just a matter of changing a setting. Many people have had success by picking the right mic in the Realtek connector.
If that doesn’t work, it helps to check if the system has permission to use the microphone. That small step can make a big difference. When those options don’t solve the problem, enabling the mic in device properties usually does. If none of these steps fix the issue, it might be time to think about a new microphone or contact Windows support.
Frequently Asked Questions about How to Fix Microphone Not Plugged in Windows 10
Q1. How to fix the rear mic input not working in Windows 10?
Start by holding the Windows key and pressing X. Choose Control Panel from the list. In the next screen, go to the Playback tab. Right-click in the empty area and select Show Disabled Devices. Look for your microphone. If it’s there, right-click and choose Enable. That usually does the trick. Sometimes Windows just hides the mic. A small setting like this can mess things up. Once it’s back on the list, your mic should begin working again like normal. Always try this before assuming it’s broken.
Q2. Why won’t your PC detect the microphone?
If your mic vanished after a Windows update, permissions might be the reason. Head to the Start menu and pick Settings. Then choose Privacy and go to Microphone. Hit Change, and make sure apps are allowed to use it. Without that switch on, the system blocks access completely. The mic might still be working, but Windows just won’t detect it.
Q3. Why is the USB microphone not working on your computer?
Always use the cable that came with your mic. Plug it straight into a USB port on your PC, not a hub. If that doesn’t help, try another port. Still nothing? Test the mic on a different computer. That way, you know if the mic is really at fault. Sometimes the port just isn’t providing enough power. A quick switch can make it work again. Even a loose connection can confuse the system. Double-check everything before blaming the mic. Simple steps often solve stubborn issues.
Q4. What causes Realtek audio to say not plugged in?
Most times, it means your driver is old or missing. You’ll need to update it. Go into Device Manager and find your audio section. Right-click Realtek and choose Update Driver. Let Windows check online or do it yourself. A broken or outdated driver can make Windows think your device is gone. Updating fixes that, in many cases. If nothing changes, try uninstalling the driver, then restarting your system. Windows will reload it during boot. This refresh often clears up the problem completely.
Q5. Why does your jack mic say not plugged in on Windows 10?
Start by running the audio troubleshooter. Just go to Settings, then Update and Security, then Troubleshoot. Pick Recording Audio. After that, go to Privacy settings and find the Microphone tab. Check if apps are allowed to use it. If it’s off, turn it on. Still not working? Reinstall the mic driver. Open Command Prompt as admin, then type devmgmt.msc. In Device Manager, uninstall the mic, restart, and scan for hardware changes. Finally, check for pending updates. These steps usually fix the issue for most users.