


.png)
How to Set Up a Home Recording Studio( Expert Tips)
Setting up a home recording studio can feel overwhelming, especially with so much equipment and advice out there. But if you focus on building a clean, efficient space step by step, you’ll get professional results even without a commercial setup.
This guide walks you through expert-backed methods and fixes for creating a home studio that fits your needs, sounds great, and stays functional for years.
1. Choose the Right Room for Recording
Your recording quality starts with the room itself. Ideally, choose a quiet, interior room far from foot traffic, street noise, or household disturbances. Rooms that aren’t square or symmetrical tend to sound better because they reduce the formation of standing waves, which cause uneven bass response and phase issues.
Avoid rooms with large windows, tiled floors, or bare walls, as these create harsh reflections and echo. If you’re stuck with a space like that, be prepared to treat it heavily with soft materials or acoustic panels. It’s always easier to build good sound in a quiet, imperfectly shaped room than to fix bad acoustics in a noisy or reflective one.
2. Optimize Room Acoustics
Good acoustics don’t require expensive gear they require smart treatment. Start by treating the reflection points: the areas directly to the sides of your speakers and behind your listening position. Acoustic panels here will drastically reduce echo and make your recordings cleaner.
Next, place bass traps in the corners to tame low-end buildup, which is a common issue in home studios. Add curtains, carpets, and bookshelves to naturally diffuse sound. Soundproofing (keeping noise out or in) is separate from acoustic treatment (improving sound inside), so don’t confuse the two.
3. Plan Your Studio Layout
Your layout should follow your workflow. Separate your recording and editing zones to minimize distractions and reduce unwanted noise. For example, keeping your microphone away from your computer’s fan or drive noise can make a noticeable difference in clarity.
Position your monitors at ear level and form an equilateral triangle between your head and the speakers. This improves stereo imaging and helps you make better mixing decisions. Avoid cramming everything into one spot, give your creativity space to breathe.
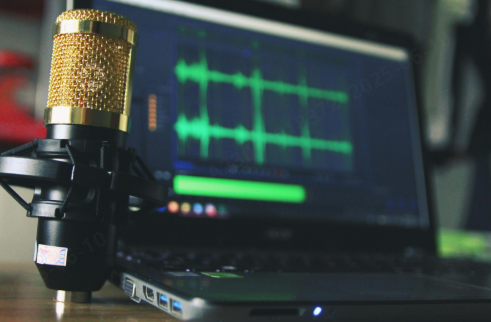
4. Select Your Core Recording Equipment
Start with a solid foundation rather than chasing flashy tech. A good condenser microphone and a quality audio interface are often all you need to begin. Avoid splurging on high-end gear before you know how to use the basics well, it’s better to understand your tools fully before upgrading.
Closed-back headphones are ideal for tracking because they prevent sound bleed into the mic. Don’t blow your entire budget on just one piece of gear; aim for balance. A $1,000 mic won’t perform well if paired with a noisy preamp or poor acoustic space.
5. Build a Clean Audio Signal Chain

Noise in your recordings often starts in the signal chain. Keep your audio connections short, balanced (XLR or TRS), and away from power cables to avoid interference. If you’re using long, unbalanced cables or daisy-chaining USB devices, you’re likely introducing hums or dropouts.
Maintain consistent gain staging throughout your recording process. Set your interface or preamp levels so that your signal is strong but never clips. A clean, well-managed audio path gives you the clarity and depth you need for professional-quality sound.
6. Set Up a DAW (Digital Audio Workstation)
Your DAW is the heart of your home studio, so choose one that matches your experience level and creative goals. Beginner-friendly options like Logic Pro, FL Studio, and Ableton Live come with built-in instruments and effects, which are more than enough to get started.
Take time to learn your DAW’s layout, create track templates, and organize your session folders from day one. Configure your audio drivers and buffer size properly to avoid latency or glitches. A well-set DAW lets you create faster and reduces tech frustrations during your sessions.
7. Manage Cables and Power Efficiently
Messy cables not only look unprofessional, they’re dangerous and confusing. Use velcro ties, sleeves, and clips to route cables neatly behind desks and under furniture. This prevents tangling and makes troubleshooting much easier when something goes wrong.
Label each cable by length and purpose, and group similar ones together with color coding if possible. For power, plug all gear into a surge protector or power conditioner to protect it from voltage spikes. Keeping your cabling clean improves safety and your creative workflow.
8. Control Background Noise
Even low-level noise can ruin a great take. Eliminate or minimize sources like air conditioners, fans, or hard drive whines before hitting record. Consider recording during quiet times of the day when street or household noise is at a minimum.
If your room isn’t isolated, use tools like portable vocal booths or reflection filters around your microphone. These can help control ambient sounds and reflections, especially if you’re working in a shared space. A clean background makes editing easier and your sound more professional.
9. Calibrate Monitor and Headphone Output

Accurate monitoring is key to making mix decisions that translate to other systems. Place your studio monitors on isolation pads to reduce low-frequency rumble from the desk or stands. Position them so they point toward your ears in a tight triangle configuration.
Use pink noise and a sound pressure level (SPL) meter to balance your left and right monitors. Always cross-reference your mix using headphones and everyday speakers to spot flaws you might miss in your main monitors. Good calibration helps you trust what you’re hearing.
10. Backup and Project Management System
Studio crashes are inevitable, but data loss doesn’t have to be. Save your sessions both locally and to cloud services like Dropbox or Google Drive. That way, even if your hard drive fails, your work is still recoverable.
Use version control by saving multiple files of the same project as you go (e.g., “Mix_v1,” “Mix_v2”). Organize your sessions by date or client to make them easy to retrieve. Weekly backups of your DAW projects and plugin presets will save you from painful setbacks.
11. Maintain Your Gear Regularly
Studio equipment lasts longer with basic upkeep. Dust everything weekly with microfiber cloths and use compressed air to clean out small crevices. Dirty knobs, sliders, or fan vents can lead to overheating or scratchy audio.
Check cables and connections monthly for signs of wear, corrosion, or damage. Software maintenance is just as important as updating your DAW, plugins, and drivers to the latest versions for better performance and fewer bugs. A few minutes of care each week keeps your studio running smoothly.
12. Improve Studio Performance Over Time
Your studio doesn’t need to be perfect on day one. Track what slows you down, maybe it’s having to swap cables often or dealing with messy sessions and focus upgrades there. Often, workflow improvements make a bigger difference than new gear.
Gradually expand your acoustic treatment as you learn more about how your room sounds. Add equipment only when your current setup limits your creative output. Iterative upgrades keep you focused and help avoid overspending on tools you don’t yet need.
Conclusion
Setting up a home recording studio is more about smart decisions than deep pockets. Start by choosing the right space, treating it for sound, and organizing your gear around how you work. You’ll get better results and enjoy the process more.
Focus on your foundation and let your studio grow naturally with your skills. Keep it clean, backed up, and optimized for what you do. A well-thought-out space helps you create without distraction, and that’s what truly makes a studio great.
FAQs
Do I need a large space to build a professional studio?
Not at all. You can create a high-quality studio in a small room. What matters is how well you treat the space acoustically and how efficiently you use the layout. A compact room with the right setup can outperform a bigger space with poor planning.
What’s more important camera or the lighting?
Even a decent camera can produce great visuals if your lighting is dialed in. Without proper lighting, the best camera in the world will still deliver flat or unflattering footage. Prioritize lighting first, then upgrade your camera if needed.
Can I make the studio portable or modular?
A portable or modular studio is perfect if you’re working in shared spaces or need flexibility. Use foldable acoustic panels, rolling desks, collapsible backdrops, and wireless audio gear. This way, you can set up or break down your studio without much hassle.
What’s the best way to avoid burnout in studio work?
Burnout sneaks in when everything feels like a nonstop grind. The fix? Batch similar tasks together, automate repetitive processes like file backups or lighting presets, and most importantly, schedule breaks. Take days off to reset and come back fresh.
Is it worth investing in automation tools for a studio?
Yes, especially as your workload grows. Tools like stream decks, macro controllers, or workflow templates save time and reduce decision fatigue. Automation keeps your creative energy focused where it matters most in your content, not repetitive tasks.


Subscribe us
to get the latest news!


