.png)
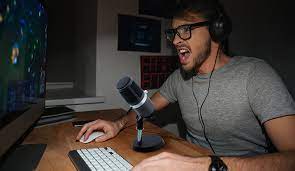
Having a good microphone is essential if you love playing video games and are planning to stream or record your gaming sessions. Gamers frequently use USB mics because they are simple to set up and provide excellent sound. However, the method may first appear complicated if you’re wondering how to connect a USB microphone to your Xbox One console. But don’t worry! In this article, we’ll walk you through each step of setting up your USB microphone to connect to your XBOX One, allowing you to experience crystal-clear audio throughout your gaming and streaming sessions. So take your USB microphone, and let’s kick-off!
This step-by-step guide will teach you how to set up your USB microphone for use with your XBOX One console so that you never miss an opportunity to hear the optimum sound quality.
Step 1: Choose Your USB Microphone
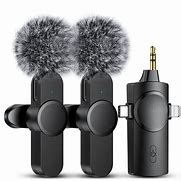
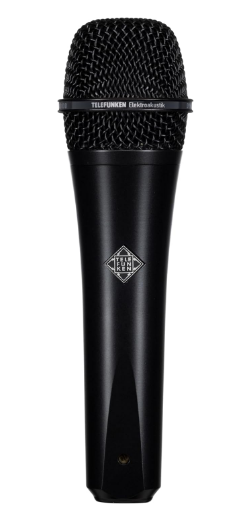
Before we get started, you’ll need to choose a USB microphone that is compatible with your Xbox One. Make sure to choose a high-quality microphone that is built to deliver clear and crisp sound. Some popular options include the Blue Yeti USB Microphone and Audio-Technica AT2020USB+ Cardioid Condenser USB Microphone. Furthermore, gamers love the Razer Seiren X USB Streaming Microphone for its small size and superior audio quality. And those who love to play without getting tangled between the mic and cables choose the Hollyland Lark M1.
Lark M1 is not just an ordinary mic but a gateway to freedom. You can attach a TRS to a USB-C adapter to connect it to any USB interface for wirelessly experiencing 48kHz / 24-bit Hi-Fi sound up to 650ft. And that’s not it! Gamers admire its compact size and spectacular color combination that unintentionally resembles the BumbleBee. But, of course, the Lark M1 comes in plenty of colors, which can surely go with your Xbox One gaming setup.

Wireless Lavalier Microphone with High-Quality Audio.
Ultimately, the finest USB microphone for your Xbox One will be determined by your tastes and financial limitations. Once you’ve chosen your microphone, plug it into an available USB port on your Xbox One.
Step 2: Navigate to Settings
Open the Xbox guide by pressing the “Xbox” button on their controller to access settings. Users should then use the left stick to browse to the “Settings” menu and the “A” button to select it.
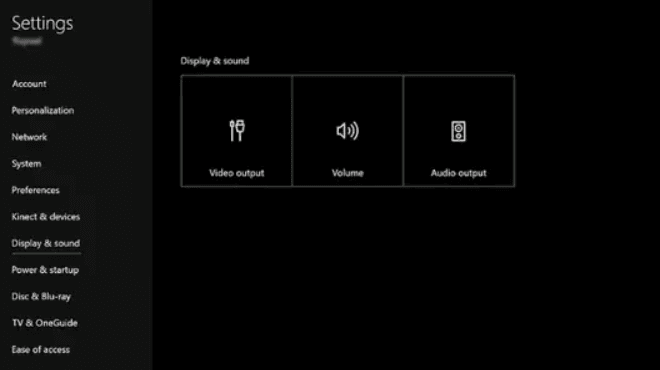
There should be several settings available once users are in the “Settings” menu, including “Display & Sound,” “System,” “Account,” “Kinect & Devices,” and more. The “Settings” menu may seem somewhat different depending on the version of the Xbox One dashboard the user is using, but they should be able to find the option they need by using the left stick to browse and the “A” button to choose.

Step 3: Select Audio Output
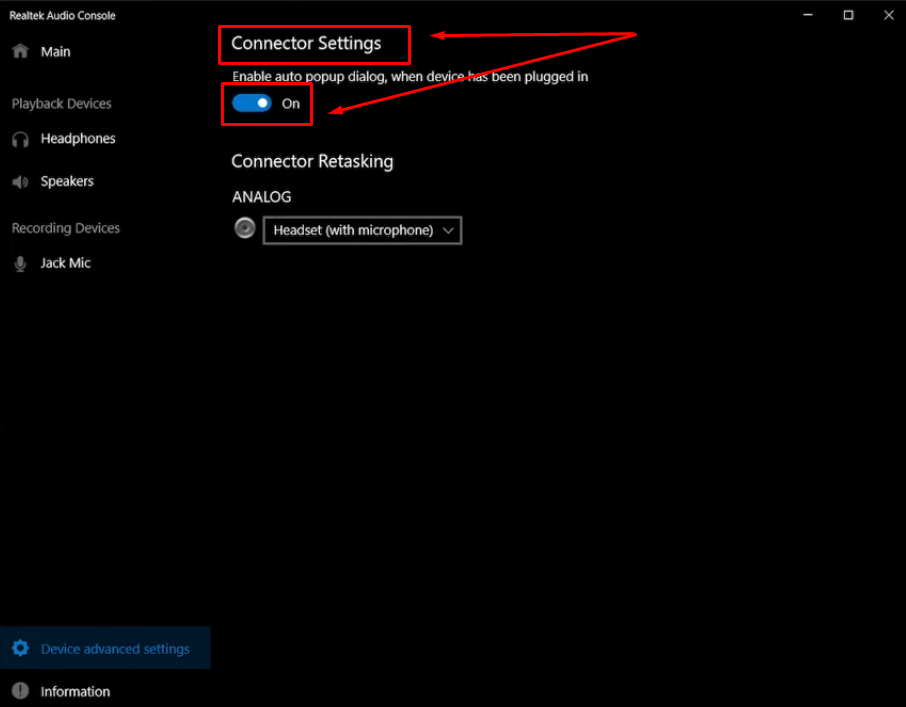
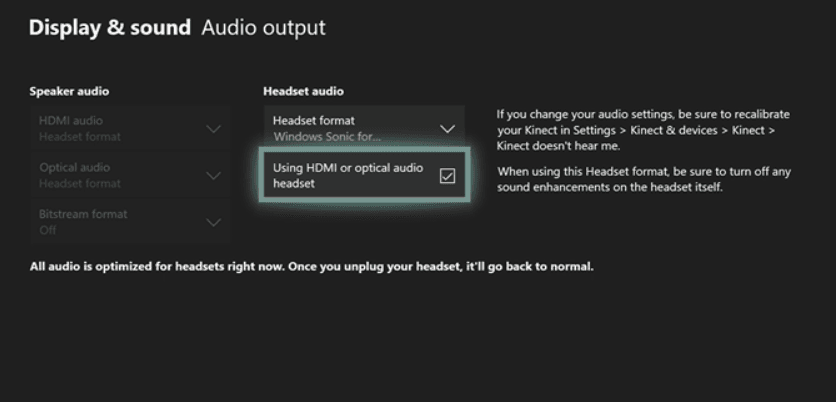
Under the “Display & Sound” tab, select the “Audio Output” option. From there, select “Headset format” and choose “Stereo uncompressed.” This will ensure that you’re getting the best possible audio quality from your USB microphone.
Step 4: Configure Microphone Settings
Next, select the “Headset mic” option under the “Audio Output” tab. From there, you’ll be able to adjust your microphone’s volume, mic monitoring, and other settings. Make sure that your microphone is properly set up by testing it out in a party chat or game.

Step 5: Adjust Chat Mixer
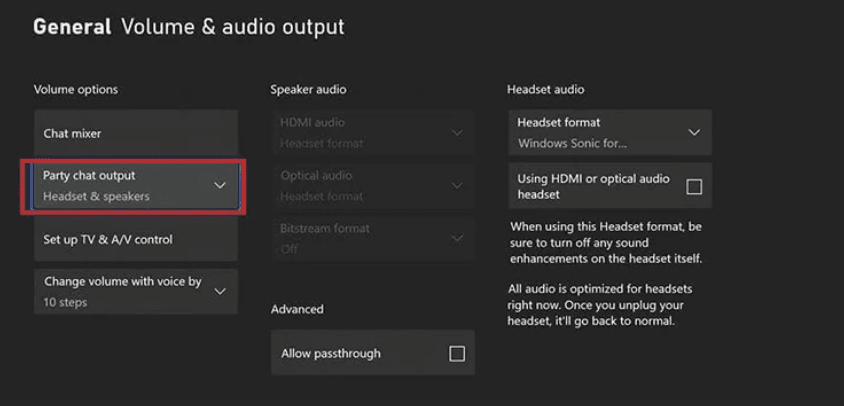
To ensure that your microphone’s audio is balanced with in-game sounds, you’ll want to adjust the Chat Mixer settings. Navigate back to the “Display & Sound” tab and select “Volume.” From there, choose the “Party chat output” option and adjust the slider to your desired level.
Step 6: Test Your Microphone
Finally, make sure to test your microphone to ensure that everything is working properly. You can do this by joining a party chat or game and speaking into your microphone. If you’re experiencing any issues with your microphone, double-check that it’s properly connected and that your settings are configured correctly.
Conclusion:
In conclusion, connecting a USB microphone to your Xbox One is a straightforward process that can make a huge difference in your gaming experience. Whether you’re looking to communicate with friends during an intense multiplayer battle or just want to stream your gameplay with clear audio commentary, a high-quality USB microphone can help you achieve your goals.
Remember to choose a microphone that is compatible with your Xbox One and can deliver crystal-clear sound with minimal background noise. Once you’ve found the perfect microphone, be sure to follow the simple steps outlined in this article to get it up and running. By adjusting your audio output and chat mixer settings, you can fine-tune your audio experience and enjoy high-quality sound that truly immerses you in the game.
So what are you waiting for? Connect that microphone and start dominating the competition! With clear and crisp audio, you’ll be able to communicate with your teammates effectively and stay one step ahead of the competition. Take your gaming experience to the next level and experience the power of high-quality audio today!
FAQ’s
- What kind of USB microphone do I need to connect to my Xbox One?
You need to use a USB microphone that is compatible with your Xbox One console. There are several options available on the market, so make sure to choose one that is specifically designed to work with Xbox One.
- Can I use any regular USB microphone with my Xbox One?
No, not all USB microphones are compatible with Xbox One. You need to choose a microphone that is specifically designed to work with Xbox One and has been approved by Microsoft.
- Why is my USB microphone not working with my Xbox One?
There could be several reasons why your USB microphone is not working with your Xbox One. First, make sure that your microphone is compatible with Xbox One and has been approved by Microsoft. Also, check to see if the microphone is properly connected and if the settings are configured correctly on your console.
- How can I test my USB microphone to make sure it’s working correctly?
You can test your USB microphone by going to the settings menu on your Xbox One and selecting the “Display & Sound” option. From there, choose “Volume” and then select “Headset Mic.” Speak into your microphone and you should see the volume levels move on the screen if it’s working correctly.
- Can I use my USB microphone for in-game chat and streaming at the same time?
Yes, you can use your USB microphone for both in-game chats and streaming at the same time. However, you may need to adjust your settings to ensure that your microphone is picking up the correct audio sources.