.png)
.png) 日本語
日本語 .png) Português
Português Having trouble with echo, background noise, or delayed sound while recording? A good audio interface can easily solve that, and honestly, it’s one of the best upgrades you can make. Unlike regular computer audio, an interface gives you clearer sound, less delay, and lets you use proper mics and instruments.
No matter if you’re just starting out or you’ve been doing this for a while, this guide will walk you through everything, including choosing the right interface, connecting cables, installing drivers, adjusting settings, and fixing common issues. All so you can get high-quality sound from day one.
What Is an Audio Interface?
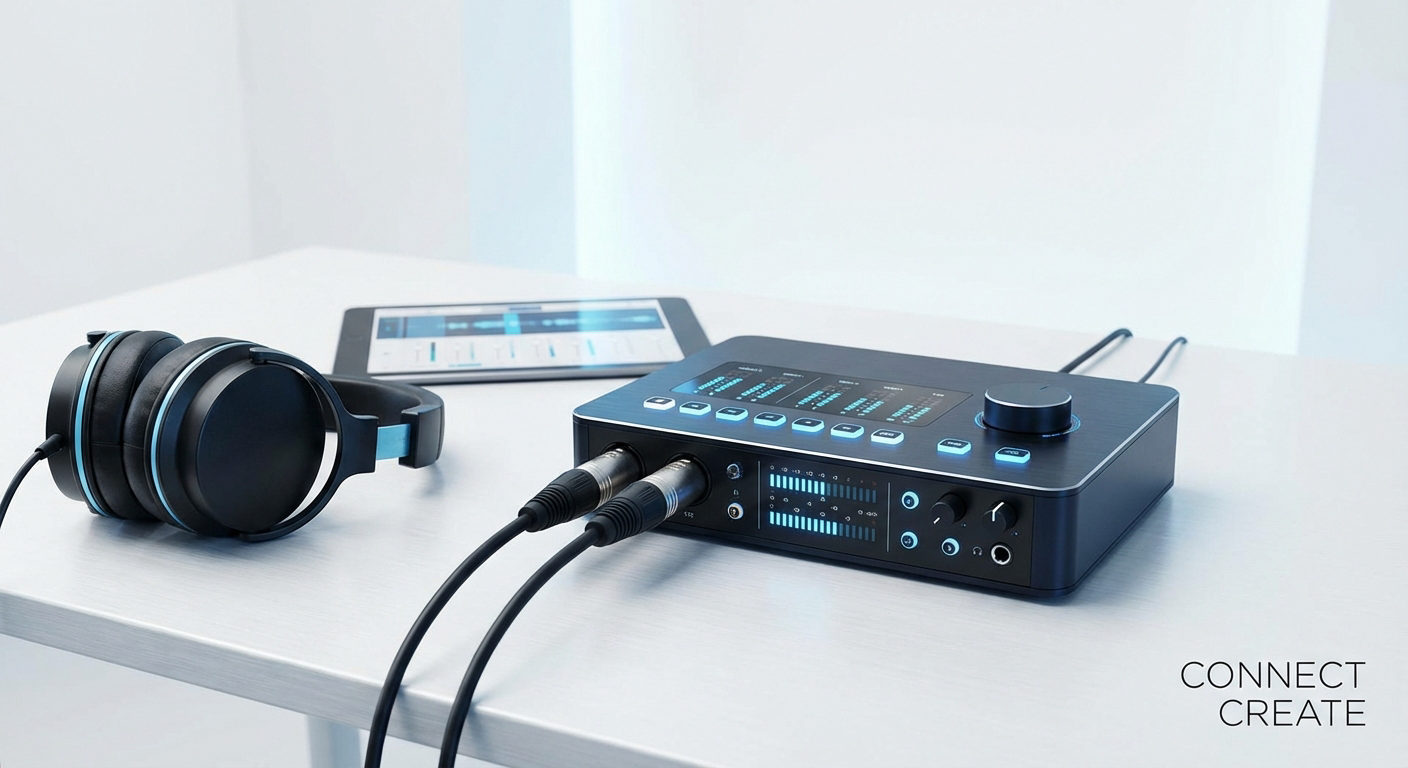
An audio interface is a small device that lets you connect mics, instruments, and other audio gear to your computer. It takes the sound (which is analog) and turns it into digital so your computer can work with it, and it does this way better than your computer’s built-in sound system.

Built-in sound cards, like the ones on your motherboard or added through a PCIe slot, are okay for simple stuff like gaming or watching videos. But they usually don’t give you many input options, the sound quality isn’t great, and there’s more delay (latency).
Audio interfaces, on the other hand, are made for recording and creating music or podcasts. They come with mic preamps (which help improve quiet mic signals), high-quality converters for clean sound, and sometimes even fancy class-A preamps found in high-end gear.
Most modern interfaces connect using USB or Thunderbolt, while older ones might use FireWire but the goal is always the same: smooth, fast, and reliable audio.
Typical input/output options include:
- XLR (for microphones)
- ¼″ TRS/TS jacks (line or instrument level)
- Digital I/O like ADAT or S/PDIF for expanding channels
- Headphone outputs with dedicated amp
- MIDI I/O (5‑pin DIN) for connecting keyboards and other gear
How to Physically Connect an Audio Interface to Your PC
Setting up an audio interface may sound hard at first. But with a simple and clear method, anyone can do it. Whether you are new to recording, a hobbyist, or a professional, this article will guide you through all the necessary steps. It covers both the hardware setup and the software configuration using Focusrite 4i4 (3rd Generation). But you can use these steps for any basic audio interface. Also, you will learn how to record your first track on digital audio workstations by adjusting the correct settings on the interface.
Step 1: Check for Drivers and Manuals First
Before plugging in your new interface, take a moment to prepare. Most brands suggest downloading drivers or software first. These tools help your computer work smoothly with the device.
- Visit the interface brand’s website.
- Download the latest drivers or control software.

- Follow the setup instructions in the quick start guide.
Mac users often don’t need drivers. Many interfaces are plug-and-play for macOS. But Windows users usually need ASIO drivers for better performance.
For Focusrite Scarlett models, like the 4i4, a guided setup helps you install the needed app. This app is called the Focusrite Control. If you have another audio interface, you can check if it offers any application similar to Focusrite.
Step 2: Connect the Interface to Your Computer
Once drivers are ready, connect the interface.
- Use the USB cable provided in the box.
- Plug one end into the audio interface.
- Plug the other into your computer’s USB port.

The 4i4 uses a USB-C to USB-A cable. If your computer has USB-C ports, a USB-C to USB-C cable works as well.

After connection, set the interface as the default audio device.
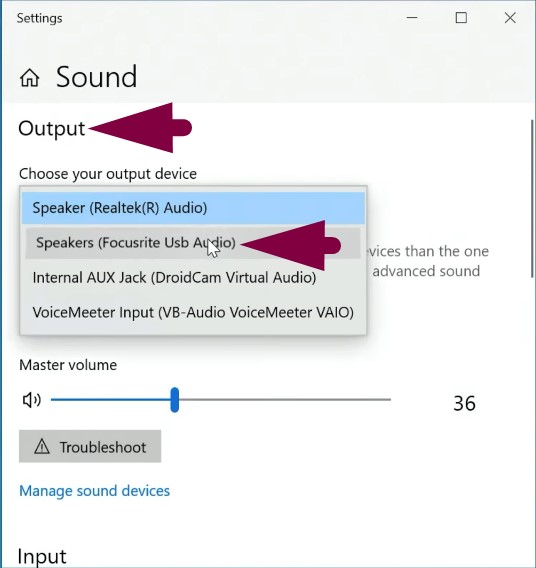
If you have a Windows PC:
- Go to Sound Settings.
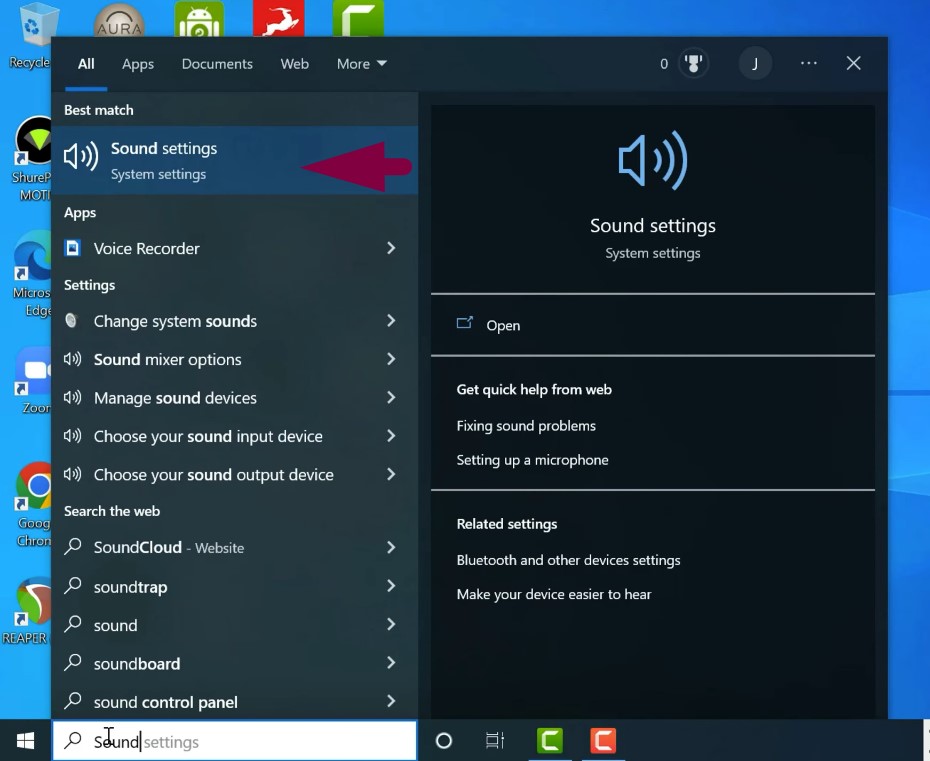
- Choose the name of the audio interface in the input and output devices.

If you’re connecting to a Mac:
- Open Sound Preferences and click Sound.
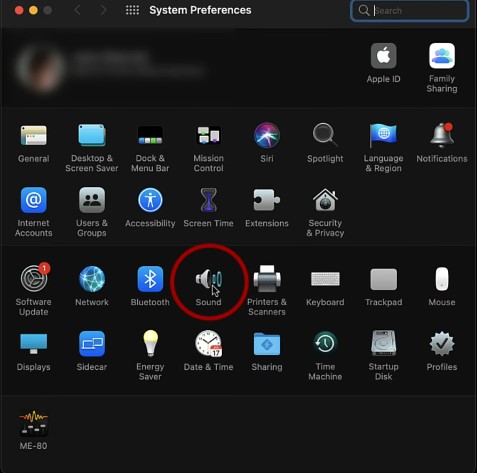
- Select the interface as the input and output device.


Now, all system sounds will go through the interface. This includes YouTube, Spotify, and other apps. Keep in mind that your built-in speakers will stop working when the interface is active. Sound will play only through connected headphones or speakers.
Step 3: Connect Headphones and Studio Monitors
To hear sound clearly, connect either headphones, speakers, or both.
- Most headphone jacks use a quarter-inch (1/4) plug.
- Use an adapter if your headphones have a smaller plug.

- Plug them into the headphone output on the interface.

- Adjust the headphone level knob to set volume.

If using studio monitors:
- Make sure the monitors are active (built-in amp). If you have passive monitors, you will need to have a separate amp.
- Use balanced TRS to TRS or TRS to XLR cables.


- Turn off the monitors and reduce the volume first.
- Connect the left output to the left speaker, and the right to the right speaker.

- Use the big monitor knob to control speaker volume.

Step 4: Plug in Mics, Instruments, and Line Level Devices
Audio interfaces often include combo jacks. These accept both XLR and 1/4 inch jacks. You can plug in mics, guitars, or keyboards using these.
For Microphones:
- Use an XLR cable.
- Plug the female end into the mic.
- Plug the male end into the interface input.
- Turn the gain knob all the way down before connecting.
- Slowly increase the gain while checking levels.

- If you’re using a condenser mic, phantom power must be turned on.

However, dynamic or ribbon mics do not need this. Still, most modern dynamic mics can handle phantom power safely. But it’s best to check your mic’s specs just in case.
For Instruments (like electric guitars):
- Use a standard 1/4 inch jack cable.
- Plug it into the input labeled “Instrument.”

- Switch the input to “Instrument” mode using a button or software.

The 4i4 model needs this done in the Focusrite Control App. Once set, the gain control adjusts the signal properly for instruments.
For Line Level Devices (like keyboards):
- Use 1/4 inch jack cables.
- Plug them into the inputs on the back or front.
- Balanced TRS or unbalanced TS both work, depending on the device.

Always remember to reduce gain knobs before plugging in any device. Then raise them slowly to get a good level.
Step 5: Setting Up the Software (DAW)
After the hardware is ready, open your Digital Audio Workstation (DAW).
Example used here: Reaper
- Open Reaper.
- Go to Options > Preferences > Audio > Device.

- Choose your audio interface from the list.

Some DAWs allow input renaming. This helps keep things organized.
- Tick the box for input aliasing.
- Select the Edit Name/Map button.

- Name inputs like “Mic 1”, “Guitar”, or “Keys.”

This makes it easier when creating tracks.
Step 6: Create and Arm Tracks in DAW
Now it’s time to create tracks for recording.
- Double-click in the track window to create a new track.

- Add as many tracks as you need.
Each track must be armed before recording.
- Press the record-arm button.

- Choose input type: mono or stereo.

- Pick the correct source (e.g., Mic, Guitar, Keys).
Naming and coloring tracks can help avoid confusion. Assign each track a clear name and color. This reflects in both the track view and the mixer.

Choosing Mono or Stereo:
- Use mono for microphones and guitars.
- Use stereo for keyboards or devices with two outputs.
As you arm the tracks, level meters will show signal levels. Aim for a strong but safe level by adjusting gain knob on the interface and monitoring the level meters.

- Target around -18 dB for the average signal.
- Peaks should not go above -12 dB.
Avoid pushing levels too high. Distortion may occur if levels peak too much.
Step 7: Handling Echo and Monitoring
Sometimes, you might hear a delay or echo. This happens if both direct monitoring and software monitoring are active.
Options to fix it:
- Mute the track in your DAW during recording.

- Turn off direct monitoring from the audio interface if there is a button for it.
The Focusrite 4i4 allows a direct monitoring setup through the Control app. There is no physical button for it. You can create a custom route for monitoring based on your needs.

Step 8: Recording Your First Tracks
With tracks armed and levels set, press record.
- Record multiple tracks at once (mic, guitar, keys).
- Or record one track at a time.
For layered recordings, unmute earlier tracks to hear them while recording new parts.
Example:
- Record keyboard first.
- Then add a guitar to a new track.
- Finish by recording vocals while listening to the previous parts.
Overdubbing allows for adding extra tracks on top of the base.
Special Tip: Loopback Recording
Some interfaces, like the 4i4, offer loopback channels. These are virtual inputs that let you record computer audio.
To use loopback:
- Create a new stereo track.
- Arm it for recording.
- Select “Loop 1-2” as input.

- Mute the track before hitting record.
This prevents audio feedback. You can now record YouTube, streaming songs, or anything your computer plays. Apps like Black Hole (Mac) or Voicemeeter (Windows) offer similar features for devices without a loopback.
Tips for Choosing the Right Audio Interface
Not all audio interfaces are built the same. Picking the right one depends on how you plan to use it, what you want to connect, and how future-proof you want your setup to be. Here’s what to look for:
Connector Types (USB vs Thunderbolt vs FireWire)
- USB is the most widely compatible and cost-effective option. USB 2.0 and USB 3.x offer ample bandwidth for multi-track recording, and high‑quality ASIO drivers ensure low latency.
- Thunderbolt delivers lower latency and PCIe-level performance up to 40 Gbps and allows daisy-chaining of several devices. Ideal for pro rigs, though pricier.
- FireWire was once popular, offering peer-to-peer and DMA support, but it’s now obsolete and harder to find.
Input/Output Count
Pick an audio interface based on what you actually need. If you’re a solo singer or just recording vocals and guitar, a simple 2-in/2-out setup is probably enough. But if you’re recording a band or using several mics at once, go for something with 4 or more inputs.
Also, think ahead. Your setup might grow later, so it’s smart to choose something with a little extra room to expand.
Essential Features
When choosing an audio interface, look for handy features like built-in phantom power (for condenser mics), good-quality mic preamps, MIDI in/out if you use keyboards, and proper monitor outputs for your speakers.
Some interfaces also come with bonus software, like a DAW or plugin packs, which can be a big plus, especially if you’re just starting out.
One more thing: latency (the delay between playing or speaking and hearing it back) is super important, even on budget interfaces. Most audio engineers consider it a key factor, so don’t overlook it.
Budget Vs. Quality
Cheaper audio interfaces usually cover the basics, but they might not give you the best sound quality or the lowest latency. The preamps might be a bit noisy, and the overall performance can be limited.
Spending a little more can make a big difference. You’ll get better sound, more stable drivers, and more room to grow your setup.
That said, even interfaces under $200 these days often support 24-bit/192 kHz audio, have decent preamps, and offer low latency. So for most home studios, they’re more than good enough to get started.
Troubleshooting Common Audio Interface Issues
Quick fixes for the most frustrating roadblocks so you can keep recording without interruption.
Interface Not Detected
Here’s how to fix common connection or sound issues with your audio interface:
Drivers & firmware: Go to your interface’s website and download the latest drivers. If you’re on Windows, you can uninstall the old ones using Device Manager, restart your PC, and then install the new ones.
Connections: Unplug the USB or Thunderbolt cable and plug it back in securely. Try using a different port on your computer, and avoid USB hubs unless they’re powered, most regular hubs don’t work well for audio.
Power cycling: Turn everything off, then turn it back on in this order: audio interface first, then your PC, and finally your monitors or headphones. This helps reset everything properly.
No Sound or Low Volume
Here’s a quick checklist to troubleshoot sound issues:
OS settings: Make sure your audio interface is selected as the default input and output device in Windows Sound settings or macOS System Preferences.
DAW routing: Double-check that your inputs and outputs are set up correctly and turned on inside your DAW.
Monitor/headphone volume: Don’t forget to check the volume knobs on both your audio interface and your speakers or headphones.
Latency
To cut down on delay while recording, lower the buffer size in your DAW’s audio settings, try setting it between 64 and 128 samples.
Using direct monitoring helps even more by letting you hear your sound right away, without any delay from the software.
If you still notice latency, don’t worry, when you’re mixing and using lots of plugins, you can increase the buffer size to ease the load on your computer.
Ground Hum or Noise
Use balanced TRS or XLR cables because they help block out electrical interference and keep your sound clean.
Avoid using passive USB hubs and ungrounded power supplies, as they can cause noise problems.
If you have noisy devices nearby, try to keep them away or use a ground-lift adapter to reduce unwanted hum or buzz.
Conclusion
Setting up an audio interface doesn’t have to be scary. If you follow the right steps, picking the right device, connecting it the right way, installing drivers, setting up your software, and troubleshooting common problems, you’ll see a big jump in your sound quality.
Just remember to use balanced cables, avoid plugging your interface into USB hubs, and turn on direct monitoring for the best results. With this guide, you’re ready to connect your audio interface to your computer and get clean, reliable sound for all your creative projects.
Frequently Asked Questions
How do you connect an audio interface to a PC?
Plug the interface into your PC using the provided USB or Thunderbolt cable, install any required drivers, and then connect your audio gear (mics, instruments, headphones).
How do I get my computer to recognize my audio interface?
Install the latest drivers from the manufacturer’s website, then set the interface as the default input and output device in your system sound settings.