


.png)
Have you ever streamed on Twitch only to realize later that your broadcast wasn’t saved? For many creators, losing valuable content can be frustrating, especially when streams hold highlights worth sharing or repurposing.
Fortunately, Twitch offers several ways to save and manage your past broadcasts, whether automatically through VODs or manually using highlights and downloads.
In this guide, we’ll walk through everything you need to know about saving your Twitch streams, with clear steps for affiliates, partners, and regular users alike.
How Twitch’s VOD System Saves Your Streams
Twitch’s VOD system acts as an archive of your past broadcasts. However, Twitch does not save your streams by default. You must enable the feature in your account settings to preserve your content. Once activated, streams are automatically stored and can be accessed from your channel’s video section.
Method 1: Enable VOD Saving on Twitch (Desktop Guide)
Now that you know how the system works, let’s walk through the steps to turn on automatic saving for your streams on Twitch.
Step 1: Open the Creator Dashboard
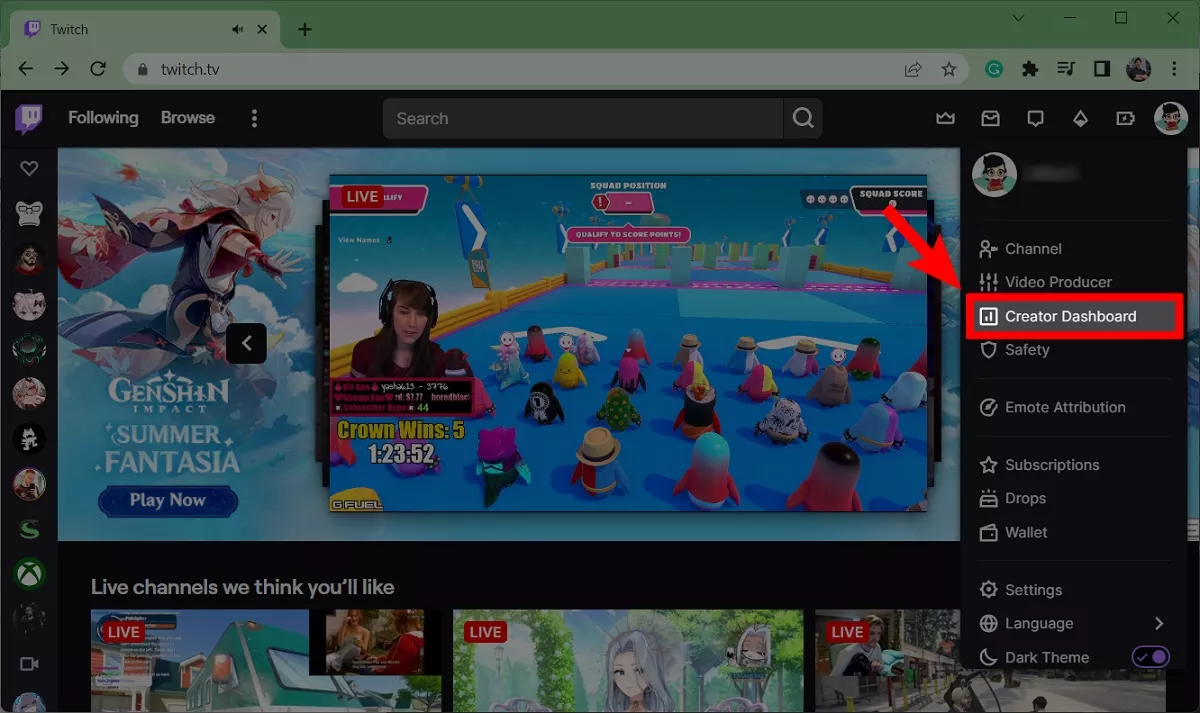
- Navigate to Twitch’s homepage. Click on your profile picture in the top-right corner.
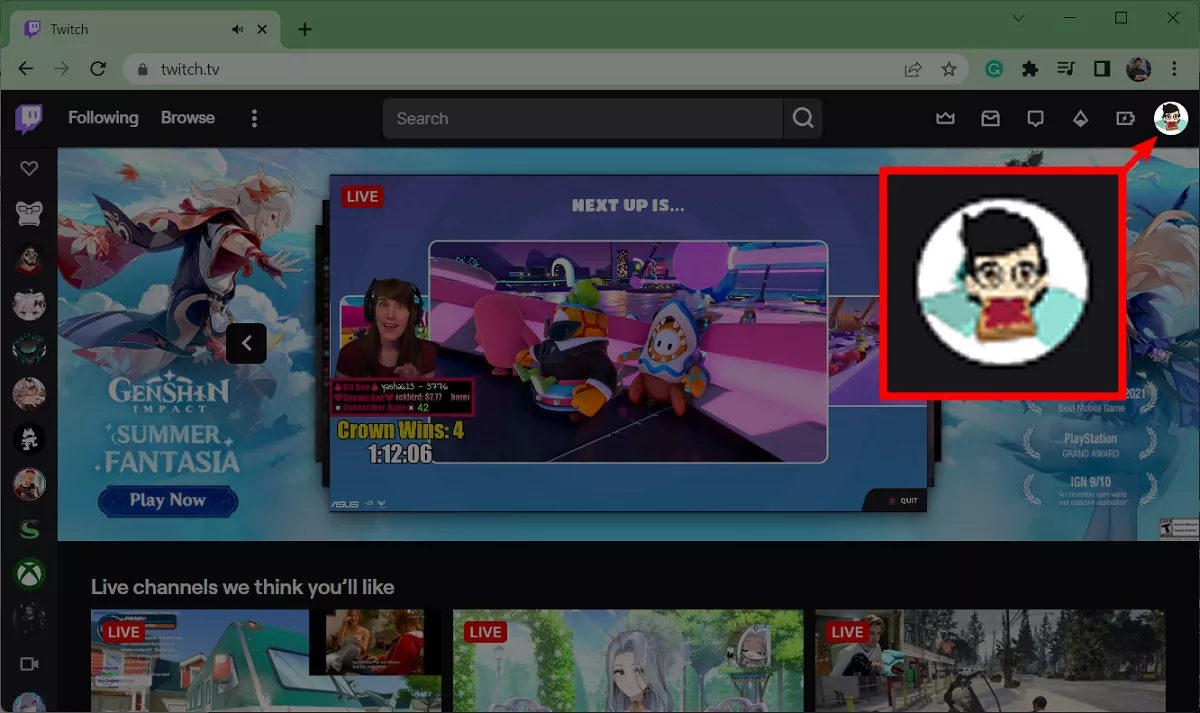
- From the dropdown menu, select the Creator Dashboard option to access your streaming management tools.
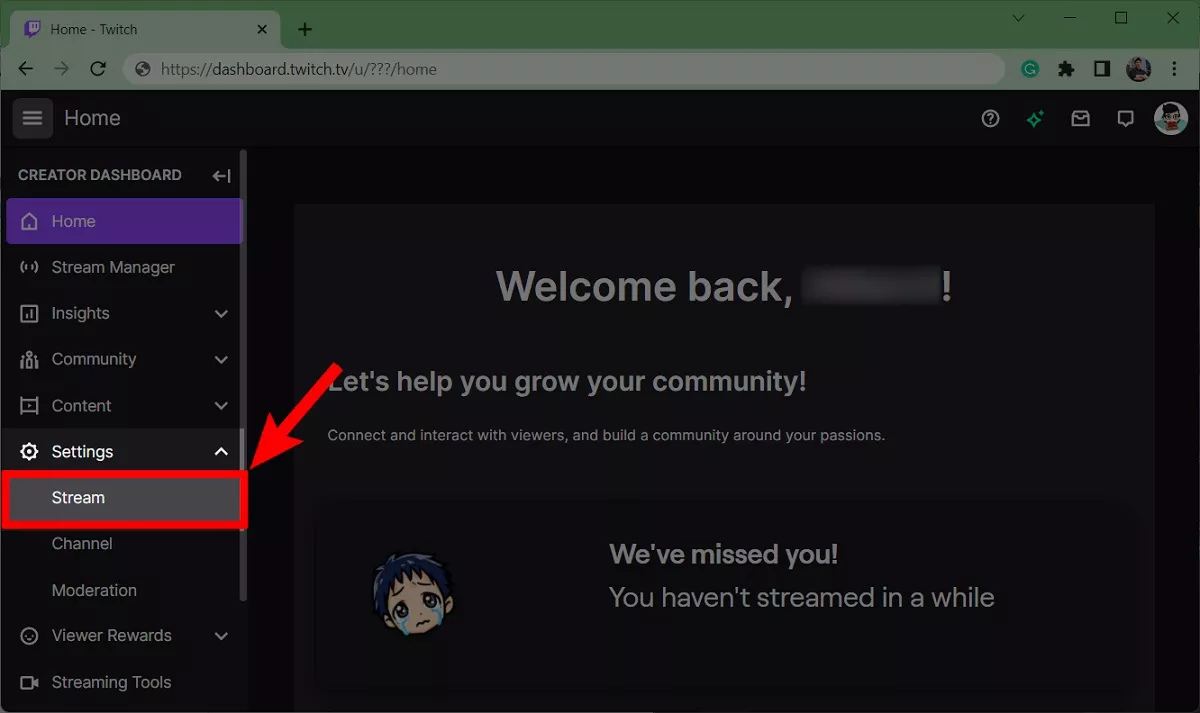
Step 2: Go to Twitch Stream Settings
- From the left sidebar in the Creator Dashboard, click on Settings.
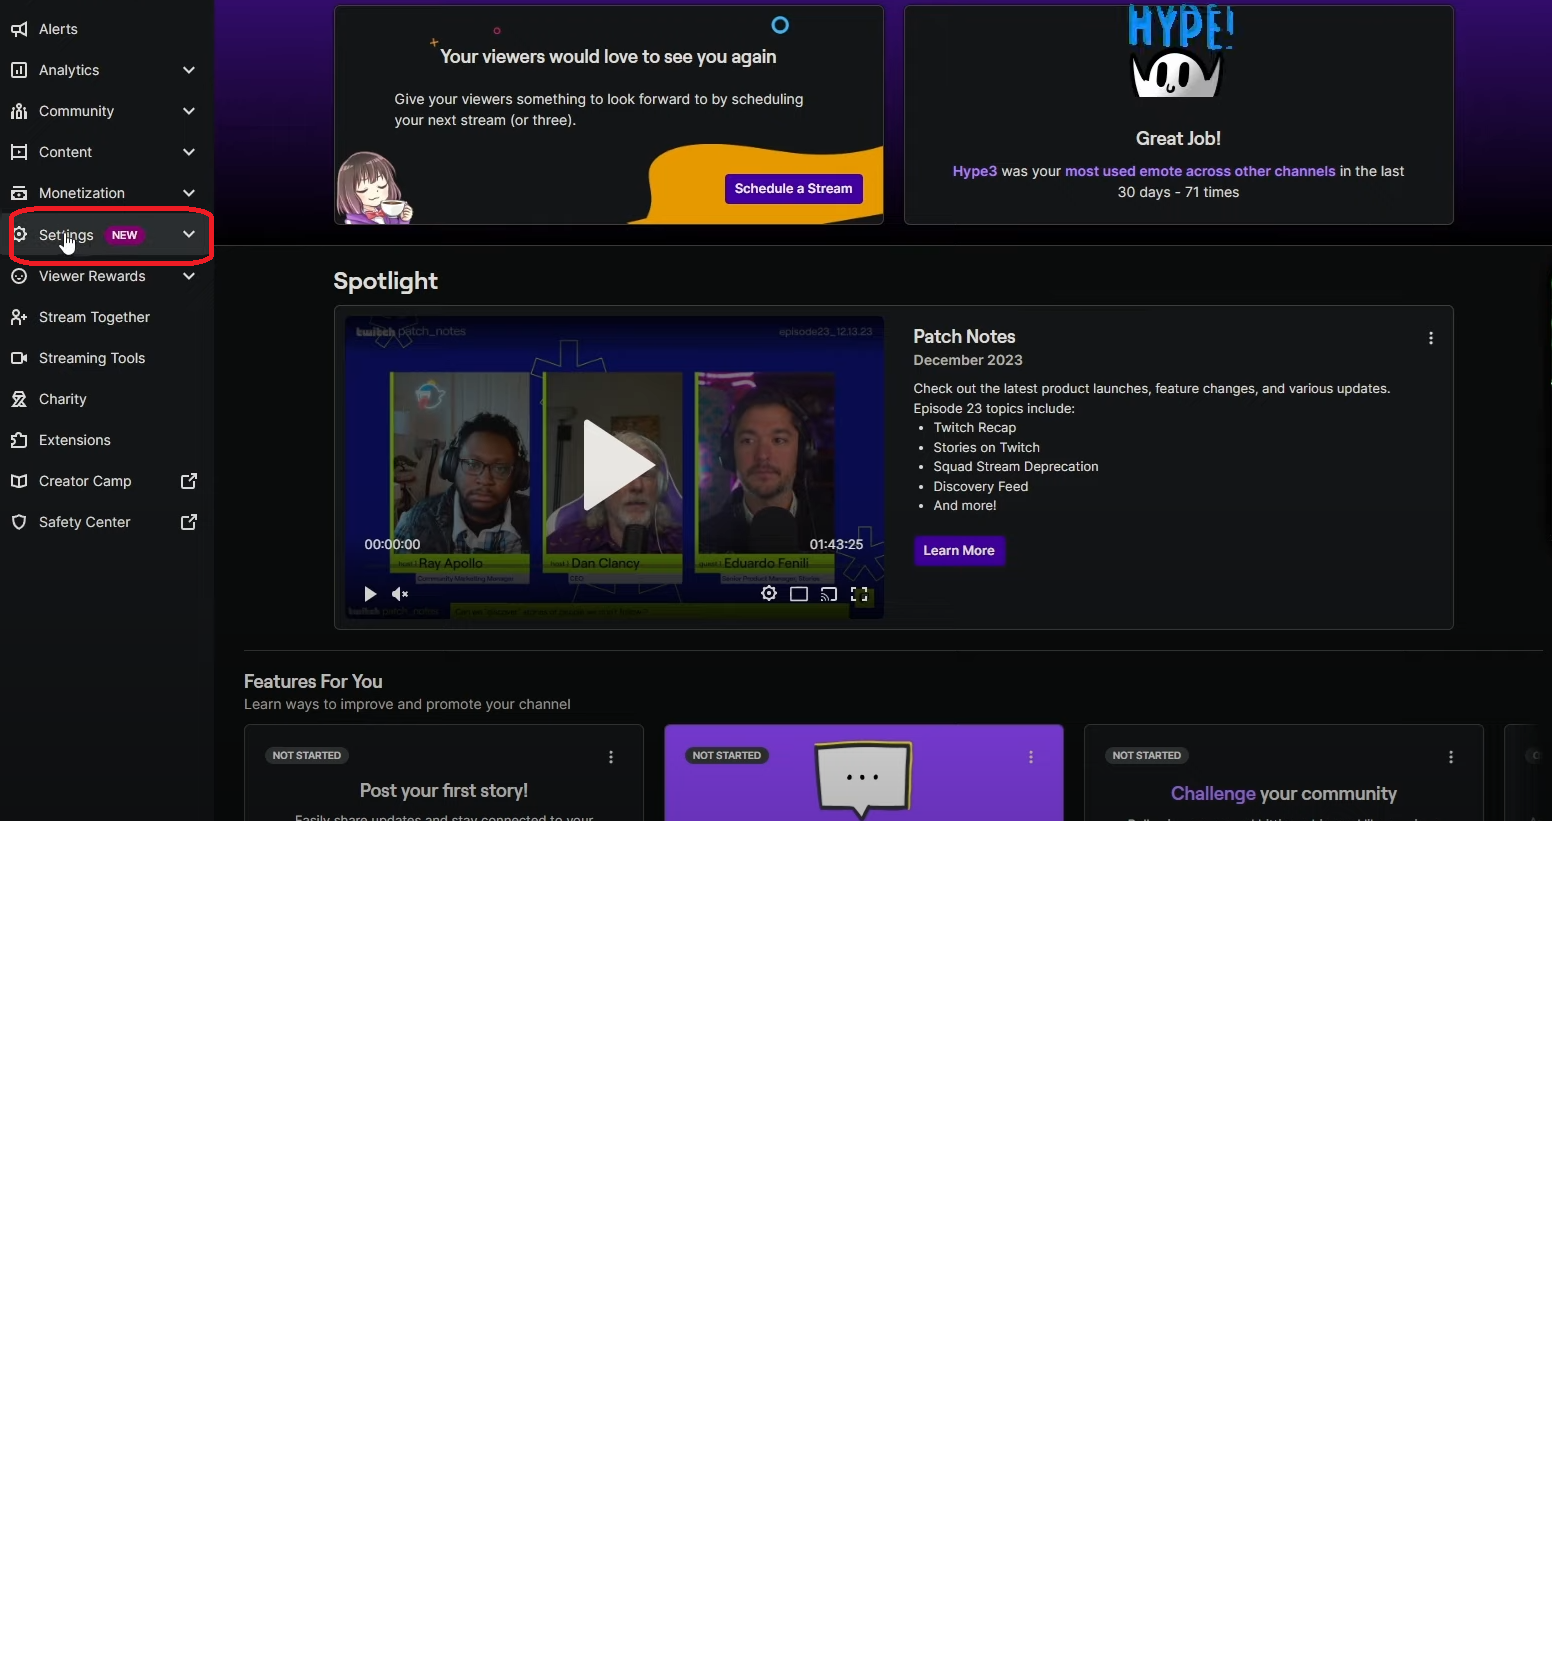
- Next, choose Stream from the available options. This section contains all your streaming and archiving options.
Step 3: Turn On Save Past Broadcasts
- Scroll down to find the VOD Settings section on the stream page.
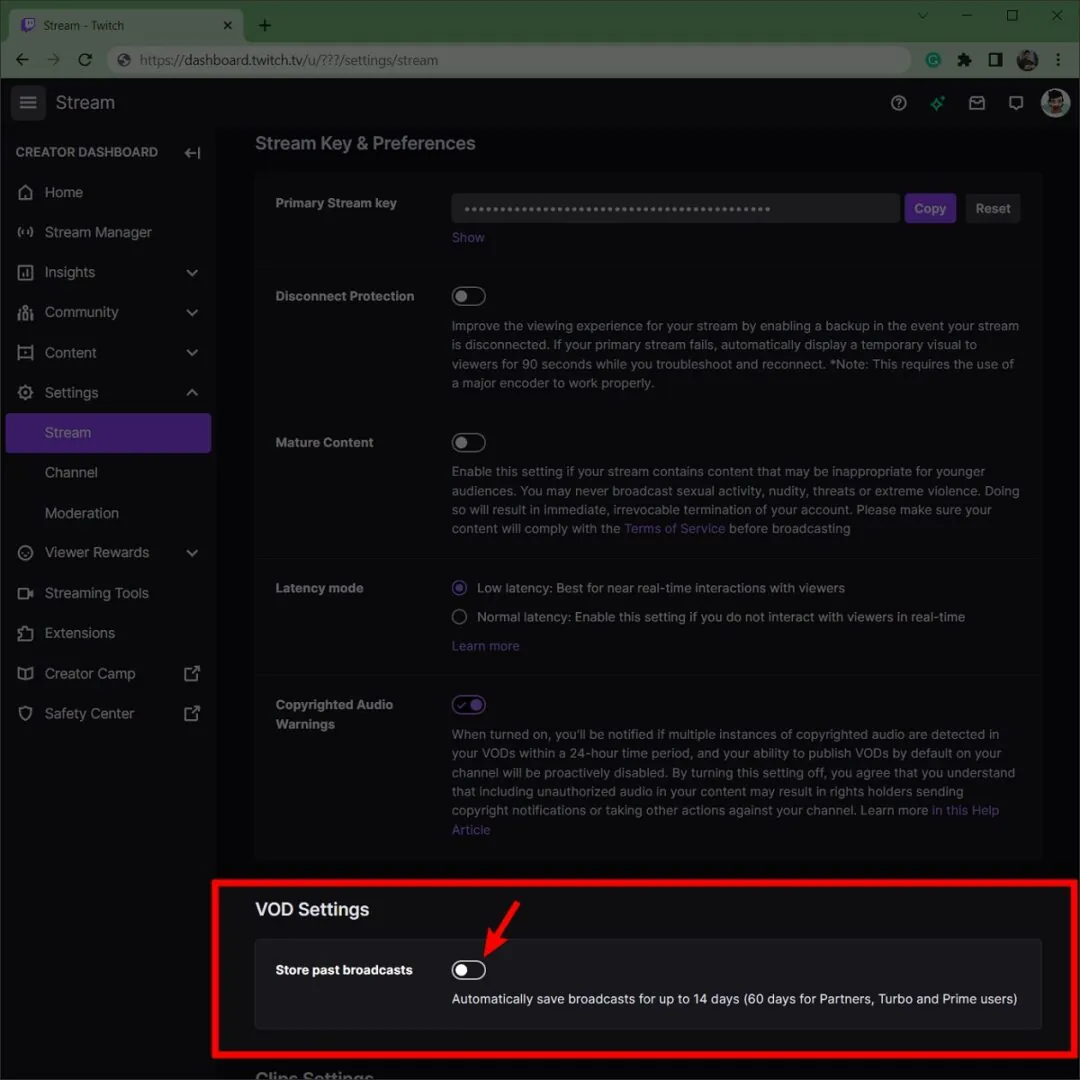
- Click on the Store past broadcasts to enable automatic saving as per your subscription.
- You’ll also see an option to automatically publish past broadcasts as VODs.
- If you leave this off, you get control over which recordings go public. This allows you to filter out test runs or less-polished streams.

Method 2: Saving Twitch Streams with Highlights
Enabling VODs is only the first step. Highlights are the best way to keep your content accessible on Twitch. Check out the step-by-step process.
Create Highlights from Past Streams
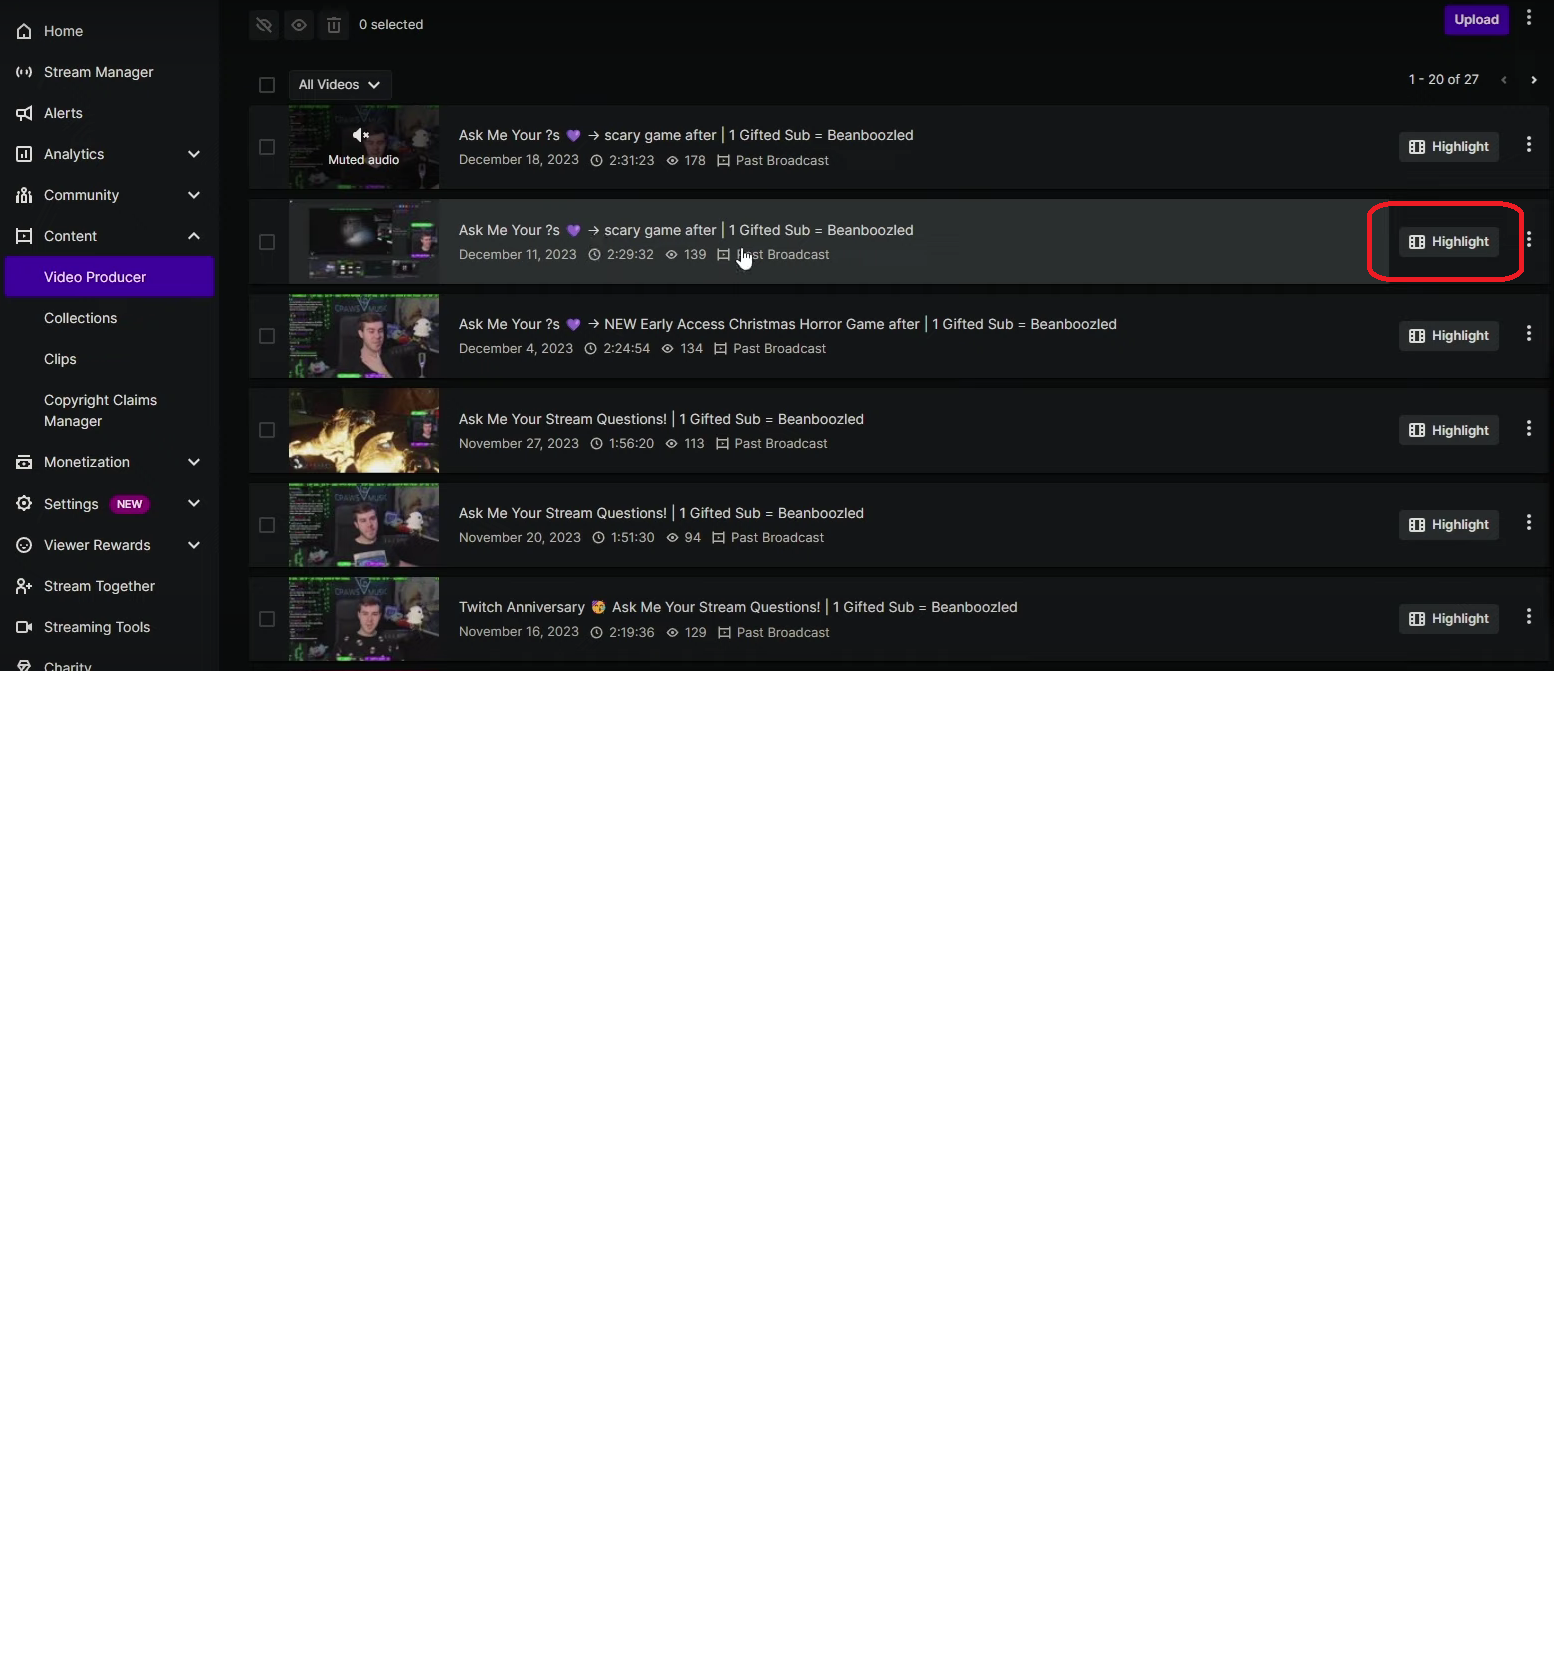
- Head over to the Content button and select Video Producer in your Creator Dashboard to view saved streams.
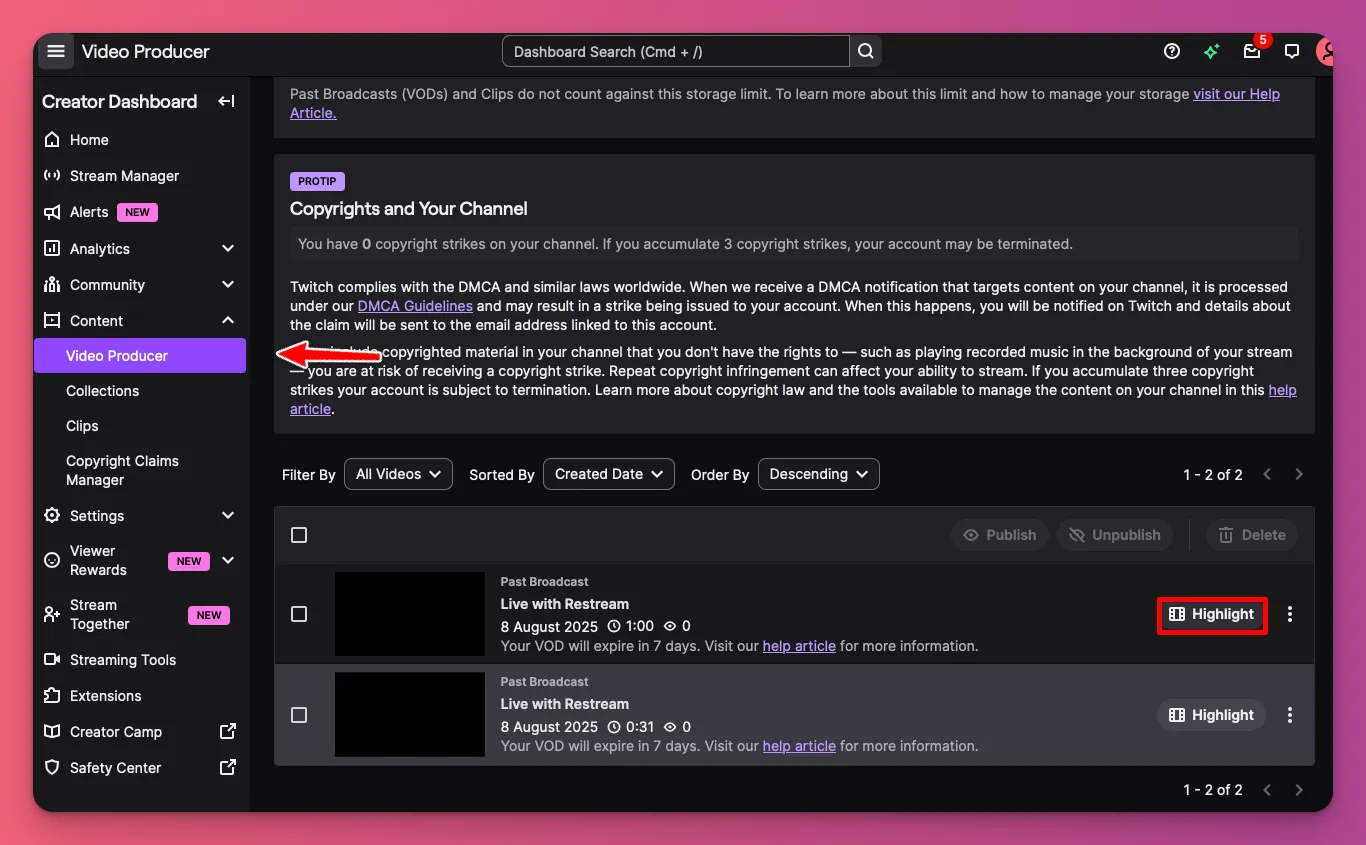
- Now, choose your desired stream and select the Highlight button under a VOD of your choice.
- A yellow bar will appear, allowing you to trim and select the portion you want to keep.
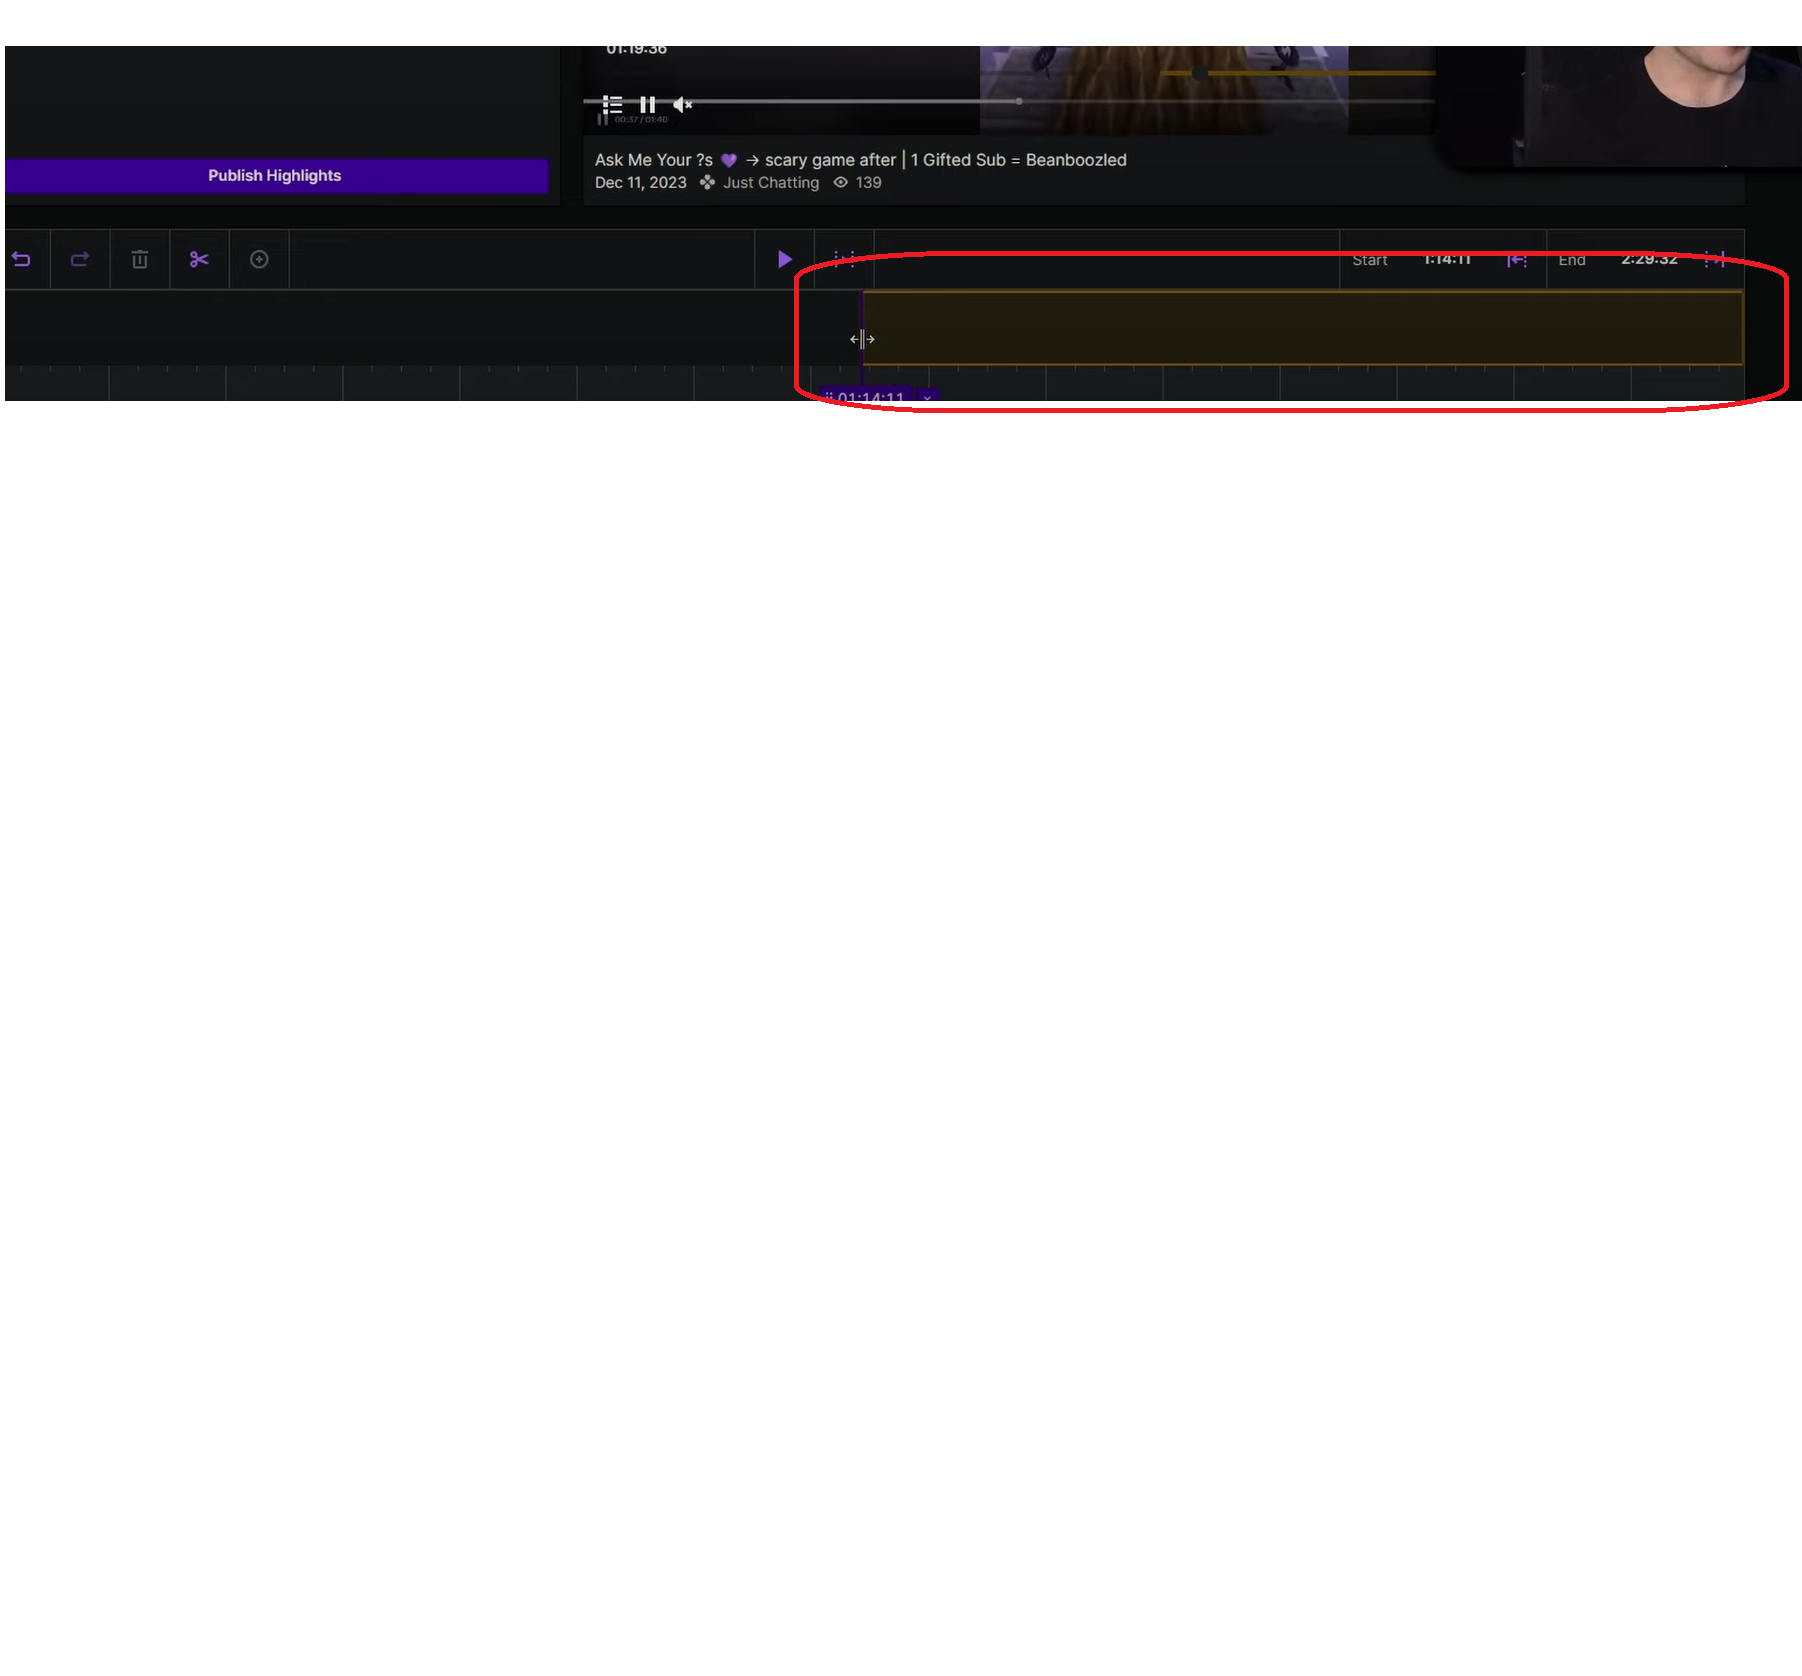
- You can drag this bar’s endpoints or use the Scissors icon to trim the undesired part from the stream.
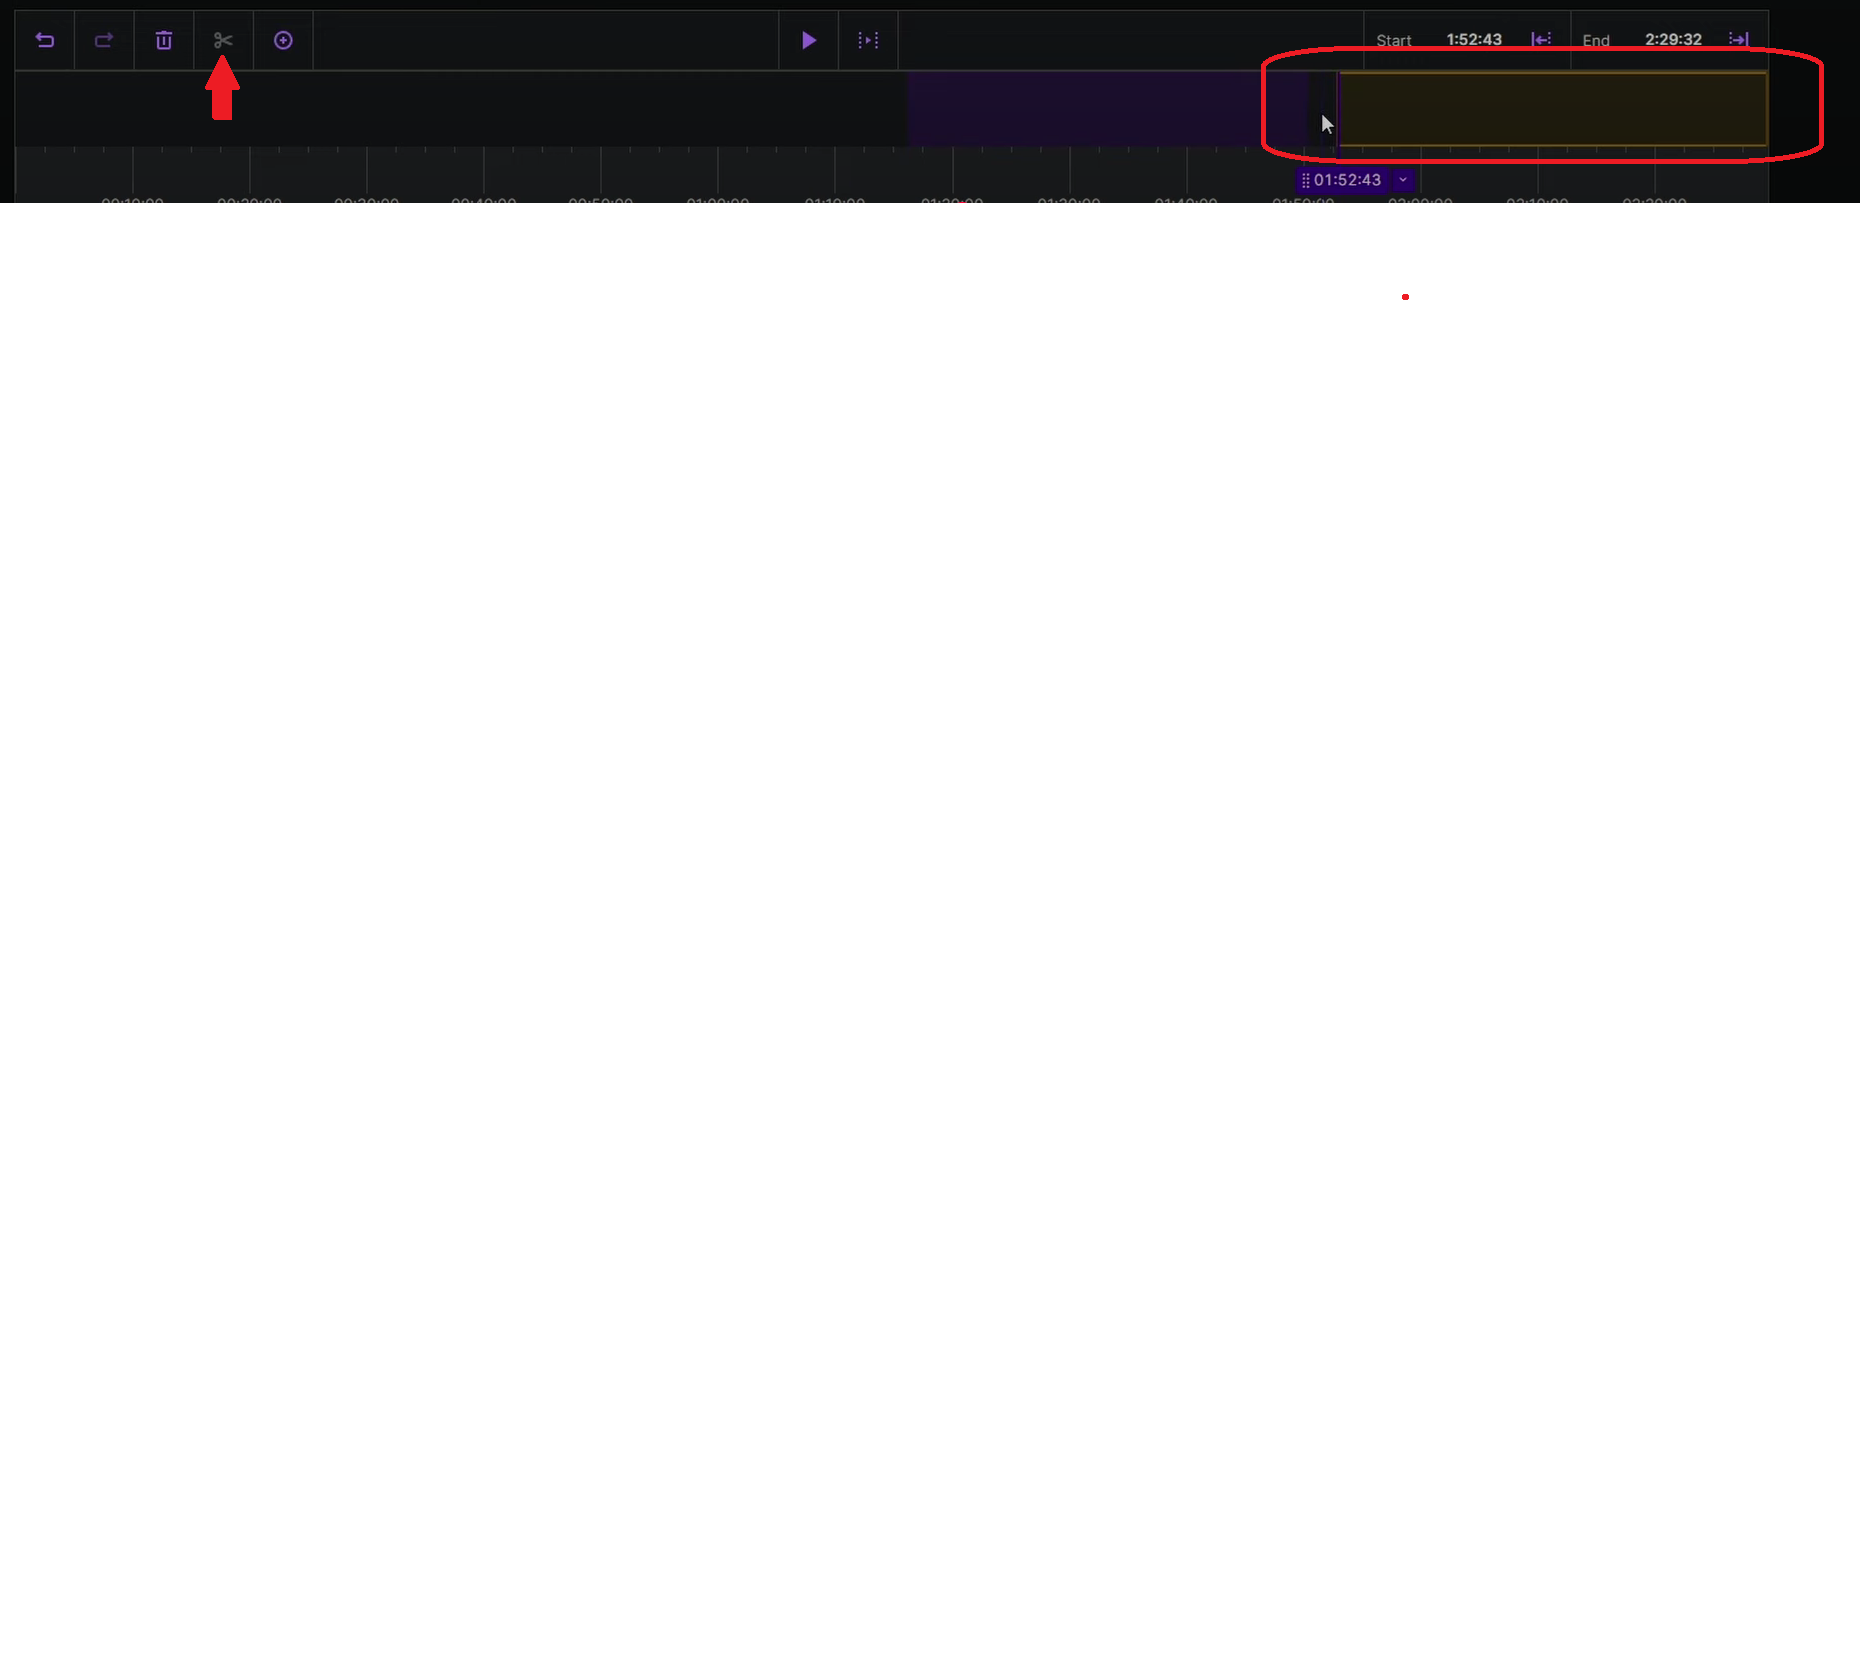
- Select the specific moments, or leave it covering the full duration to save your complete broadcast.
Publish Highlights to Your Channel
- Once you have trimmed the video, click on Publish Highlights.

- Then, add a strong title, description, and thumbnail. Metadata like keywords and visuals help improve discoverability and engagement rates.

- Once your broadcasts are saved, highlights ensure your best moments stay accessible for longer.
Download Twitch Streams for Secure Backups
While highlights keep content on Twitch, downloading your VODs ensures you always have personal copies. Follow the given steps to download your streams.
Download Saved VODs Directly
- For streamers who want offline copies, Twitch offers direct download functionality.
- For creators who want a reliable backup outside of Twitch, the Hollyland VenusLiv Air provides 24/7 streaming capability, ensuring uninterrupted archiving of your broadcasts. It also supports 4K 30fps recording, which gives professional-quality copies of your streams.
- On the Twitch dashboard, click on your Profile icon, then Video Producer.

- Next to each VOD, click on the three vertical dots menu icon.

- Select the Download option to save the complete stream file to your device.

- This method works perfectly for content creators who are planning to edit streams into shorter highlight reels or upload to other platforms.
How to Save Twitch Streams on Mobile
If you are streaming or managing your channel on the go, Twitch’s mobile app makes it possible to save broadcasts directly from your phone with just a few quick adjustments.
Method 1: Enable Automatic Twitch Stream Saving on Mobile
- Download and open the Twitch App on your Android or iOS device or log in to twitch.tv on your browser.

- Tap your profile icon at the top left corner to access your channel dashboard.

- Tap “Settings” (gear icon or under profile menu).

- Scroll and select Channel & Videos. This may appear as Channel Settings on some devices.

- Look for an option named Store Past Broadcasts or Enable VODs. Switch it ON.

Method 2: Download or Highlight Twitch Streams on Mobile
Currently, Twitch’s mobile app limits direct downloads; you may need to access VODs from the desktop site for downloads. Highlighting VODs, however, is possible:
- Open the Twitch App, go to your profile, and visit the Video Producer Section.

- Select Videos and then go to Video Producer. Here, you’ll see your saved broadcasts.

- Tap a VOD to open it, and click on three dots to look for options to ‘Create Highlight.’

- Follow the on-screen prompts to trim and save specific clips.
Conclusion
Twitch makes it easy to save streams using VODs, highlights, and downloads, but storage is limited. VODs expire after 7, 14, or 60 days, depending on your account type. So always download important broadcasts before they vanish. Building a backup library ensures your best content remains secure, reusable, and ready for long-term growth across platforms.
FAQs
Q. How long do Twitch VODs stay saved?
A. This depends on your subscription plan. For Regular users, Twitch offers 7 days, and affiliates get 14 days, while partners receive 60 days of storage. But you can download them offline to save permanently.
Q. Can I save streams if I’m not a partner or affiliate?
A. Yes, all Twitch accounts can enable VOD saving on their dashboard. But this is valid only for a 7-day limit if you are a regular user.
Q. Can viewers download my VODs?
A. No, only streamers are allowed to download their own content. However, viewers can watch saved streams and highlights, but cannot download them.
Q. What happens if I don’t create highlights before the storage limit ends?
A. Your VODs will automatically expire after 7, 14, or 60 days unless they are downloaded for offline access.
Q. Do I need extra software to save Twitch streams?
A. No, Twitch’s VOD system manages saving automatically. You can also use any external tools for creating the backups.
