.png)
Ever thought about how those content creators sound so clear in their podcasts and streams? And when you try to record yourself, the recordings often have crackling or buzzing noises in the background – no matter how expensive your microphone is.
Relax! You’re not the only one experiencing this issue. Reddit and other public forums are full of queries on how to eliminate microphone static noise. So, to ensure you don’t have to spend time searching for solutions on every platform, we have crafted this guide that shows you 4 methods to get rid of static sounds. Moreover, you will explore additional tips to make your microphone free from static noises.
Let’s begin!
How to Eliminate Microphone Static Noise?
Here are the 4 tried-and-tested ways to overcome the static noise that comes out of your mic.
Method 1: Choose the Correct Microphone on Your Computer
If you have multiple microphones connected to your Windows PC, it might be possible that the default microphone is not selected. Therefore, you will need to choose the right mic to differentiate the primary audio input source from the secondary, as any one of the microphones might be causing the static noise.
So, here’s what you should do.
- Step 1: Open your computer. Once all icons on the system tray appear, click on the “speaker” symbol and choose “Sound” from the menu
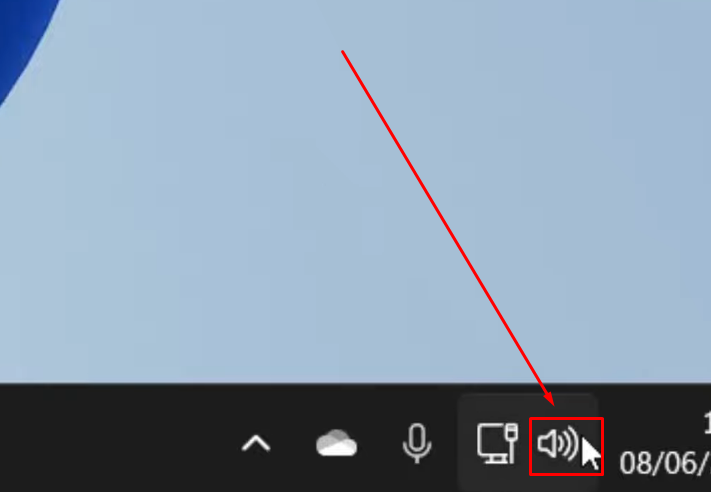
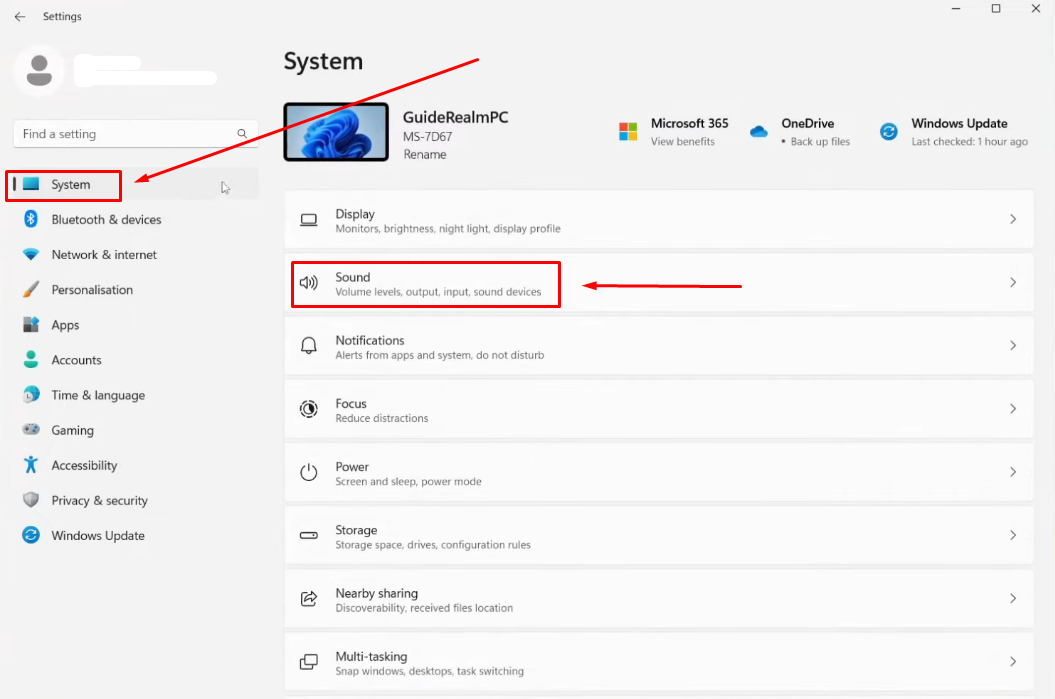
Alternatively, you can go to “Settings,” choose “System,” and select “Sound” to view related settings.
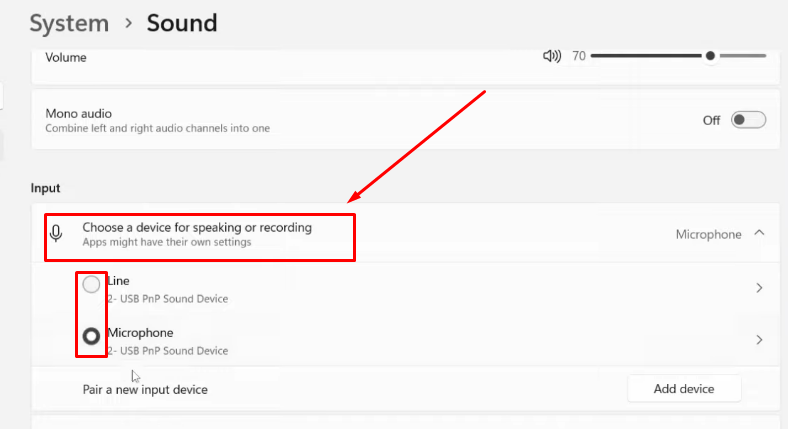
- Step 2: On the “Sound” settings page, scroll down to the “Input” section
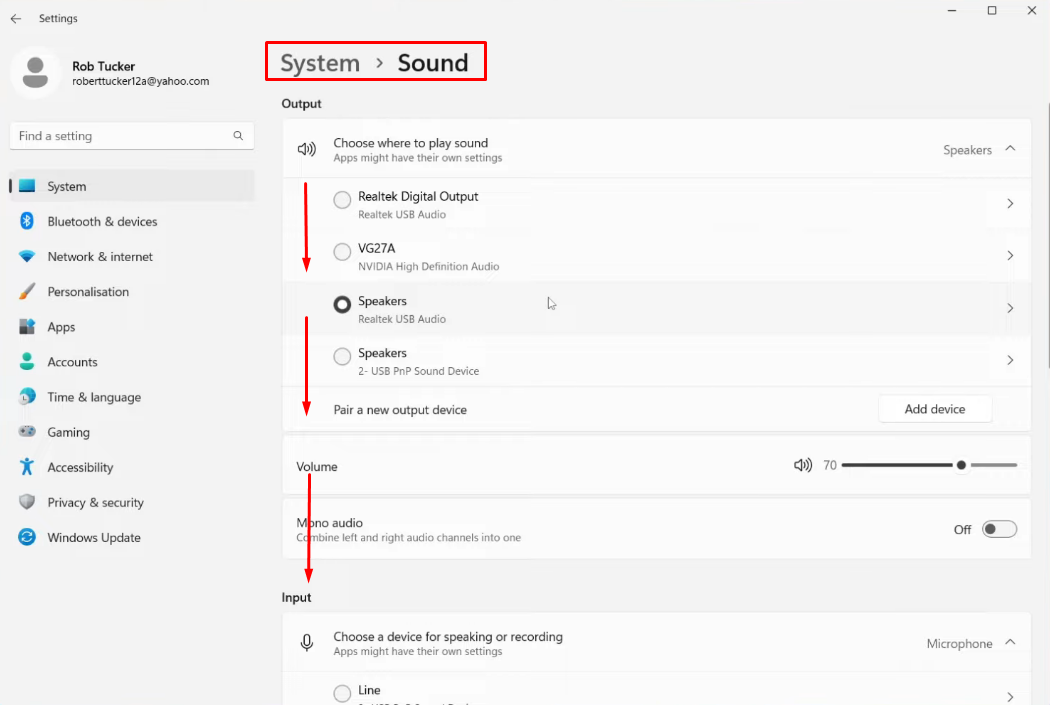
- Step 3: Here, you should select the microphone you want to use as a primary source of input audio. So, look for the microphone’s name under the “Choose a device for speaking or recording” title
- Step 4: When you see the name of your preferred mic, select it by clicking on the checkmark option
- Step 5: Open any audio recording tool and check if the static noise is now gone
Method 2: Increase and Decrease Input Volume
If you have correctly set the primary microphone as your input device, but the static noise is still present, try changing the volume levels.
To do that.
- Step 1: Go to the “Settings” of your PC and click on the “System” option in the left panel, then choose “Sound”
- Step 2: Scroll down to “Volume,” which is just below the “Input” section
On the left side, you will notice a microphone icon with an adjustment bar along with a slider.
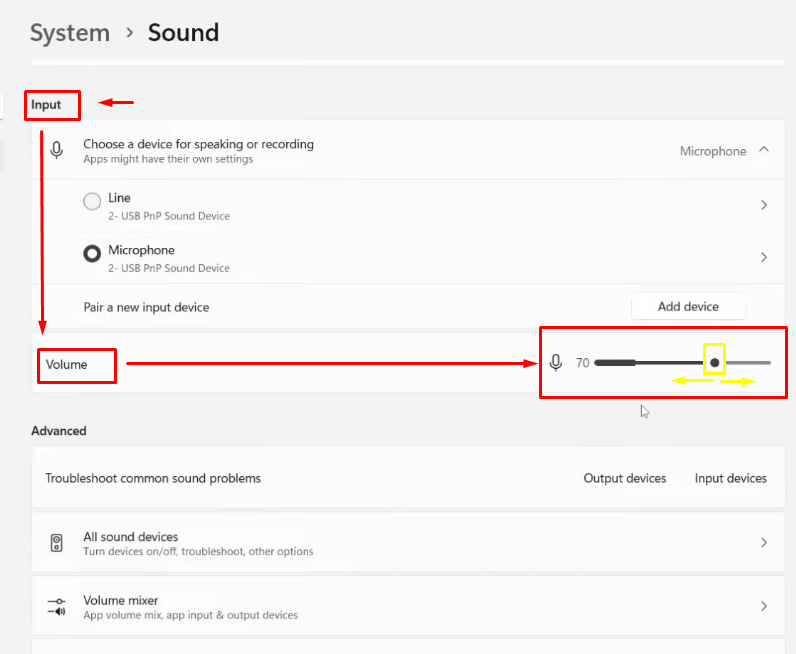
- Step 3: Right-click on the slider and keep pressing the mouse button to adjust the bar left and right in order to set the volume
NOTE: Start by lowering the volume on different levels, such as 70, 60, and 50, and check if the static noise still exists.
Method 3: Use the Windows Enhancement Option
If the above two ways didn’t resolve the issue, this method has a high chance of eliminating microphone static noise.
Here’s what you need to do:
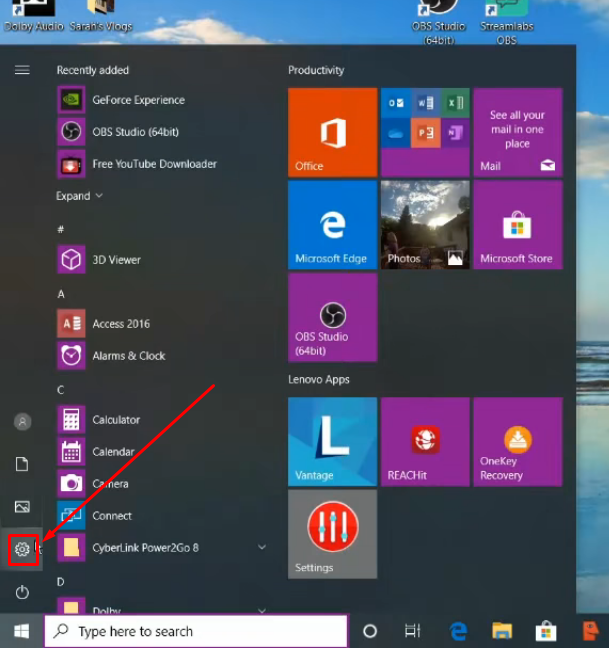
- Step 1: Open your Windows computer and click on the “Start” button

- Step 2: When the Start menu appears, click on the “gear icon” above the power icon to view the main settings
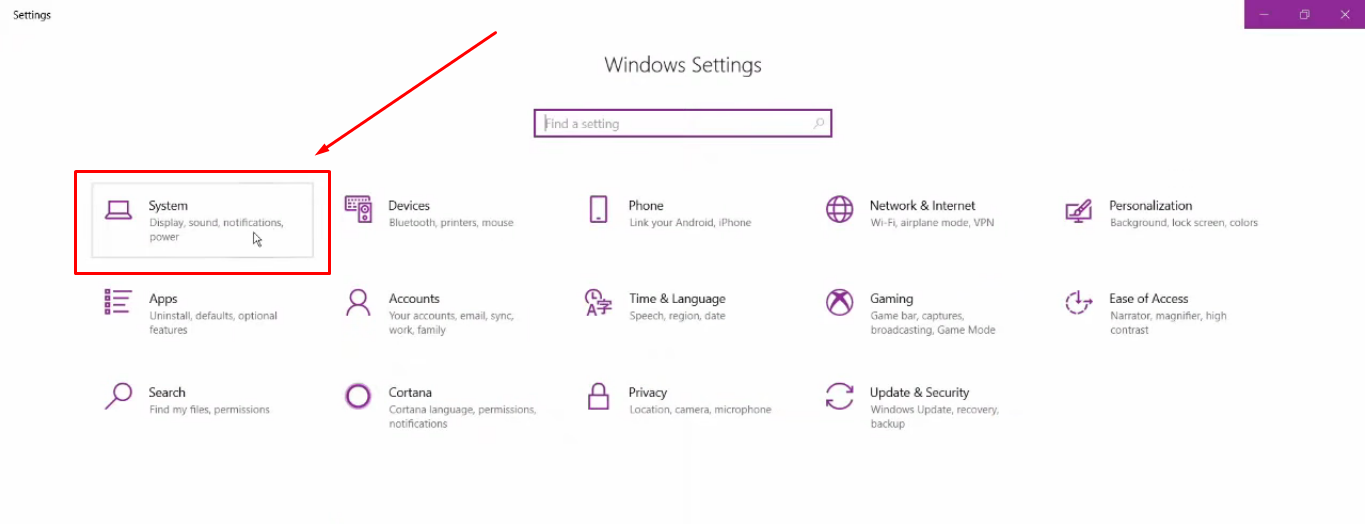
- Step 3: Now, choose the “System” tile/option
- Step 4: Once inside the system’s settings, look at the left sidebar and click on the “Sound” option
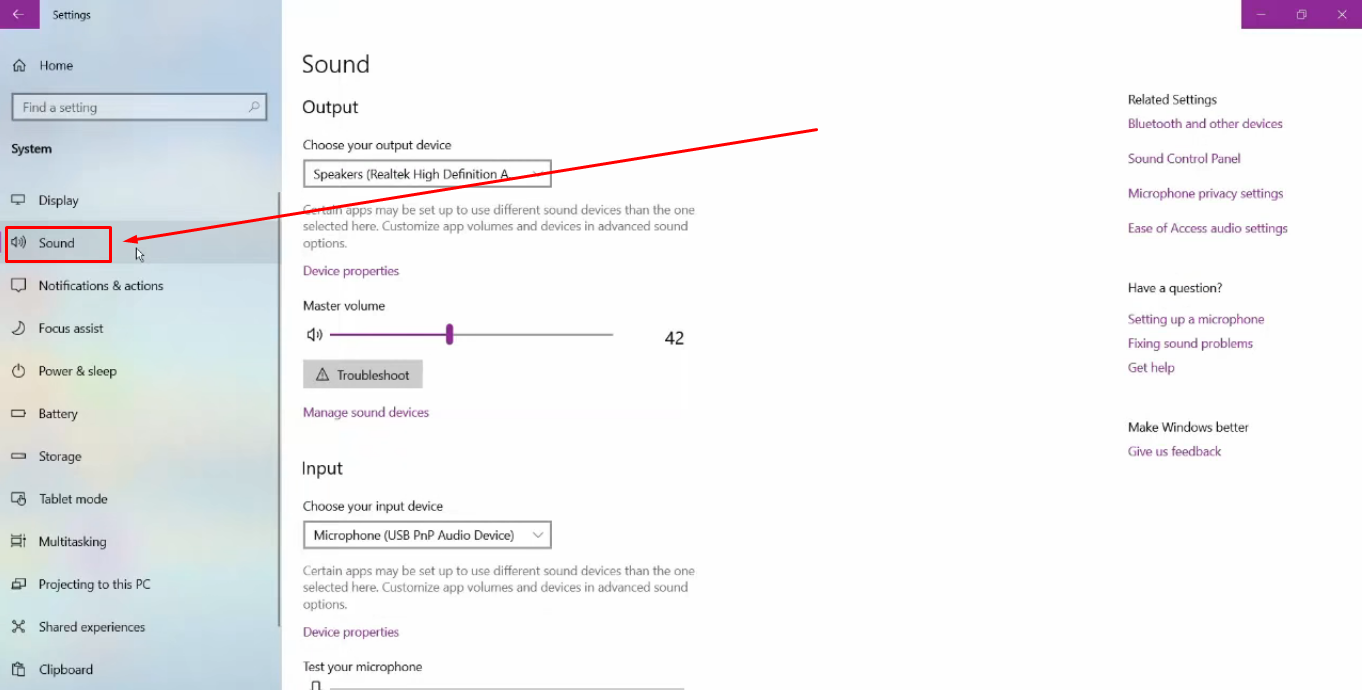
After that, you will see sub-options related to Sound in the right panel. However, if you look at the extreme right, you will see the “Sound Control Panel” option under the “Related Settings” section.
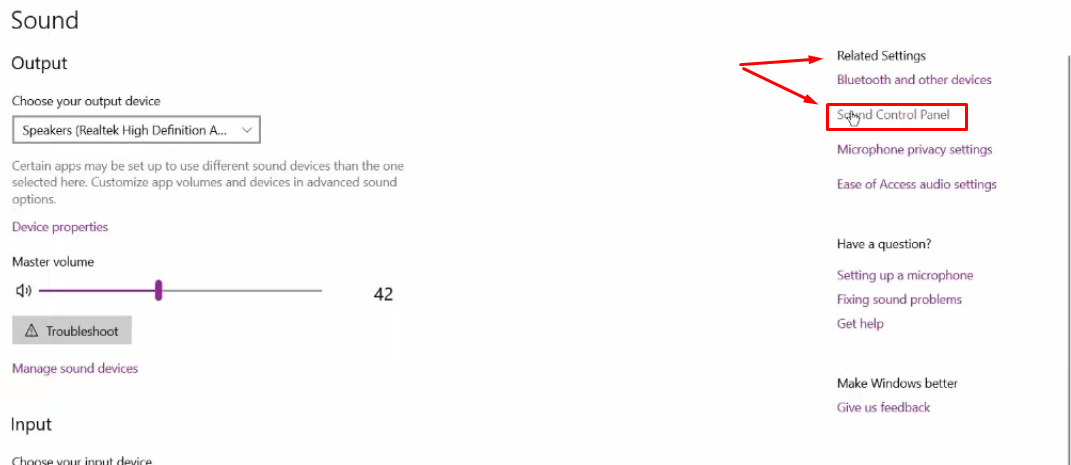
- Step 5: So click on “Sound Control Panel” to open a new window with playback, recording, and other options
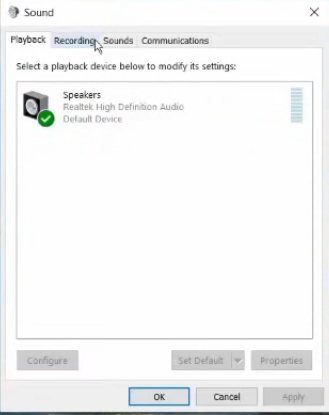
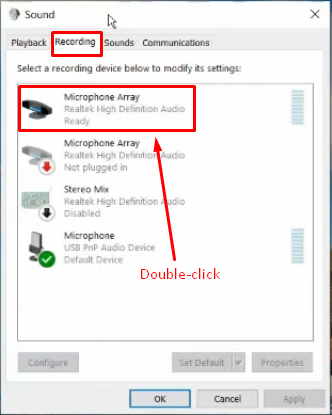
- Step 6: Click on the “Recording” tab on the top to view all the enabled and disabled recording devices connected to your PC
- Step 7: Look for your microphone’s name in the list and double-click it
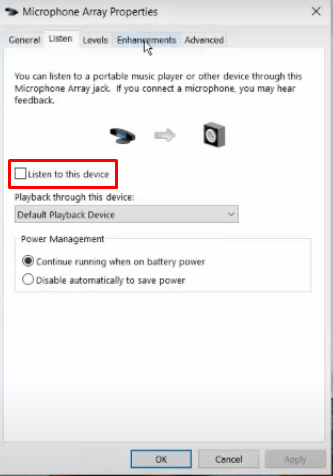
Doing so will open the microphone’s properties like this.
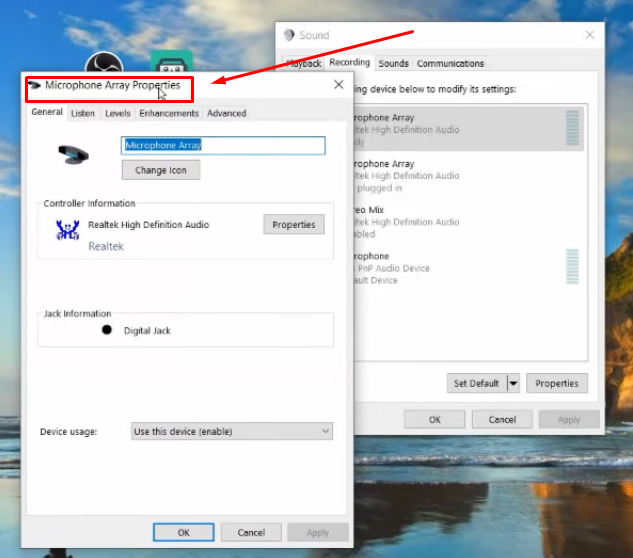
- Step 8: On the properties window, you will see different tabs. By default, you will be inside the “General” tab. So click on the “Listen” tab and put a checkmark on the “Listen to this device” option
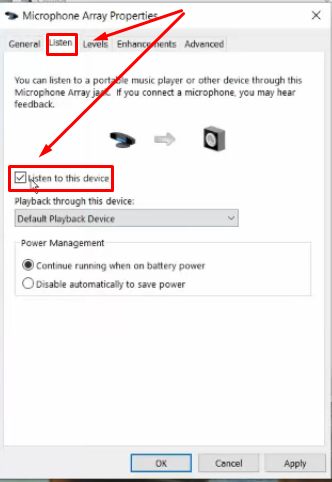
Through this step, monitor your microphone’s sound and observe the presence or intensity of the static noise. Simply speak into the mic and use headphones or speakers to hear the feedback. Then, uncheck the box.
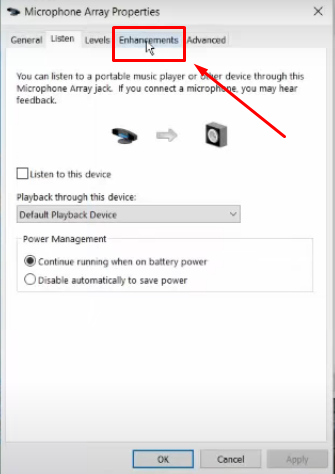
- Step 9: Assuming that you have noticed static noise, click on the “Enhancements” tab in the same properties window
- Step 10: Here, you will observe different sound effects along with their description. While you can experiment with all of them in the list, some effects, like Acoustic Echo Cancellation (AEC) and Beam Forming (BF), may work best to remove static noise from your mic
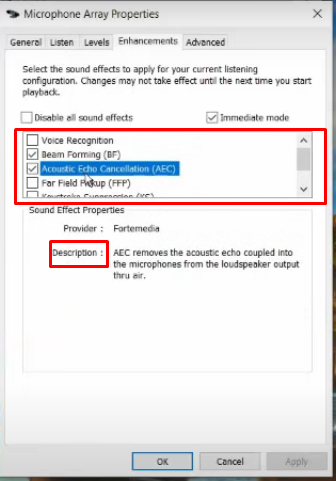
- Step 11: Click the “Apply” and “OK” button
NOTE: Some users reported that their Enhancement tab is missing from the microphone properties. If you’re experiencing the same issue, follow these simple steps to make this option appear on the properties window.
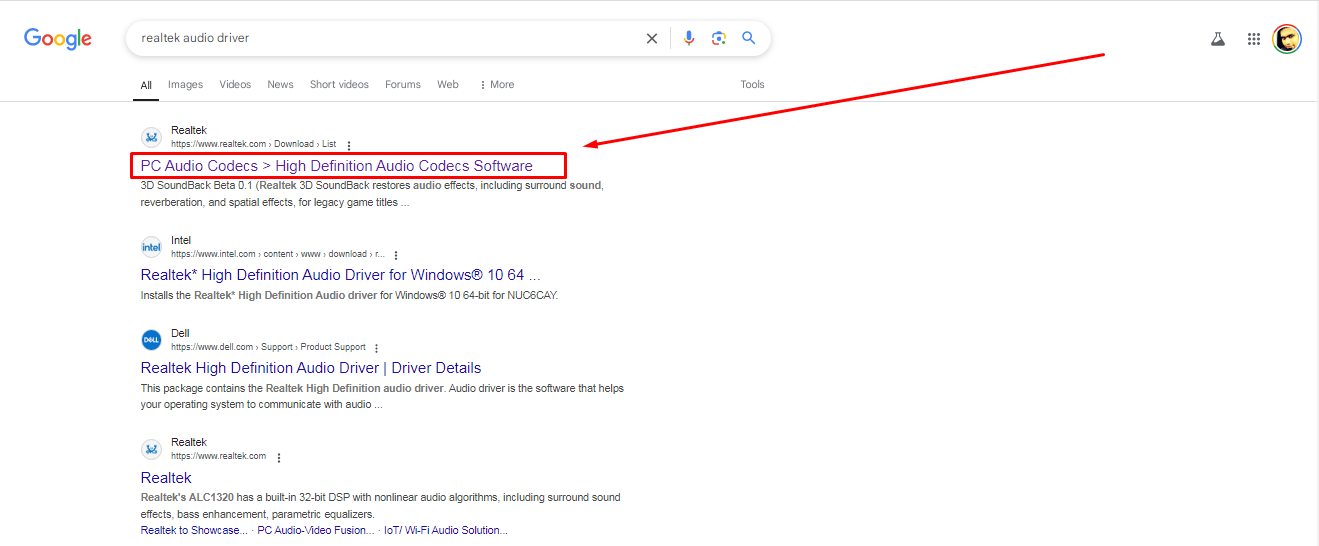
- Step 1: Open your browser on your Windows PC or laptop. Go to Google.com and search for “realtek audio driver”

- Step 2: Upon getting the search results, click on the link that says “PC Audio Codecs > High Definition Audio Codecs Software.” It should be the first URL on Google’s page
- Step 3: Download the file with the following name:
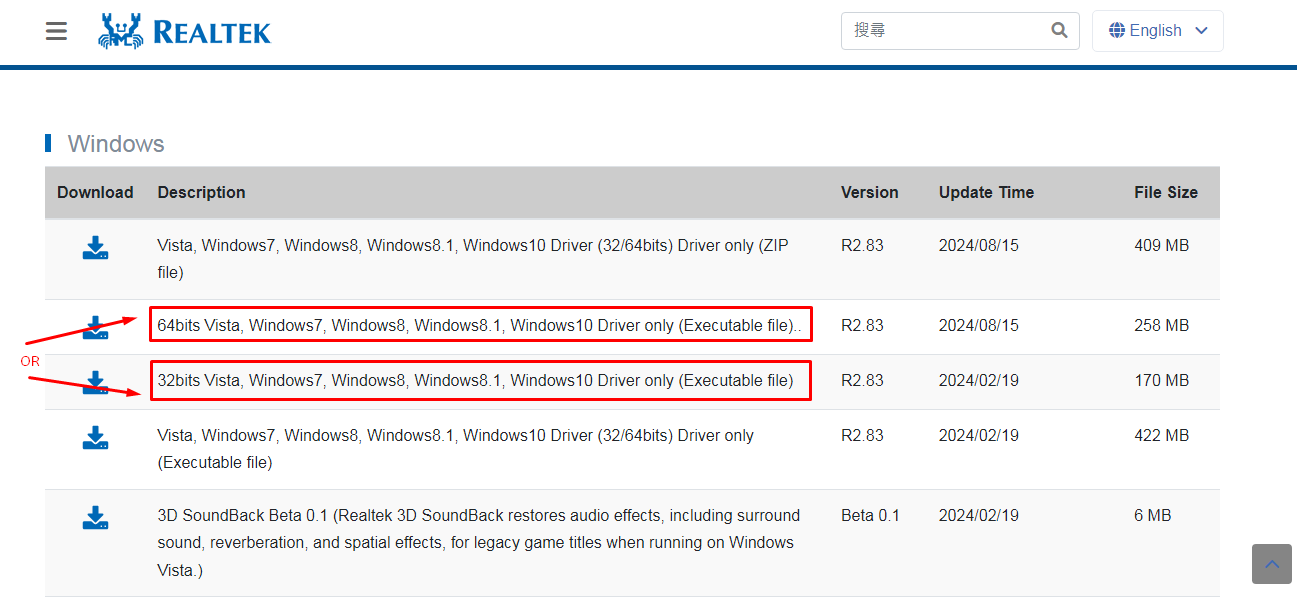
64bits Vista, Windows 7, Windows8, Windows 8.1, Windows10 Driver only (Executable file)
OR
324bits Vista, Windows 7, Windows8, Windows 8.1, Windows10 Driver only (Executable file)
- Step 4: Install the file and open microphone properties, and now you should be able to see the “Ehancements” tab
Method 4: Adjust the Microphone Input Volume on the Mac
Adjusting the input volume and enabling ambient noise reduction can help get rid of the static noise that your microphone makes.
Use these instructions to locate these options on your Mac.
- Step 1: Open your Mac computer and click on the “Apple” menu icon
- Step 2: Choose “System Preferences” or “System Settings” from the menu
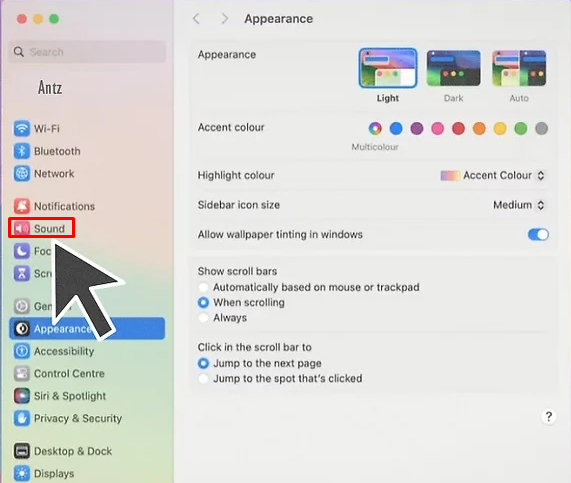
- Step 3: Look for the “Sound” option in the left panel and click on it
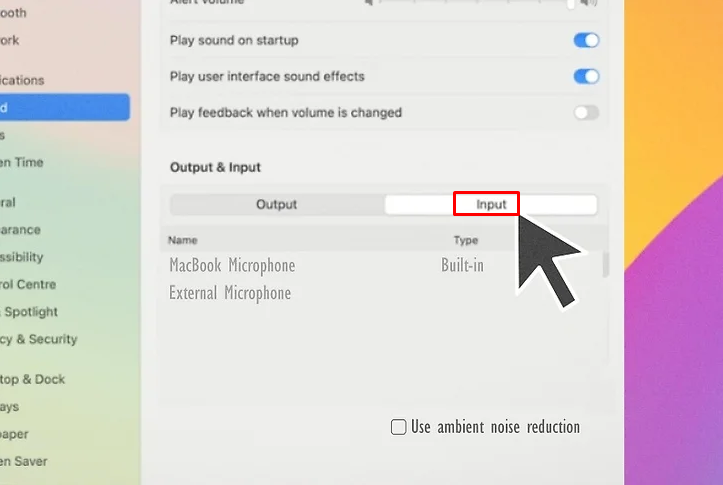
- Step 4: Now, focus on the right area of the screen, scroll down and click on the “Input” tab
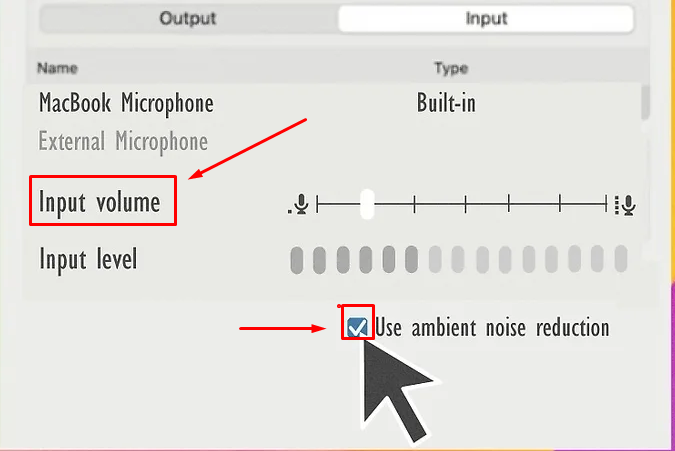
- Step 5: Select your microphone by clicking on the name. Then, use the slider to adjust the mic volume and lower it. Also, put a check on the “Use ambient noise reduction” option
- Step 6: Test your mic to see if the problem is fixed
More Tips to Eliminate the Static Noise from Microphone
Here are a few more tips that may look small but have the power to make a huge difference in diminishing static noise from the mic.
Lower the Mic Gain
Reduce the gain on your amp or audio interface immediately. High gain typically causes disruptive static noise in most recordings. Locate the gain knob on the microphone or interface carefully. Turn the knob down by one or two decibels steadily. Speak into the mic and test the improved sound quality. Adjust the settings slowly until the static noise is gone.
Secure the Cables
Push all headphone and microphone cables fully into their ports. Keep in mind that loose jacks often create persistent static and unwanted noise disturbances. Therefore, ensure that the cables are firmly connected to both devices and ports. Test each connection by gently moving the cables slightly during operation. Faulty cables may require immediate replacement to remove static permanently. Secure connections consistently reduce interference during audio transmission. Replace damaged cables to ensure flawless audio performance always.
Keep the Microphone Away from Speakers
Place the microphone far from the speakers to avoid feedback loops. Maintain at least ten feet distance from all loud devices. Always avoid placing the mic near amplifiers or other electronics. Quickly relocate any nearby phones or TVs that disturb the recording. Changing positions often effectively eliminates feedback and unwanted static noises. Distance prevents ambient sounds from interfering with clarity. Test several placements to achieve consistently optimal audio quality.
Don’t Place Electrical Equipment Near the Microphone
Separate audio gear from nearby electrical devices to prevent interference. Keep microphones consistently distant from power amps, strips, and wires. Avoid placing computers near audio equipment to reduce current clashes. Relocating devices quickly can lower electrical interference during recording sessions. Switching additional outlets might resolve issues caused by current fluctuations. Isolate all cables to maintain stable audio signals. Test alternative setups if interference problems persist during use.
Turn Off AC and Other Appliances
Disable air conditioning and fans when recording for cleaner sound. Household appliances produce background noise that disrupts clear audio recordings. Turn off nearby heating vents to eliminate additional ambient interference. Shut down household washers, dryers, and dishwashers during recording sessions. Noise from appliances can be picked up by sensitive mics. Silence extra room sounds for optimal recording performance. Monitor all areas to ensure no disruptive noises persist.
Soundproof the Room
Soundproof the recording room using foam or heavy insulation materials. Apply acoustic panels or tapestries to reduce ambient sound effectively. Carpets and curtains also help diminish echoes in the space. Minimizing room reverberations consistently improves vocal recordings and overall clarity. Closet recordings with abundant clothes can also dampen unwanted sounds.
Purchase a High-Quality Microphone
Get yourself a professional microphone with truly superior noise-canceling capabilities. Carefully research and compare reviews before making a final purchase. High-quality microphones significantly reduce the likelihood of disruptive audio issues. For example, the Hollyland Lark Max.

Hollyland LARK MAX - Professional Wireless Microphone
A professional wireless microphone system featuring studio-quality audio with advanced noise cancellation.
Key Features: Studio-Quality Audio | Magnetic Attachment | 8GB Internal Recording
If you’re looking for a high-class, professional-grade wireless microphone, Lark Max covers all the standards. Its MaxTimbre technology ensures clean and crisp wireless recordings up to 820ft. This microphone also comes with a Professional Environmental Noise Cancellation feature to eliminate unwanted noises. Plus, there are no reported issues with static noise or buzzing when using this wireless mic kit with computers, smartphones, or cameras.
Conclusion
You can eliminate static sounds from your microphone in several ways. For instance, on a Windows PC, make sure you have selected the right microphone if you have multiple mics in your setup. Next, try increasing and decreasing the mic’s volume to find a point where the voice is clear and static noise fades. You can also try this volume adjustment fix on your Mac and enable the ambient noise-reducing option.
It is also noted that many users choose effects from the microphone’s properties in the Enhancement section to mitigate the microphone’s static noise.
Besides, there are a couple of things that you should take care of to stop the crackling sounds and irritating buzzes. For example, soundproof the room, avoid recording near electrical appliances, and turn off ACs and fans.
If you’re tired of dealing with frustrating static noise during recordings, upgrading to a reliable wireless lavalier microphone can dramatically enhance the clarity and professionalism of your audio. By ensuring stable wireless connections and crystal-clear sound, a quality lavalier mic is key to consistently achieving static-free recordings.
Frequently Asked Questions about Eliminating Microphone Static Noise
Q1. How do you reduce static noise from a dynamic microphone?
Reduce the input level on the dynamic microphone immediately. Then, add extra gain using the DAW’s control panel. Boost a clean signal by lowering the input first. Run tracks at -20dB if needed. Use gain plugins or EQ to restore normal volume. Address electrical noise by selecting a quiet recording spot. One of the best solutions is to consider using a portable vocal booth for extra isolation.
Q2. Why do I have extreme static on my mic?
Excessive microphone volume often produces extreme static noise. Lowering the volume can reduce static disturbances effectively. Ground issues may cause additional constant static interference. Also, recording audio on an old laptop can raise this issue. A user on Reddit reported that a three-prong AC adapter plug started grounding problems, causing static noise in recordings. Therefore, using a two-prong adapter is likely to get rid of the static noise due to grounding.
Q3. What’s this static noise coming from my USB mic when the volume is at 0?
Static noise may occur on a USB microphone. Volume settings sometimes do not affect unwanted background interference. Electrical power from the USB port often causes issues. A USB hub can isolate the microphone from interference.
Q4. How to treat a recording with static noise?
Noise suppressor plugins help reduce static noise effectively. Many modern DAWs reliably include built-in noise suppression tools. For example, Logic Pro X offers a useful Noise Gate plugin. The plugin stops low-level sounds from passing through. It improves clarity by blocking unwanted microphone noise. Other plugins like X-Noise can also help significantly. What’s more? Using EQ can effectively reduce hissing and buzzing background sounds. However, EQ may also slightly lower the overall audio quality. So, it is suggested to use EQ carefully.