.png)
Setting the default microphone in Windows 10 ensures seamless communication during video calls, voice recordings, and online meetings. Whether using a built-in microphone or an external device, configuring the correct input source ensures optimal audio quality.
Here we look at steps to change your default microphone, troubleshoot common issues, and optimize audio performance.
Why Change Your Default Microphone?
Changing your default microphone allows you to select the device that best suits your needs. While built-in microphones are convenient for casual use, they often lack the clarity and quality required for professional applications.
External microphones offer superior sound quality, enhanced noise reduction, and greater flexibility, making them ideal for podcasting, video conferencing, and content creation. Switching to an external microphone can achieve clearer audio capture, reduce background noise, and provide more precise control over your sound settings.
Methods to Change Your Default Microphone in Windows 10
Windows 10 provides multiple options for setting your default microphone. Whether you’re adjusting settings for general use, specific applications, or resolving audio conflicts, the steps below will guide you through each method.
1. Using Windows Settings
This is the quickest way to select and switch your default input device:
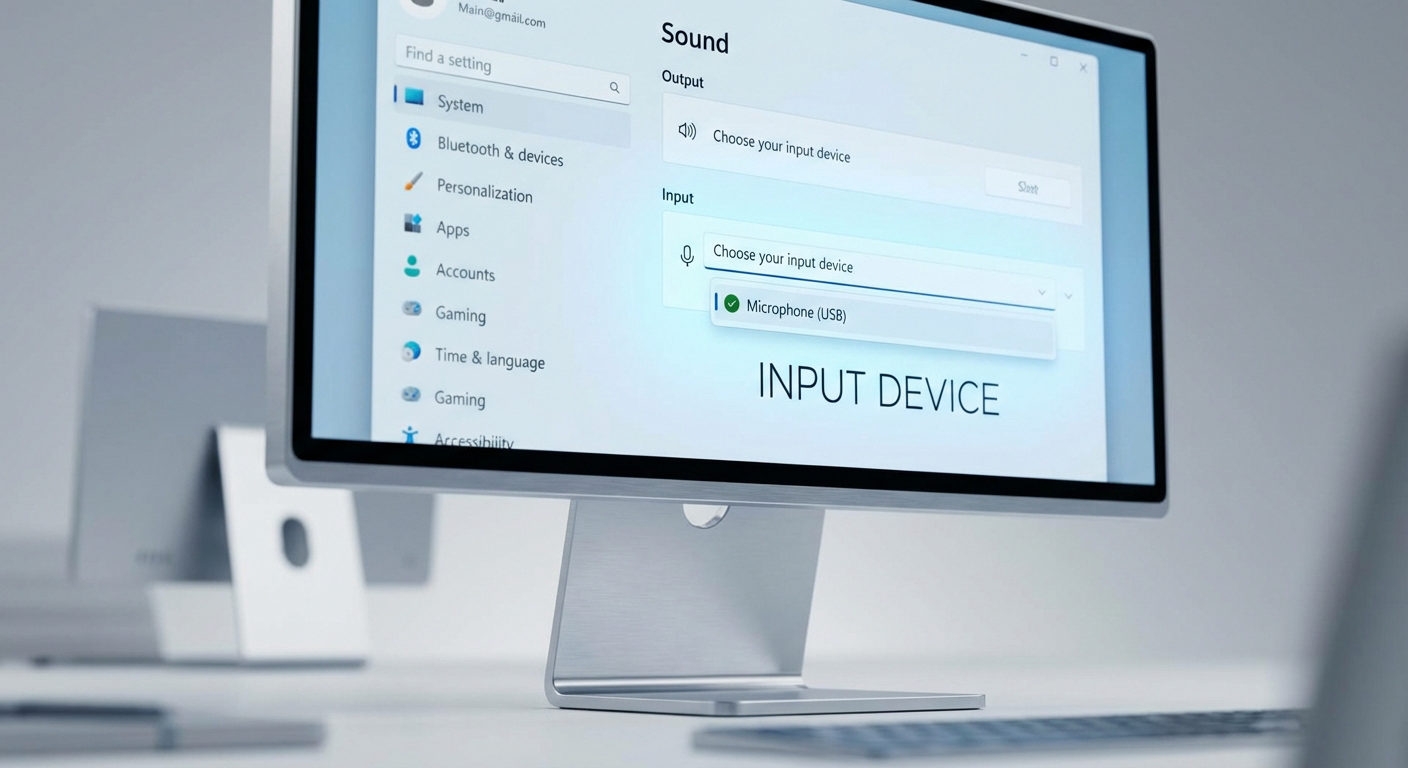
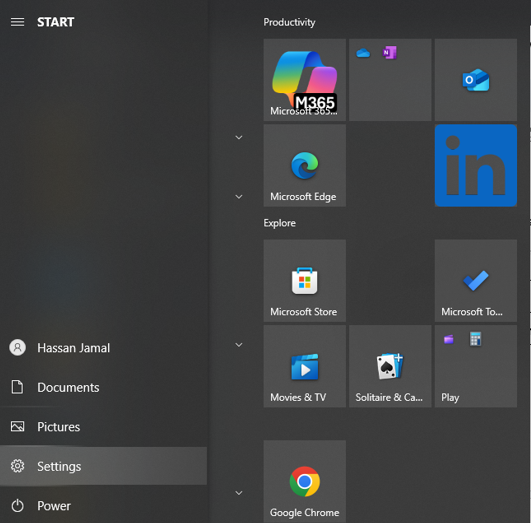
- Click the Start Menu, then select the Settings icon (represented by a gear).
- Navigate to System > Sound.

- Under the Input section, click the dropdown menu labeled “Choose your input device.”
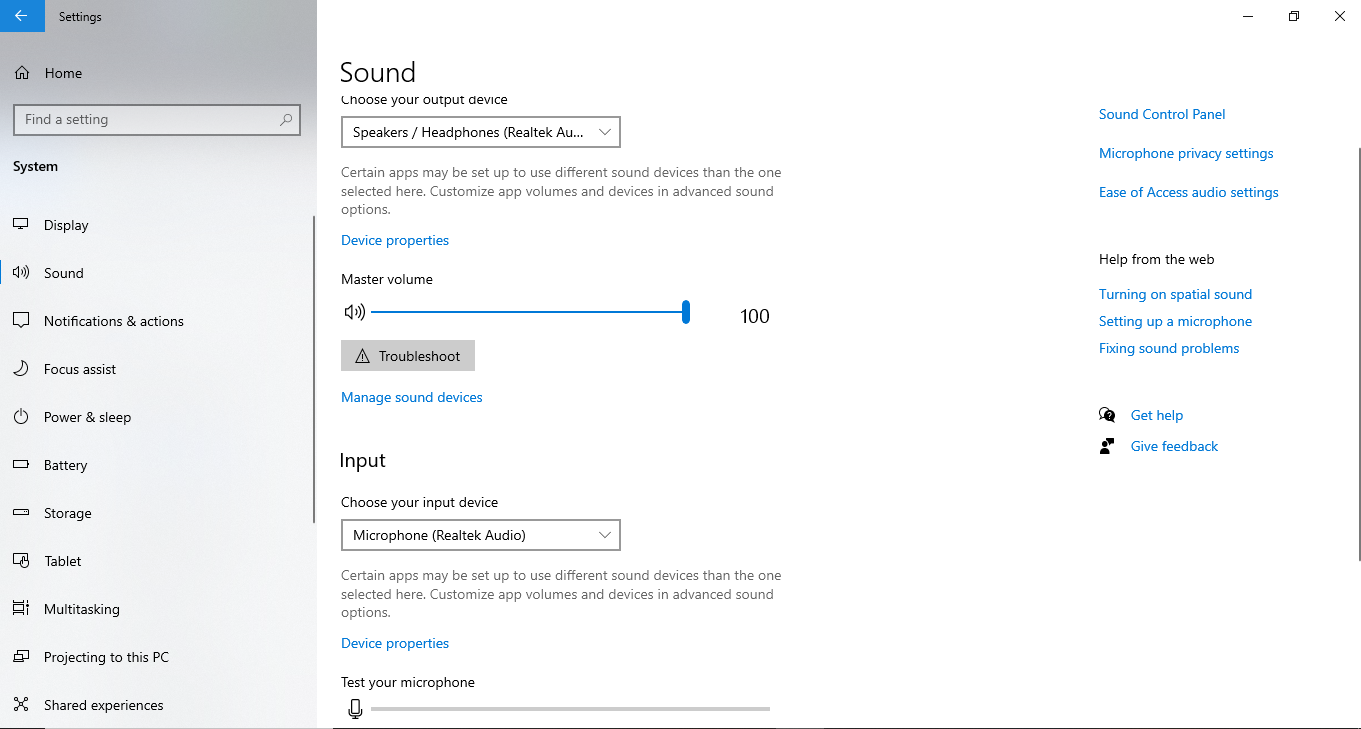
- Select the microphone you wish to use from the list of available devices.
- Use the “Test your microphone” tool just below the dropdown to check that it’s working. Speak into your mic and watch the volume bar move, confirming audio input is detected.

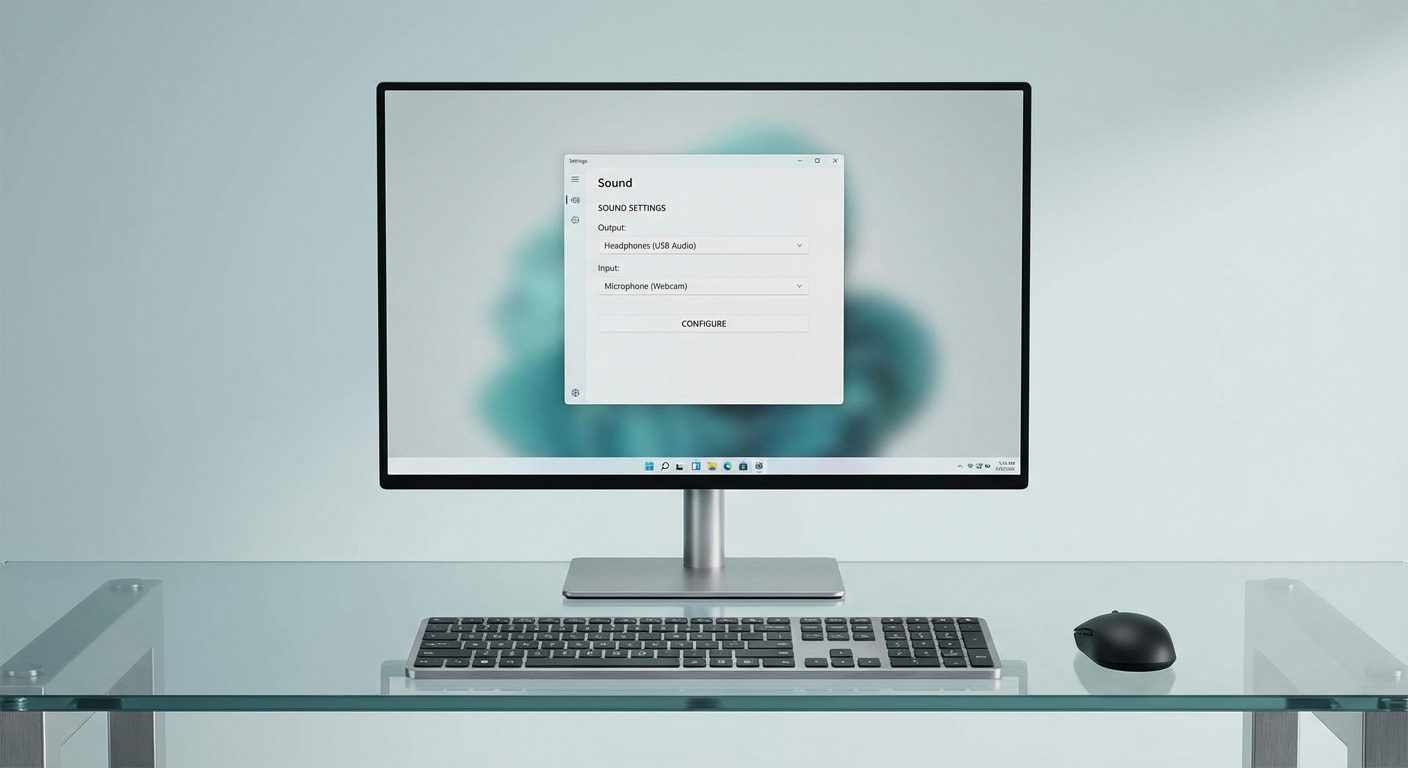
2. Using Control Panel
For more control and access to additional sound settings:
- Press Windows + R, type Control, and press Enter to open the Control Panel.

- Click on Hardware and Sound > Sound.
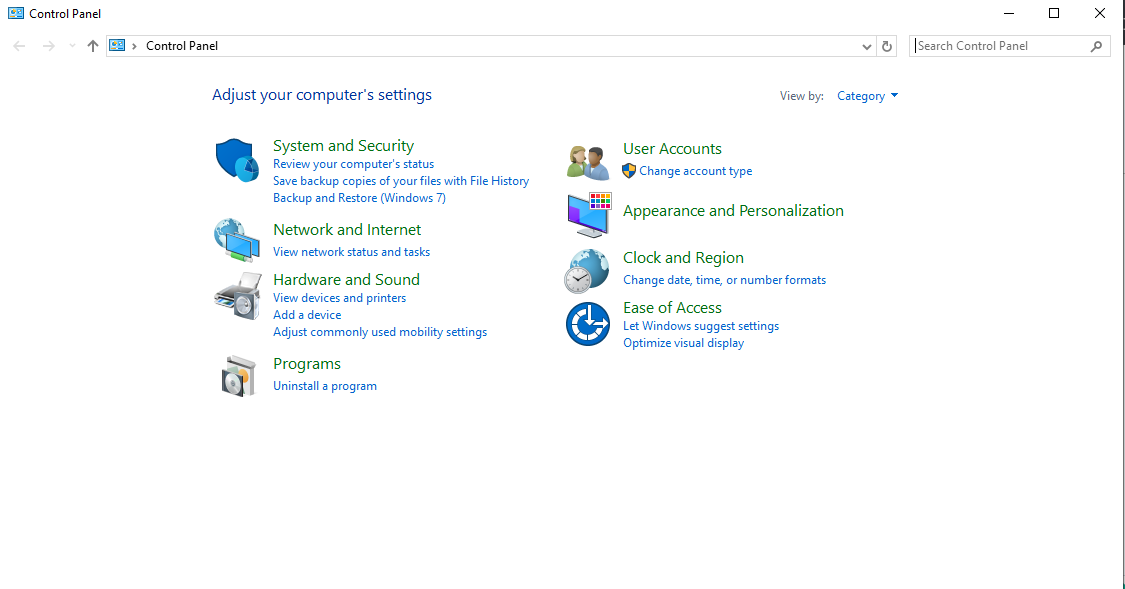
- In the Recording tab, you’ll see all connected microphones.

- Right-click on your desired mic and select “Set as Default Device.”
- If available, click the arrow next to the Set Default button to choose between:
- Default Device (used by general apps)
- Default Communication Device (used for calls and communication apps like Zoom or Skype)
- Click Apply, then OK to save your changes.
3. Using Advanced Sound Options (Per-App Configuration)
Want to use different mics for different apps? Here’s how:
- Go to Settings > System > Sound.

- Scroll down and click on “App Volume and Device Preferences” under the Advanced sound options section.

- Here, you can assign input (microphone) and output (speaker/headphone) devices for individual applications.
- Simply find the app in the list and select your preferred microphone from the Input dropdown menu.
Troubleshooting Common Microphone Issues
Software Fixes
If your mic still isn’t working after setting it as default, try these steps:
- Enable Microphone Access:
- Go to Settings > Privacy > Microphone.
- Toggle Allow apps to access your microphone to On.
- Scroll down and make sure individual apps also have access.
- Update or Reinstall Audio Drivers:
- Right-click the Start Menu and choose Device Manager.
- Expand Sound, video, and game controllers.
- Right-click your audio/mic device and select Update driver.
- You can also uninstall and restart your PC—Windows will attempt to reinstall the correct drivers automatically.
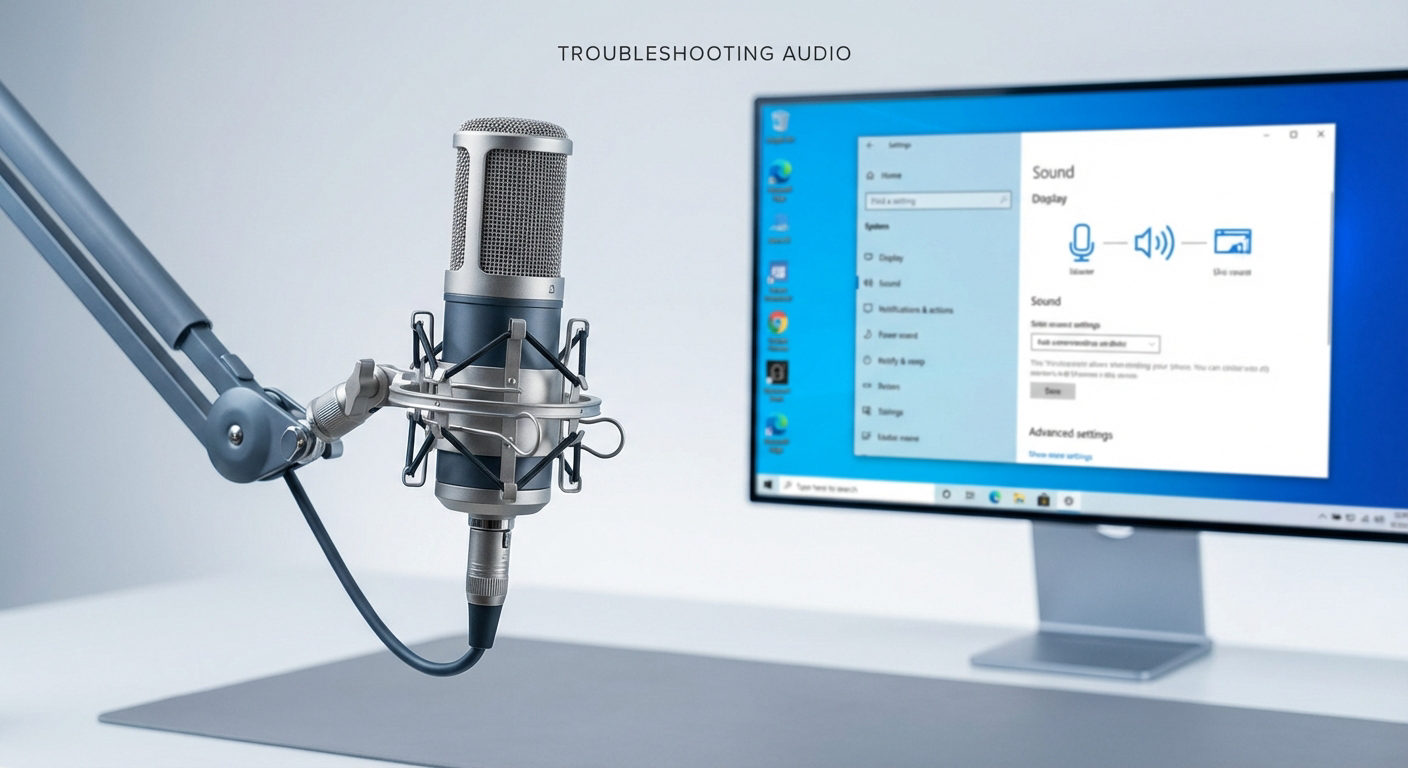
- Run the Windows Troubleshooter:
- Navigate to Settings > Update & Security > Troubleshoot > Additional troubleshooters.
- Click on Recording Audio and follow the on-screen prompts.
Hardware Checks
Sometimes, the problem lies outside of the software:
- Inspect Physical Connections:
- For external mics, ensure all jacks and USB plugs are properly inserted.
- Try different ports or cables to rule out faulty connections.
- Clean Built-In Microphone Pinholes:
- Use a can of compressed air or a soft brush to gently remove dust from mic pinholes on your laptop or webcam.
- Test on Another Device:
- Connect your microphone to a different PC or phone to determine if the issue is with the microphone itself.
Optimizing Audio Quality After Changing Default Microphones
After setting your preferred microphone as the default, it’s important to fine-tune your setup to get the best possible sound quality. A well-optimized microphone delivers clearer audio and reduces distractions, such as background noise or distortion. Here’s how to get it just right:
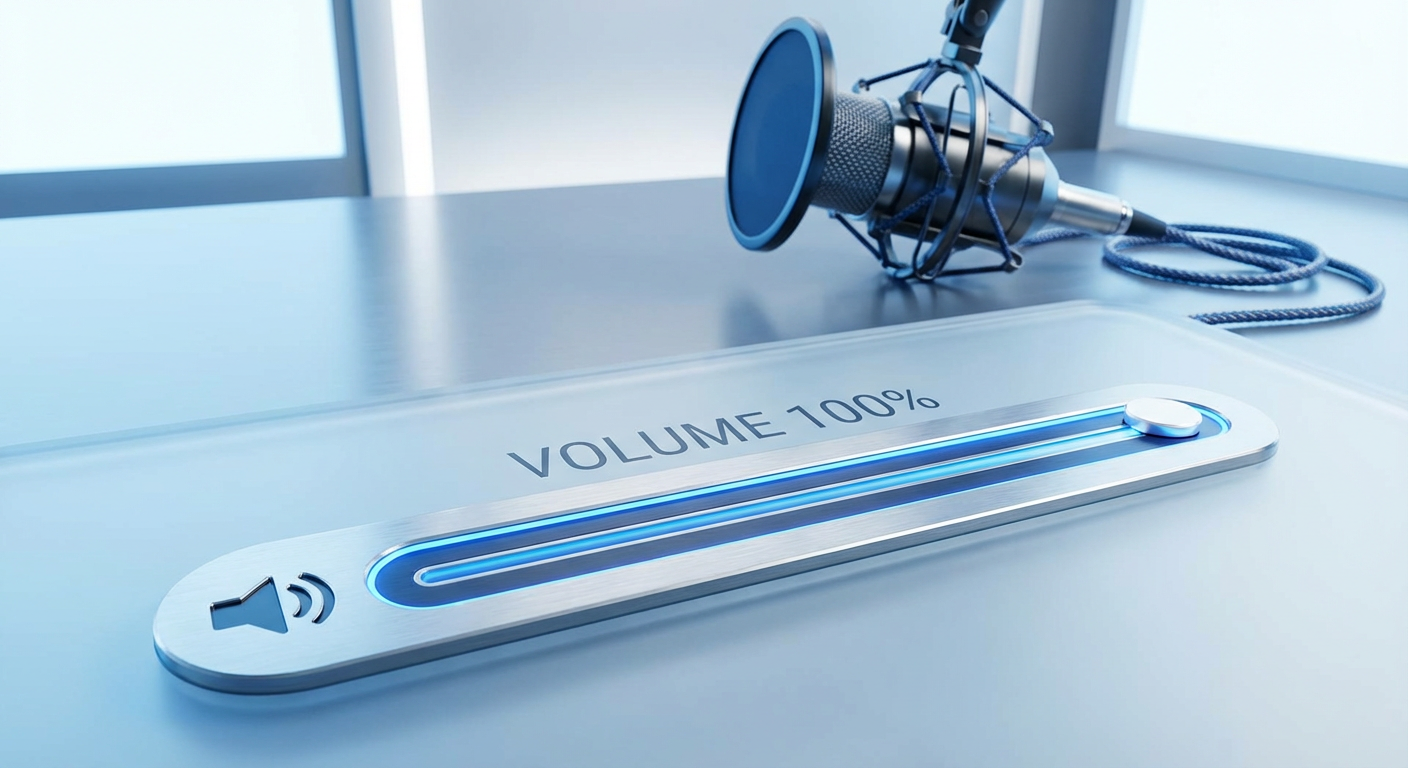
1. Adjust Microphone Sensitivity and Volume
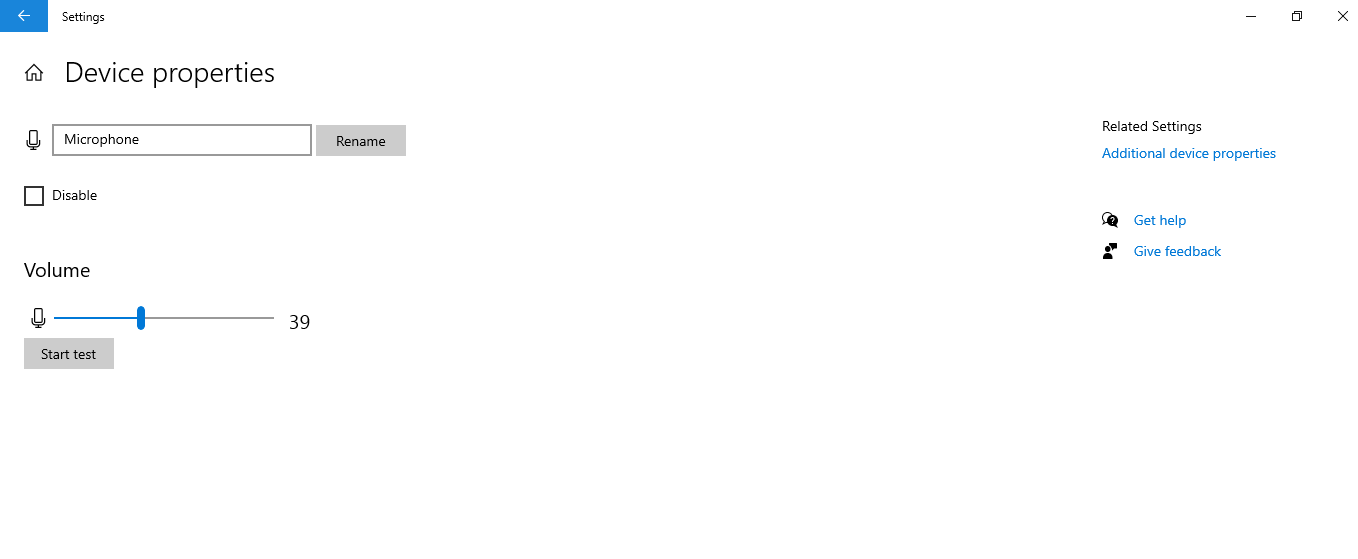
Navigate to Settings > System > Sound > Input > Device Properties and tweak the input volume. Set it high enough to pick up your voice clearly, but not so high that it captures every background sound or causes distortion.
2. Enable Noise Suppression and Echo Cancellation
Microphones and sound drivers offer built-in enhancements, such as noise suppression, echo cancellation, and automatic gain control. You can access these under Control Panel > Sound > Recording tab > [Your Mic] > Properties > Enhancements tab, or use third-party tools like Krisp or NVIDIA RTX Voice for real-time noise filtering.
3. Proper Mic Placement
For desktop or external mics, maintain a distance of about 12–18 inches from your mouth. Avoid placing the mic directly in front of your mouth to minimize popping sounds—position it slightly to the side or below.
4. Use a Pop Filter or Windscreen
A simple pop filter or foam windscreen can significantly reduce plosive sounds (like “P” or “B”) and wind noise, especially if you’re recording voiceovers or streaming.
5. Eliminate Background Noise at the Source
Try recording in a quiet room, turn off fans or air conditioners, and close windows. Consider adding soft furnishings or acoustic panels to absorb echo for serious setups.
6. Regularly Test and Recalibrate
Windows updates, driver changes, or app switching can alter sound settings. Re-test your mic occasionally using the built-in “Test your microphone” feature or online mic testers to ensure consistent performance.
Using External Microphones for Superior Audio
External microphones are ideal for professional applications requiring high-quality audio input. The Hollyland Lark M2S Wireless Microphone’s sleek logo-free design and titanium clip-on mechanism deliver exceptional sound clarity while ensuring secure attachment during use. It features advanced noise reduction capabilities and compatibility with multiple devices via USB-C connectivity.

Hollyland LARK M2S - Wireless Hidden Microphone
An ultra-discreet wireless microphone featuring a clip-on transmitter for an “invisible” fit.
Key Features: No-Logo Fit | Ti+ Design | 48 kHz/24-bit
With up to 9 hours of battery life per transmitter and an additional 30 hours via the charging case, this microphone system supports extended recording sessions without interruption. Its impressive 300-meter (1,000 feet) range ensures stable, long-distance wireless performance, giving you freedom and confidence while recording.
Conclusion
Setting your default microphone in Windows 10 is a simple yet powerful way to improve your audio experience. Whether hopping on a video call, recording a podcast, or chatting with friends, choosing the right input device ensures your voice is clear and professional.
From built-in mics to high-performance wireless models like the Hollyland Lark M2S, taking control of your microphone settings can significantly enhance your audio experience. Follow the steps in this guide, troubleshoot as needed, and don’t forget to fine-tune your setup for the best possible sound quality.
FAQs
Q: How do I test my microphone after setting it as the default?
A: Go to Settings > System > Sound, scroll to the “Input” section, and speak into the mic. The bar under “Test your microphone” should move to show it’s picking up sound.
Q: Why isn’t my preferred microphone appearing in the list?
A: Make sure the device is connected properly and powered on. Then, right-click in the Recording tab of the Sound settings and select “Show Disabled Devices.”
Q: Can I assign different microphones for specific apps?
A: Yes. Head to Settings > System > Sound > App Volume and Device Preferences, and assign microphones individually for supported apps.
Q: What should I do if my default microphone picks up background noise?
A: Try repositioning the mic, lowering the sensitivity in Device Properties, or using built-in noise suppression options. You can also explore third-party noise reduction software.
Q: Can I set a wireless Bluetooth microphone as the default?
A: Absolutely. Once paired with your PC, it will appear in your list of input devices. You can then set it as a default like any other mic.
Q: How do I reset all sound settings in Windows 10?
A: Go to Settings > System > Sound > App Volume and Device Preferences and click “Reset” at the bottom to restore all settings to default.