


.png)
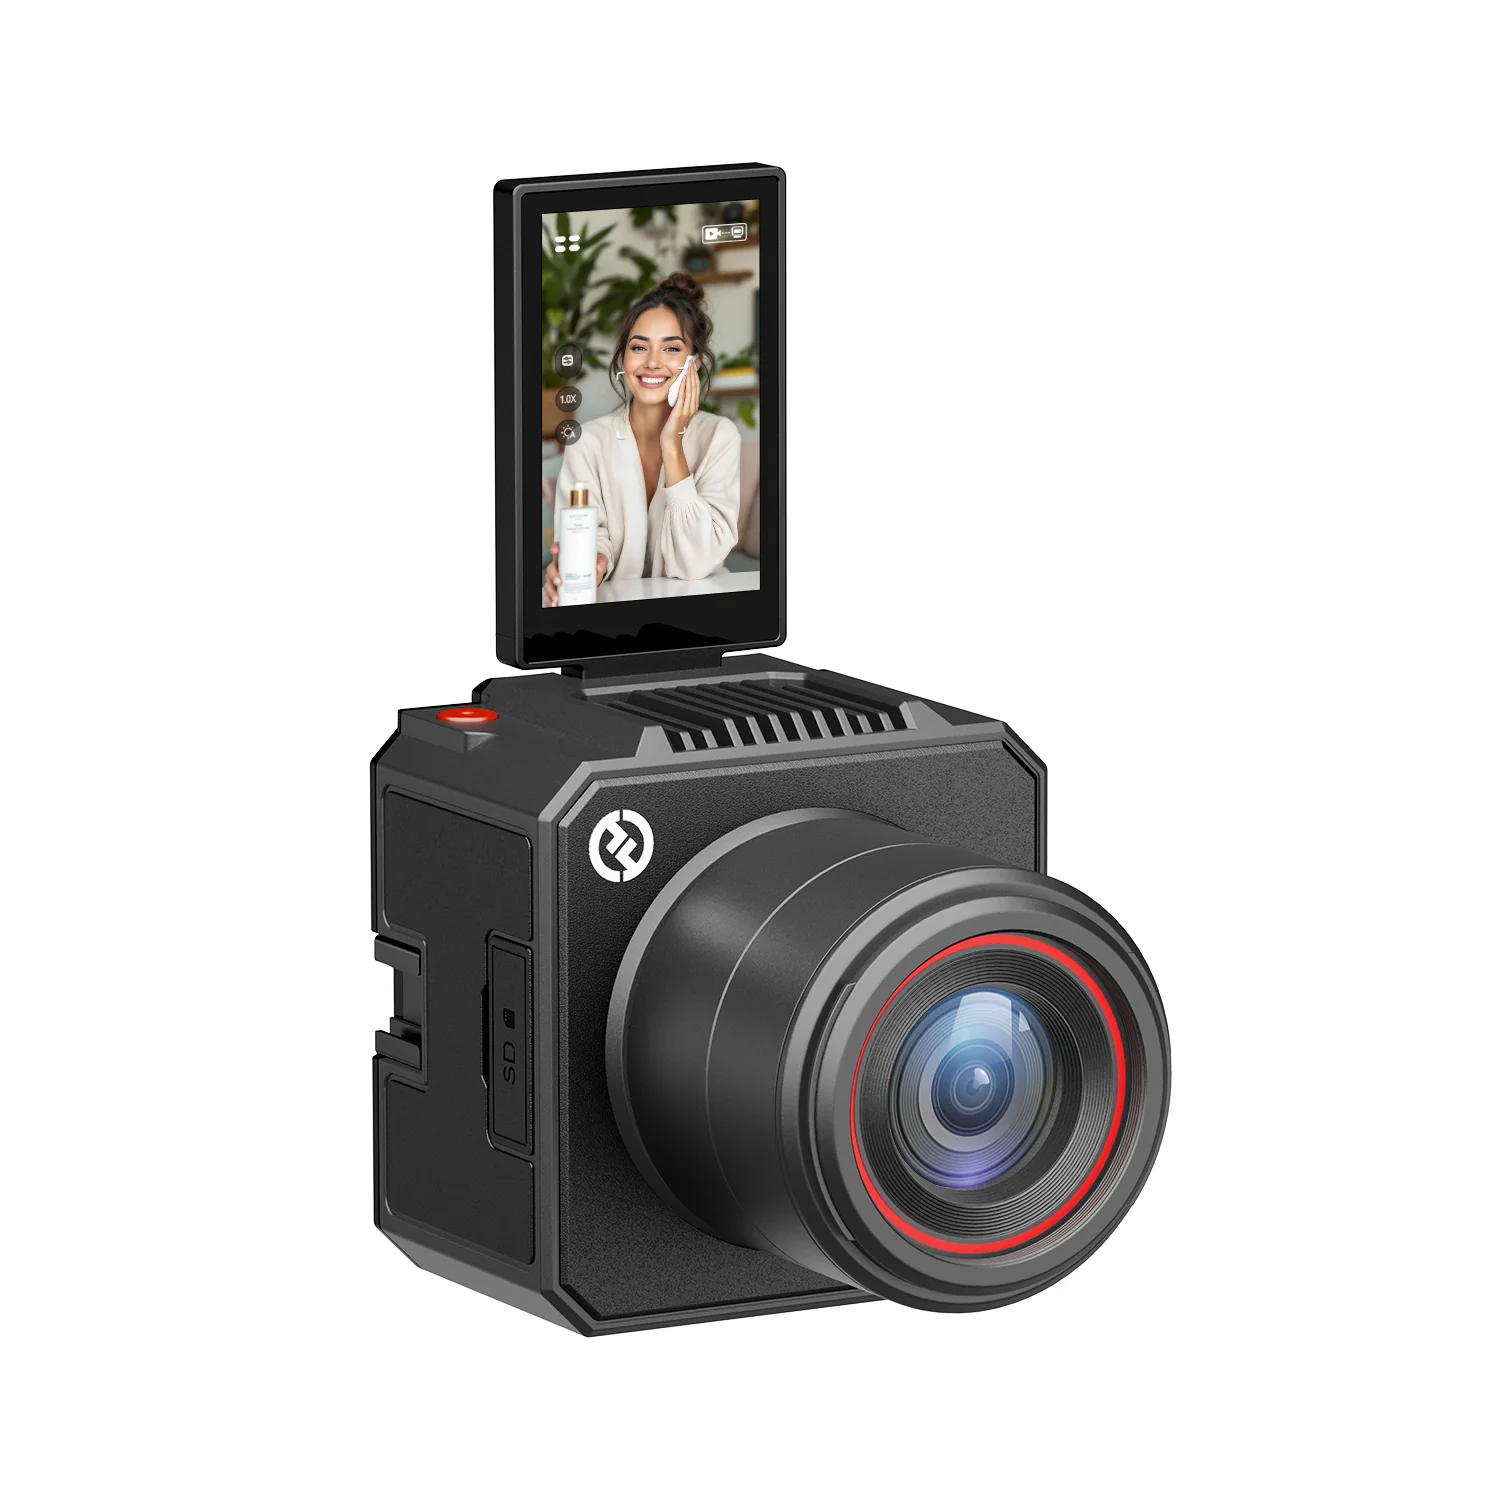
The key to achieving a professional streaming presence is to create an efficient stream overlay. The first step is to have a high-quality streaming camera, such as the Hollyland VenusLiv Air, which allows 24/7 live streaming. Plus, it enhances clarity with its AI-Tuning feature. It would be incorrect to underestimate the power of overlays when it comes to attracting a larger audience to your streams.

In this article, you will explore ways to make a stream overlay on Canva and OBS.
Designing Your Stream Overlay
Choosing the Right Design Elements
Make your overlay consistent with your brand identity and streaming theme. Colors, fonts, and graphics should align with your personality and content type. A successful overlay uses matching colors, typography, and style across all elements to create a cohesive and recognizable appearance. Common components include:
- Webcam Frame: An outline of your version of the camera.
- Chat Box: The messages viewers send are displayed in a stylish window.
- Alerts: Like notifications, subscriptions, or donations, have an animation.
- Social Media badges: Getting to your profiles with the click of a button.
- Elements of Branding: Logo, colors, and fonts depicting your identity in terms of your channel.
To maintain the best quality, overlay design should be carried out at a resolution of 1920 x 1080 pixels, which corresponds to the principal screen resolution at the time of broadcast when imported into broadcasting software. To keep the right overlay of your video feed, static overlays must be saved as transparent background PNG files. WEBM should be used as the format of animated overlays to maintain the transparency of the animations.
How to Make a Stream Overlay With Canva?
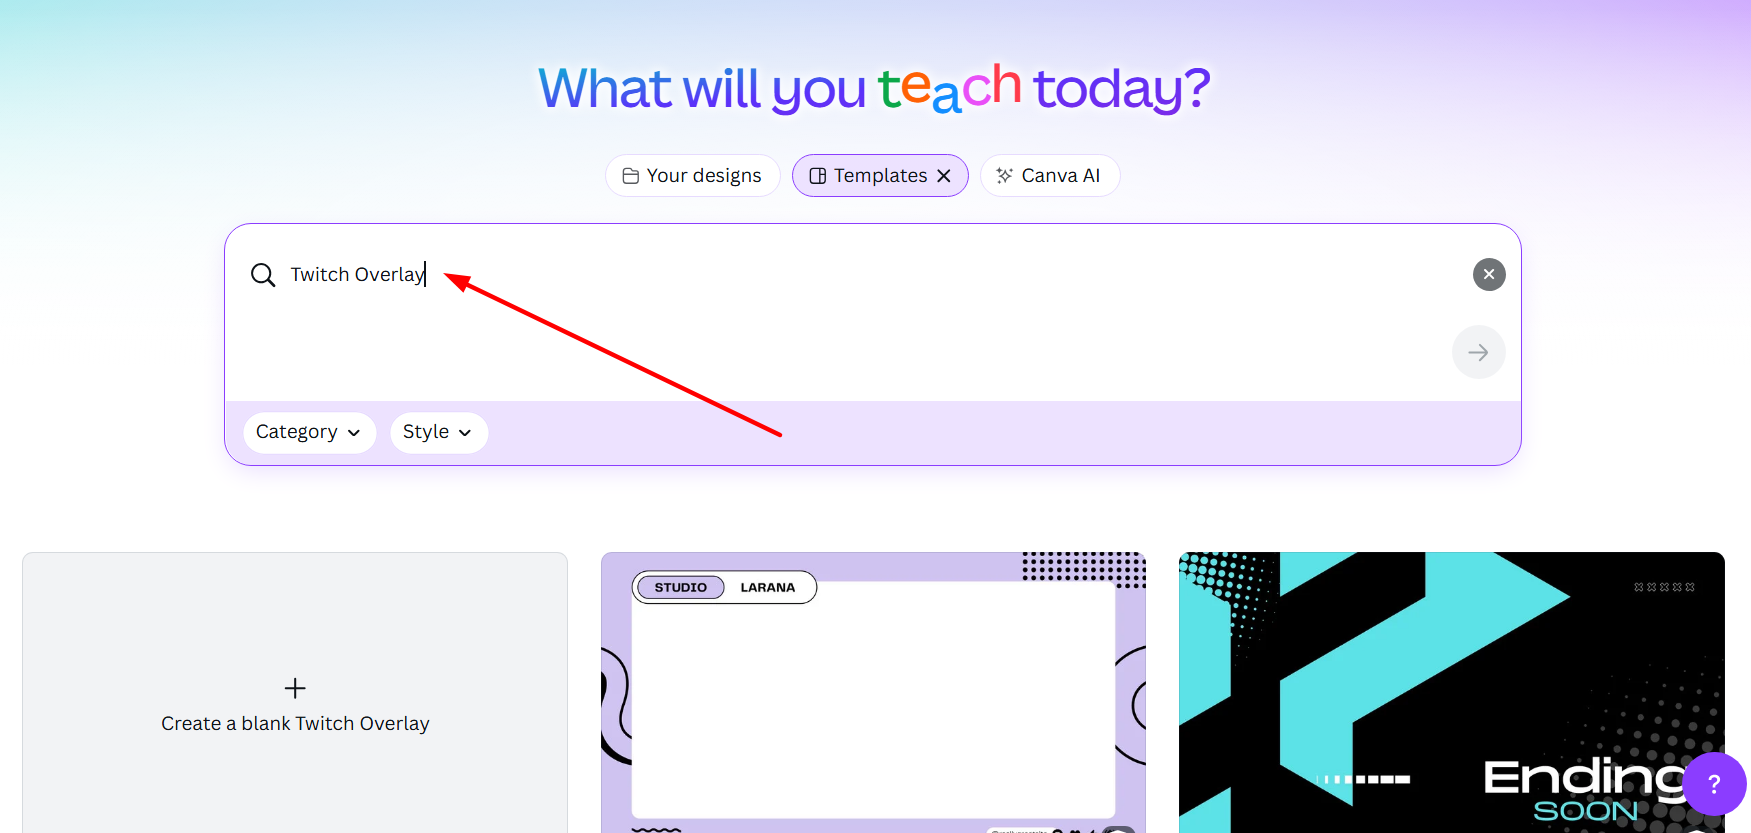
Canva is a simple program that allows users to create professional-looking stream overlays without requiring advanced design skills. To start, open Canva and type either ‘stream overlay’ or ‘Twitch overlay’. Find your match among a high-quality set of free and paid, professionally designed templates, choose one that fits your personality and our streaming style.
- Step 1: Open Canva and search for “Twitch Overlay.” Select a design theme or a specific focus for your Twitch overlay.
- Step 2: Stay in search on Canva’s list of free and paid high-quality professionally built Twitch overlays and pick one that represents you the best.

- Step 3: Rearrange the pieces to fit your preferred configuration. Include on-brand fonts and color schemes.

- Step 4: Add effects to frames or complete screens that occur with each new follow, intermission, or donation.

- Step 5: Save your static or animated Twitch overlays as transparent PNGs or MP4s, accordingly. Then, import them into your choice of live streaming software. These can be used with Streamlabs, OBS Studio, Facebook, and YouTube.

How to Make a Stream Overlay With Streamlabs/OBS?
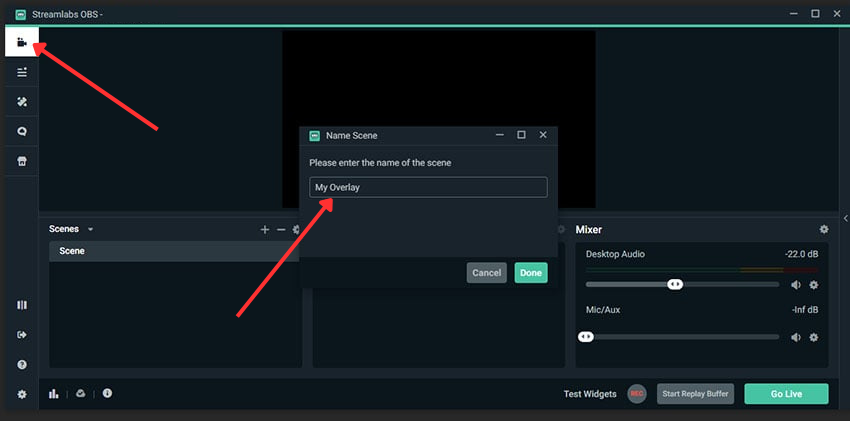
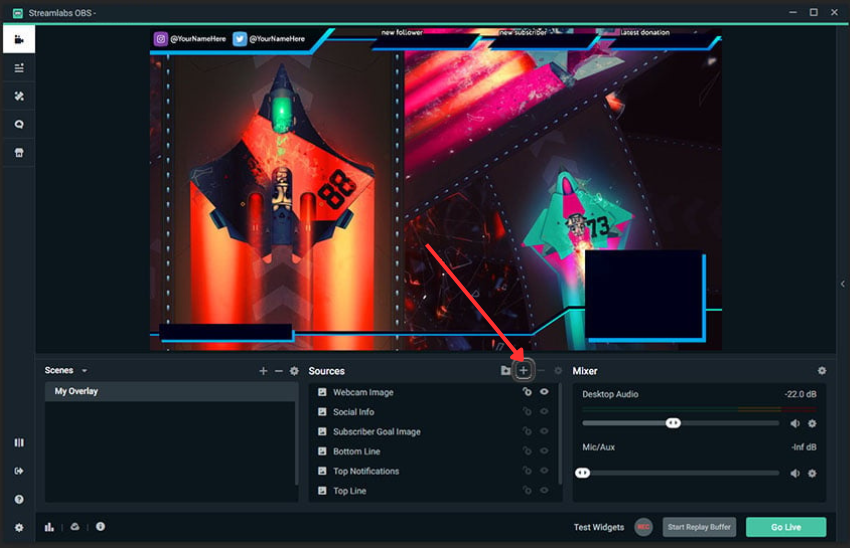
Step 1: Create a new scene by clicking the plus sign beneath the Scenes panel. You will then be asked to give your new scene a name.
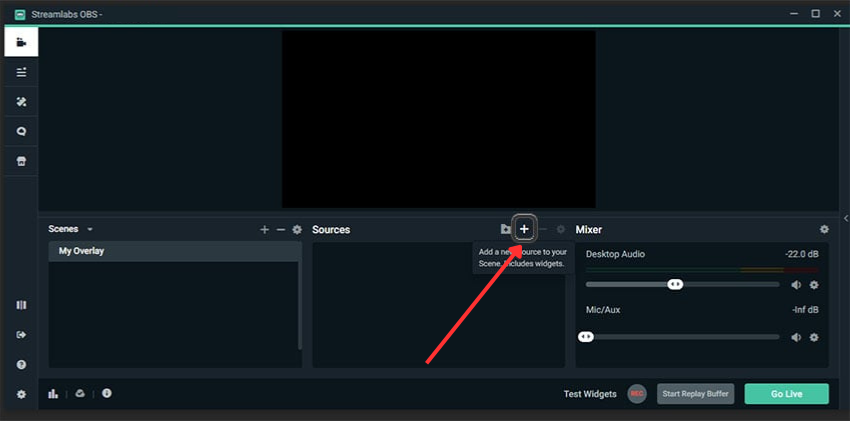
Step 2: Click the plus symbol once more, this time in the Sources panel.
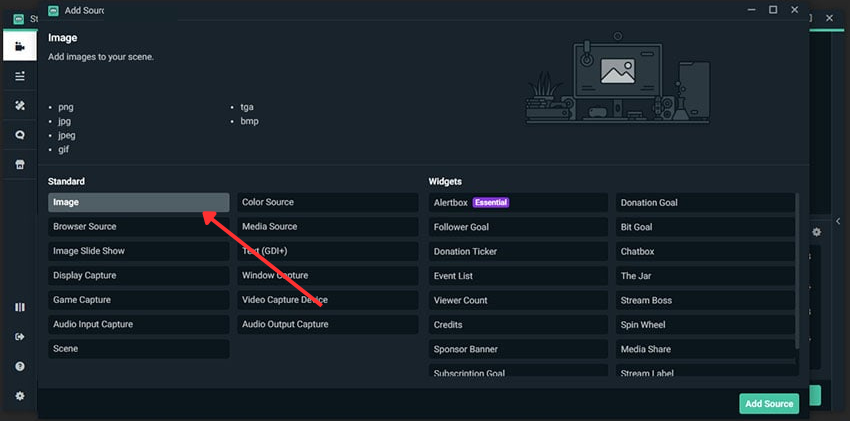
Step 3: Choose Image as the source, then click Add Source.
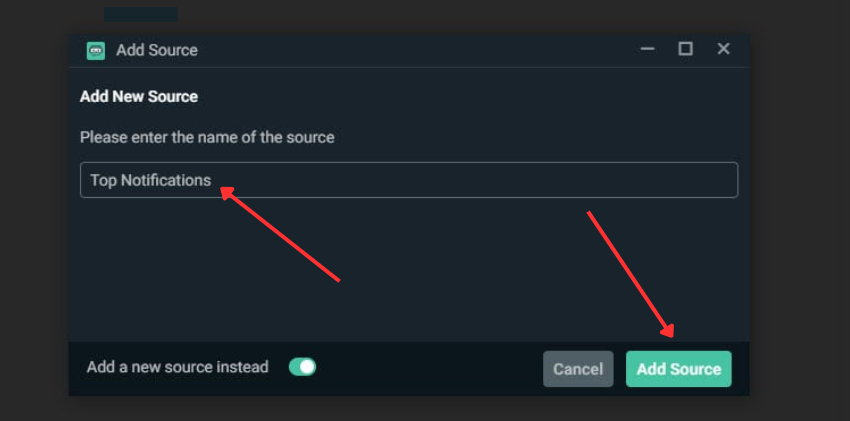
Step 4: These are the resulting pop-up options. We’d like to add a new source instead. Give it a name, then click Add Source.
If “Add a new source instead” is not selected, we can select from previously defined sources.
Step 5: Now choose the image you want to import. Once you’ve chosen your image, click Done.

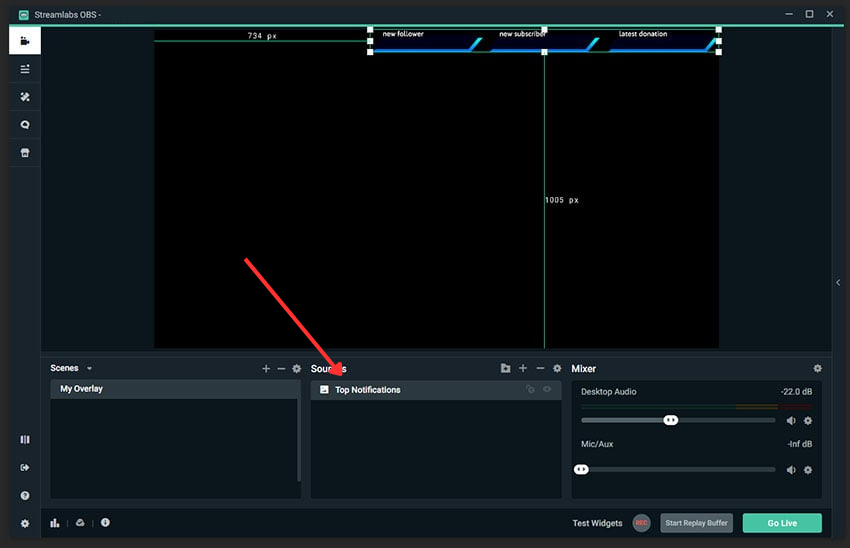
Step 6: Now, you’ll notice that Streamlabs OBS has imported the image into our visible area.
Click and drag the image to the desired location in your layout.
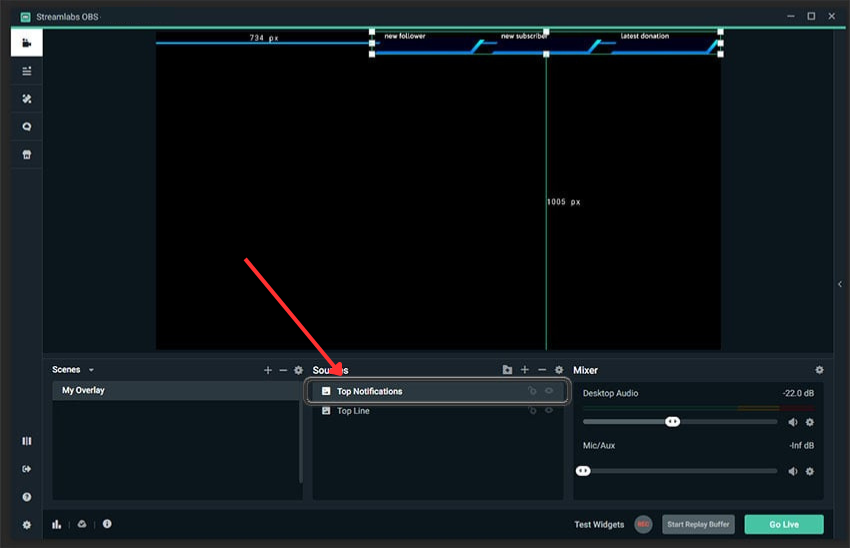
Step 7: Just click and drag to adjust your sources. Now that I’ve placed my line behind my polygons, they’ll display together as intended in my design.
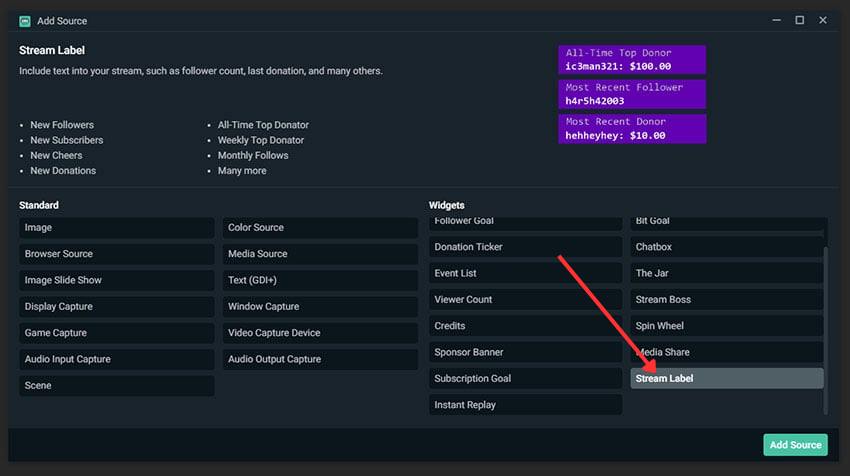
Step 8: To add a new source, click the + sign in your Sources menu again.
Step 9: Choose Stream Label from the list of Sources, then click Add Source.
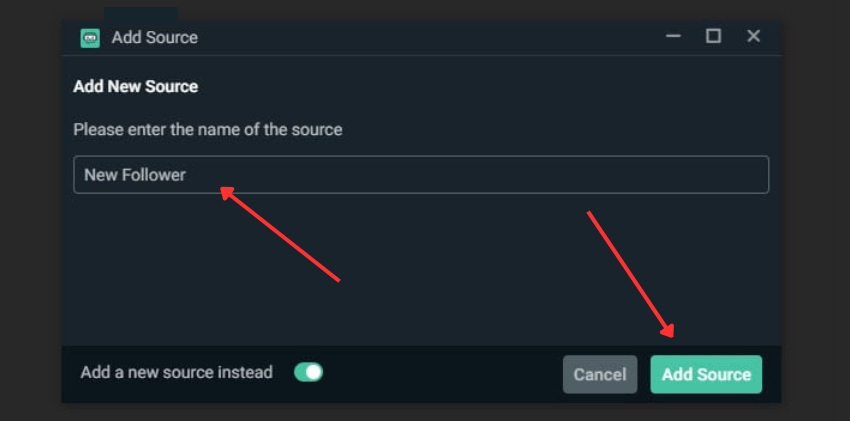
Step 10: To create a new source, select Add a new source, just as we did when adding an image.
Give your new source a descriptive name for easy reference, and then click Add Source.
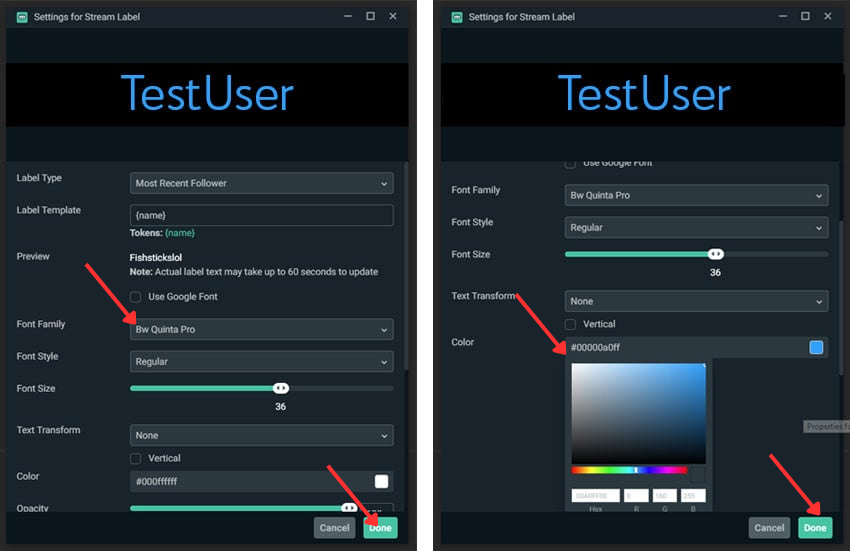
Step 11: Pay attention to the Label Type. Your top donor for the month, your most recent cheer, and much more are just a few of the many options available to you here!
When you are satisfied with your choices, click Done.
Step 12: To position your text in your layout, click and drag, just like you would when importing images.
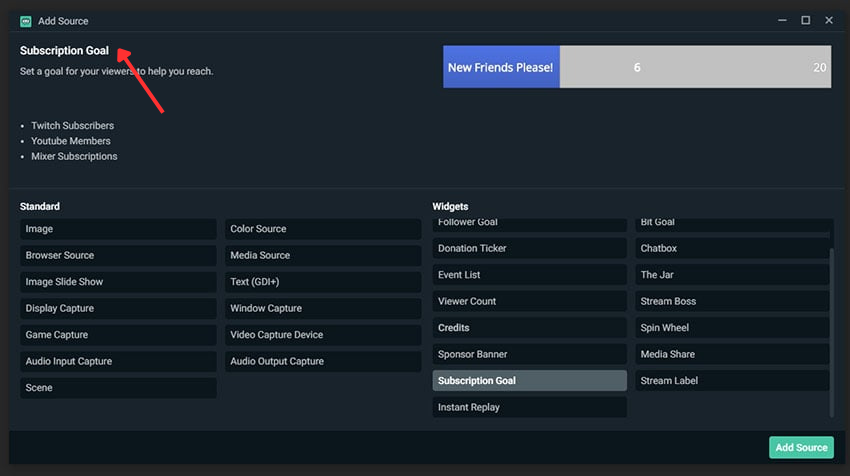
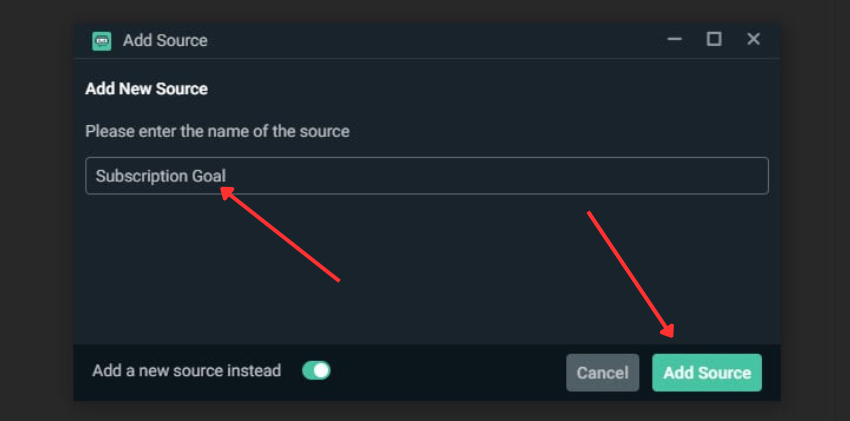
Step 13: We can once again select Subscription Goal from the Add Source options, rather than Image or Stream Labels. You may find it under Widgets.
Step 14: Already familiar? Instead of using an already-existing source, add a new one and name it for your reference. Click Add Source after that.
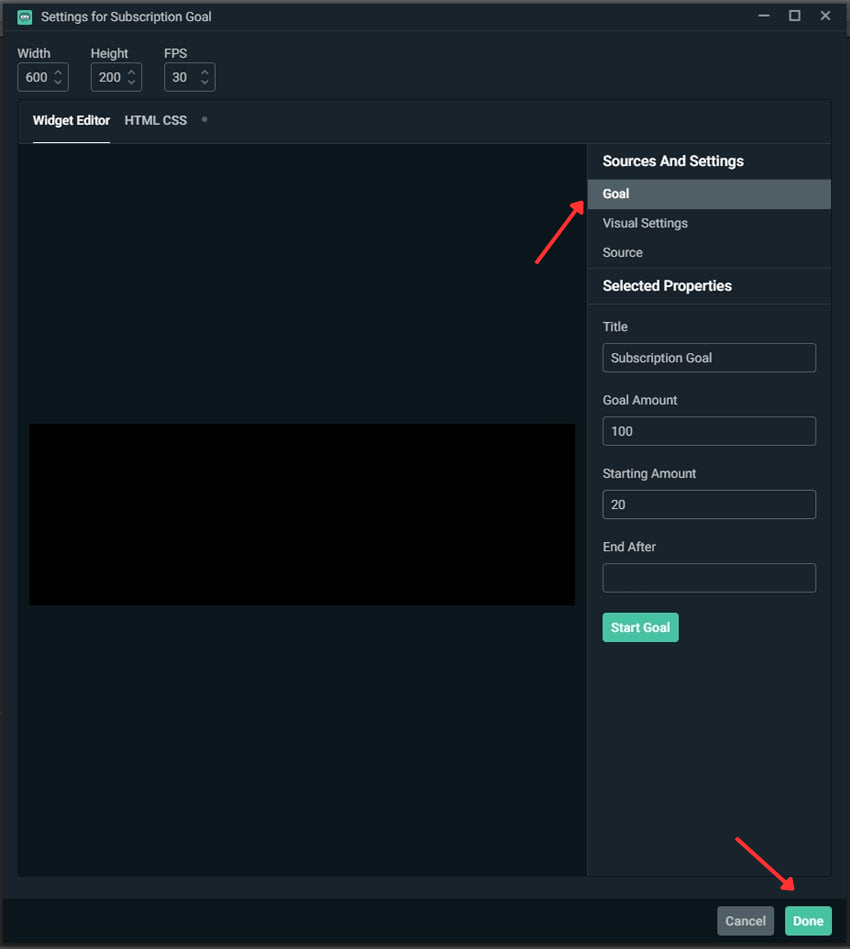
Step 15: Enter the values you want, such as the title, the starting amount, and the amount of your target. The stream overlay settings’ upper left-hand section also allows you to change the width and height.
When you are satisfied with your characteristics, click Start Goal.
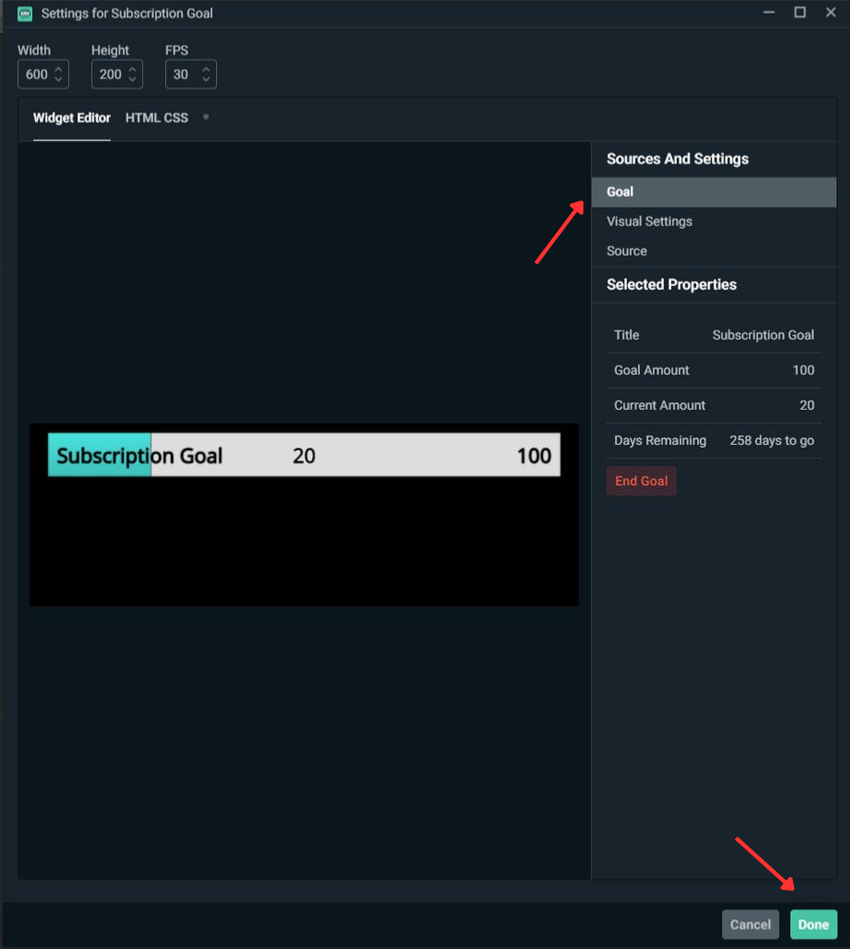
Step 16: After selecting “Start Goal,” a sample of our subscription bar appears.
To modify the properties, click End Goal and make the necessary changes. Click Done if you are satisfied with your values.
Step 17: You can now align and modify your subscription target bar by clicking and dragging, just as we did with earlier sources. Using the resize handles, you can also adjust the size of items in this preview.
Conclusion
To build productive stream overlays that prioritise your core content while being visually appealing, you will need to strike a balance between visual appeal and practicality. With the help of design tools like Canva and effective overlay usage in OBS or Streamlabs, you can create a professional stream that captures people’s interest and strengthens your brand image.
FAQs
Which file format should stream overlays use?
PNG format should be used for static overlays with a particular non-erasable background, and WEBM format for overlays that are to be animated. Those formats guarantee you a good overlay concerning your video material without undesirable undertones. 2
What density will be my overlay?
The 1920×1080 pixel overprints are primarily used to create high-quality graphics that are compatible with most streaming configurations. This resolution provides low-sanity graphics and adequate display on various streaming mediums.
What should I do to ensure I do not congest my overlay?
Keep on important features, including: webcam frame, progressive alerts, and text light information only. Use space wisely and avoid adding unnecessary decorations that lack a significant impact on attracting the audience.
Is it possible to use an animated overlay without affecting the streams?
Yeah, but sparse animations and large file sizes should be minimized. Complex animated cross layers may overload your computer and result in dropped frames, so test thoroughly and consider your computer’s capabilities.
How can I ensure that my overlay is supported on mobiles?
Check the appearance of your stream at different levels of detail and ensure that the text readability is clear on both phones and tablets. Most viewers stream on mobile devices, making it essential to be compatible with them to retain the audience.


