.png)
When it comes to music production, one of the most critical factors that may make or break a song is the vocal quality. A robust and full-bodied vocal may lift a song to new heights, capturing the listener’s attention and leaving an indelible impression. However, getting your vocals to sound fuller and more professional might be one of the most challenging skills to master—but it doesn’t have to be. Mixing vocals can be simple with the correct tools and knowledge. Do you want your vocals to sound fuller and enhancing? If so, keep reading this post, I will be discussing a step-by-step guide on how to make vocals sound fuller.
The Importance of Making Vocals Sound Fuller
A song’s vocal part acts as its emotional anchor and can captivate and engage listeners profoundly. A complete, rich vocal sound is more than simply aesthetically pleasing. It also plays an essential part in transmitting the song’s core, increasing its impact, and providing a well-rounded audio experience. Let’s look at the main reasons why having a broader vocal sound is essential:
- Emotional Resonance
Today, when home recording studios are becoming more widespread, the standard for professional-quality music has risen. Artists and producers must strive for the best level of audio quality to stand out and compete. Rich, full vocals distinguish professional recordings.
- Quality of Professionalism
Today, when home recording studios are becoming more widespread, the standard for professional-quality music has risen. Artists and producers must strive for the best level of audio quality to stand out and compete. Professional recordings are distinguished by rich, full vocals.
- A well-balanced mix
Achieving a well-balanced mix is critical in music production. Other elements in the mix, such as instruments or background tracks, might dominate vocals that lack depth and fullness. A well-rounded vocal sound is a solid basis for the remainder of the mix.
- Authenticity of Genre
Different musical genres necessitate distinct vocal aesthetics. For example, soul, jazz, and ballads rely significantly on lush, full vocals to express their intended mood and style. Failure to fulfill these genre-specific vocal requirements can jeopardize the music’s authenticity.
- Participation of the Audience
The listener may struggle to connect with a song if the vocals are weak or lack depth. A more full-bodied vocal sound can fascinate the listener. Vocal tone that captures and maintains the listener’s attention results in a more engaging listening experience.
The need to make vocals sound richer goes beyond mere technique; it is a quest for musical greatness, emotional resonance, and a constant connection with the audience.
So now you are aware of why it is necessary to make the vocal sound fuller. Let’s explore the steps to do so.
How to Make Vocals Sound Fuller?
Many musicians, producers, and audio engineers want a broader, more powerful vocal sound. Are you also one of them? If so, keep reading step by step this process of improving your vocal recordings to create a richer, more engaging sound:
Some Basic Tips to Make Vocal Sound Fuller:
- Choose the Right Microphone
A large diaphragm condenser microphone is frequently used to capture the warmth and nuances of vocals. Experiment with many microphones to find the best one.
- Position Microphone Properly
Maintain a steady 6-8 inch spacing between the microphone and the singer. You can also experiment with the microphone’s angle to locate the sweet spot that captures the desired tone.
- Make Use of High-Quality Preamps
Consider using external preamps or the preamps built into your audio interface. High-quality preamps can enhance the warmth and depth of your vocal recordings.
- Tracking twice
Make several takes of the same vocal section. Layering these clips can produce richer sound with subtle timing and pitch fluctuations. Remember, many layers can make the vocals sound excessively thick.
- Use EQ and Compression
Use equalization (EQ) and compression to improve the vocal sound. Boost the lower middle frequencies (about 100-300 Hz) to enhance warmth.
- Play about with reverb and delay
Apply reverb and delay effects with care to give the vocals depth and a sense of distance. Excessive use can cause the sound to become muddy.
- Add Background Vocals
Complement the primary vocal with supporting vocals. These extra layers round out the sound and give depth.
- Think about the arrangement and production
The instruments, arrangements, and production choices should support and complement the vocals.
- Encourage a Powerful Performance
Finally, emphasize the significance of a solid vocal performance. Encourage the vocalist to engage emotionally with the music and to perform passionately.
- Selectively Mix and Master
Pay special attention to the vocal levels and their relationship with other elements in the mix. Make sure the vocals are well-balanced and fit in with the overall sound.
Following these tips and constantly improving your techniques will allow you to steadily improve your vocal recordings to obtain a broader, more appealing sound. Remember that mastering the skill of making vocals sound fuller requires practice, experimenting, and attention to detail.
Step by Step Guide to Make Vocals Sound Fuller—
Vocals that sound “professional” often have a consistent level, are in tune, and are simple to hear. Depending on your vibe and genre, they may also have some creative effects to aid boost their presence in the mix. I’ll walk you through eight typical mixing methods to help you get your vocals to sound excellent in any mix.
In the sections below, you will learn voice mixing ideas utilizing iZotope products, including the new Nectar 4 vocal mixing plugin. So, let’s start with the steps.
Step 1: Compile all of your vocal takes into a few recordings. Like this:
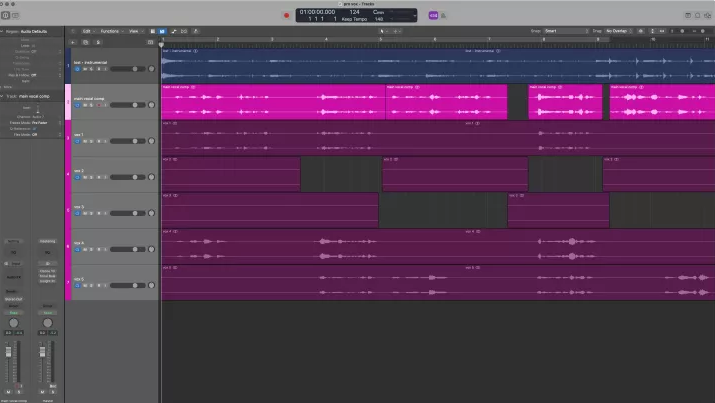
Step 2: After you’ve condensed all of your vocals into a few tracks, it’s time to do any required audio repairs.

Step 3: Use Nectar’s Tame Noises function.

Step 4: Go to the Vocal Assistant in Nectar. The voice Assistant will take you to a user interface where you can easily adjust the processing done to the EQ curve.
Step 5: Correct any pitch issues in the vocal performance. Adjust the strength and tempo of the pitch correction in Nectar 4 to get the ideal amount for your vocal.

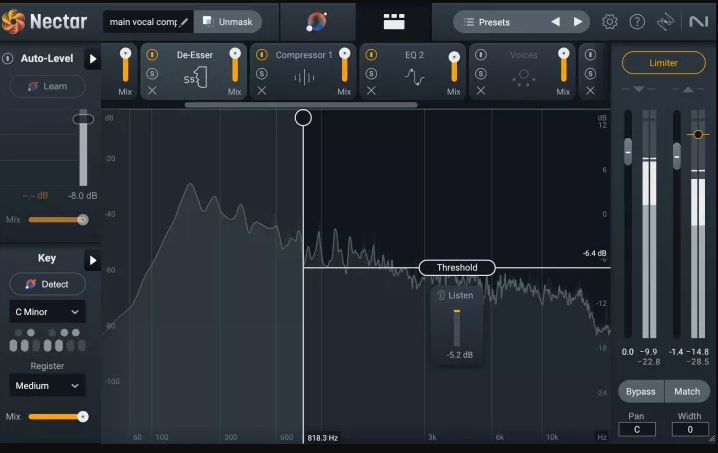
Step 6: Create clarity with an equalizer (EQ).

Step 7: Make use of level automation and compression.
Note: Vocal performances frequently have a broad dynamic range, with some notes being louder than others. As a result, softer phrases may become buried beneath the rest of the mix. Simply apply compression and/or vocal riding to equal out the loudness of a vocal.


Step 8: To minimize sibilance, use a de-esser.
Note: If your sibilants (“s” and “sh” sounds) have gotten too intense, utilize Nectar’s De-esser module to muffle these harsh frequencies.
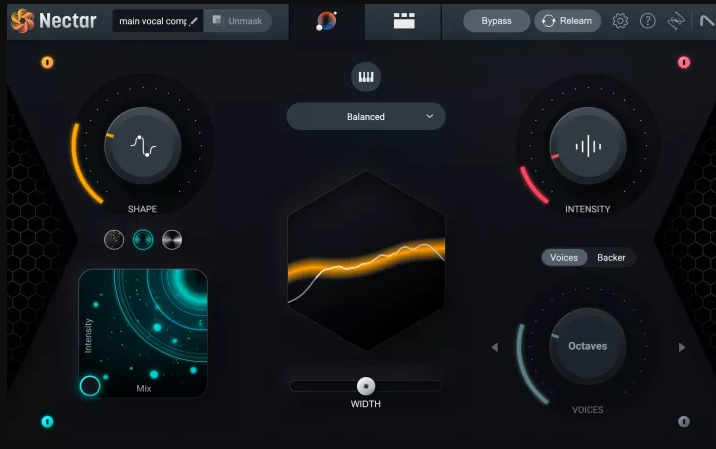
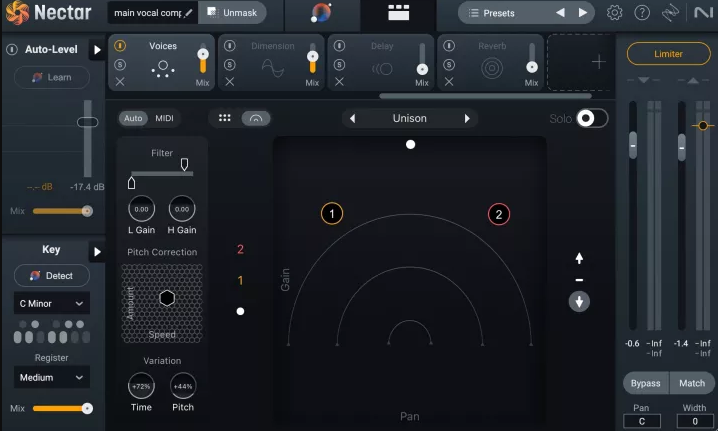
Step 9: Use vocal effects to provide depth and character:
- Saturation: If, after EQing, the vocal is still not punching through the mix as you desire, some saturation can help.

- Doubling vocal: Layering the main vocal with other takes of the same part to give your lead vocal greater weight and width.
- Delay: Your tracks can have that polished appearance you’re after by considering the sense of space you want to create and then adding the proper amount of delay to your vocal.

- Reverb: Reverb can allow your vocal a sense of natural space and help it fit appropriately in your mix. It allows vocals to breathe while retaining the original clarity and impact in the mix.

So, by following these steps, you can speed up your workflow while having a lot of fun. Remember that each vocal will have unique requirements. Furthermore, if you use the above suggestions and steps, your vocal mixes will have that professional sound you’ve sought.
Conclusion
After reading this post, you might be aware now that a mix of technical abilities, equipment, and aesthetic sense is required to get a broader vocal sound. You can take your music production to the next level by recognizing the importance of complete vocals and using the abovementioned approaches. However, remember that experimentation and practice are essential for achieving the ideal balance for your distinct style and sound. Your vocals will reverberate with depth and richness with effort and the appropriate approach, capturing your listeners and leaving a lasting impact.
Achieving professional-grade vocal recordings starts right at capturing a clear, warm voice signal. Using a reliable wireless lavalier microphone ensures pristine vocals at the source, enabling richer, fuller-sounding results in your mixes.
FAQs
Q1. How do you improve dull vocals?
Apply a DeEsser to the vocal first to brighten it, followed by another DeEsser to add air and overall brightness. However, the DeEssers are run in series following the EQs and compressions. There can sometimes be three DeEssers on there!
Q2. What improves the quality of your vocals?
To improve the sound of your vocals, begin by editing. When editing, eliminate background noise, utilize clip gain to balance dynamics and remove plosives or undesirable sibilance. Subtractive EQ, Compression, Additive EQ, Saturation, Exciters, and other short and long reverb types can then be added.
Q3. How are professional tunes so loud?
Compression is simply how you make a mix sound louder, but it must be used cautiously. The track’s energy is derived from the different elements and the compression applied to those elements.