.png)
As you can see, FL Studio (previously known as FruityLoops) is a renowned software among amateur and professional music producers. It allows them to create a diverse range of musical genres.
Given that, recording vocals within FL Studio isn’t as straightforward as you may ponder. You are required to have the fitting set up and follow some key steps.
In this exhaustive guide, we’ll accurately guide you as to how to record vocals within FL Studio. That’s from preparing your equipment to hitting the record button in FL Studio.
Lastly, we’ll promptly respond to your frequently asked questions about recording vocals within FL Studio.
The step-by-step method to record vocals within FL Studio
Getting Started
You need the proper equipment before you begin recording vocals within FL Studio. For this, you’ll require:


A Microphone: For recording vocals, a condenser microphone is ideally the best option. That’s because it will capture all the nuances and other details in your voice more accurately than a dynamic or ribbon microphone.
Some good microphone choices encompass the Shure SM4 (having XLR connectivity) and the Blue Yeti (having USB connectivity).

An audio interface: It’s a physical device that converts analog signals from your microphone into digital ones. Consecutively, your computer can process that.
Thus, an audio interface is rightly regarded as the brains of the whole setup. A fitting example of an audio interface is the Focusrite Scarlett 2i2.
A computer: Your computer must have the capability to install and run FL Studio. For this purpose, check the software’s system requirements to ascertain compatibility.
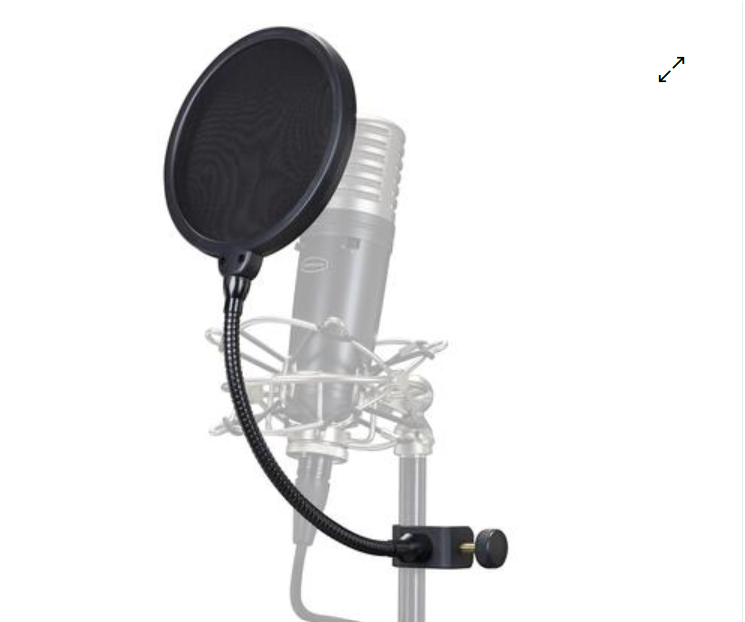
Pop filter: You require a pop filter, an effectual microphone accessory. It helps eliminate harsh plosives (the “P” and “B” sounds) from your vocal recordings.
Cables: You specifically require an XLR cable for connecting your microphone to the audio interface. Furthermore, you necessitate a USB cable to link your audio interface to your computer. If you have a USB microphone, you can connect it directly to your computer’s USB port using the provided USB cable.

Headphones: You will also need a pair of headphones for vocal monitoring while recording. An example is the Sennheiser HD 280 PRO II.
The Method
Step 1: Set up your equipment
The commencing step in recording vocals in FL Studio is setting up your equipment. For this, link your microphone to the audio interface via the XLR cable. Ensure a secure connection. Power up the interface and then turn on phantom power (+48V) on it. It’s a necessity for the condenser microphone to function correctly.
Afterward, plug your audio interface into your computer via the USB cable. Your computer should be able to detect the interface automatically. If it doesn’t, you need to install the fitting proprietary driver. That can be obtained from the manufacturer’s website if required.
It’s significant because these are the drivers that will work the best.
After sorting it out and the computer picks up the audio interface, fine-tune the microphone gain on the interface. That determines the loudness of the microphone input.
While singing into the microphone, steadily raise the gain and aim for the level to remain in the green, with only orange when singing at your loudest. Avoid the level going to red. If that happens, it means your signal may distort.
If you have a USB microphone, then you may not need to install any driver. That’s because such devices are typically plug-and-play.

After connecting your USB microphone to your computer, ensure it’s selected as the default recording device. Navigate to Settings and search for Sound. Open Sound settings and ascertain that your USB mic is set as the default.
Lastly, link your headphones to the audio interface’s headphone out. It aids you to hear the whole thing clearly while you record. If you don’t have an audio interface, link the headphones to the headphone output on the USB mic itself.
Step 2: Tweak audio settings in FL Studio


After setting up your hardware, you need to prepare FL Studio for recording. Open FL Studio and navigate to Options>Audio Settings.
Select the Device tab and choose the ASIO driver that matches your audio interface.
Note that utilizing ASIO is crucial, as it enables you to minimize latency. It implies averting delays between what you sing and what you hear.
If you don’t have an audio interface, then you can use the generally default FL Studio ASIO that’s already included.
Afterward, adjust the buffer length. For this, click on the Buffer Length box below. For vocal recording, a buffer length of around 256 samples is fitting. This setting enables optimal performance with reduced latency.
If you have a USB mic, also check that it’s selected as the default input device.
Step 3: Allocate the microphone input to a mixer channel

Then, you need to tell FL Studio which input device it needs to record from and which channel it will be allocated.
For that, click on the channel you necessitate to record in the mixer. Select the Audio Input Source by clicking in the dropdown menu. That’s on the mixer’s upper right side.
If you’re recording a mono signal in FL Studio, choose Input 1. As a result, you must be able to view the metering display move when you speak into the microphone. That implies FL Studio does pick up the sound.
Step 4: Arm the track to record

After picking the input, the next step is to arm the track for recording. To do this, click on the small disc icon on the track.
That tells FL Studio to record audio on that specified track. Once done, you’ll eventually be able to capture vocals to that track.
Ensure that input monitoring is permitted by pressing the headphone icon. That allows you to hear your voice through the headphones as you record, helping you fine-tune your performance.
Step 5: Pick a location to save your file


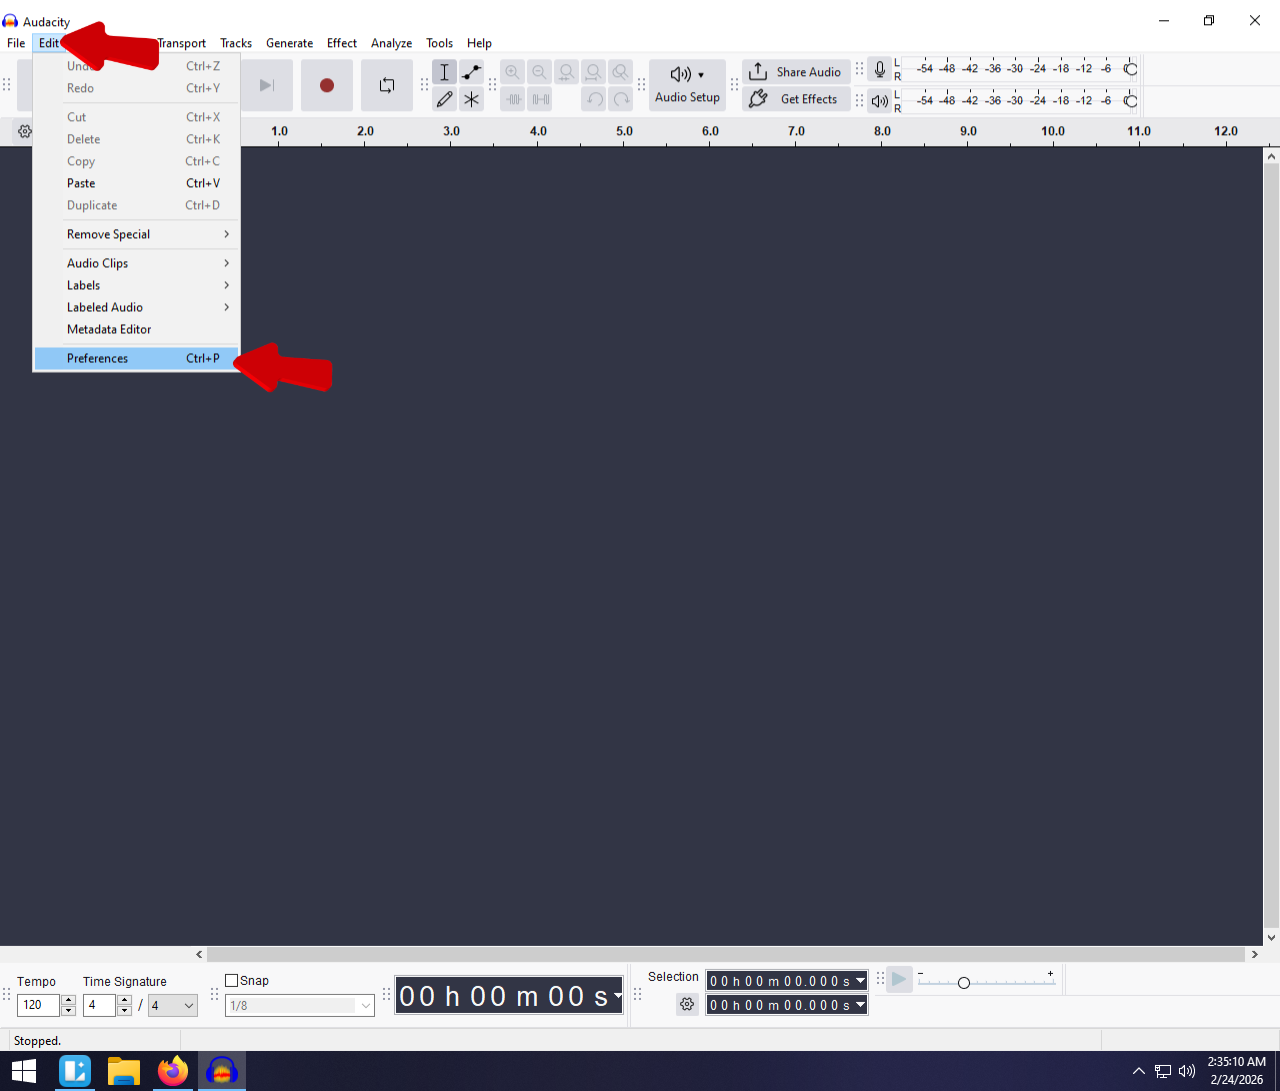
Before commencing recording, you necessitate to select a location to save your files. To do this, navigate to Options>File Settings in FL Studio. Then, choose a folder to save your audio files.
Step 6: Commence recording


Lastly, you can commence recording your vocals. At the screen’s top, you can observe the main toolbar.
To begin, hit the record button here, the (small circle). Then FL Studio will ask you whether you want to record MIDI or audio. Select audio as vocals are being recorded.
Before commencing, turn on the countdown timer. That provides you with some seconds to get ready for the recording to start. You may also want to turn on the metronome to aid you in steady timing as you sing. Further check that the super helpful input monitoring feature is enabled, as stated earlier.
Then, hit play or press the space bar to record. Once done, hit the stop button or press the space bar to stop recording.
Conclusion
You are now cognizant of recording vocals within FL Studio. We covered each step, from getting started with the required equipment and setting it up to adjusting the audio settings in FL Studio. We further explored recording features, such as a countdown timer.
It may sound intricate, but after following the steps, you can achieve your desired results.
After following this guide, you can surely commence your next recording session.
Ensure you use the most appropriate audio drivers with your preferred equipment. Otherwise, you may experience latency that can make recording troublesome.
FAQs
What exactly is FL Studio, and what edition is required to record vocals?
FL Studio is a renowned digital audio workstation (DAW). It’s also otherwise known as a complete music production environment.
With over 20 years of existence, it’s an all-in-one package for composing, arranging, recording, editing, mixing, and mastering professional-quality music.
Some of the FL Studio’s primary features encompass:
- Mixer
- Browser and Playlist
- Piano Roll
- Included instrument and effect plugins
- Instruments and FX
To use a microphone and record your vocals in FL Studio, you require the Producer Edition or higher.
Do you necessitate an audio interface for recording vocals in FL Studio?
Technically, you can surely record vocals in FL Studio without the requirement of an audio interface. Yet, if your target is professional and clean-sounding vocals, an audio interface is highly recommended.
The audio interface converts the analog signals from the XLR microphone into high-quality digital audio that FL Studio can recognize and process.
The audio interface also provides phantom power for condenser microphones and significantly reduces latency. That provides professional quality recording.
Without an audio interface, you can employ a USB microphone to record vocals. However, they typically don’t offer the same fidelity or control as an audio interface.
Is FL Studio excellent for vocal recording?
FL Studio is an excellent and versatile Digital Audio Workstation (DAW) for recording vocals. It’s a source of varied tools and features to achieve high-quality recordings for radio-ready and flawless tracks.
For instance, it features cutting-edge plugins, such as newTone, for pitch correction. Alongside FL Studio, you also necessitate the proper setup and techniques to create first-rate vocal recordings.