.png)
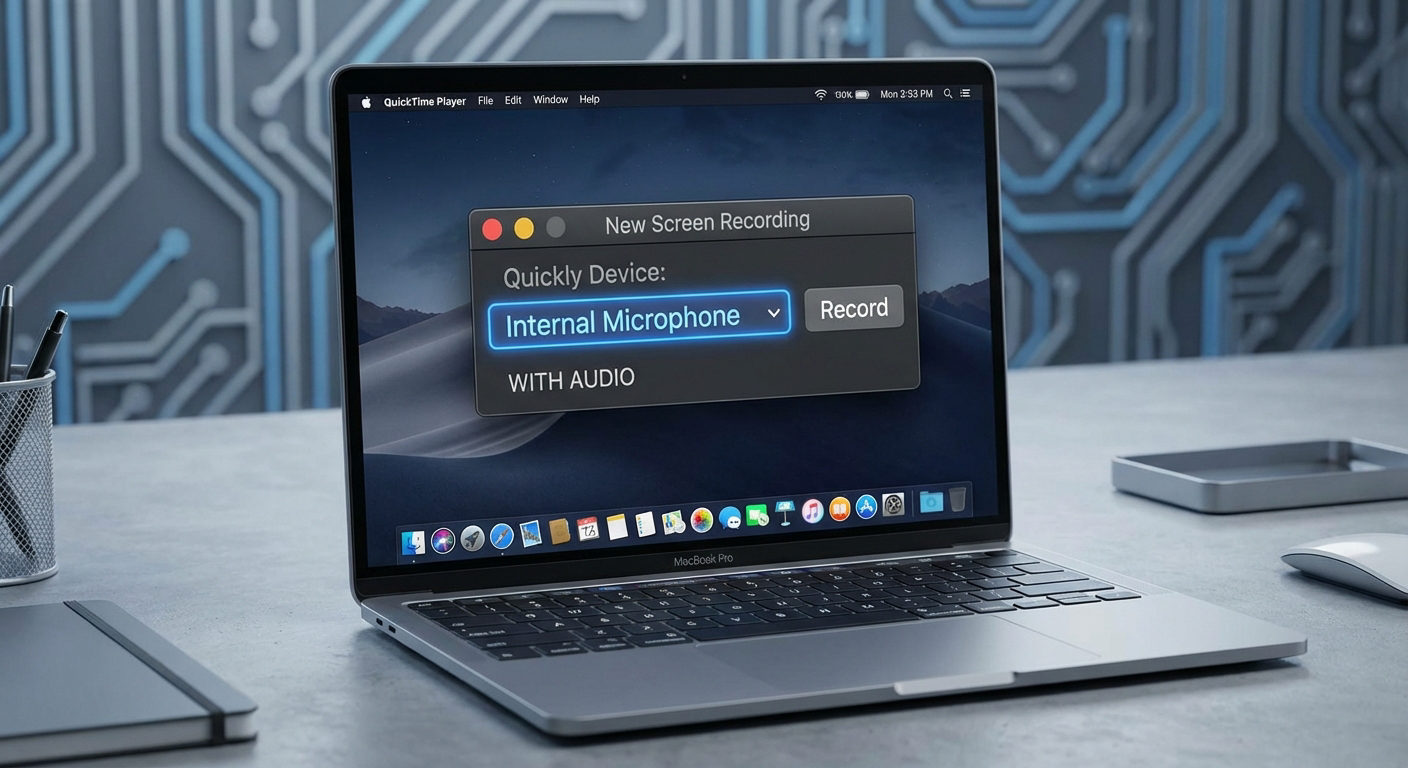
Screen recordings have skyrocketed in both their prominence and utility thanks to a variety of applications you can use them for. While being especially useful in hybrid work environments when employees need to share precisely what they need to, screen recordings are also popularly used by social media influencers, gamers, teachers, and much more.
However, combined with an audio capability, you can infinitely optimize the quality of your screen recordings, especially when you consider using high-quality microphones, such as the LARK MAX from Hollyland.

Hollyland LARK MAX - Professional Wireless Microphone
A professional wireless microphone system featuring studio-quality audio with advanced noise cancellation.
Key Features: Studio-Quality Audio | Magnetic Attachment | 8GB Internal Recording
In light of this, let’s talk about what you need for quality screen recordings, some tips to enhance your experience, and the types of platforms you can use.
Important Things to Know When Preparing for a Screen Recording Session
Selecting the Best Software
Loom
If you’re looking to expedite your screen recording sessions while maintaining the quality of the video, Loom is a good option. One of the best things about the software is that it has a very low learning curve and it provides users with added options to record their screens, webcam videos, and much more. In addition, the platform also comes with easy-to-use editing tools in their intuitively designed web dashboard.
Camtasia
Another web-based screen recording tool that is simple and fun to use is Camtasia. The tool provides users the option to select their area of capture and you have the opportunity to either use microphone inputs or not. Plus, the software comes with a slew of editing tools and functionalities, including customization options.
OBS Studios
When it comes to free-to-use screen recording apps, it doesn’t get any better than OBS. This platform is specifically designed for live streaming – and leans a bit more towards social media influencers, gamers, Twitch and YouTube users, etc. However, you can still use OBS for more general screen recording activities.
Features To Look For In Popular Screen Recording Apps
Before selecting a screen recording app or tool, it is just as important to consider looking for important features and functionalities, such as:
Audio Customizations
Always look for screen recording tools that come with audio features and capabilities such as sound customizations, audio mixing, and easy transitioning.
Straightforward Editing Tools
Next, user-friendly video editing tools are also a major plus. You should be able to cut, trim, edit, and optimize your video quality at the touch of a button and with low effort.
Collaboration Tools
This is especially useful for hybrid employees who want to intuitively share their screen recordings with their team across multiple workflow platforms, such as Asana or Trello.
Things To Do Before Setting Up For a Recording
Setting Up Your Recording Environment
Reducing Background Noise
One of the most important elements of doing a screen recording is to minimize any noise or annoying interruptions such as someone slamming a door, car noises in the background, dogs barking, etc. Always start a screen recording session in a quiet environment.
Ensuring Your Mic is Optimally Positioned
While using quality microphones is critical to producing smooth and easy-to-listen recordings, placing your mic optimally is also important. Your mic shouldn’t be too far away so that nobody can listen to what you are saying or too near, muffling the sound.
Good Internet Connection (For Streaming)
If you’re a social media influencer, YouTuber, or gamer on Twitch, you need to have a very good and stable internet connection for an uninterrupted and high-quality screen recording session.
Configuring Audio Settings
Accessing Audio Settings in Your Screen Recording Software
A fundamental aspect of screen recording using desktop software or a mobile phone app is configuring your audio settings. For example, Loom has built-in recording functionalities that you can access via the browser, and by its extension, you can configure the settings for your mobile device through the desktop app.
Selecting the Correct Audio Source
Internal Audio (For Capturing System Sounds)
System audio comprises all the sounds coming from the system via your speakers. If you are an online gamer, Twitch user, or a YouTuber, is important to ensure your screen recording captures all your system sounds. Similarly, if you’re recording a webinar or a presentation, you’ll need to include your system sounds.
External Audio (Sounds Captured from the Microphone)
In many cases, you would also want to ensure that your voiceover is also recorded simultaneously atop your system sounds. While most screen recording apps come built-in with external recording tools, you can also use third-party apps.
Adjusting Audio Levels
Balancing Audio from Different Sources
One of the best ways to get your recording settings right is to adjust the system and application volume before you start recording. You can do this by accessing the software’s speak and microphone settings and using the buttons or sliders to set a desirable volume.
Preventing Audio Clipping and Peaking
Clipping and peaking problems in audio can be annoying. They are mainly caused by different recording components such as your mic, system, speakers, etc. An optimal and easy way to automatically fix sound distortions is using plug-ins.
Modern screen recording plug-ins are designed to adjust the clipping sections of your recording, mending the damage, and allowing you to fix the issues post-recording.
Conducting a Test Recording
Testing your screen recording session is crucial to ascertain the quality of your recording. The best way to do this is to first check whether your device is picking up your web camera. The software you are using will automatically detect what camera is connected to your device.
Similarly, you need to stay clear of any background noise distortions, which is why it is vital to use a separate mic to record your voice. This is going to help cancel out any background noise. So, it is vital to check your microphone operability before you start recording.
How to Perform a Test Recording
Record a Short Clip
Before you proceed with starting your screen recording, it is recommended to A/B test your equipment and software by conducting a short 20 to 30-second screen recording session.
Evaluate Audio and Video Quality
Check your camera performance and whether the image is grainy or distorted in any way. Similarly, test your mic for any audio clipping or noise distortion. Play around with the volume settings of both your system and the software.
Recording Your Screen with Audio
For explanation purposes, we’re going to discuss how you can use Loom to record your screen with audio capabilities.
Step 1: Download and install the Loom app on your desktop computer or laptop and access the app.
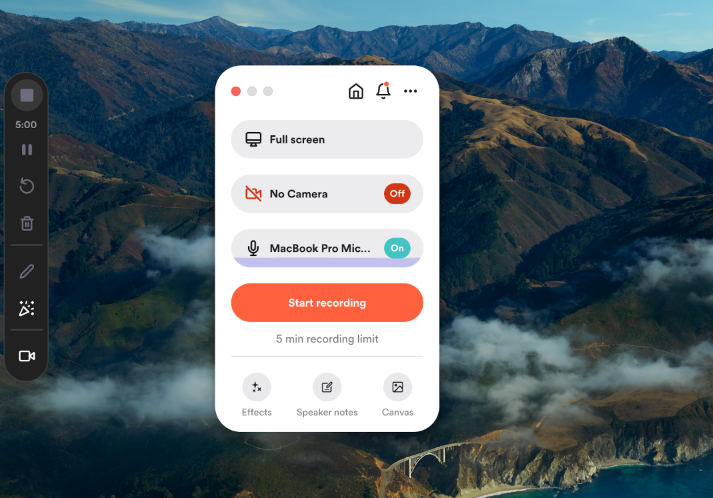
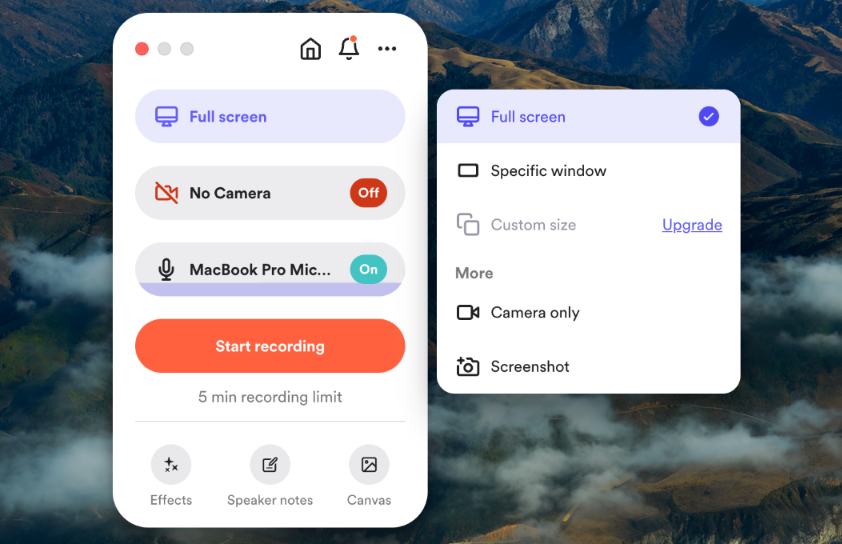
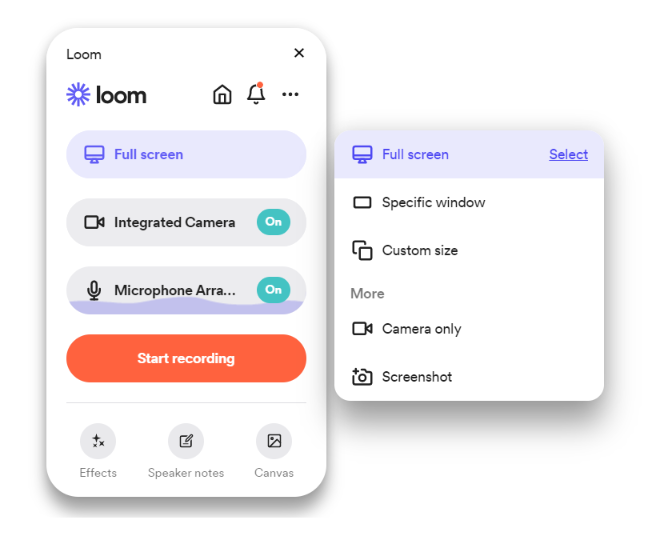
Step 2: Select what type of screen recording you wish to conduct. Loom offers three different options. It can record both your screen and camera, just the screen, or a cam only.
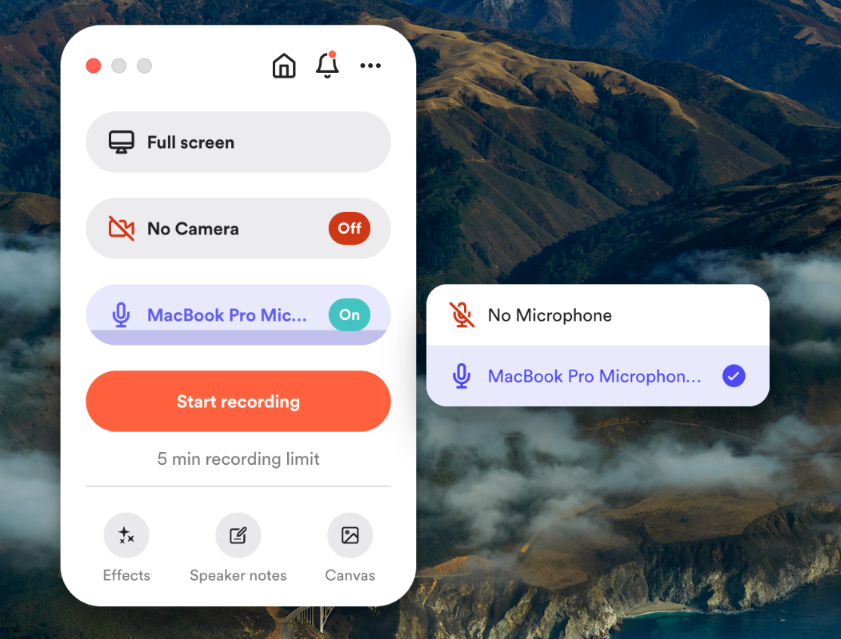
Step 3: Select your audio device. With Loom, you can use your built-in microphone or a third-party mic to record your screen with audio capabilities. Just be sure that your mic is toggled when recording.
Step 4: Initiate the recording session by clicking on the “Start Recording” button.
Step 5: Once you’re done, click on the “Stop” button that you will be able to see on the Control Menu.
Screen Recording Tips to Keep in Mind
Prepare an Audio Script Before Recording
If you’re recording your screen with audio, it is a good idea to know what you are going to say beforehand to make the experience smoother and more streamlined. A script is going to help you stay consistent whether you plan to use voice-over effects or recording on-the-go.
Testing the Microphone
The best thing about preparing an audio script before you click on the “Start Recording” button is that you’ll also be automatically testing the quality of your microphone, checking for background noise distortion or other unpleasantries.
Make Sure Unused Tabs Are Closed
Before starting the session, you are going to want to close all unimportant tabs so that nothing pops up in the middle of your recording.
Completing the Recording
The best way to end a recording is to add an outro to it. For example, if you are a social media influencer promoting a product, an outro would include talking about the next steps your users should take and what to expect. This concept applies to just about any type of screen recording session. In addition, always be sure to save and rename your recording file. You can also make backups in case something goes wrong with the recording.
Post-Recording Editing
Basic Audio Editing Techniques
One of the most important aspects of editing a screen recording is trimming unnecessary or irrelevant audio clips, and shortening the recording while also making it crisp. However, it is simple to do as many screen recording software come with audio cutter and trimming functionalities.
Similarly, you should also adjust the audio levels of your record post-production to ensure there are no lingering noise distortions and to make the recording as clear as possible.
Tips for Better Audio Quality
Using External Microphones
A very good reason to use external microphones for your screen recording is that they are designed to provide a more immersive experience because they are directional and will only record your voice from the front. This helps eliminate any noise distortion or ambient sounds.
Utilizing Audio Enhancement Software
Audio enhancement software is designed to optimize the overall listening experience. For example, many audio enhancement tools come with surround sound capabilities for a more enveloping experience.
Frequently Asked Questions
- Can I record internal audio during screen recording?
Yes. However, this will depend on the type of screen recording software you are using as well as your device. Fortunately, many platforms and tools provide users with the capability to turn off their system sounds to record their internal audio.
- How do I fix desynchronized audio and video in my recording?
Having desynchronized audio and video is a common issue that can be resolved by disconnecting and reconnecting any external microphone or camera.
- What are the best formats to save my screen recordings with audio?
The best and most typically used format to save screen recordings is MP4 as it ensures that you will be able to play your file across multiple devices.
- How can I improve the audio quality of my screen recordings?
The most optimal way to boost the audio quality of your screen recording is to use a top-notch external microphone.