


.png)
Recording on your Mac screen for learning or presentation purposes can prove to be incredibly useful. But what if you also need to record the audio of what you are playing on your computer? While the built-in QuickTime Player offers screen recording, it has one drawback. It cannot capture internal audio by default. This means when you see the recording, you won’t hear any explanations or system sounds you play during the recording.
You don’t need to be worried; there are ways around this. We’ll explore two approaches: using free third-party software and making some adjustments to your Mac’s system configuration. Both methods have their pros and cons. Let us guide you through each option to help you choose the one that best suits your needs.
Setting Up Your Mac for Screen Recording with Internal Audio
Let’s learn how we can prepare your Mac for screen recording with inclusion of internal audio.
Understanding macOS Built-in Capabilities for Screen Recording
We’ll begin with understanding what your Mac already offers. QuickTime Player is a versatile app you can find on all Macs. This app lets you capture basic screen recordings. However, we have to understand that it has one crucial limitation.
QuickTime alone cannot directly capture your computer’s internal sounds. These sounds can be audio from applications, games, or system notifications. This might not be a trouble if you intend to capture silent visuals. The problem comes when it won’t work for recordings that require audio explanation or demonstrations.
Third-Party Software Options
When Quick Player falls short, third-party softwares come in. Several tools can help you overcome this limitation and record your screen with internal audio. Here, we are talking about three popular options, each with its own advantages and setup complexity.
- Soundflower (Free): This freeware acts as a virtual audio router. However, it’ll require you to take care of some configuration within your Mac’s Audio MIDI Setup utility. If you are a beginner, setting it up can be a bit technical for you.
- BlackHole (Free): Here, we have another free tool for you. BlackHole creates a virtual audio device within your system. Similar to Soundflower, it requires configuration in Audio MIDI Setup. The advantage this offers is more flexibility for routing your audio.

- Audio Hijack (Paid): This premium software provides a user-friendly interface for advanced audio capture and manipulation. While offering the most features, it comes with a price tag.
Installing Required Software
Once you’ve chosen your audio capture tool, follow these steps for installation:
- Download: Head over to the developer’s website for your chosen software. Here are some helpful links:
- Soundflower: https://github.com/RogueAmoeba/Soundflower-Original
- BlackHole: https://existential.audio/blackhole/
- Audio Hijack (Paid): https://www.rogueamoeba.com/support/knowledgebase/?showArticle=AudioHijack-AlwaysOnSessions
- Installation: You’ll have to follow the on-screen instructions provided by the downloaded installer.
Important Note: After installing any of these tools, you’ll need to grant them microphone access within your Mac’s Security & Privacy settings. To do this, go through System Preferences > Security & Privacy > Privacy > Microphone. Find your chosen tool and check the box next to it to enable access.
Preparing to Record
After setting up the computer, it is time for you to prepare to record. For that, you’ll have to do the following things.
Configuring Internal Audio Capture Settings
Now that your audio capture tool is installed let’s configure it. We’ll use BlackHole as an example, but the general steps are similar to Soundflower.
- To start with, you’ll need to open Audio MIDI Setup. You can usually find this utility within Applications > Utilities.
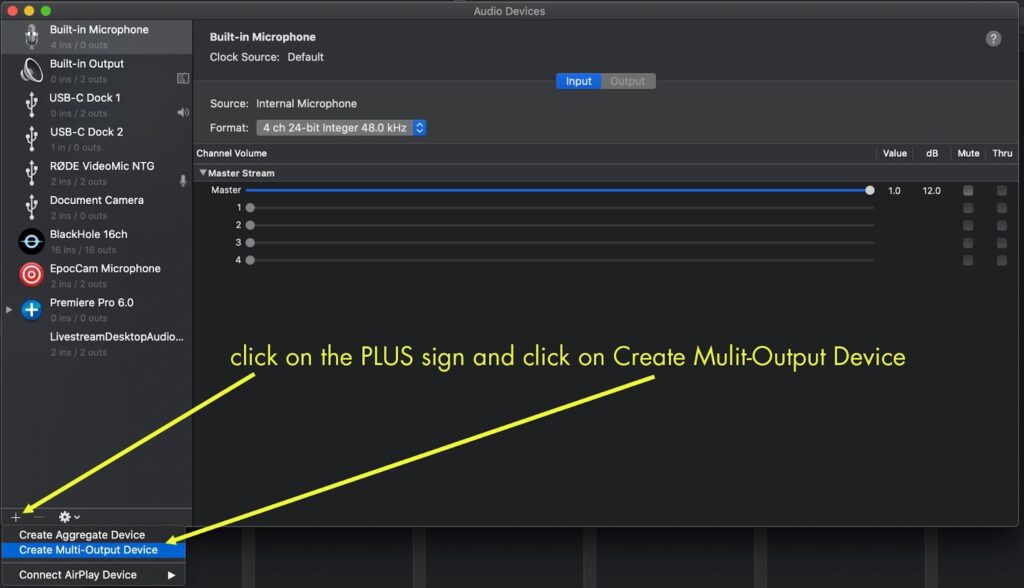
- After that, you are to locate BlackHole. For that, you should look for a black hole icon labeled “BlackHole 16ch” in the window.
- Once you have located the tool, it’s time to route system audio. For this, click on the arrow next to the volume slider for “BlackHole 16ch.” A dropdown menu will appear. Select “Built-in Output” from this menu (this routes your computer’s audio to BlackHole).
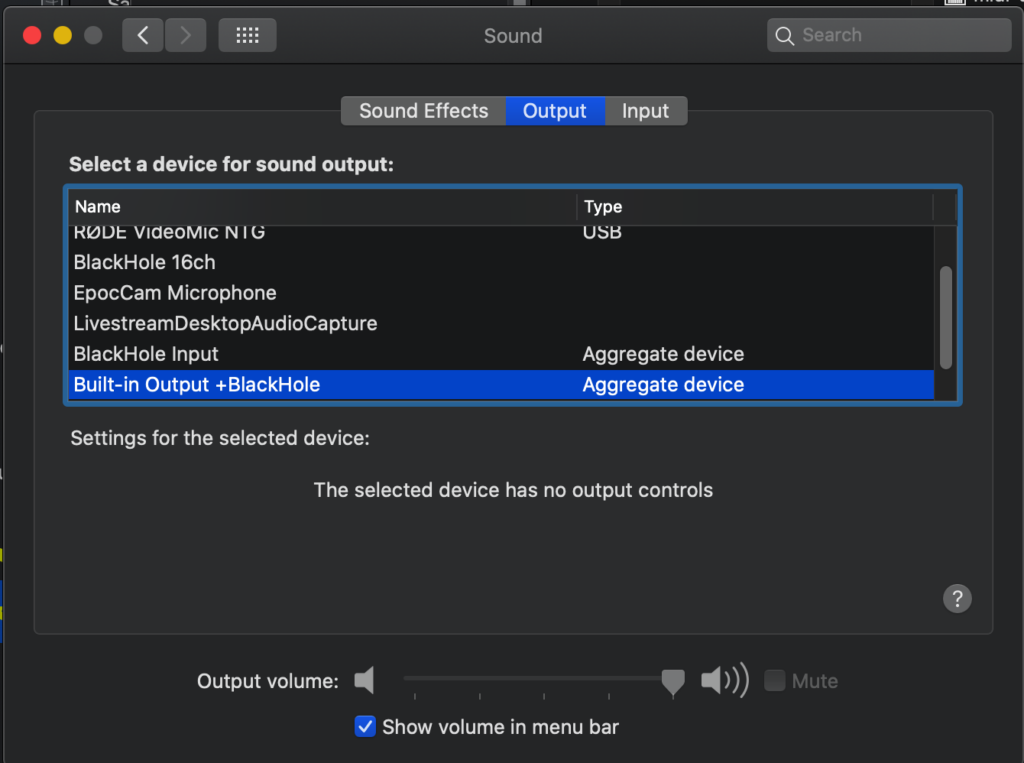
4. Now, it is time to set up the output device. You’ll be required to close Audio MIDI Setup for this. Now, You should navigate to System Preferences > Sound. Go to the “Output” tab and ensure “BlackHole 16ch” is selected as your output device.
Selecting Recording Area
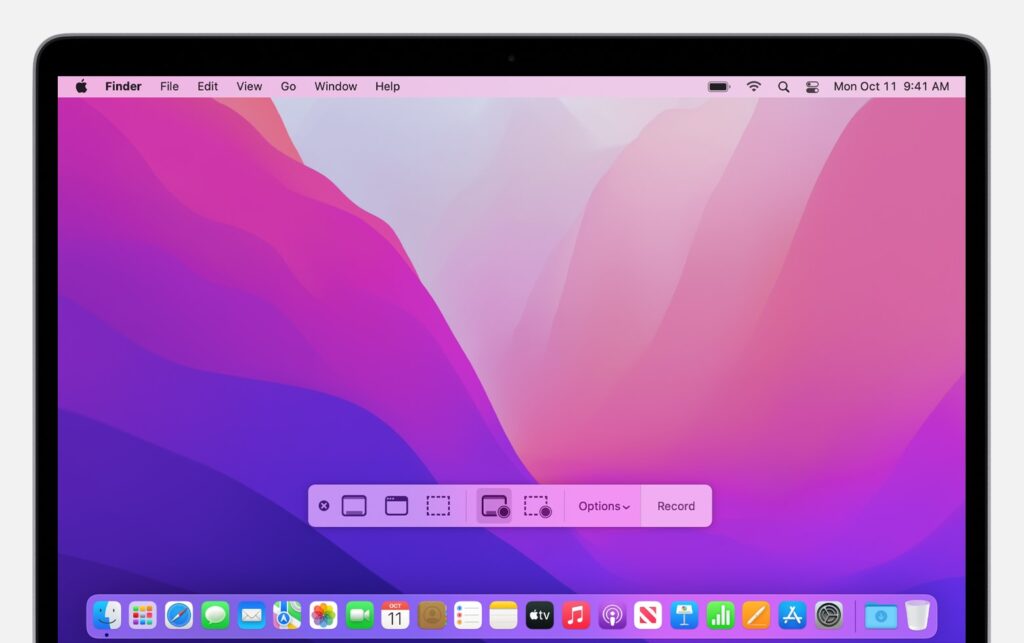
With internal audio captured, it’s time to choose what you want to record on your screen. Both QuickTime Player and most third-party recording apps offer two options.
- Full-Screen Capture: Here, you can record everything on your entire screen.
- Partial Screen Capture: You can also select a particular window or area of your screen to focus on.
QuickTime Player provides you with a dropdown menu next to the record button to choose between these options. Simultaneously, third-party apps might have a dedicated selection tool or keyboard shortcuts.
The Recording Process
Now that we are all set, let’s move towards recording.
Starting the Screen Recording
Here’s how you can initiate capture depending on your chosen software.
QuickTime Player
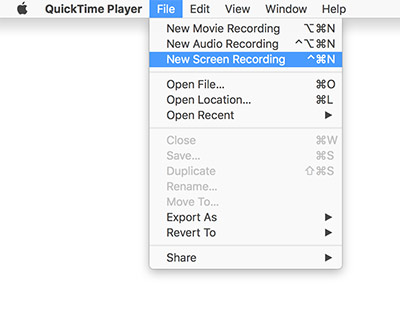
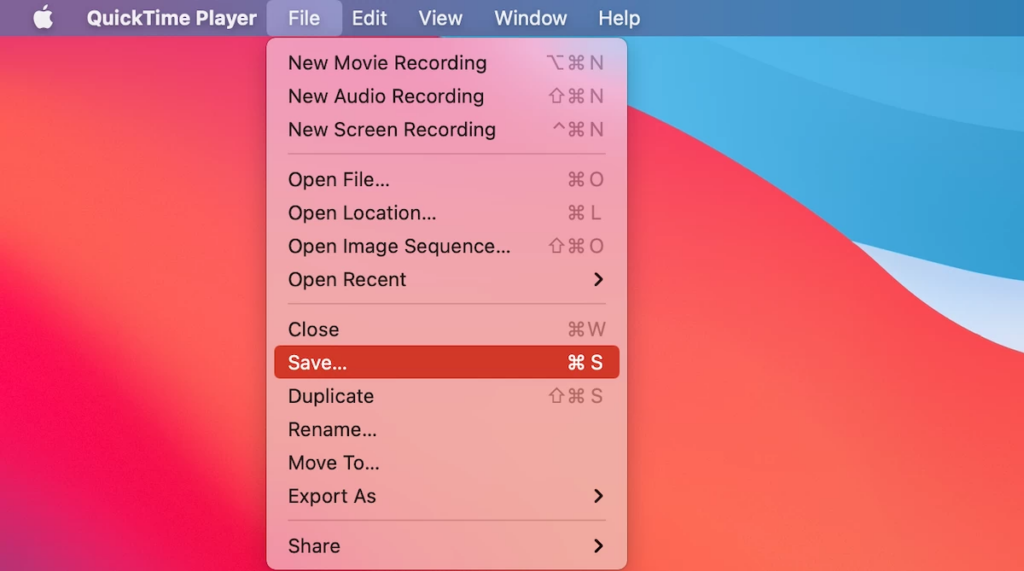
- Firstly, you’ll open QuickTime Player.
- After that, you need to go to FileFile> New Screen Recording.
- Once you’ve done that, click the dropdown menu adjacent to the record button to choose your preferred recording area.
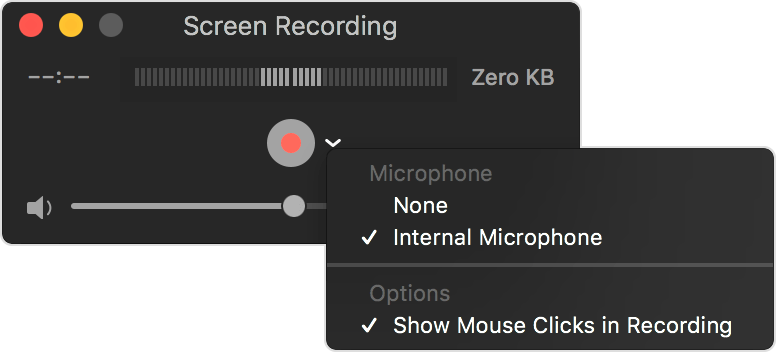
- This is an optional step. You can capture mouse clicks and keystrokes visually. To do that, you’ll click the “Options” button. Post that, you’ll check the boxes next to “Show Mouse Clicks in Recording” and “Show Keyboard Input in Recording.”
- After everything, you click the red record button to begin. Alternatively, you can utilize the keyboard shortcut Shift + Command + 5 (opens the screenshot utility) followed by the record screen option.
Third-Party Software
Each third-party app might have slightly different interfaces, but most will offer a record button to initiate capture. You can consult your software’s documentation for specific instructions.
Capturing Internal Audio
When your recording is underway, it is critical to ensure your audio capture tool is correctly intercepting sound.
To verify, you can do a quick Test. Start by playing some audio on your Mac (e.g., music, a video). If you hear it, internal audio capture is working.
Volume Adjustment
If the audio seems too quiet or loud, most recording software allows you to adjust recording volume levels. You can refer to your software’s specific instructions for this.
Managing the Recording Session
During recording, you’ll likely need to pause, resume, or stop the capture. You should look for these controls in your recording software.
The pause/ resume button allows you to temporarily halt recording and resume later. The stop button (usually a square icon) terminates the recording and saves the captured video file.
Monitoring Progress
Some software might display a timer or a progress bar indicating the recording duration. File size information might also be available after stopping the recording.
Post-Recording Steps
After you are done recording, it’s time to know what are adequate steps afterward.
Saving and Editing the Recording
Once you’ve stopped recording, it’s time to save and potentially edit your newly captured video.
When it is time to save the FileFile you can notice that most screen recording software allows saving in various formats. Among these formats .MOV and .MP4 are common choices. You can also designate a specific location on your Mac to save the recording file.
After that is it time for basic editing: Both QuickTime Player and most third-party software offer basic editing tools. You can trim unwanted parts from the beginning or end of your recording or crop the video frame size to focus on a specific area.
Exporting and Sharing
After any necessary edits, you’ll likely want to export and share your recording. Here are some things to consider:
You should note that choosing the right format is the key. The best format depends on how you plan to use the video. For online sharing (e.g., YouTube), .MP4 is generally a good choice. If you plan on further editing in professional software, exporting as a .MOV file might be preferable.
As we discuss sharing options many screen recording apps offer direct upload options to platforms like YouTube or Vimeo. Alternatively, you can save the video file locally and then upload it manually.
Troubleshooting Common Issues
No Sound in Recording
- Double-check your recording software’s settings and ensure the audio input source is set to your chosen capture tool (e.g., BlackHole).
- Verify that “BlackHole 2ch” remains selected as the output device in your Mac’s System Preferences > Sound.
Poor Audio or Video Quality
- Experiment with different recording settings within your software. Higher resolutions and frame rates will produce better quality but larger file sizes.
- Shut off any unnecessary applications running in the background to optimize system performance during recording.
- Also if you want to record a call then you should use a microphone. Hollyland’s Lark M1 is a great choice.
File Compatibility Issues
- Free online converters can change video formats if needed. However, be cautious of unreliable websites.
- For more control and advanced features, consider using video editing software that works with various file formats.
- Common media players like QuickTime Player or VLC can handle most popular video formats (e.g., MP4, MOV).
FAQs
Can I record internal audio with QuickTime Player on a Mac?
Unfortunately, not directly. Third-party tools or system workarounds are required.
What are the best free tools for screen recording with internal audio on Mac?
Soundflower and BlackHole are free virtual audio devices that work with screen recording software.
How do I fix desynchronized audio in my screen recording?
This depends on your recording software. Consult its documentation for troubleshooting steps.
Can I screen record on a Mac with internal audio without installing third-party software?
No. While macOS offers basic screen capture, it cannot record internal audio by itself.


