.png)
GarageBand is a powerful music editing app. This app seamlessly records, mixes, and edits your music files. One of its many features is the ability to split a track into multiple sub-tracks. This feature is excellent for adjusting levels and adding effects to different music parts. However, most people don’t know how to utilize GarageBand to split a track. In this article, we’ll show you how to do it on different devices; let’s get into it.
How to Split a Track in GarageBand Mac
You can use GarageBand to split a track on Mac. Learning how to use this app because it helps to effectively edit your music on your device. With GarageBand on your Mac, you can remove some elements from the music file and also create new tracks for your music. In addition to splitting a track in GarageBand, you can explore other editing features. The steps are quite simple; follow the steps below to split tracks in GarageBand.
Step 1: Start by downloading and installing GarageBand on your Mac
Step 2: After installation, open the app and then open a new project on the app.

Step 3: Now, open the tracks you want to split, and once this is done, click the track to highlight it.
Step 4: Position the play head at the particular spot in the track that you would like to split.
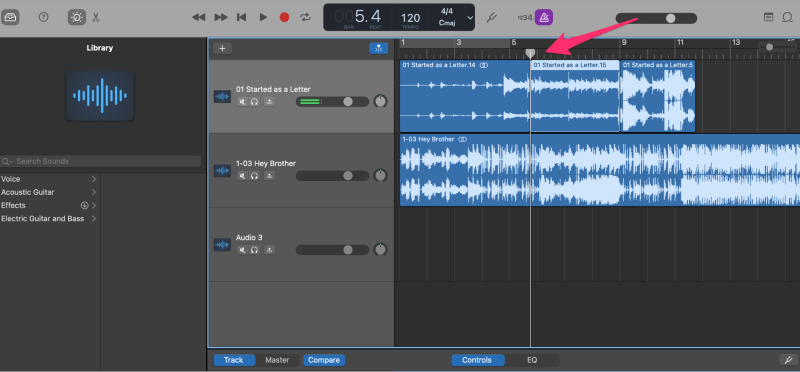
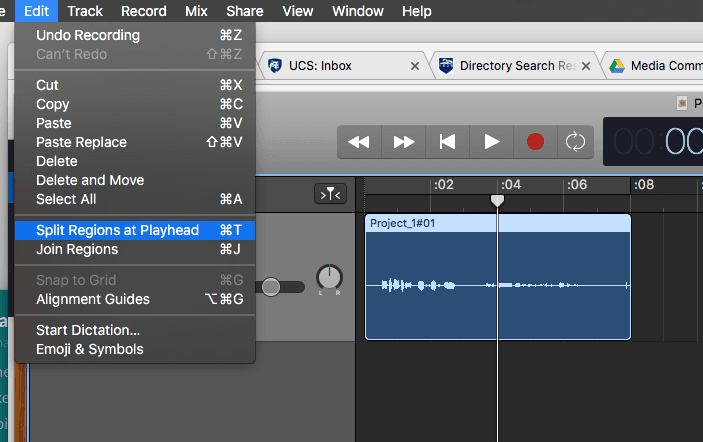
Step 5: Press’ Command T’ to split the track at the desired spot once you’re at the right spot. Alternatively, you can split the track by navigating to the Edit tab on the main menu and selecting ‘Split Regions at Playhead.’ Doing this will immediately split the track like the command.
That’s all you need to do. You can split your track as many times as you would like to. If you want to remove or move a section of your music file, then the steps above can also help you do that. All you need to do is make a split and then move the split section of the track around. You can also explore other editing features on the split track to improve your music file.
How to Split a Track in GarageBand for iPhone
Although you can split a track in GarageBand on Mac, you can also utilize it on your iPhone. The steps to split a track on GarageBand are quite different, but the result is the same. You can also split tracks on your iPhone by following the simple steps below.
Step 1: Download the GarageBand app from the Apple Store and proceed to install it on your device.
Step 2: Launch the app and open the project with the tracks you want to split.
Step 3: Double-tap the track on your screen to highlight it.
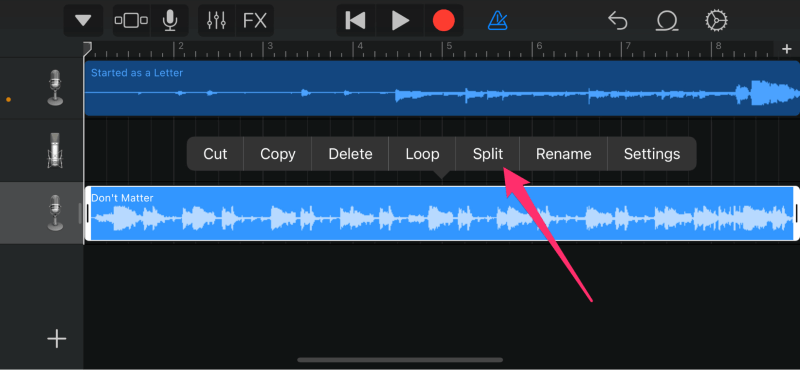
Step 4: Once it is highlighted, tap on the track again, and the menu option will pop up.
Step 5: From the options on the screen, tap ‘Split’ to split your track into two.
Step 6: Selecting the split option will make a scissors icon appear on the track. Position the icon wherever you want on the track as you would on Mac.
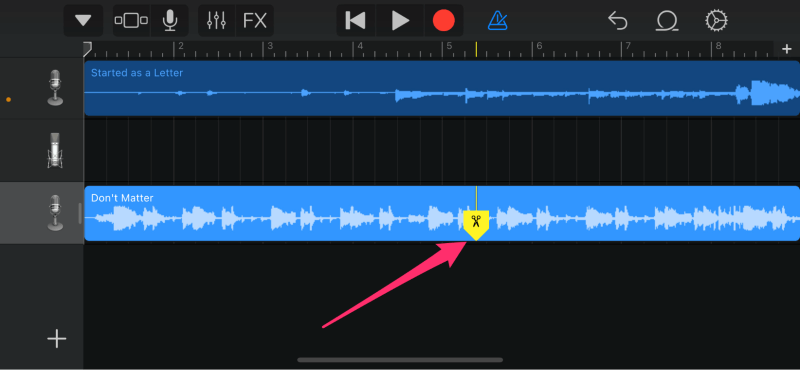
Step 7: Once you have the Split icon in the correct position on the track, slide the scissors icon using your fingers to do a split. While sliding the icon down, you’ll see the track split into two.
Step 8: You can repeat Step 7 to make any more splits you want to track. All you have to do is tap on the region of the track you would like to split and then use the scissors icon to split.
How to Split a Track in GarageBand for iPad
The iPad is another device where you can split tracks on Garageband. The steps are also quite simple and outlined below to make the process easier.
Step 1: Download the GarageBand app and install it on your iPad. After installation, launch the app.
Step 2: Next, you must open a new project with the track you want to split.
Step 3: On your iPad, move the vertical line on the timeline (play head) to anywhere you want to split the track.
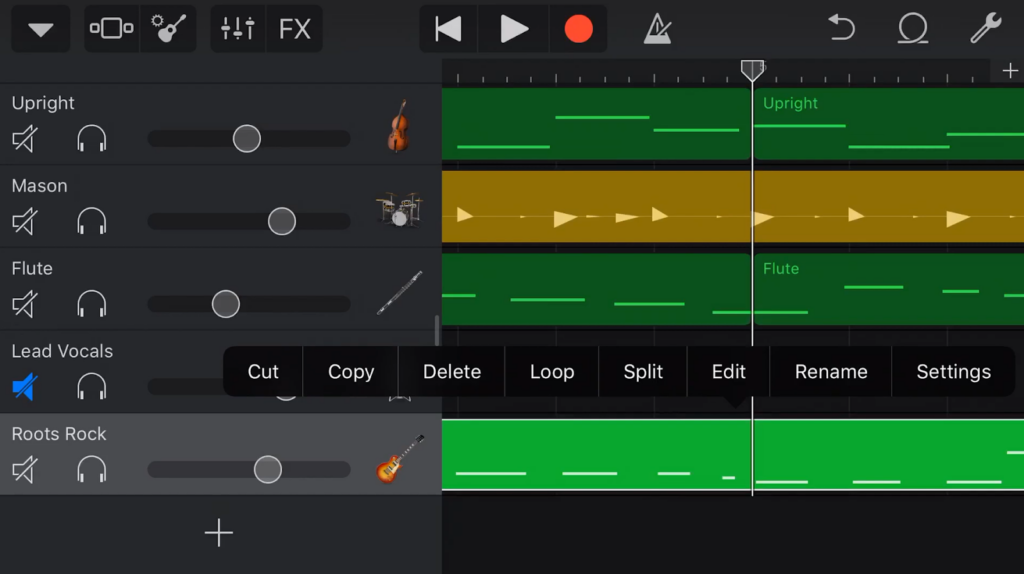
Step 4: Tap the region and there will pop up a menu bar. Then select split. This will cause the track to split into two.
Step 5: Each track has unique effects and settings; you can edit each track further to improve various aspects.
If you want to also combine two tracks into one, all you have to do is drag an audio file region into the existing track till it overlaps.
How to Split a Music File into Multiple Tracks
If you’re a producer, learning to split your song into multiple tracks can be useful. It is handy when editing your music files or adding various effects to different track sections. Splitting your song into different tracks is easy; simply follow the steps below.
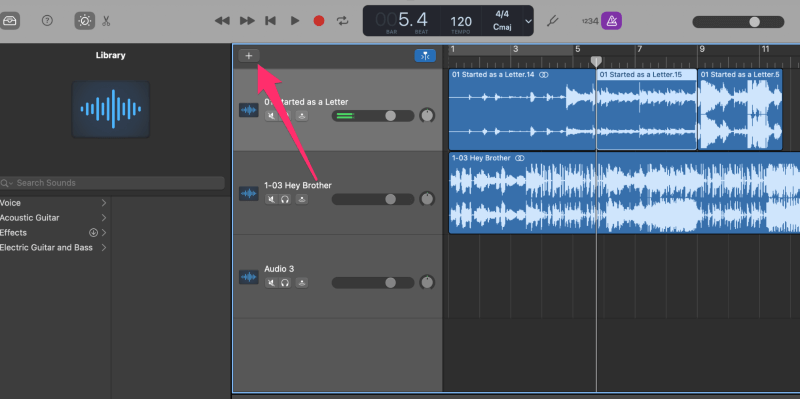
Step 1: First, you must create a new track on the GarageBand app, where you can split your app. Creating a track is relatively easy; you only have to select the ‘Add Track’ button on the left side of the track window. It looks like a + icon.
Step 2: Once you have added a track to your project, split it following the steps outlined above; you can split it into one or multiple tracks.
Step 3: Now, click on the track region you want to move and drag it to a new track where you can drop it. You can position the new split track anywhere on the new track region.
GarageBand allows you to add as many tracks as you would like to a project and repeat the process as many times as you want.
How to Join Split Track in GarageBand
While it’s easy to split tracks, most people wonder how they can join various split tracks together. This skill is valuable for anyone to pick up and makes editing your songs easier. This way, you can make necessary adjustments to various split tracks and then line them up again when you’re done with the edits.
After splitting your tracks and making the edits, you can move them around to form new tracks or add them to existing tracks in the preferred position. It’s simple; all you have to do is drag the tracks together within the same track till each end touches the other. You can do this on a Mac, iPhone or iPad.
However, you must ensure no space within the split tracks when joining multiple tracks. Ensure you drag them as close as possible. A time ruler is a tool that can help you with this; it’s right at the top and can serve as a reference for perfectly joining tracks.
Once you have the tracks in the right spot, simply press the ‘Play’ button to listen to the track and ensure no pauses or silence between the joined region. If you don’t get the result you’re looking for, simply readjust the regions to remove the pauses between the song.
Final Thoughts
GarageBand is an excellent music editing software. It is also user-friendly and offers various features, including audio effects, virtual instruments, loops and many more to enhance your tracks. In addition to these features, you can split a track on GarageBand following the steps outlined below.
Looking to improve your audio quality when recording vocals or interviews directly into GarageBand? A wireless lavalier microphone lets you capture clear, professional-level sound effortlessly, making your editing and track-splitting workflow smoother than ever.
FAQs
What is the split-track format?
It’s like a background track or an accompaniment track. It is usually a divided track with the vocals in one channel and the instrumentation in another. Therefore, it allows you to use the vocals for practice when you want.
Can you mix audio in GarageBand?
Yes, you can. It’s quite easy to do, and when you mix a project, you can balance various parts and ensure the blend into a smooth audio file. It also allows you to add effects that’ll create a dynamic change in your project.
Can you make a DJ mix on GarageBand?
The answer is yes; you can make a DJ mix any time you want on GarageBand. You can do this in the Live Loops grid or the Tracks area.
Can you release a song from GarageBand?
Yes, you can. It’s entirely legal to publish songs made in GarageBand. Apple provides the samples and loops royalty-free.