.png)
Streaming live content is one of the most exciting ways to share your passion, whether you’re gaming, teaching, or hosting events online. OBS Studio (Open Broadcaster Software) is a powerful, free tool loved by both beginners and professionals for its flexibility, user-friendly interface, and performance.
OBS may seem overwhelming at first, but with the right instructions, it becomes simple to set up powerful live streams. Our article includes everything from downloading the software to customizing scenes and audio. Get ready to create engaging broadcasts quickly and confidently by following this guide.
How to Stream with OBS
Step 1: Installation
Here’s how to install OBS on your device:
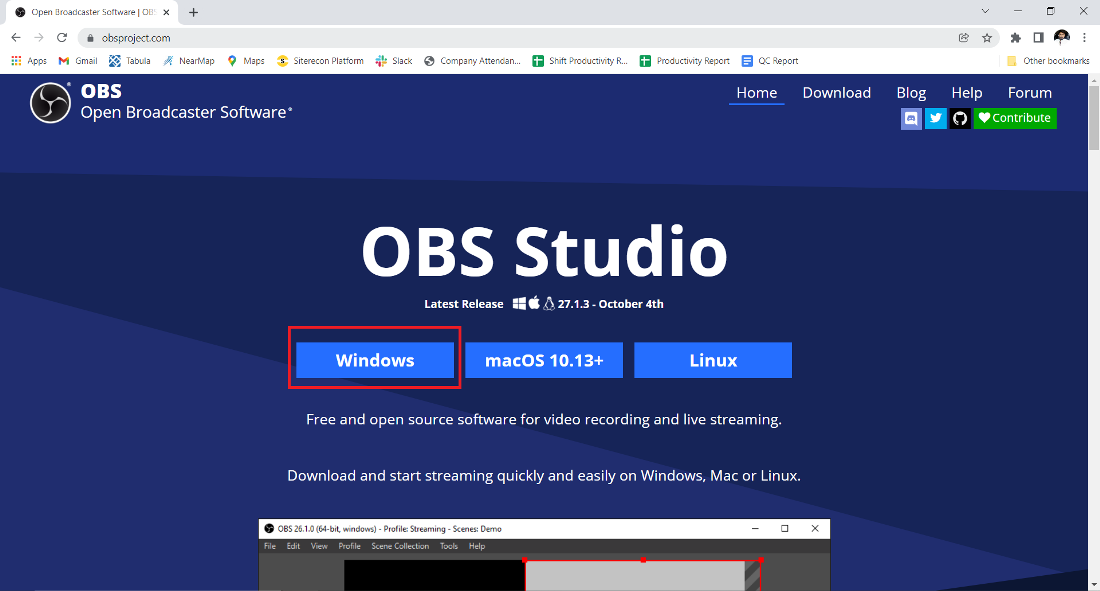
- Visit the official OBS Studio website: obsproject.com
- Select your operating system Windows/macOS/Linux and download the installer file.
- Run the installer and follow the prompts.
- Click “Next,” agree to the terms, and choose the default installation folder.

- Allow the installation to complete, then launch OBS Studio from the desktop shortcut or start menu.
Optional: Skip or decline additional plugin installations during setup to keep it simple at first.
Step 2: Set up
Now, it is time for the Setup:
- When opening OBS for the first time, an “Auto-Configuration Wizard” appears.
- Select whether you’ll primarily use OBS for streaming or recording.
- The wizard will assess your system to recommend optimal settings.
- Accept the auto-configuration or modify settings yourself later under the “Settings” menu.
- Access the “Settings” anytime from the bottom right or the menu bar to customize video, audio, and stream preferences.
If you want to use the auto-configuration again for automatic settings, go to the “Tools” option in the menu bar. You will find the option there.
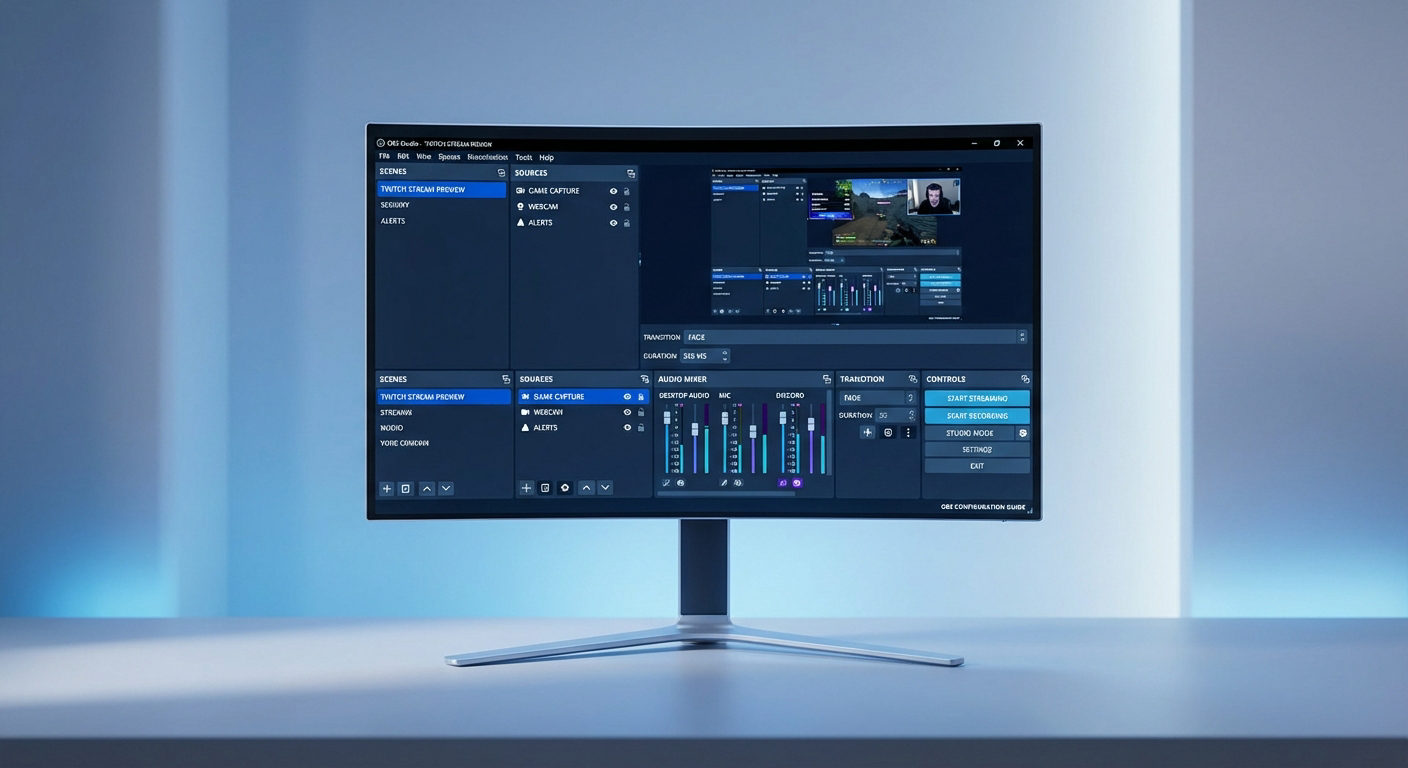
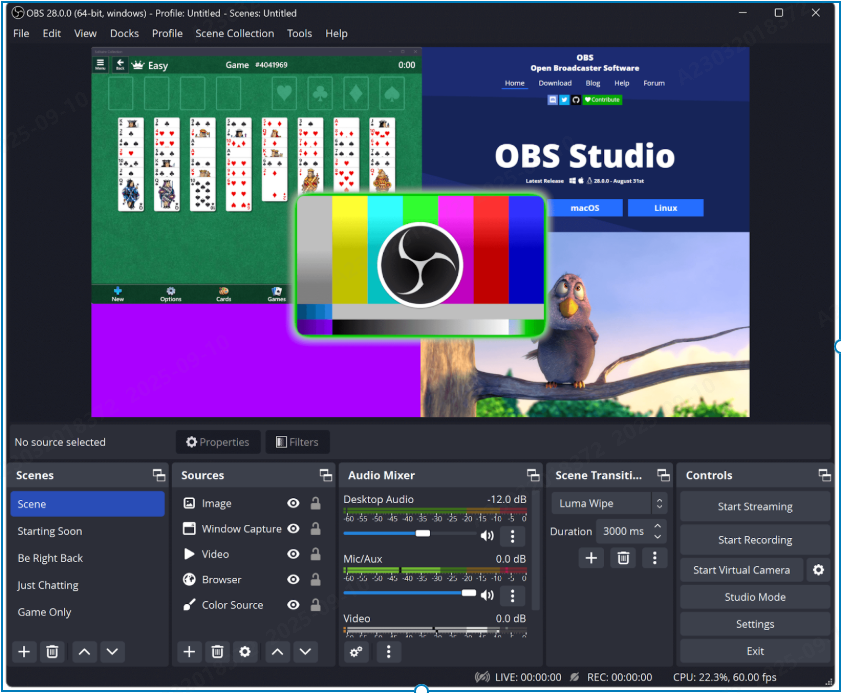
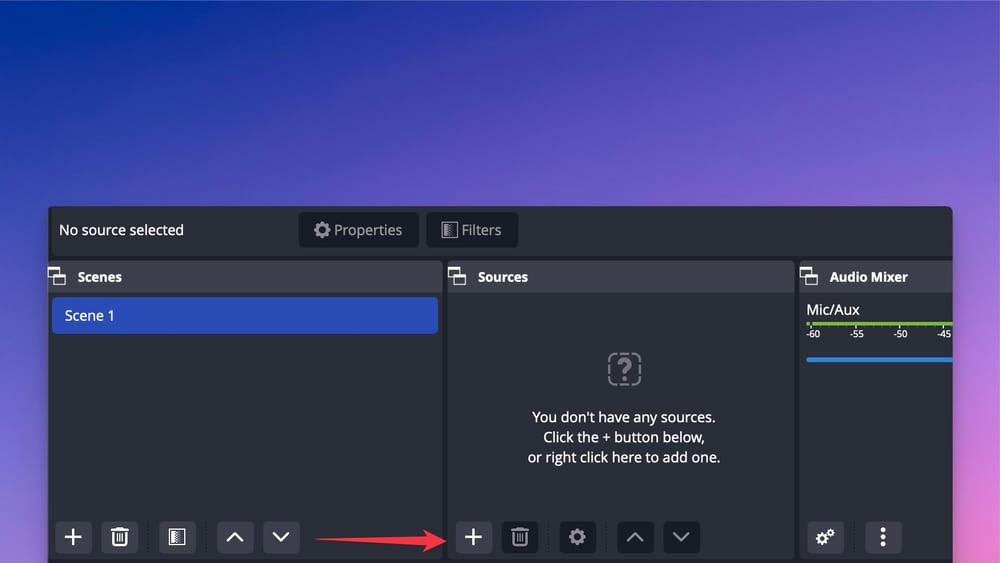
Step 3: Create a Scene
Scenes act as containers to which you add sources such as video, audio, or images. It combines various inputs, such as webcam video, microphone audio, and screen capture, into a single view, which OBS streams together as a unified live broadcast for the audience.
To create a scene before starting your stream:
- Go to the main window of OBS, locate the “Scenes” box at the bottom left.
- Click the “+” icon to add a new scene.
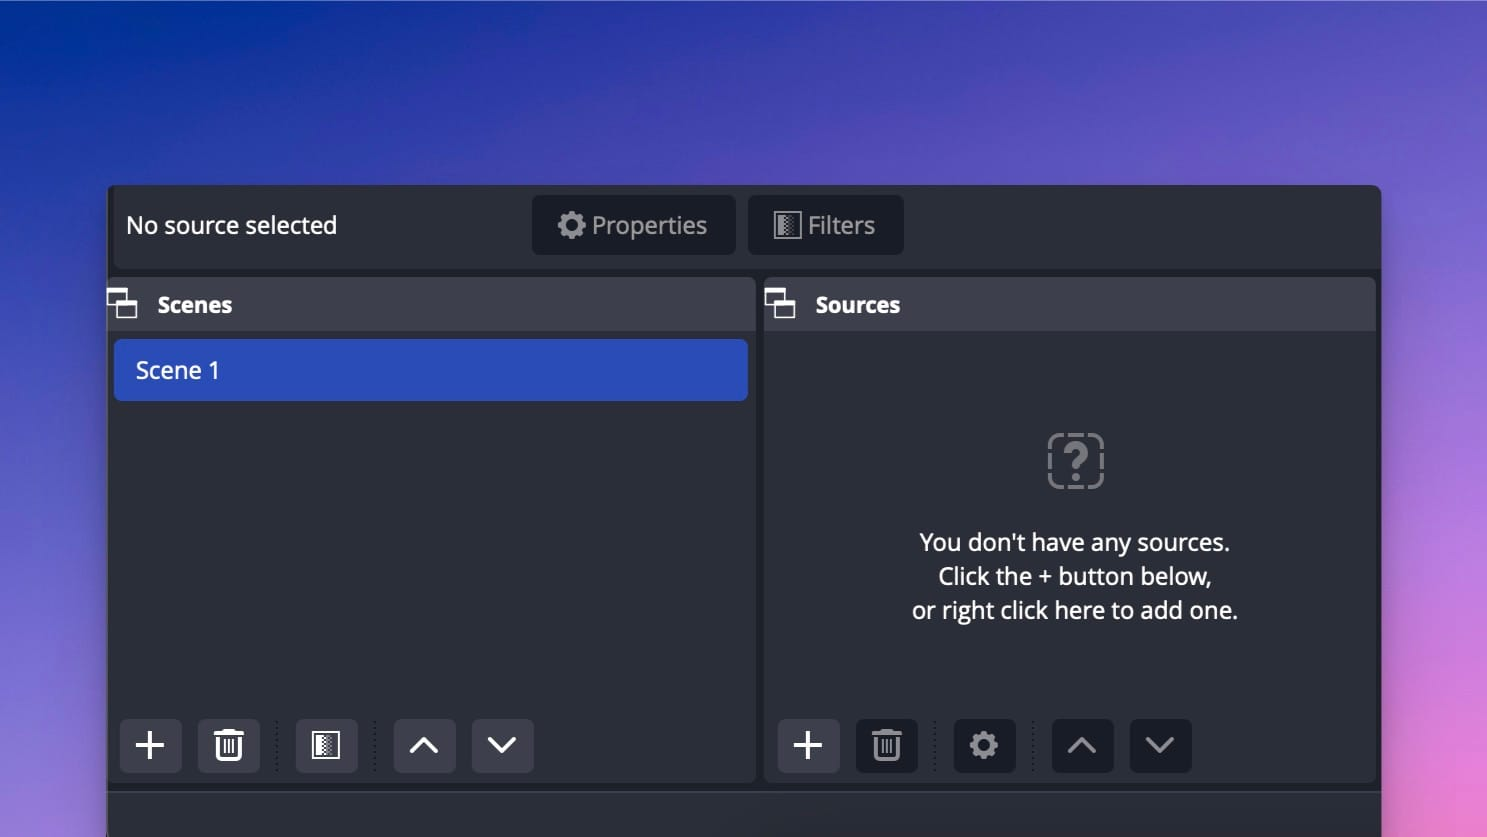
- Rename it to identify the file easily later.
Remember, your stream will broadcast only the selected scene, but you can add multiple scenes for different views.
Step 4: Add Sources
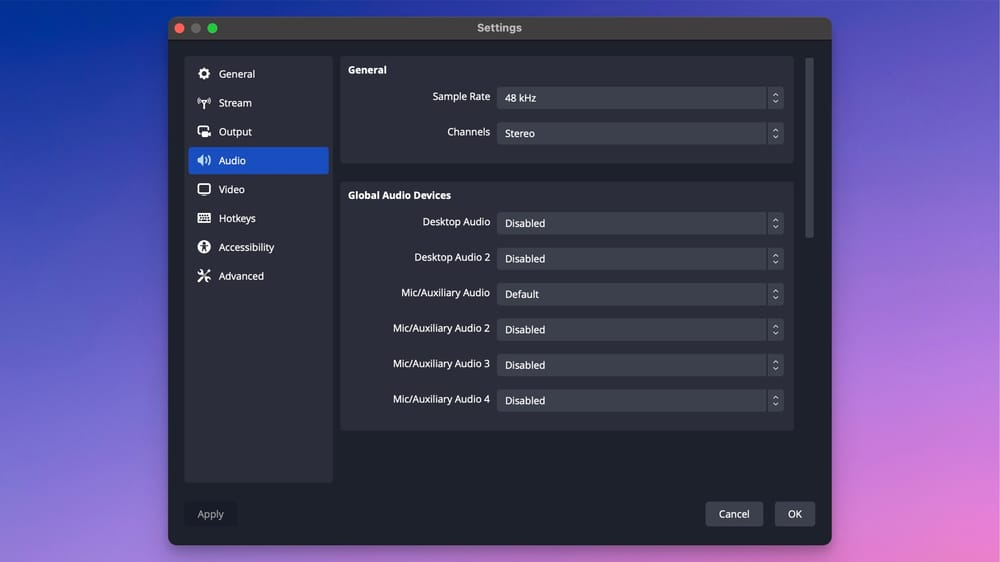
By default, OBS Studio uses your computer’s main audio input and output devices automatically.
- Go to the “Audio Mixer” panel, next to the “Sources,” to see the audio levels moving.
- To manually select or change your audio devices, click on “Settings,” then go to the Audio tab and pick the devices you want.
Video sources work differently; if the preview screen is black, it means no video source is connected.
- To fix this, go to the “Sources” box from the main OBS screen.
- Click the “+” button to add sources like:
- Display Capture: record your entire monitor.
- Window Capture: capture a specific application window.
- Game Capture: optimized for capturing games.
- Video Capture Device: add webcam video input.
- Audio Input Capture: add a microphone or other audio sources.
- After adding sources, arrange and resize them on the preview screen by dragging and resizing.
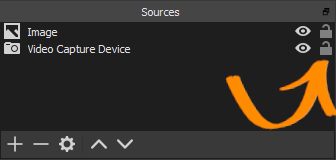
Step 5: Manage Layers
When there are multiple video sources, you can use the layering system. In this, Sources are layered in the order listed in the “Sources” panel. The top source overlays those below. To customize the layer order:
- Go to the “Sources” panel.
- Click and hold the source you want to move.
- Drag the source up in the list to bring it to the front, or drag it down to send it behind other sources.
Then lock the layers to prevent sources from moving.
- In the Sources panel, find the source you want to lock.
- Hover your mouse over the source, and a small lock icon will appear next to it.
- Click the lock icon to lock the source’s position and size.
Step 6: Add Filters and Audio Effects (Optional)
Special filters and audio effects enhance the quality of the stream. To add these:
- Right-click a video or audio source.
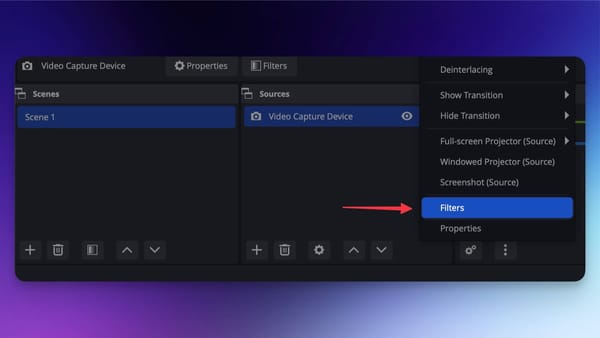
- Select “Filters.”
In Video filters, you can add Chroma Key (Green Screen) to remove backgrounds and color Correction for adjusting brightness and contrast. Audio filters include noise suppression, compression, and noise gate, etc.
Step 7: Optimize Settings (Optional)
You can optimize settings to stabilize stream playback. These are some settings you need to focus on:
- Under the “Settings” option, go to “Output,” and adjust the bitrate. Generally, 3000-8000 kbps is good for streams.
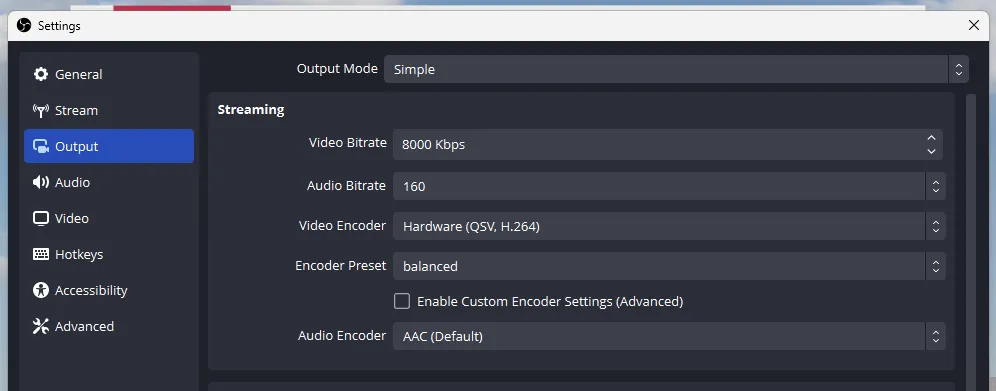
- Go back to “Settings” again and tap on “Video.” Set your base resolution and output resolution.
- Choose an encoder:
- Software (x264) uses CPU; flexible but heavier on CPU load.
- Hardware (NVENC, AMD VCE) utilizes a GPU, making it more efficient on compatible graphics cards.
- Adjust FPS (Frames per second).
Lastly, to elevate your live streaming experience, consider using a dedicated streaming camera like the Hollyland VenusLiv Air. Its AI tuning and 4K30fps capabilities deliver crystal-clear video, while its 24/7 live streaming design ensures uninterrupted high-quality broadcasts. This kind of hardware upgrade can significantly enhance the professional feel and reliability of your stream.
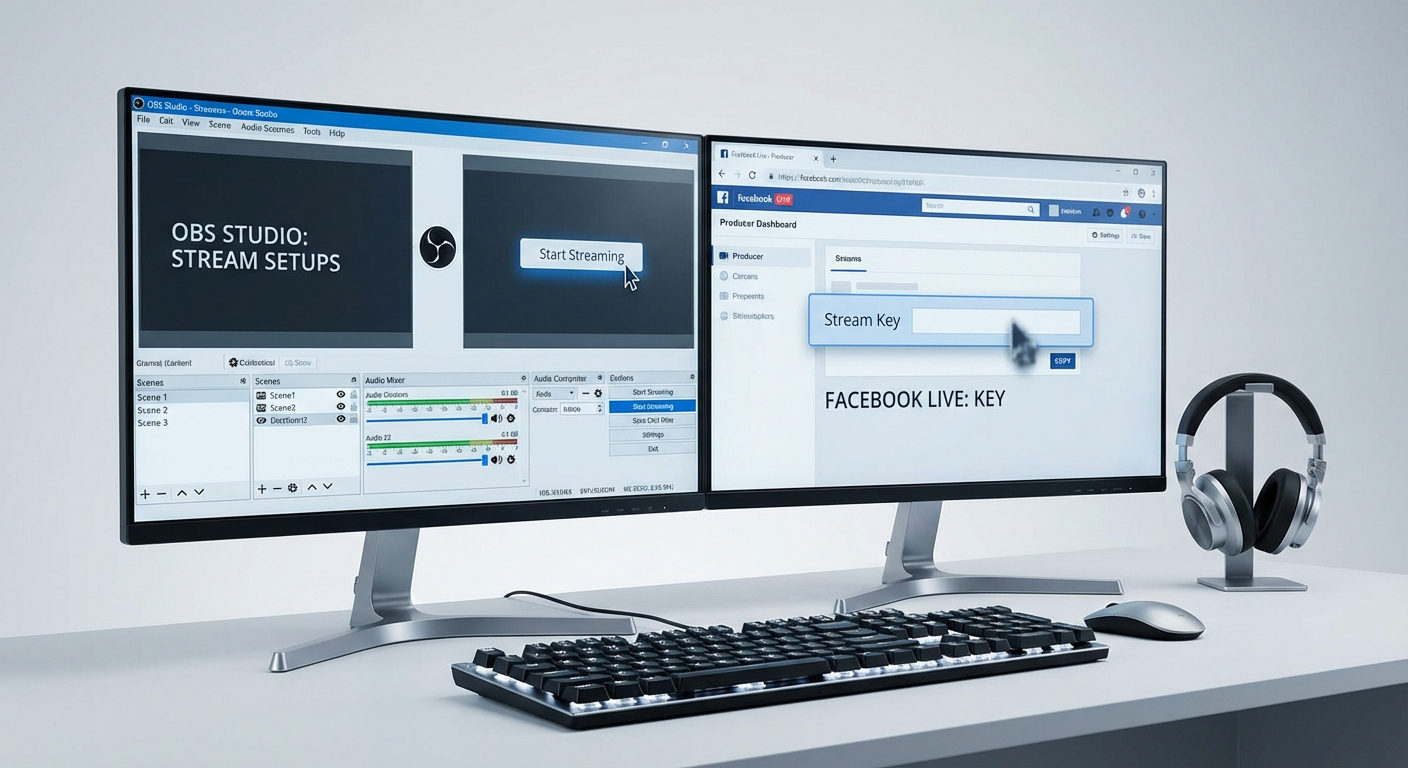
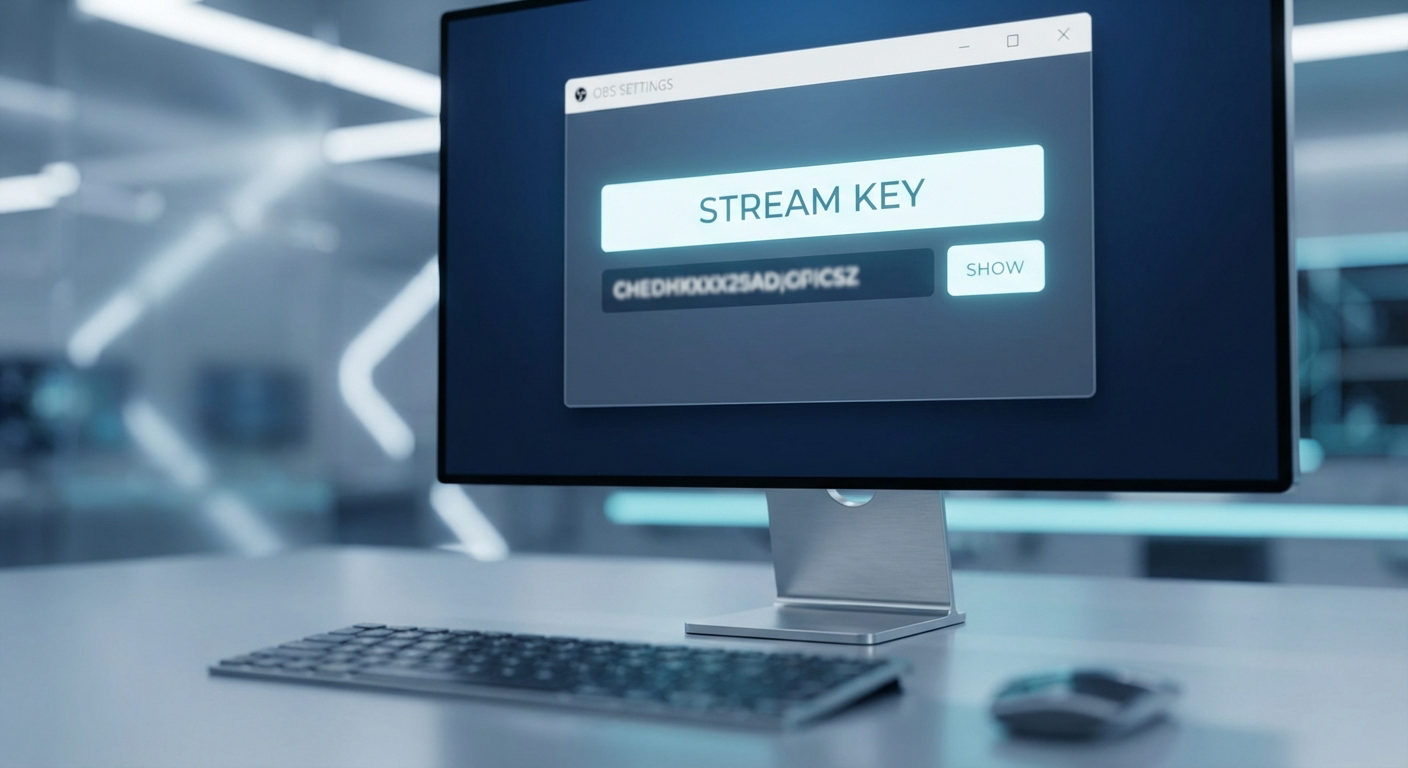
Step 8: Get Your Stream Key
A stream key is a specific code that links OBS with your streaming platform.
- Log in to your streaming platform account (Twitch, YouTube, Facebook).
- Navigate to your channel dashboard or creator studio, find the “Stream” or “Broadcast” settings.
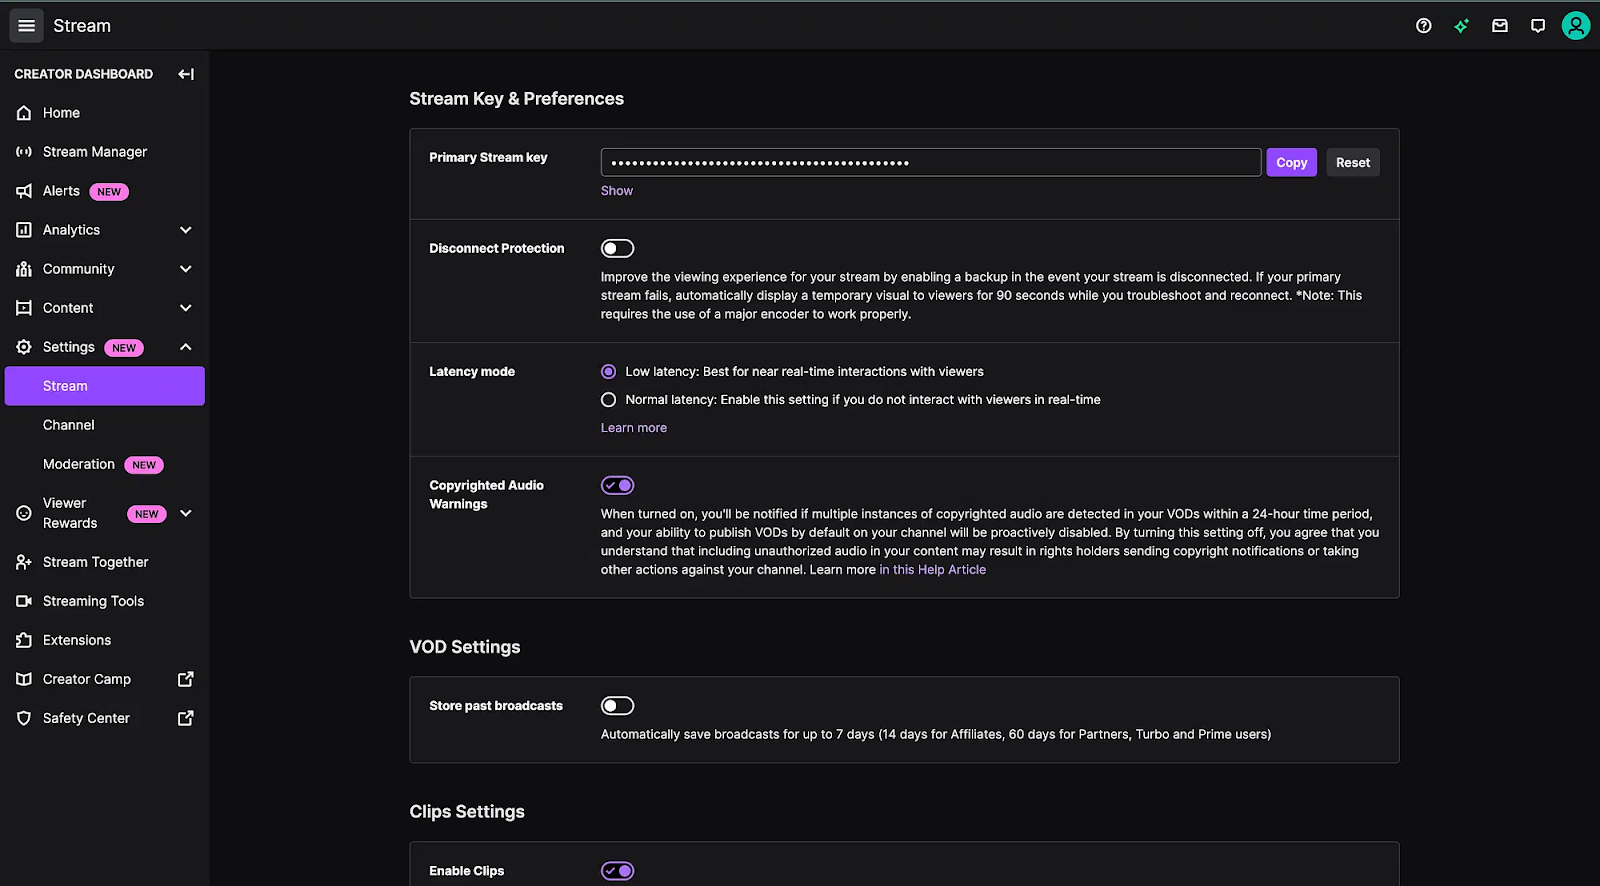
- Copy the unique stream key presented there.
- In OBS, go to “Settings” and click “Stream.”
- Select the platform from the dropdown.
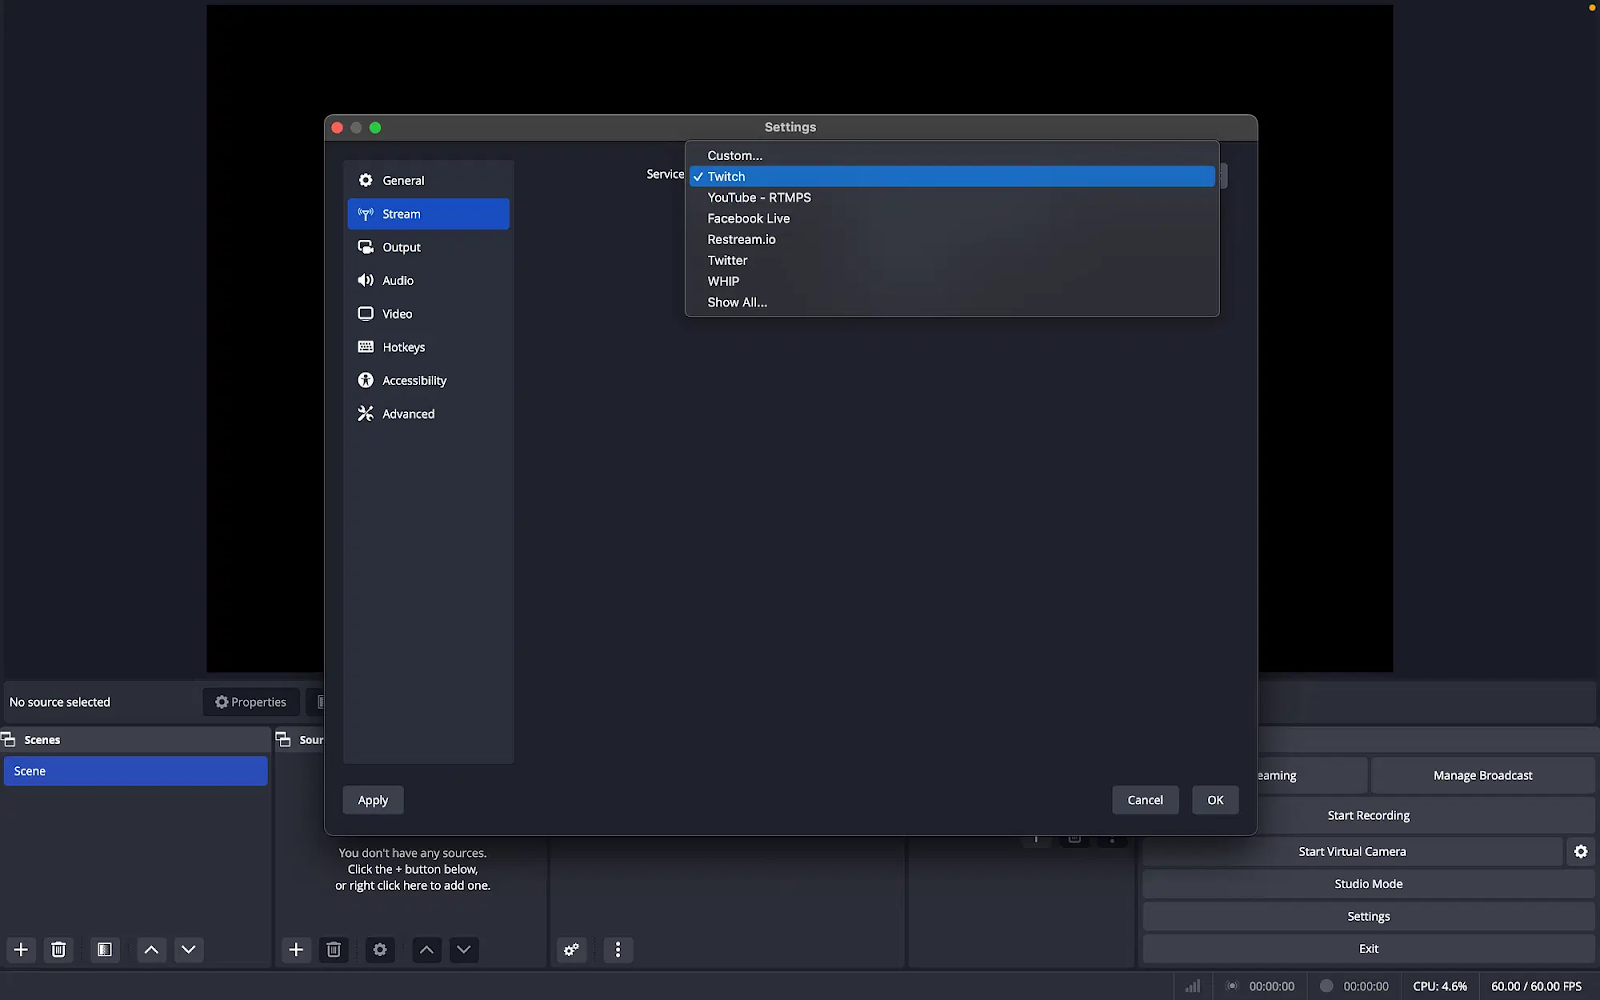
- Click “Connect Account” and link the selected platform with OBS.

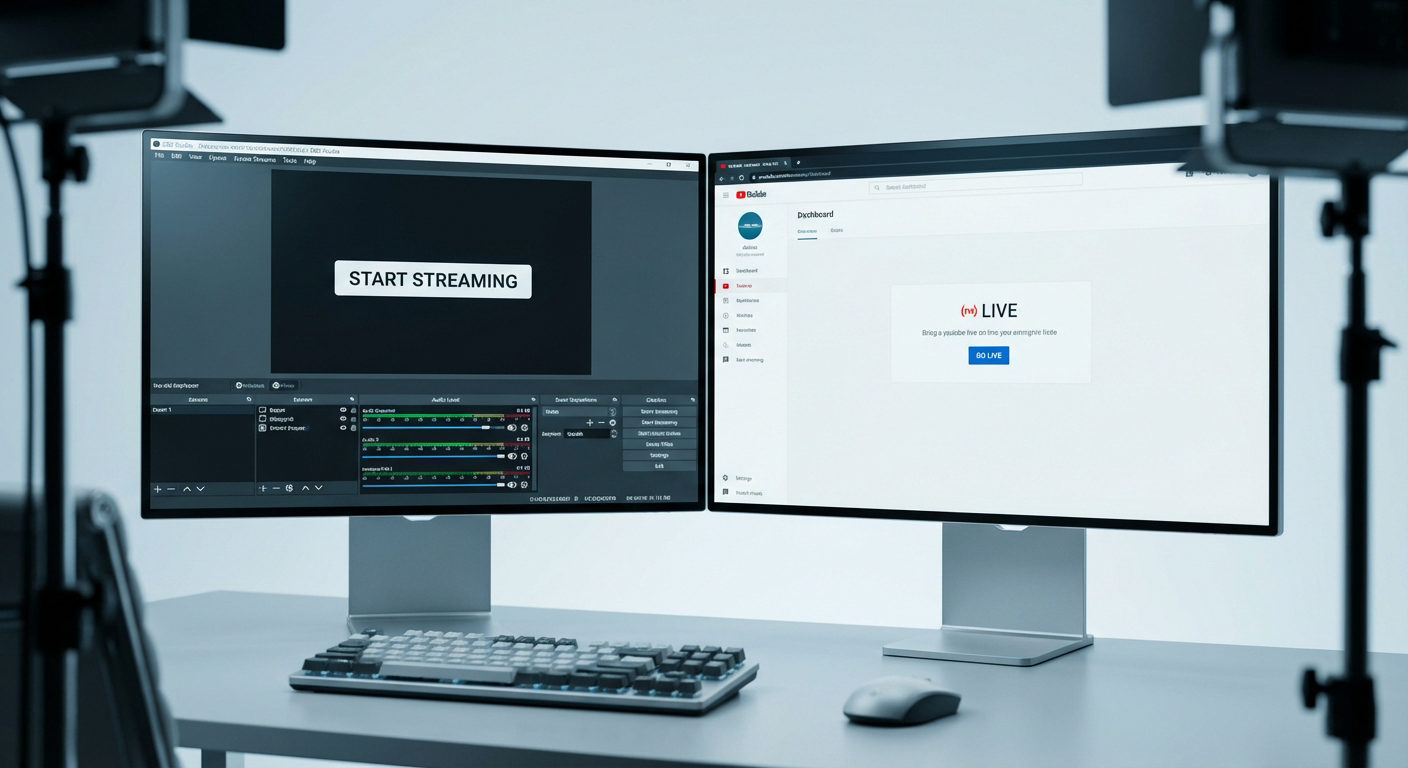
Step 9: Start Live Stream
Once you are done with all the settings and connecting OBS with your preferred platform:
- Click “Start Streaming” at the lower right to begin broadcasting live.
- To stop streaming, click “Stop Streaming.”
Conclusion
Mastering OBS Studio unlocks limitless possibilities for live streaming, whether you’re sharing gameplay, tutorials, or creative content. With this guide, setting up and customizing your stream becomes easy, helping you deliver professional-quality broadcasts. Embrace the power of OBS to engage your audience and grow your online presence.
FAQs
1. How do I find my stream key to connect OBS to my streaming platform?
Your stream key is located in your streaming platform’s dashboard under stream or broadcast settings. Copy the key and paste it into OBS under “Settings” > “Stream” to connect your account and begin streaming.
2. Can OBS stream to multiple platforms simultaneously?
OBS itself doesn’t support native multistreaming, but you can use third-party services like Restream or plugins to broadcast to platforms like Twitch, YouTube, and Facebook at the same time.
3. How to stream to Twitch with OBS?
Download OBS and install it. Get your Twitch stream key from your Twitch Creator Dashboard. In OBS, set Twitch as the service and paste your key in the “Stream” settings. Set up your scenes and click “Start Streaming.”
4. Is OBS live stream free?
Yes, OBS Studio is completely free open-source software providing robu