.png)
Uninstalling audio drivers on various operating systems is a fundamental skill necessary for troubleshooting any audio-related problems that may arise or when upgrading hardware components. Whether you’re experiencing distorted sound, no audio output, or simply need to replace your audio device, knowing how to properly uninstall audio drivers is essential.
In this comprehensive guide, we’ll provide detailed step-by-step instructions tailored to Windows, macOS, and Linux systems, ensuring that users of all backgrounds and technical expertise levels can confidently navigate the process. By following these guides, you’ll be equipped to effectively manage your audio drivers, maintaining optimal performance and resolving any issues that may arise along the way.
For Windows OS Users
Step 1: Access Device Manager
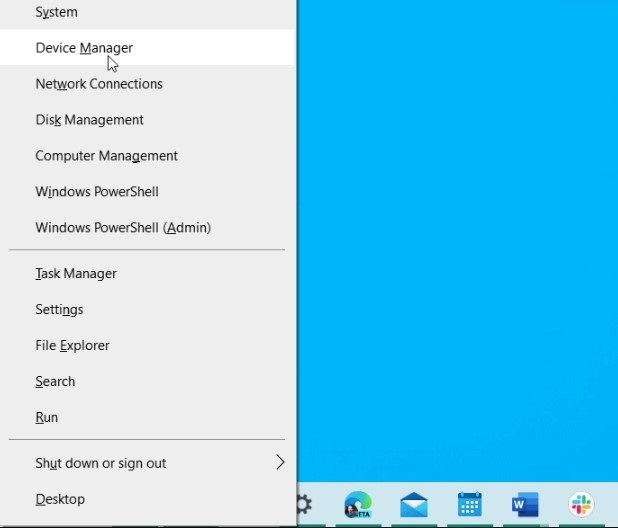
Simultaneously press the Windows key + X, then opt for Device Manager from the ensuing menu.
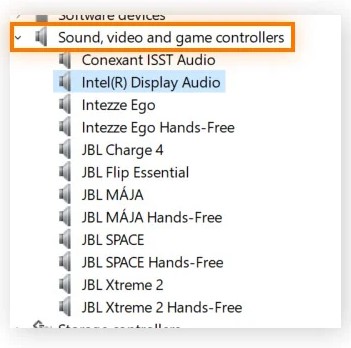
Step 2: Find the Sound, Video, and Game Controllers Section
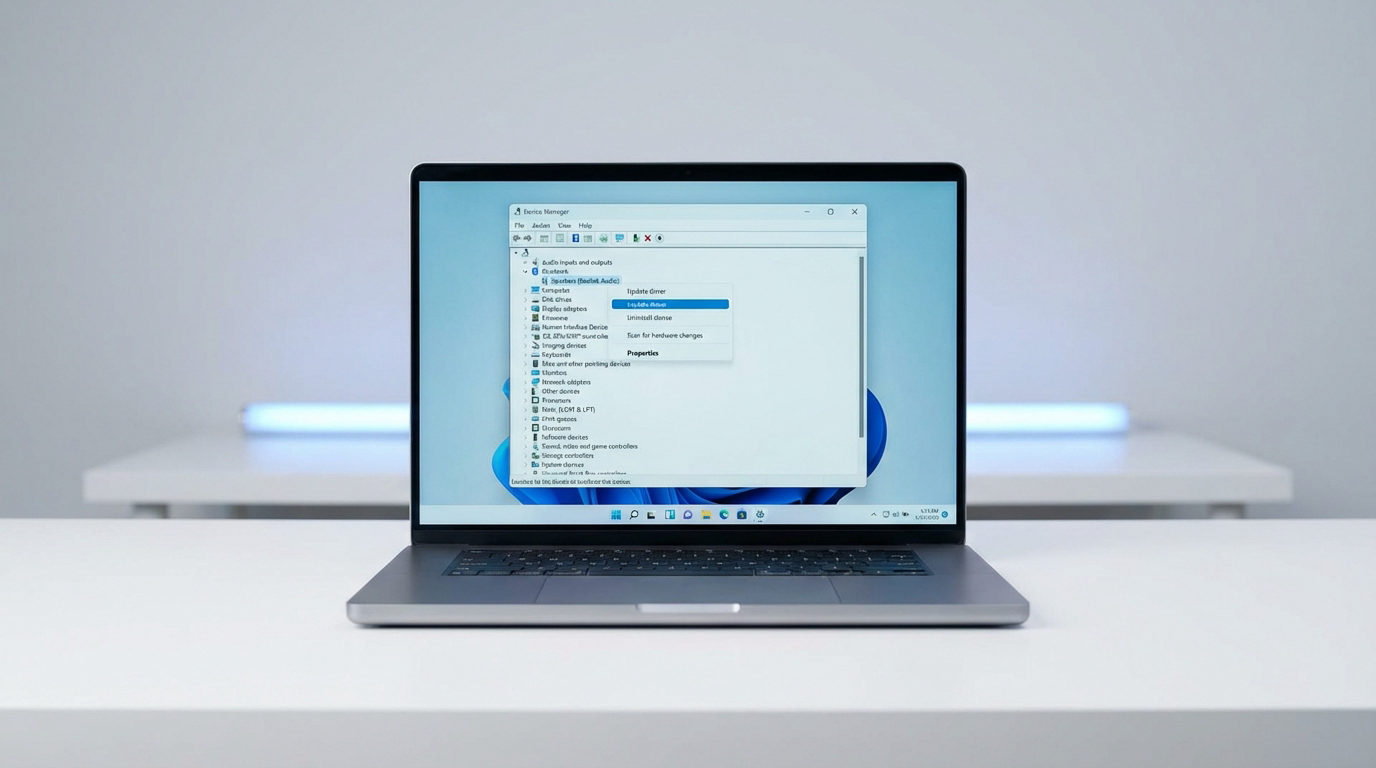
Navigate through Device Manager until you locate the “Sound, video and game controllers” category. Expand this section by clicking the arrow beside it.
Step 3: Remove the Audio Driver
- Right-click on your audio device listed within the “Sound, video and game controllers” category.
- Select “Uninstall device” from the contextual menu.
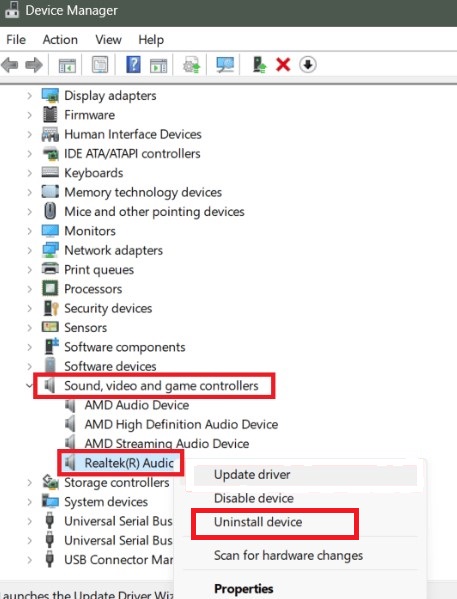
- If prompted, ensure to tick the box labeled “Delete the driver software for this device,” then proceed by clicking the “Uninstall” button.
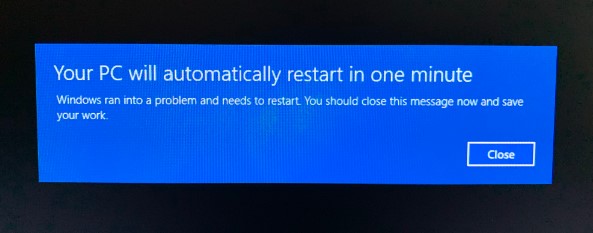
Step 4: Reboot Your Computer
Following the completion of the uninstallation process, restart your computer. Windows will initiate an automatic attempt to reinstall the driver.
For macOS Users
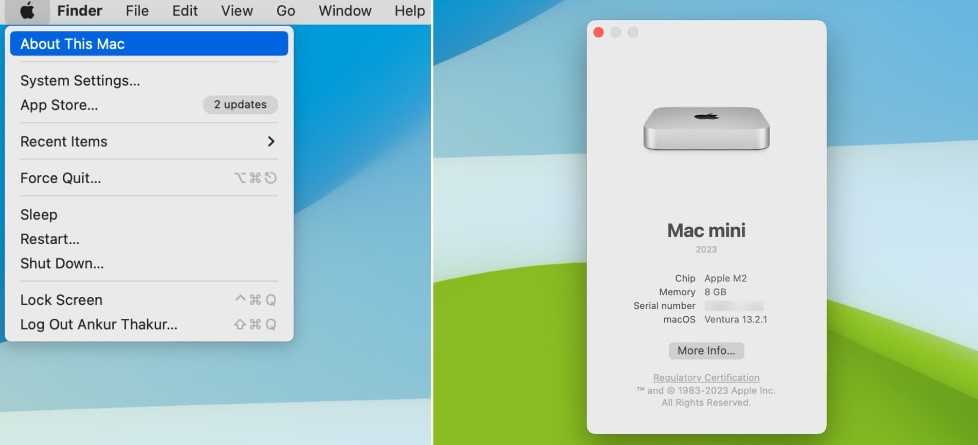
Step 1: Access System Information
- Initiate by clicking on the Apple menu, then selecting “About This Mac.”
- Proceed by clicking on “System Report.”
Step 2: Uninstall the Driver
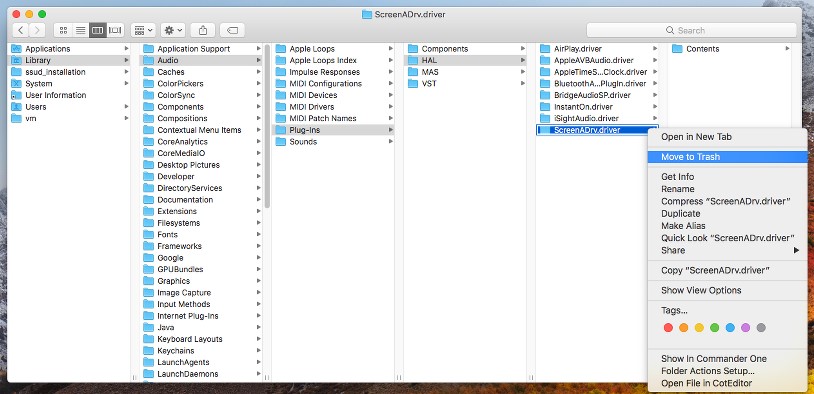
Generally, macOS handles audio driver management automatically, obviating the need for manual intervention. However, in the case of third-party audio interfaces, you might necessitate utilizing the uninstaller provided by the manufacturer or manually deleting the driver files from the Library > Audio > Plug-Ins > HAL directory.
Step 3: Reboot Your Mac
Following the removal of driver files, ensure to restart your Mac to enact the changes effectively.

Utilizing CleanMyMac X
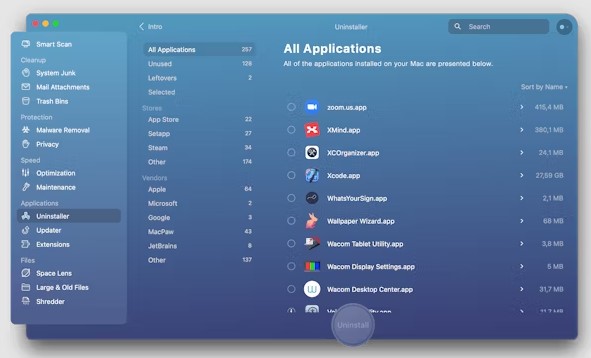
To uninstall drivers on your Mac, you can utilize the popular tool CleanMyMac X, which offers a free version for this purpose. Upon opening CleanMyMac X, it presents a comprehensive list of applications, utilities, and drivers detected on your Mac, simplifying the process of selecting items for removal. Here’s how you can proceed:
- Download the free version of CleanMyMac X.
- Navigate to the Uninstaller tab in the sidebar.
- Examine the list of apps thoroughly.
- Pay close attention to all items listed, including potentially hidden apps.
- If your drivers are among the listed items, select them and proceed to click Uninstall.
By following these steps, you can effortlessly uninstall drivers using CleanMyMac X. Additionally, if you have numerous applications installed, you can streamline your search by filtering them by developer or utilizing the search box.
Should you encounter any difficulties, consider exploring the Optimization tab within CleanMyMac X:
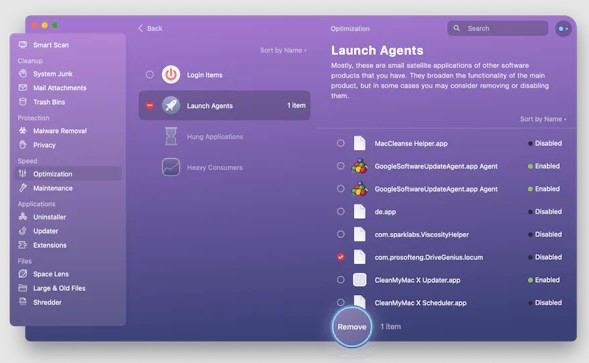
- Navigate to the Optimization tab.
- Select the Launch Agents tool.
- This provides another avenue to search for drivers.
- Simply select the desired driver and click the prominent Remove button.
By following these steps, you can effectively manage and uninstall drivers on your Mac using CleanMyMac X.
Another Way Around for Manual Uninstallation
To uninstall drivers manually on your Mac, follow these steps:
- Open Finder and navigate to the Go menu.
- Select “Go to Folder.”
- Paste each of the following locations into the text box, one at a time:
- ~/Library/Application Support/
- ~/Library/Caches/
- ~/Library/LaunchAgents/
- ~/Library/LaunchDaemons/
- ~/Library/Preferences
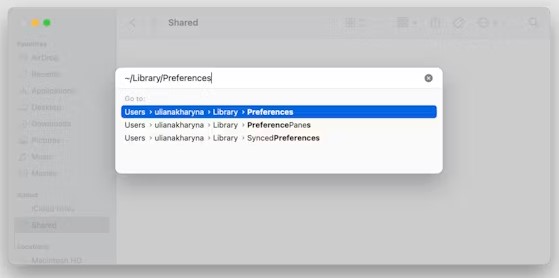
- Press Return after pasting each location to access the corresponding folder.
- Within each folder, search for files containing the name of the driver you wish to uninstall.
- Drag the identified driver files to the Trash.
- Click on the Spotlight icon in the menu bar and type the name of the driver. Press Return.
- If Spotlight finds any related files, drag them to the Trash as well.
- Finally, empty the Trash to complete the uninstallation process.
Comparing this manual method with using CleanMyMac X, you’ll notice the former provides a more hands-on approach, requiring users to navigate through specific directories and search for files manually. While it offers greater control, CleanMyMac X streamlines the process with its intuitive interface, making it easier for users to identify and uninstall drivers efficiently. Choose the method that best suits your preferences and needs for managing drivers on your Mac.
For Linux Users
Step 1: Access Terminal
Initiate Terminal by either searching for it in your applications menu or utilizing the shortcut Ctrl + Alt + T.
Step 2: Identify Your Audio Driver
Input ‘lspci -v | grep -A7 -i “audio”’ into Terminal and hit Enter. This command will display a list of your audio devices along with the associated drivers.
Step 3: Remove the Driver
The procedure for uninstalling the driver varies depending on your Linux distribution and the method used for driver installation. If the driver was installed via your distribution’s package manager, you can typically uninstall it using a command such as ‘sudo apt-get remove–purge [driver-package-name]’ for Debian/Ubuntu-based distributions.
Step 4: Reboot Your System
Following the driver uninstallation, reboot your system using ‘sudo reboot’ into the terminal to implement the changes effectively.
Conclusion
In conclusion, managing and uninstalling audio drivers across different operating systems—Windows, macOS, and Linux—requires a tailored approach. By following the step-by-step guides provided in this comprehensive article, users can effectively navigate the uninstallation process with confidence. Whether utilizing built-in tools, third-party software, or manual methods, the goal remains consistent: to troubleshoot audio-related issues, upgrade hardware, and maintain optimal system performance.
We value your thoughts! Share your feedback or reviews on this article. Did you find the information helpful? Were the instructions easy to follow? Is there anything you’d like to see added or improved upon? Your input helps us enhance the quality of our content and better serve our readers. Leave your comments below!
After you’ve resolved your audio driver issues, upgrading your sound quality could make a big difference, especially if you’re recording content or meetings. A wireless lavalier microphone provides clear audio without the hassle of cables, greatly enhancing your recording experience.
Frequently Asked Questions
What Should I Do If Windows Cannot Find a Driver Automatically After Uninstallation?
If Windows fails to automatically find a driver after uninstallation, you can manually install the driver by visiting the manufacturer’s website and downloading the latest driver for your audio device. Alternatively, you can use third-party driver update software to scan for and install the appropriate driver.
How Do I Reinstall Audio Drivers on Windows?
To reinstall audio drivers on Windows, you can either use Device Manager or download the latest drivers from the manufacturer’s website. In Device Manager, right-click on your audio device, select “Update driver,” then choose “Search automatically for updated driver software.” Alternatively, download the latest driver from the manufacturer’s website and follow the installation instructions.
Can Uninstalling Audio Drivers Resolve Sound Issues?
Yes, uninstalling and reinstalling audio drivers can often resolve sound issues such as distorted sound, no audio output, or audio playback errors. It allows for a clean installation of drivers, which can potentially fix any software-related issues causing sound problems.
What Precautions Should I Take Before Uninstalling Audio Drivers?
Before uninstalling audio drivers, it’s advisable to create a system restore point to revert to in case of any issues during the uninstallation process. Additionally, ensure you have the necessary driver files downloaded or access to the internet to download them if needed.
How Do I Update Audio Drivers Instead of Uninstalling Them?
To update audio drivers on Windows, you can use Device Manager to check for driver updates automatically. Right-click on your audio device in Device Manager, select “Update driver,” then choose “Search automatically for updated driver software.” Alternatively, you can download the latest drivers from the manufacturer’s website and install them manually.
Is It Safe to Uninstall Audio Drivers?
Yes, it is generally safe to uninstall audio drivers. However, it’s essential to ensure you have the necessary driver files or access to the internet to download them if needed. Additionally, creating a system restore point before uninstallation can provide a safety net in case of any issues.
What Are the Common Issues After Uninstalling Audio Drivers?
Common issues after uninstalling audio drivers may include no sound output, distorted audio, or the inability to detect audio devices. These issues can typically be resolved by reinstalling the appropriate drivers or troubleshooting audio settings.
How Can I Uninstall Audio Drivers in Safe Mode?
To uninstall audio drivers in Safe Mode on Windows, restart your computer and press F8 repeatedly before the Windows logo appears. Select “Safe Mode” from the boot menu, then proceed to uninstall the audio drivers using Device Manager or third-party uninstaller software.
Can I Use Third-Party Software to Uninstall Audio Drivers?
Yes, you can use third-party uninstaller software such as Revo Uninstaller or CleanMyPC to uninstall audio drivers on Windows. These programs can help ensure a thorough removal of driver files and registry entries associated with the audio drivers.
How Do I Uninstall Audio Drivers on a Mac Without an Uninstaller?
On a Mac, you can uninstall audio drivers manually by navigating to the corresponding system folders and deleting the driver files. However, exercise caution when deleting files manually to avoid unintended consequences. Alternatively, you can use third-party uninstaller software specifically designed for macOS to remove audio drivers safely and efficiently.