.png)
Audacity is a powerhouse of an audio editor, but it isn’t a magic wand. Many creators fall into the trap of thinking they can “fix it in post,” only to realize that no amount of noise reduction or EQ can turn a bad recording into a professional production.
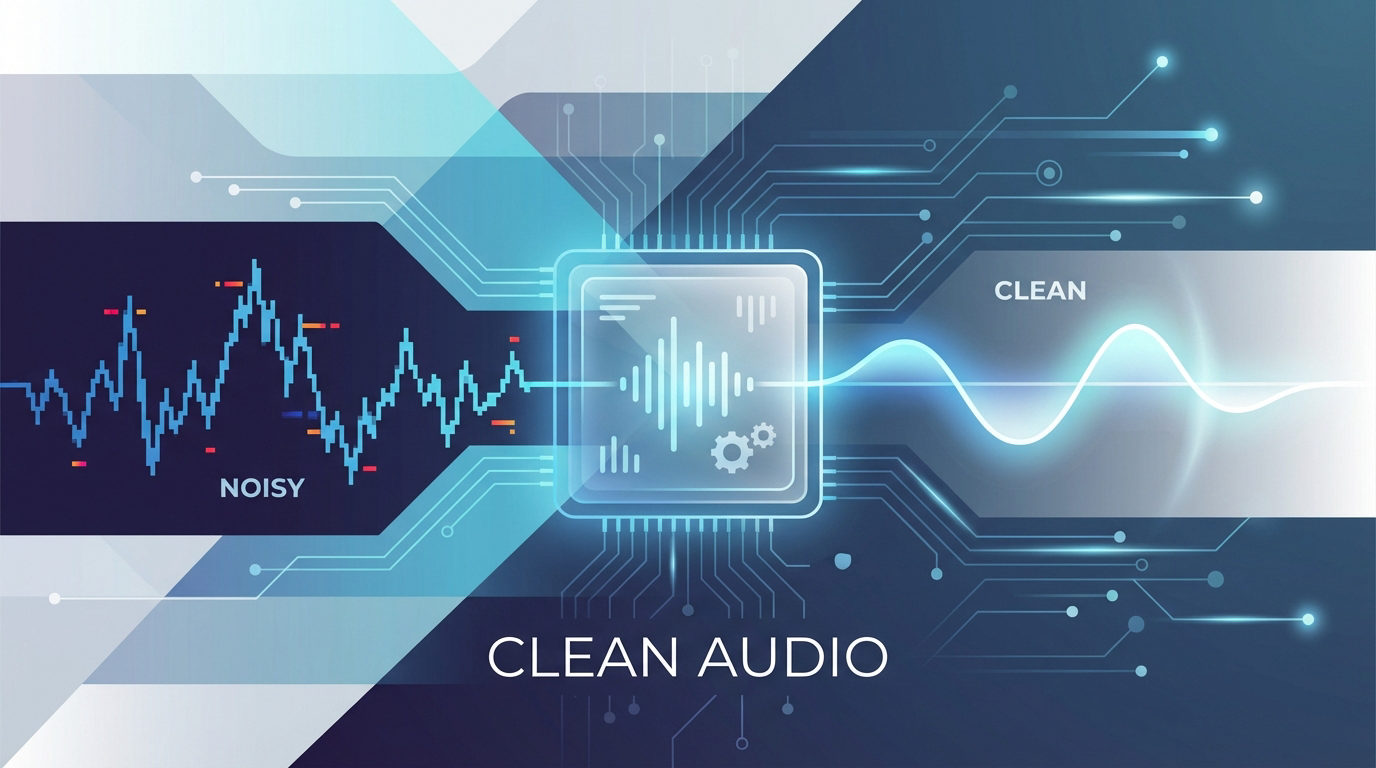
If you want to know how to capture high-quality sound with Audacity, you first need to accept the “Garbage In, Garbage Out” rule. If your source audio is distorted, echoes around the room, or is filled with static, Audacity will simply preserve those errors in high definition.
High-quality sound isn’t just about volume; it’s defined by three core pillars that you must secure before you hit record:
- Signal-to-Noise Ratio (SNR): The volume of your voice compared to the background hiss. A pro recording features a clear voice with near-silent pauses.
- Clarity: The crispness of the audio, largely determined by your microphone and where you place it.
- Depth: The dynamic range. This is controlled by technical settings like Bit Depth and Sample Rate, which determine how much data is saved in the quietest and loudest parts of your performance.
The goal of this guide is to set up your workflow so that Audacity captures a pristine file that needs minimal editing, rather than forcing you to perform emergency surgery on a bad track.
Step 1: Optimizing Audacity Settings for Studio Quality
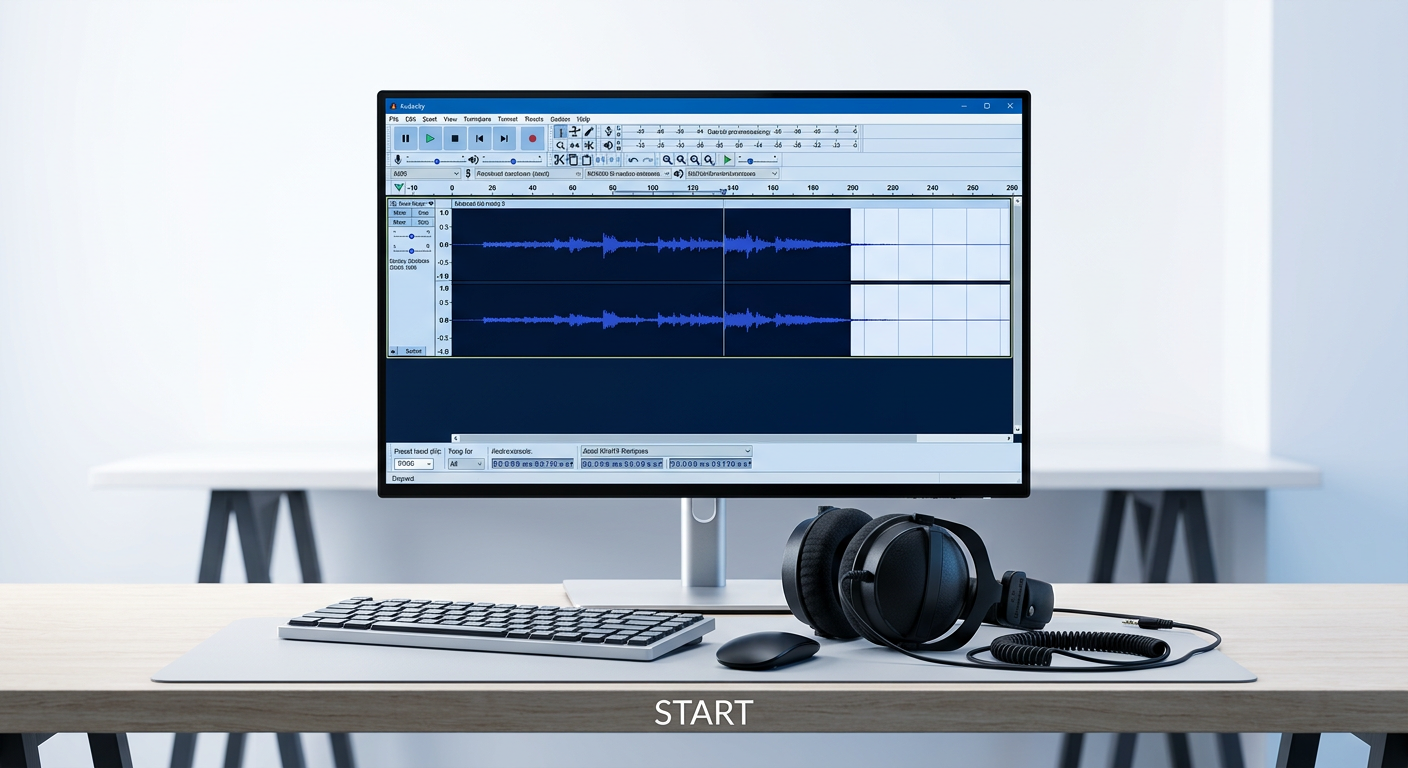
Most beginners open Audacity and immediately hit the red “Record” button. This is a mistake. Audacity’s default settings are often prioritized for compatibility with older computers rather than high-fidelity capture.
To ensure you are getting the best possible quality, you need to configure the software to handle professional-grade audio data. Locate the Audio Setup button in the top toolbar (or check your Preferences) and adjust these three critical parameters:
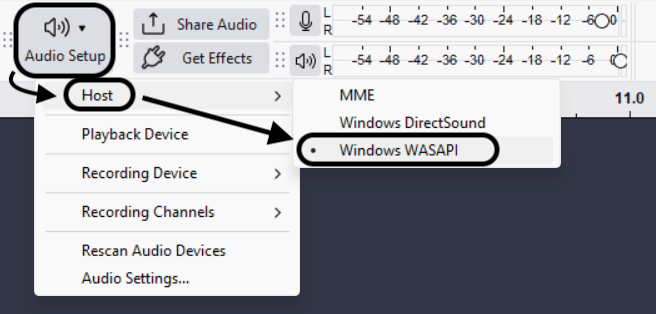
- Audio Host: Change this from MME to Windows WASAPI. MME is an outdated driver that causes significant delay (latency). WASAPI allows Audacity to communicate directly with your audio interface, resulting in a cleaner signal path.

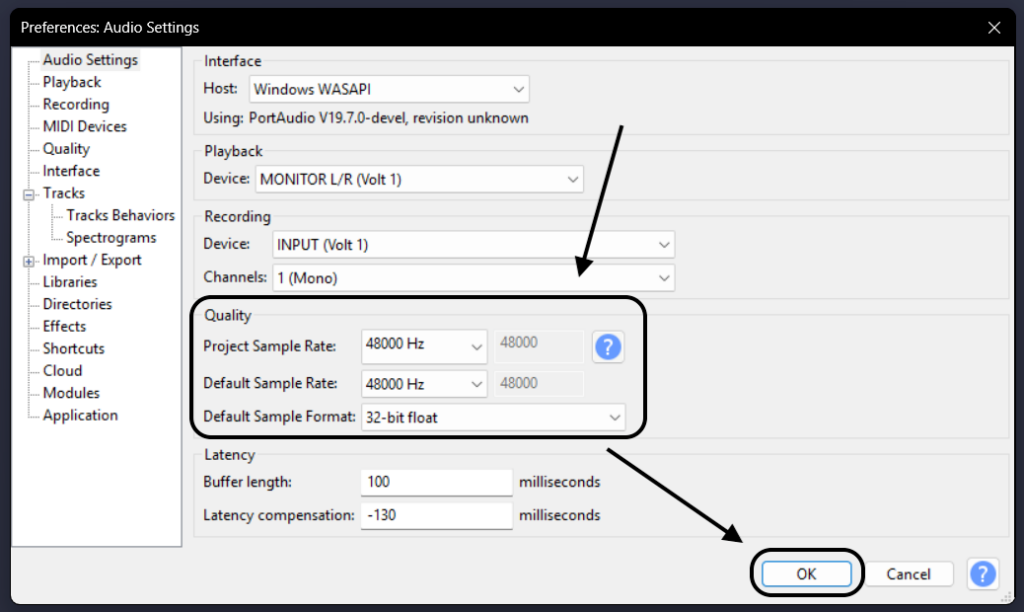
- Project Rate (Hz): Go to Edit > Preferences. Set the Project Rate to 48000 Hz. While 44100 Hz is the standard for music CDs, 48kHz is the standard for video production and streaming. Recording in 48kHz prevents audio drift (sync issues) if you plan to use your audio with video later.

- Default Sample Format: Navigate to Edit > Preferences > Quality and ensure the Default Sample Format is set to 32-bit float.
The One Setting You Must Change: 32-bit Float
If you only change one thing, make it the Sample Format.
In standard 16-bit or 24-bit recording, audio has a “ceiling” at 0dB. If you laugh too loud or shout, the audio hits that ceiling and flattens out. This is called “clipping,” and it creates harsh distortion that cannot be fixed.
32-bit float changes the rules. It provides virtually infinite headroom. If you record in 32-bit float and your audio peaks into the red, the data is actually preserved above the 0dB ceiling. You can simply apply the Amplify or Normalize effect to lower the volume, and the distorted peaks will instantly return to a clean, perfect waveform. It acts as a safety net that guarantees your recording isn’t ruined by unexpected volume spikes.
Step 2: Capturing External Audio (Voice & Interviews)
While Audacity is a capable editor, it cannot invent quality that wasn’t there to begin with. To achieve “broadcast-ready” results, you must prioritize the input source.
The Hardware Requirement
Relying on a standard laptop microphone often results in thin, noisy audio. For creators aiming for studio-grade clarity, we recommend the Hollyland LARK MAX 2.

Hollyland LARK MAX 2 - Premium Wireless Microphone System
A premium wireless microphone for videographers, podcasters, and content creators to capture broadcast-quality sound.
Key Features: Wireless Audio Monitoring | 32-bit Float | Timecode
This wireless microphone system integrates seamlessly with Audacity via USB, but its true power lies in how it handles the “clipping” problem we just discussed.
- The 32-Bit Backup: One of the biggest fears in recording is setting your gain too high and distorting the track. The LARK MAX 2 records a backup file internally in 32-bit float format. Even if your levels in Audacity are completely blown out, you can import the internal file from the microphone later and recover the audio perfectly.
- Real-Time Monitoring: The LARK MAX 2 includes OWS earphones for wireless monitoring. This lets you hear exactly what the microphone is picking up in real-time, ensuring you catch background noise or interference before you finish the take.
Configuring Your Input in Audacity
Once your microphone is connected, follow these steps to route the audio correctly:
- Connect Your Device: Plug your USB microphone or interface (e.g., the LARK MAX 2 Receiver) into your computer.
- Open Audio Setup: In the top toolbar of Audacity, click on the Audio Setup button.
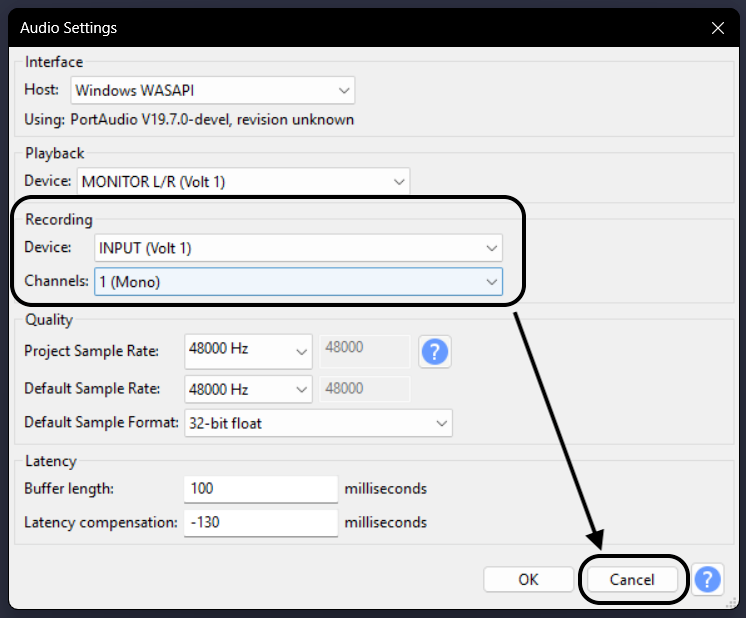
- Select Recording Device: Select your specific hardware (e.g., “Microphone (Lark Max 2)”). Do not select “Primary Sound Capture Driver” or “Stereo Mix” here.

- Set Recording Channels: Go to Audio Setup > Audio Settings. For a single voice, select 1 (Mono) Recording Channel. This ensures your voice is centered in the mix rather than playing out of only the left or right speaker.

The Essential Sound Check
Never start a session without checking your levels.
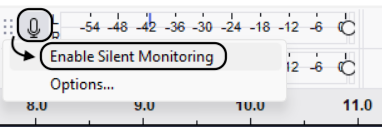
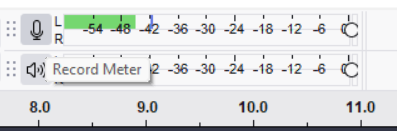
- Click the microphone icon on the Recording Meter toolbar then click on “Enable Sient Monitoring”
- Speak into the microphone at your normal volume.
- Adjust the Recording Volume slider until your voice peaks between -12dB and -6dB.

- Green (-18 to -12dB): Safe zone.
- Yellow (-6dB): Ideal target for loudest moments.
- Red (0dB): Clipping. If you hit red, lower the volume immediately.
Step 3: Capturing Internal System Audio (Computer Sound)
Sometimes, Audacity sound capture isn’t about microphones; it’s about recording what is playing on your computer. Whether you are archiving a webinar, sampling a video stream, or recording gameplay, Audacity can capture digital audio directly from your sound card without a physical cable.
To do this, you use “Loopback recording.” This captures the exact digital signal being sent to your speakers with zero quality loss.
Follow these steps to configure Audacity for internal recording:
- Change Audio Host to Windows WASAPI:
In the Audio Setup toolbar, ensure the Audio Host is set to Windows WASAPI. This is required for loopback to work correctly.
- Select the Loopback Device:
In the Recording Device dropdown, select the option that matches your current playback device but has (loopback) at the end.
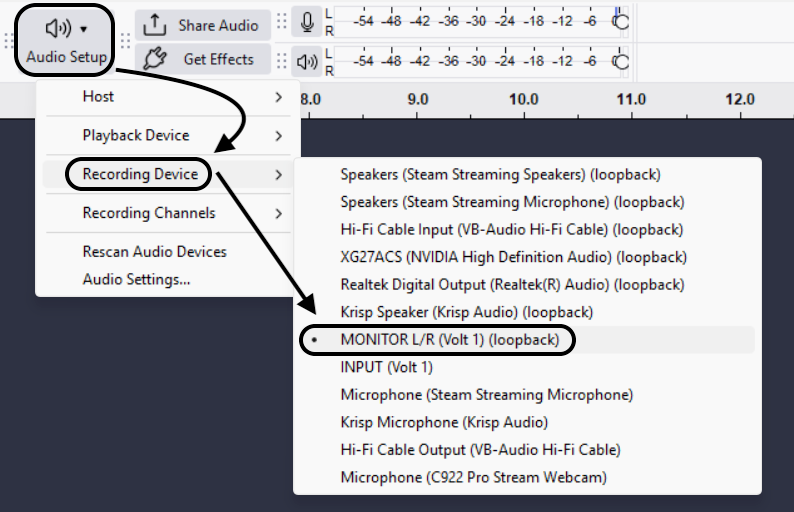
- Example: If you listen through headphones, select Headphones (Loopback).
- Example: If using speakers, select Speakers (Loopback).
- Disable “Software Playthrough”:
Go to Transport > Transport Options and ensure “Hear other tracks during recording” is unchecked. If you leave this on, Audacity will try to play the sound it is recording back through your speakers while you are recording it, creating a screeching feedback loop.

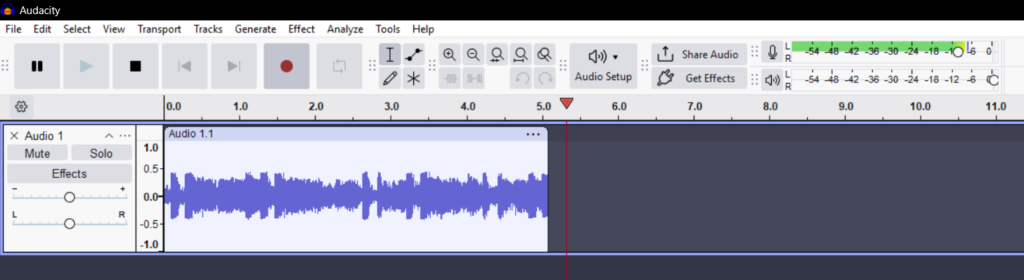
- Record, Then Play:
Press the Record button in Audacity first, then switch to your browser or media player and press play. You should see the waveforms moving in sync with the audio.
Pro Tip: When using WASAPI Loopback, Audacity captures all system sounds. Mute your email notifications, Discord pings, and system alerts before hitting record, or they will be baked into your audio file forever.
Step 4: Essential Post-Processing for Polish
Even with perfect settings, raw audio rarely sounds “radio-ready” straight out of the gate. To get that polished sound, you need to apply the “Big Three” effects: Noise Reduction, Compression, and Normalization.
1. Clean Up with Noise Reduction
Background hiss or fan whine can distract listeners. Audacity’s Noise Reduction tool works in two steps:
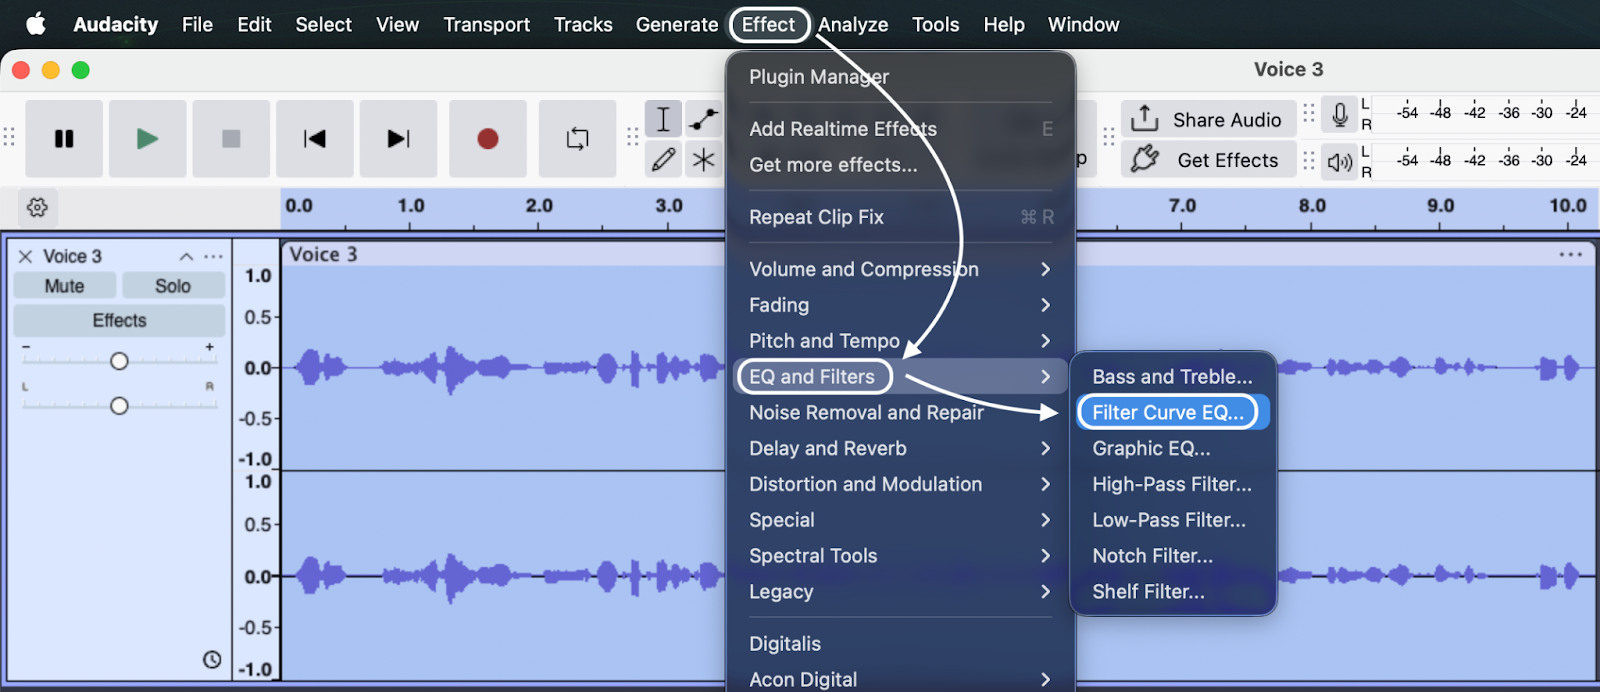
- Capture the Profile: Highlight a section of your recording where you are not speaking (just “room tone”). Go to Effect > Noise Removal and Repair > Noise Reduction and click Get Noise Profile.

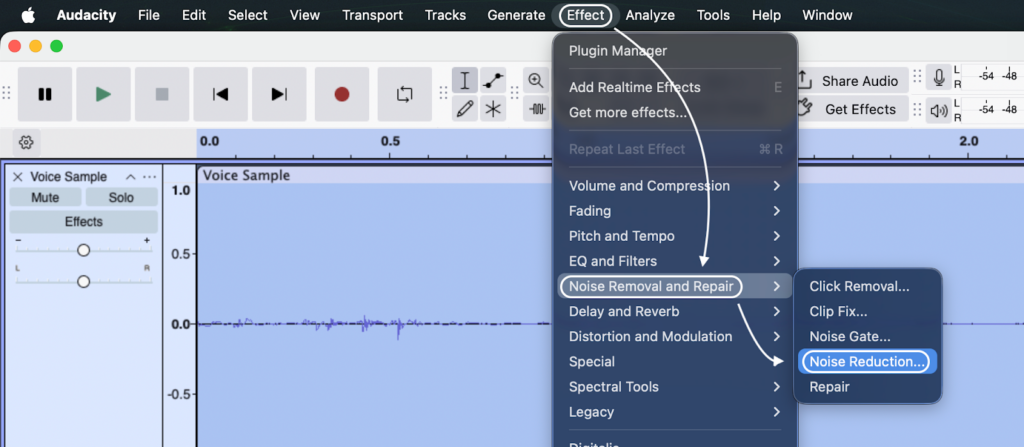

- Apply the Removal: Select your entire track (Ctrl+A). Return to the Noise Reduction menu and click OK to apply the profile you just captured.

Note: If you find yourself constantly battling background noise, the issue is likely your hardware. Using a microphone like the Hollyland LARK MAX 2 helps significantly here. Its built-in Environmental Noise Cancellation (ENC) filters out unwanted frequencies at the source, often allowing you to skip this step entirely.
2. Balance Dynamics with Compression
The Compressor effect evens out your volume. It automatically lowers loud shouts and boosts quiet whispers so your voice sits at a consistent level.
- Go to Effect > Volume and Compression > Compressor.

- For spoken word, a Threshold of -12dB to -17dB and a Ratio of 2:1 or 3:1 are great starting points.

3. Finalize with Normalization
Normalize should be your final step. This effect amplifies the entire track equally so the loudest peak hits a specific target. This ensures your audio is loud enough to compete with other content on YouTube or Spotify.
- Go to Effect > Volume and Compression > Normalize.
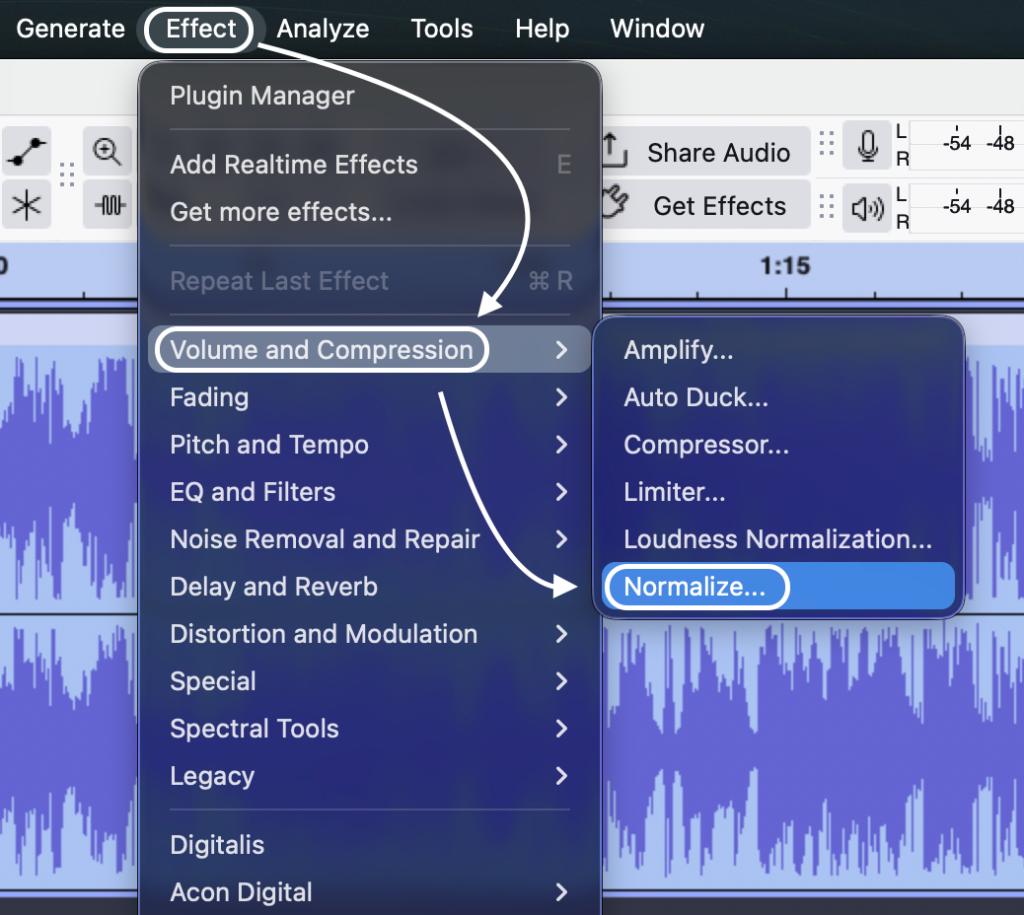
- Set the “Normalize peak amplitude to” value to -1.0 dB.

Pro Tips: Avoiding Common Recording Pitfalls
Even with the right settings, things can go wrong. Here is how to troubleshoot the two most common issues: clipping and latency.
1. Eliminating “Clipping” (The Red Zone)
Clipping happens when your input is too loud, creating a distorted, crackling sound. Visually, the waveforms look “chopped off” at the top and bottom.
Traditionally, the only fix was to re-record the take. However, strictly using 32-bit float recording (via the Hollyland LARK MAX 2 and Audacity settings) solves this.
- The Fix: If you clip a 32-bit float file, simply use the Amplify effect and enter a negative number (e.g., -10 dB). The distorted peaks will reappear perfectly restored.
2. Fixing Audio Latency (Lag)
Latency is the delay between when a sound is made and when it appears on your screen. If your recording doesn’t align with the backing track, your buffer size is likely too high.
To adjust this:
- Click Audacity > Preferences > Audio Settings.
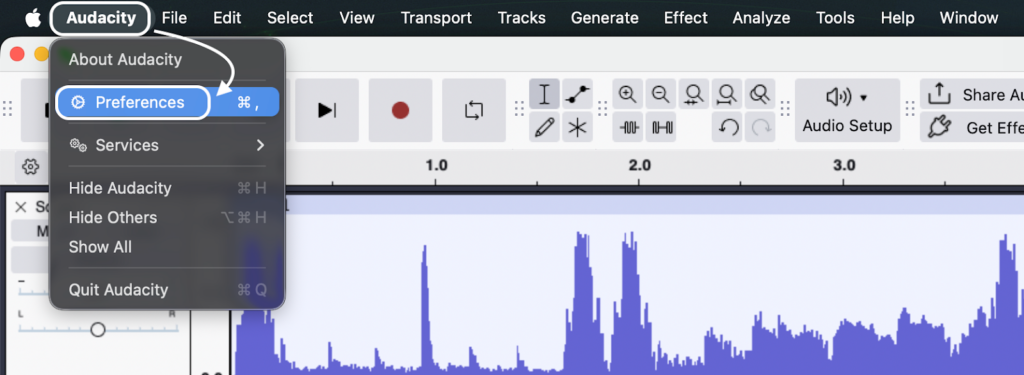
- Look for the Audio Settings section.
- Buffer Length: The default is usually 100 milliseconds. Lower this value (e.g., to 50ms) to reduce lag.

- Warning: If you set it too low, the audio may click or drop out. You need to find the “sweet spot” for your specific computer.
Frequently Asked Questions (FAQ)
How do I record computer audio and microphone at the same time?
Recording both sources on a single track is tricky. You can use the “Stereo Mix” workaround on Windows:
- Enable Stereo Mix in your Windows Sound settings.
- Set Audacity’s Recording Device to Stereo Mix.
- In Windows Microphone properties, check “Listen to this device” to route your mic through the speakers.
Warning: This merges your voice and game audio into one flat file. You cannot edit them separately later. For professional results, record your voice externally (using a device like the Hollyland LARK MAX 2) and capture system sound with Audacity, then align them in post-production.
What is the best sample rate for high-quality audio?
For modern content creation, 48,000 Hz (48kHz) is the standard.
- 44.1kHz: Used for Music CDs.
- 48kHz: Used for Video (YouTube/TV) and most podcasts.
Using 48kHz prevents sync issues with video files. Always pair this with 32-bit float format in Audacity preferences.
Why does my Audacity recording sound muffled?
If your audio sounds “underwater,” check these culprits:
- Wrong Input Device: Audacity may be using your laptop’s built-in mic instead of your USB mic. Check the “Recording Device” dropdown.
- Too Much Noise Reduction: Aggressive noise reduction strips away high frequencies, making voices sound robotic.
- Mic Technique: Ensure you are speaking into the front of the microphone and are within 6–8 inches of it.
Conclusion & Recommended Gear
Achieving professional audio in Audacity is a formula based on signal flow and precision. You now have the technical roadmap: set your project rate to 48kHz, use Windows WASAPI, and switch to 32-bit float for maximum editing safety.
However, software settings cannot fix a poor source signal. If your input is clipped, distant, or noisy, plugins can only do so much.
To get the most out of your Audacity workflow, we recommend upgrading your input source to the Hollyland LARK MAX 2.
This wireless microphone system is the ideal hardware companion for Audacity users because:
- It Saves Ruined Takes: With 32-bit float internal recording, you have a fail-safe backup. If you clip your audio in Audacity, you can simply swap in the backup file from the mic and save the performance.
- Studio Standard: It captures native 48kHz/24-bit quality, matching the optimal settings for video production.
- Monitoring: You can hear exactly what is being recorded before you hit the button.
Master your settings, invest in a source that forgives mistakes, and hit record with confidence.