.png)
Learning how to loop audio in Audacity for seamless playback can save you hours of editing time, but it’s easy to get confused by the software’s different features. In Audacity, looping refers to two completely different workflows, and mixing them up is a common mistake.
Before you start, determine which method matches your goal:
- Loop Playback (Preview Only): You want to listen to a specific section repeatedly without changing the file. This is useful for analyzing background noise, practicing a voiceover against a beat, or checking an edit.
- Creating a Loop (Extending the Track): You want to physically extend the audio clip so it lasts longer. This is how you turn a 10-second beat into a 5-minute background track for a podcast or video.
This guide covers both methods, starting with the quick shortcut for playback previews.
Method 1: How to Loop Audio for Playback (Preview Only)
Use this method when you need to hear a specific section on repeat—like when you are trying to identify a pop or perfect a cut—without altering the actual length of the file. This is purely for monitoring; when you export the file later, this loop will not be included.
Here is the fastest way to toggle loop playback in Audacity:
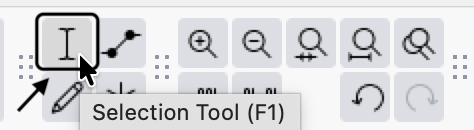
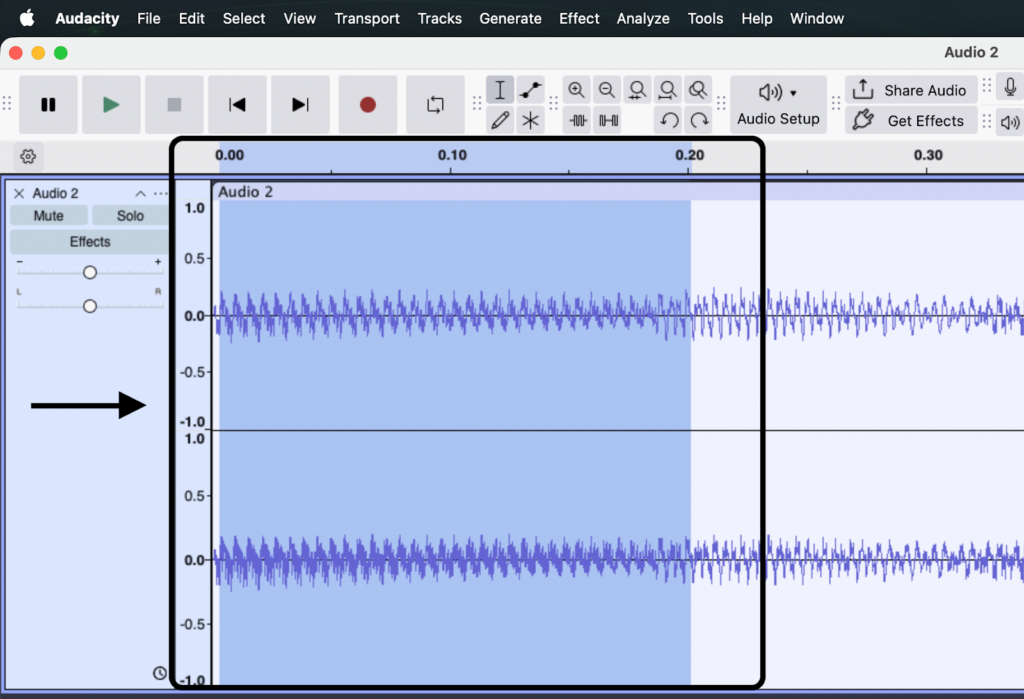
- Select the Region: Click and drag your mouse over the portion of the waveform you want to hear.

- Press the “L” Key: While the audio is selected, press L on your keyboard.
- Press Play: Click the green Play button (or press Spacebar).
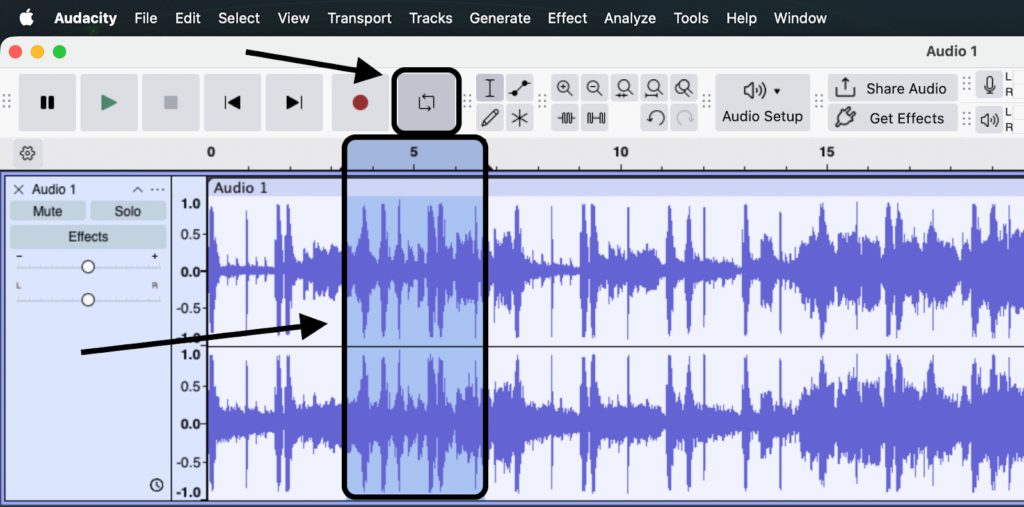
The audio will now repeat that specific section until you press Stop.
Pro Tip: Using the Timeline Ruler
You can also create a loop region by dragging your cursor along the Timeline Ruler (the numbers above the tracks). Once selected, just click inside that timeline selection to immediately start looping playback. This is often faster than using keyboard shortcuts if your hand is already on the mouse.
Method 2: How to Create a Permanent Loop (Extending the Track)
If you are creating a podcast intro or background music for a video, simply listening to a loop isn’t enough. You need to physically extend the audio file so it lasts for the full duration of your project.
While you could manually copy and paste the clip over and over, that is tedious and prone to mistakes. The Repeat effect handles this instantly.
Follow these steps to permanently loop a track:
- Import your audio clip into Audacity (File > Open or drag-and-drop).
- Select the audio you want to loop. To select the entire track, press Ctrl + A (Windows) or Cmd + A (Mac).

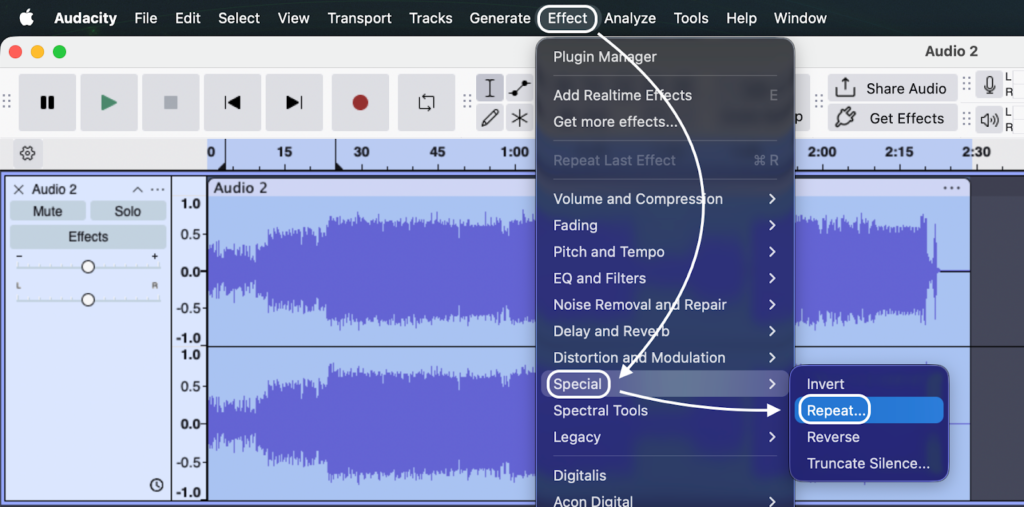
- Navigate to the top menu bar and select Effect > Special > Repeat.

- Note: In older versions of Audacity, this is located directly under Effect > Repeat.
- Configure your settings. The dialog box offers two ways to extend your track:
- Number of repeats: Enter how many times you want the clip to play in addition to the original.
- New selection length: This is ideal for video editors. If you know your video is exactly 5 minutes long, simply type 00:05:00 into this box, and Audacity will do the math for you.
- Click Apply.
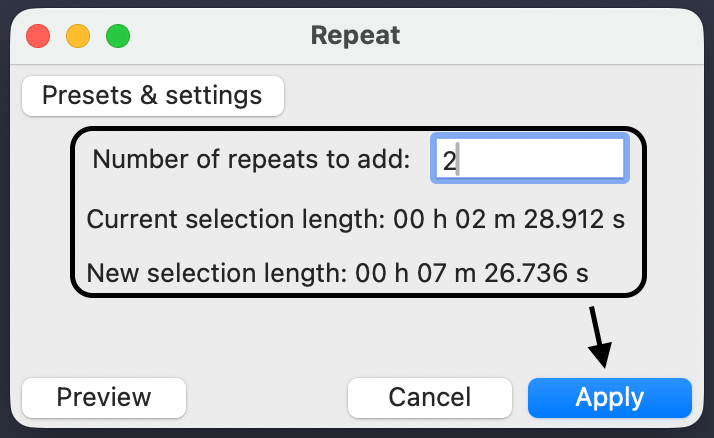
Audacity will instantly duplicate the selection and stitch the copies end-to-end on the timeline. You can now export this new, longer file as a single MP3 or WAV.
Troubleshooting: How to Fix “Clicks” and “Pops”
Nothing ruins a seamless audio loop faster than a rhythmic “click” every time the track restarts. This happens when the start and end points of your loop have different volume levels (e.g., the loop ends at a high peak but starts at a low valley). When playback jumps between those levels, your speakers produce a pop.
Here are the two best ways to smooth out your transitions.
Method A: The Zero Crossing Technique (The Quick Fix)
The cleanest way to loop audio is to ensure your cut happens exactly where the waveform touches the center line—a point known as a Zero Crossing. At this line, the volume is effectively zero, meaning there is no sudden jump when the audio restarts.
- Highlight your selection on the timeline.
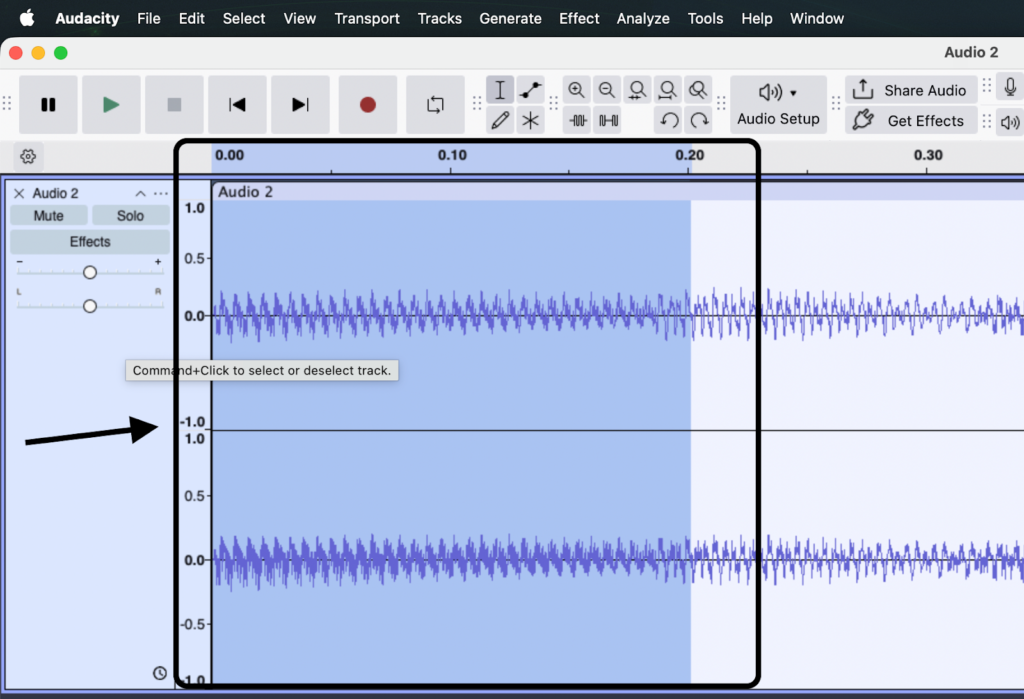
- Press the Z key on your keyboard (or navigate to Select > At Zero Crossings).
- Audacity will automatically adjust the edges of your selection to the nearest point where the waveform meets the center line.
- Apply your loop (Effect >Special > Repeat).
Note: If you are looping a complex stereo track, Audacity may struggle to find a point where both Left and Right channels hit zero simultaneously. If clicking persists, try Method B.
Method B: Crossfading (The Smooth Fix)
If “Zero Crossings” doesn’t work, or if you are looping atmospheric sounds (like rain or drones), a crossfade is the professional solution. This blends the end of the first clip into the start of the second, making the transition invisible.
- Duplicate your clip (Ctrl + D) so you have two identical copies on the timeline.
- Use the Clip Handle (drag bar) to move the second clip so it slightly overlaps the end of the first clip (a 0.5 to 1-second overlap is usually enough). Press Shift while moving the second clip to move it freely.
- Select the overlapping region where the two clips meet.
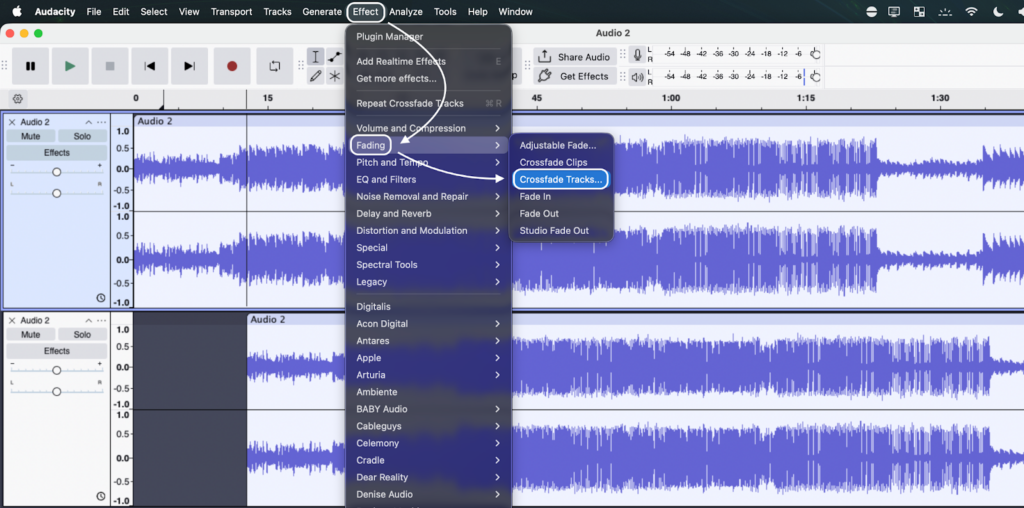
- Go to Effect > Fading > Crossfade Tracks.

Audacity will apply a fade-out to the first clip and a fade-in to the second clip simultaneously, creating a buttery smooth connection.
Pro Tip: Why Source Audio Quality Matters
When you loop a track in Audacity, you aren’t just extending its duration—you are multiplying its characteristics. This creates a unique problem: minor imperfections in your source audio become major distractions when repeated.
A faint background hiss or a slight room echo might go unnoticed in a single 5-second clip. However, if you loop that clip to fill a 3-minute background track, that hiss becomes a rhythmic, pulsing noise that fatigues the listener. Garbage in equals garbage out—multiplied.
To create professional loops, you need pristine source audio. If you are recording your own samples, sound effects, or voiceovers to loop, consider using the Hollyland LARK MAX 2.


Here is why hardware matters for this specific workflow:
- No More Clipped Loops (32-bit Float Recording): One of the hardest things to fix is a distorted peak. If your recorded sample “clips” (hits the red zone) even once, that distortion will repeat every time the loop restarts. The LARK MAX 2 features 32-bit Float Recording, which captures such a wide dynamic range that your audio essentially cannot distort. You can record loud foley or sound effects without worrying about levels, saving you from having to “repair” peaks in Audacity before looping.
- Clean Repetition: The system records in 48kHz/24-bit studio quality with Environmental Noise Cancellation (ENC). This ensures a low noise floor. When you loop a track 50 times, you want to hear the audio, not a 50x amplification of background static.
Starting with high-quality source material allows you to use the Repeat effect immediately, rather than spending hours trying to remove noise from a bad recording.
Method 3: Manual Looping (Duplicate & Align)
While the Repeat effect is fast, it is a “blind” process—you can’t see the specific point where the loop restarts until after you apply the effect. Manual looping gives you total visual control, allowing you to fine-tune exactly where the second loop begins.
This method is best when you need to manually crossfade between loops or if you are building a complex soundscape with irregular timing.
Step 1: Select Your Clip
Click on the track header (the area with the track name on the left) to select the entire audio clip you wish to loop.
Step 2: Duplicate the Track
Instead of copying and pasting, use the Duplicate shortcut.
- Windows: Press Ctrl + D
- Mac: Press Cmd + D
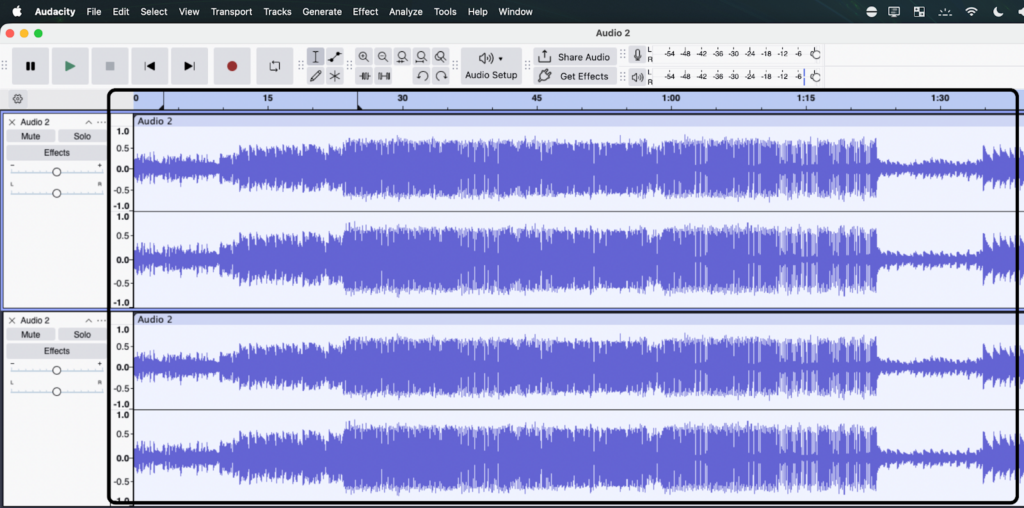
This creates an exact copy of your audio on a new track directly below the original.
Step 3: Align the Clips
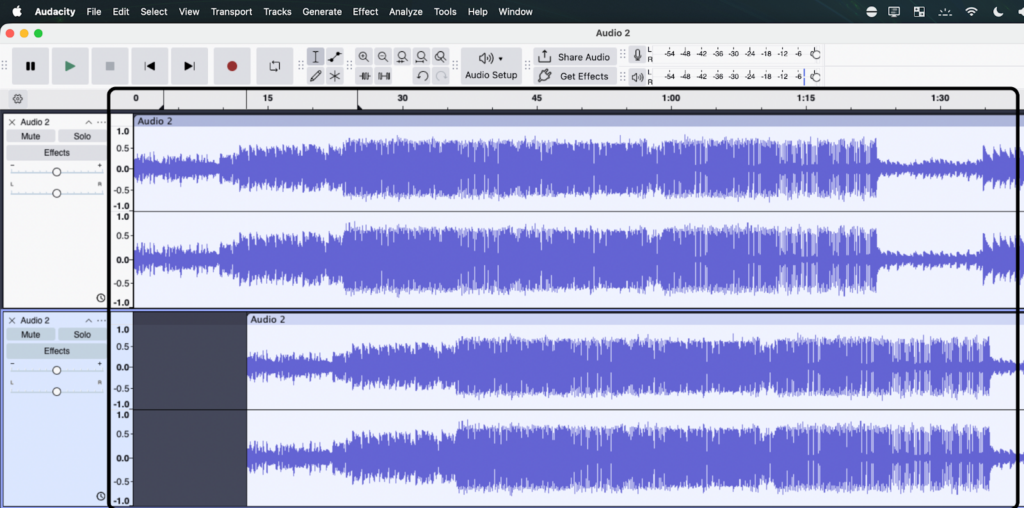
Now you need to move the duplicate audio so it starts exactly when the first clip ends.
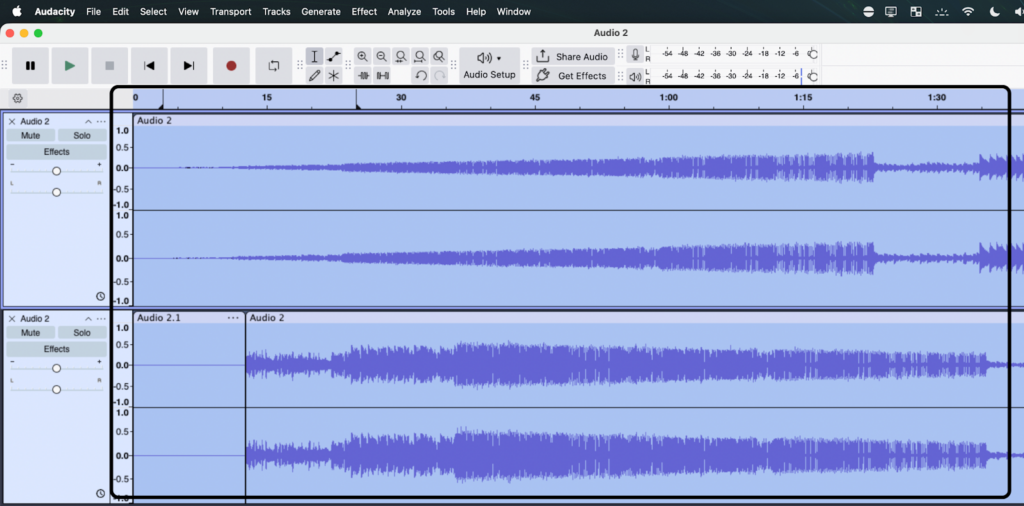
- In Audacity 3.0 and later: Hover over the top bar of the new clip (the “Clip Handle”) until your cursor turns into a hand. Click and drag the clip to the right.
- In Older Versions: You must manually select the Time Shift Tool (Double-arrow icon or F5) before dragging.

Pro Tip: Watch for the Yellow Snap Line. As you drag the second clip near the end of the first, a vertical yellow line will appear. This indicates that the two clips are perfectly aligned with no gap.
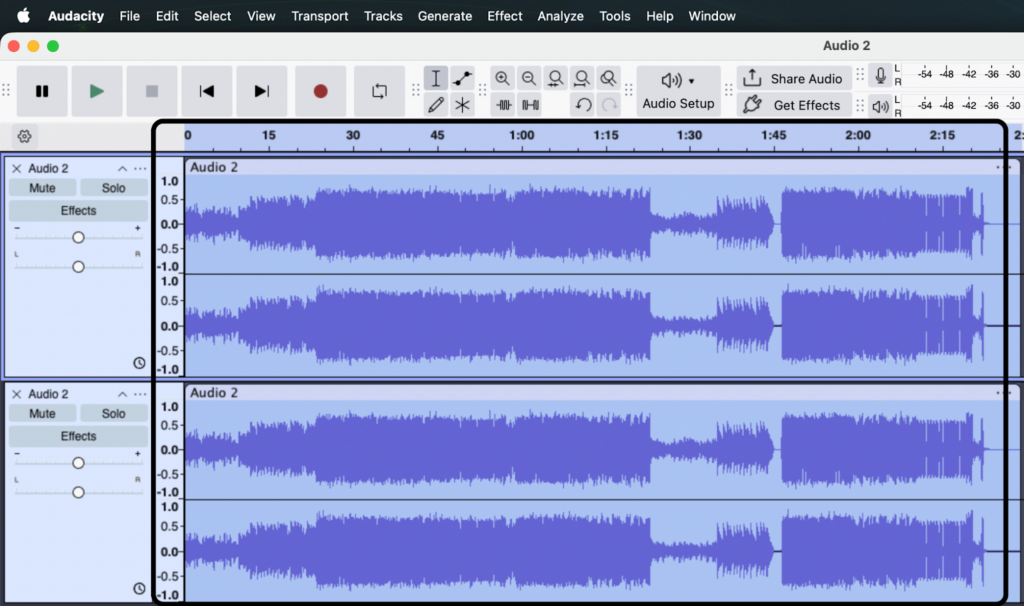
Step 4: Merge the Tracks
Once you have lined up your loops (you can repeat the duplication process as many times as needed), you likely want them on a single track for easier export.
- Select all the tracks you want to combine (Ctrl + A).
- Go to Tracks > Mix > Mix and Render.

Audacity will combine the separate layers into one continuous, looped stereo track.

Frequently Asked Questions (FAQ)
Can I save a looped section as a new MP3?
Yes, you can export just the specific section you have looped without exporting the entire project timeline.
- Highlight the looped section you want to save.

- Go to File > Export Audio.

- Choose MP3 (or WAV for higher quality), select Current Selection and click Export.

Why is the “Repeat” effect grayed out?
This is the most common error in Audacity. The “Repeat” effect will be grayed out if:
- Playback is Paused: If you pressed the Pause button (two vertical lines) or the Spacebar to pause, Audacity locks the track. You must press the Stop button (the yellow square icon) to apply effects.
- No Audio is Selected: Audacity needs to know what to repeat. Ensure you have highlighted the specific clip or pressed Ctrl + A.
How do I loop a specific region indefinitely?
It depends on whether you want to hear it indefinitely or extend the file indefinitely.
- For Playback (Listening): Highlight the region and press Shift + Space.
- For the File (Editing): You cannot make a file “infinite,” but you can make it long enough to cover your entire project. Use Effect > Special > Repeat and enter a high number of repetitions (e.g., 50 times).
Conclusion
Looping audio in Audacity ranges from a simple preview shortcut to a precise editing technique. Whether you are using Shift + Space to check a specific edit point or the Repeat Effect to extend a short beat, the workflow is straightforward once you know the commands.
However, the difference between an amateur loop and a professional one is usually the “click.” Always remember to check your Zero Crossings or apply a subtle Crossfade to ensure the transition is invisible to the listener.
Finally, keep in mind that a loop acts like a magnifying glass for audio quality. If your source recording has background hiss or clipping, looping it 20 times will only multiply those flaws. If you plan on recording your own soundscapes to create loopable assets, a tool like the Hollyland LARK MAX 2 can ensure your source audio is clean, distortion-free, and ready for looping immediately.