.png)
 简体中文

Webcam noise falls into two separate problems that require different solutions. Grainy, speckled video comes from your camera’s sensor working too hard in low light. Hissing, humming, or ambient sound in your audio comes from a high microphone gain level or a noisy environment. Applying a video fix to an audio problem wastes time and often makes things worse. This guide explains both types of noise and their causes. It starts with the changes that make the biggest difference. You will also learn how Hollyland Lyra and HollyStudio reduce noise. These adjustments target the problem instead of masking it.
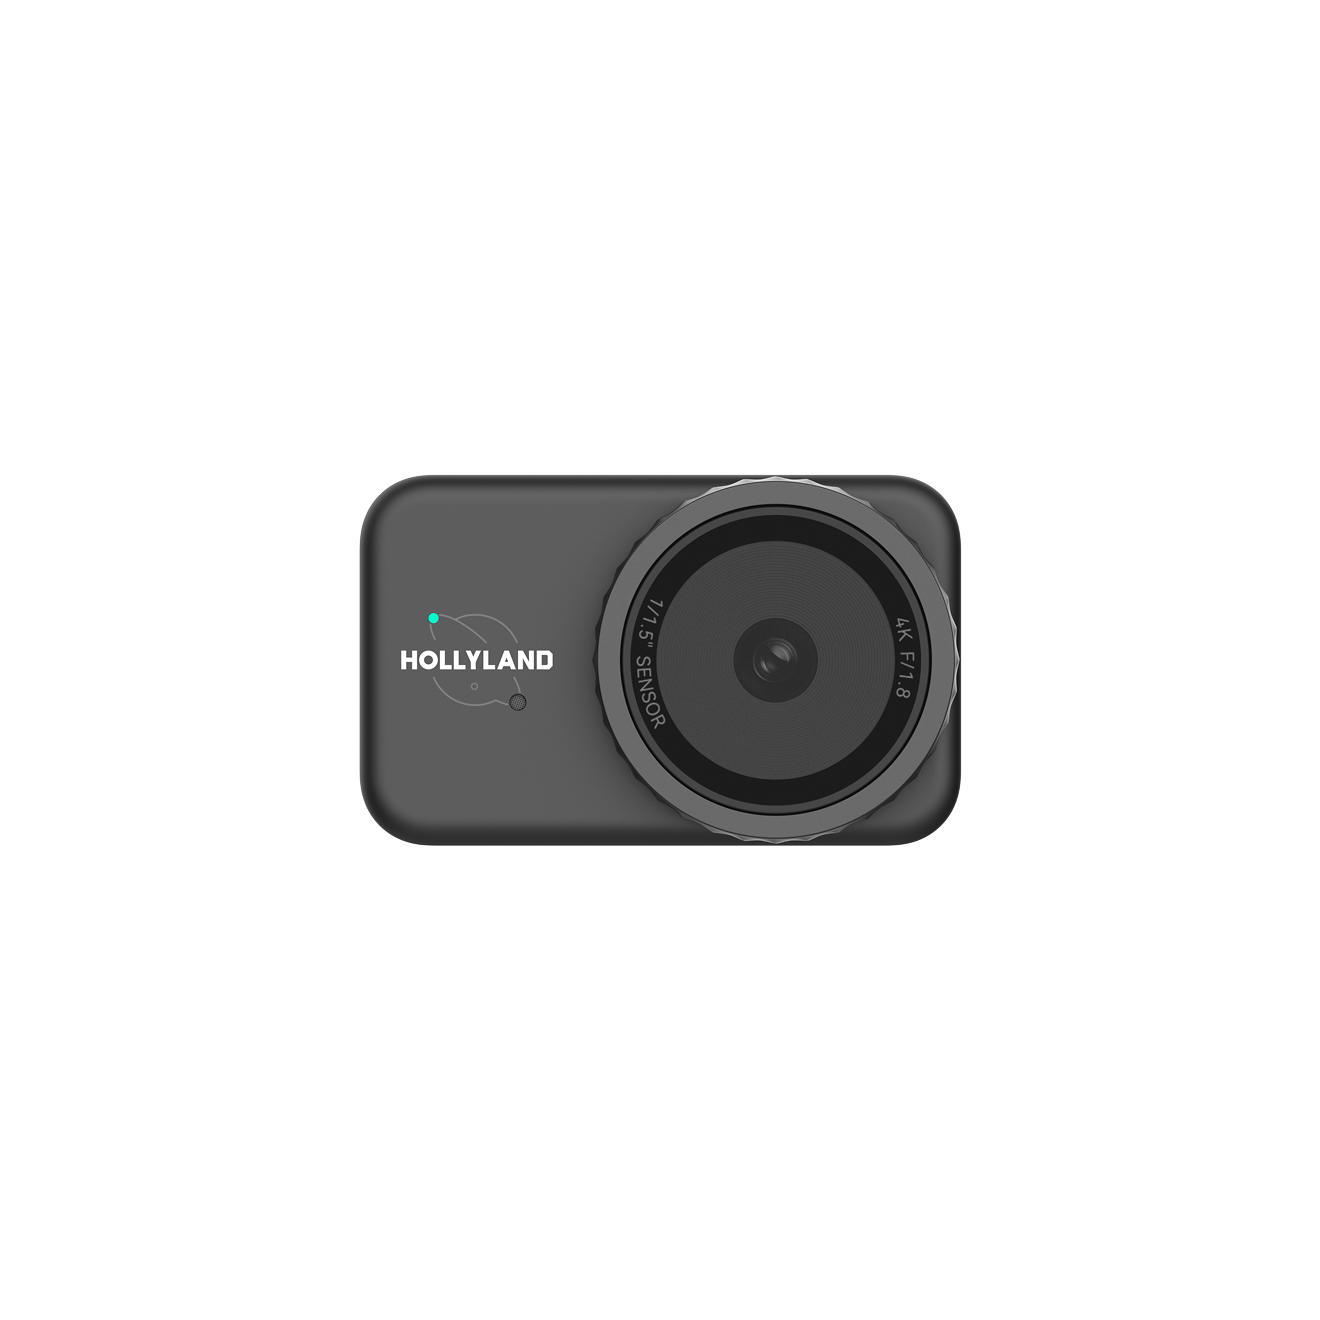
Hollyland Lyra - 4K AI Webcam
A flagship 4K AI webcam featuring a large 1/1.5″ CMOS sensor, smart auto-framing, and studio-grade 48 kHz/24-bit audio for effortless streaming and conferencing.
Key Features: 1/1.5″ CMOS & 4K30 | AI Tracking & Auto Framing | 48 kHz/24-bit Audio
Understanding the Two Types of Webcam Noise
Before adjusting any settings, confirm which type of noise you are dealing with. The fix path is completely different for each.
Video noise shows up as random grain, colored speckles, or a muddy texture distributed across the frame. It happens when the camera boosts its digital gain to compensate for low ambient light. The higher the gain, the more noise the sensor introduces into the image.
Audio noise shows up as a persistent hiss, hum, or layer of ambient room sound under your voice. It can come from high microphone gain, electronic interference, or environmental sources such as HVAC systems, computer fans, and traffic.
| Symptom | Noise Type | Go to Section |
|---|---|---|
| Grainy, speckled, or muddy video | Video / Image Noise | How to Reduce Video Noise |
| Persistent hiss, hum, or room ambient sound | Audio / Mic Noise | How to Reduce Audio Noise |
How to Reduce Video Noise in Your Webcam
Image grain is almost always a response to insufficient light. When the sensor cannot gather enough photons, the camera amplifies the signal digitally, and that amplification introduces visible noise. The three-step approach below addresses the problem in the right order: improve the environment first, then adjust settings, then consider a hardware upgrade if grain persists.
Step 1: Improve Your Lighting Before Adjusting Any Settings
Adding light is the single most effective action you can take, and it benefits every webcam regardless of model or price. When the sensor receives more light, the camera does not need to amplify the signal as aggressively, and visible grain drops immediately.
Practical lighting adjustments to make right now:
- Position a key light in front of you, not behind. A ring light or desk lamp at eye level, angled slightly toward your face, provides even, shadow-free illumination. Backlighting creates a silhouette effect that forces the camera to push gain much higher.
- Face a window during daylight hours. Natural window light is bright and diffuse. Sitting with the window in front of you puts soft, free light directly on your face.
- Avoid relying solely on overhead ceiling lights. A single overhead source creates harsh downward shadows on the face and leaves areas that the sensor reads as underexposed, which triggers gain increases. Supplement it with a desk lamp aimed at your face.
- Add a fill light to balance shadows. Placing a second, softer light source on the opposite side of your key light removes the dark zones that push digital gain higher and cause grain to concentrate.
- Increase general room brightness. Even switching on additional room lights reduces the contrast range the sensor has to handle, lowering the gain needed to produce an acceptable image.
Pro Tip: Run a short test recording before your next call or stream, then watch the footage at full size. Grain almost always appears first in the darkest corners and shadow areas of the frame. If those areas look clean, your lighting is working.
Step 2: Adjust Exposure and White Balance in HollyStudio
Once your lighting is improved, the next step is to prevent the camera from overcorrecting through software. If the exposure or gain setting in HollyStudio is still set too high, the camera applies digital amplification on top of your improved lighting and reintroduces grain into an otherwise well-lit scene.
- Launch HollyStudio on your Windows or Mac machine with the Hollyland Lyra connected via USB-C.
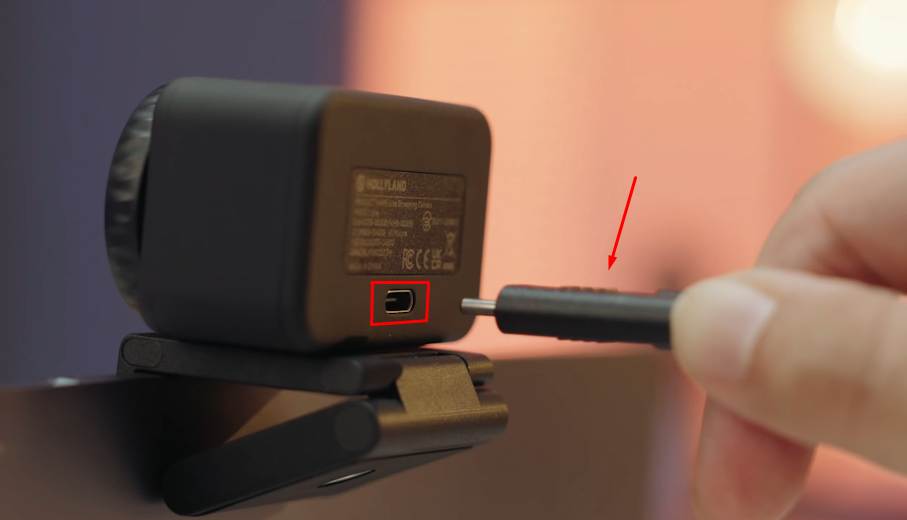
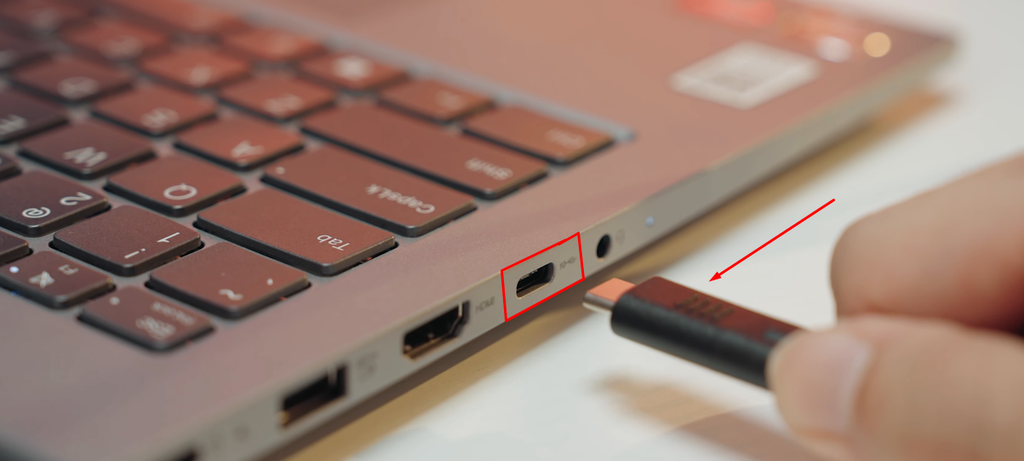
- Open the Image Control page in the main dashboard.
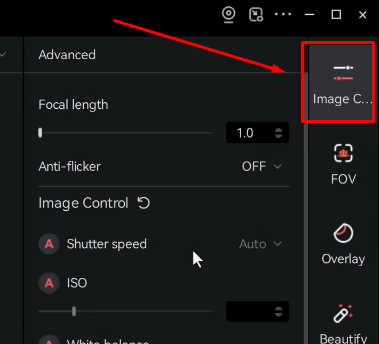
- Locate the Exposure slider. Drag it to the left to reduce the exposure value. Watch the live preview window as you adjust. Visible grain in darker areas of the frame will decrease as exposure comes down toward a natural level.
- Locate the White Balance slider. Right above the Exposure slider, there is a White Balance control. Turn off its automatic function by deselecting the “A” symbol. Then, adjust the slider manually, probably lower it, to see if you get your desired results.
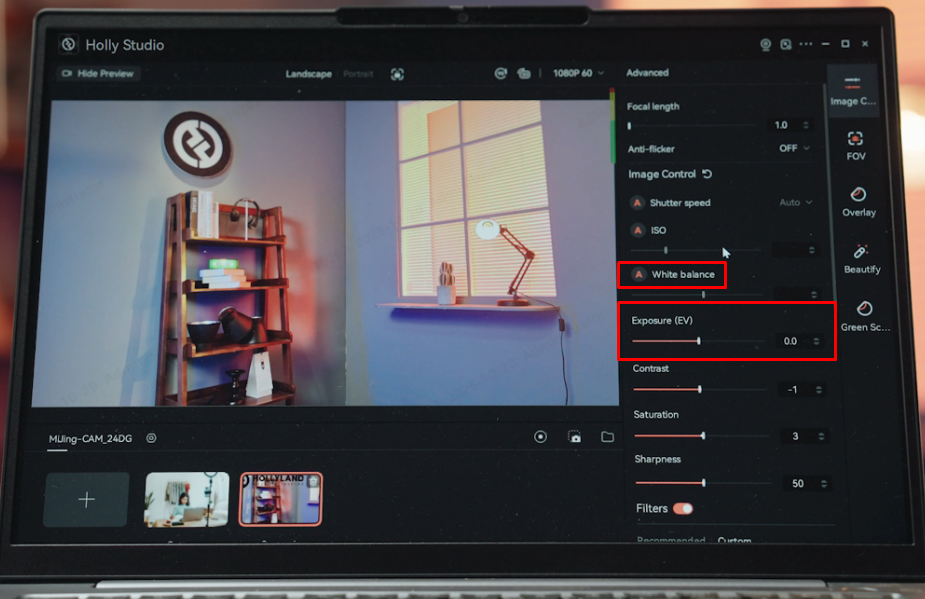
- Confirm in the live preview that the image looks clean and correctly exposed before closing the panel.
Step 3: Use a Larger-Sensor Webcam to Cut Noise at the Hardware Level
If you have optimized your lighting and reduced your gain settings and your footage still shows persistent grain, the limiting factor is likely the sensor itself. Small sensors common in budget webcams capture less light per pixel, which means the camera must apply more digital amplification even in moderate lighting. That amplification is the direct cause of image noise.
A larger sensor gathers more light naturally, allowing the camera to produce a clean image at lower gain values. The Hollyland Lyra uses a 1/1.5” CMOS sensor paired with an F/1.8 aperture. That combination captures significantly more light per pixel than the smaller sensors typical of entry-level webcams, keeping the noise floor low even in dim conditions.
| Sensor Factor | Typical Budget Webcam | Hollyland Lyra |
|---|---|---|
| Sensor size | 1/3” to 1/4” | 1/1.5” |
| Aperture | F/2.0 to F/2.8 | F/1.8 |
| Gain required in low light | High | Low |
| Low-light noise level | Visible grain | Minimal grain |
The Lyra connects via USB-C with no driver installation required. It operates as a standard UVC device on Windows and macOS, so HollyStudio opens immediately with a clean 1080p or 4K preview ready to configure.
How to Reduce Audio Noise in Your Webcam
Webcam microphones are physically close to the device body, making them susceptible to picking up fan noise, USB electrical interference, keyboard clicks, and ambient room sound. The two steps below address audio noise from the most direct hardware-level fix to a full mic replacement for challenging environments.
Step 1: Enable Hardware Noise Cancellation in HollyStudio
The Hollyland Lyra includes Intelligent Noise Cancellation, which suppresses background noise by up to 25 dB directly on the device before the audio signal reaches your computer. Because the processing happens at the hardware level, the cleaned signal is what your conferencing app or recording software receives, resulting in better quality and lower latency than software-only filters.
- Open HollyStudio with the Lyra connected.
- Click the gear icon under the preview window to open the main Settings window.
- Navigate to the Audio Settings tab.
- Locate the Intelligent Noise Cancellation toggle and switch it to On.
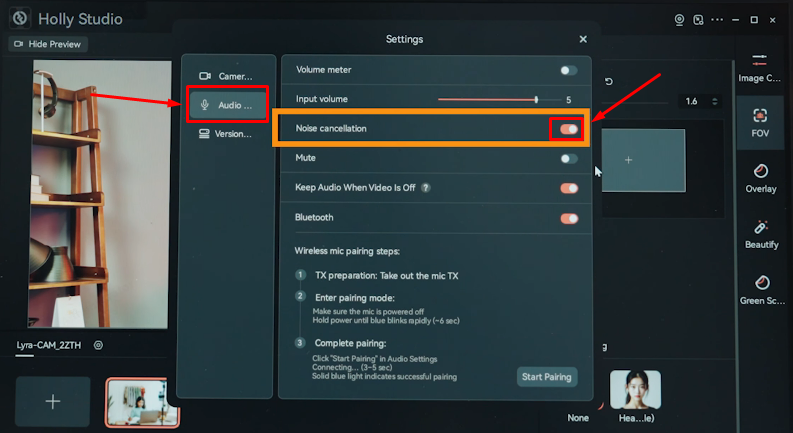
- Run a short test recording using the preview or your video application. Listen carefully to the before and after. Background hiss, HVAC hum, and fan noise should be reduced substantially.
- Compare with the toggle on and off to confirm the setting is active and producing an audible improvement.
Because the Lyra processes audio on-device, applications like Zoom, Teams, and OBS receive an already-cleaned audio stream. This makes Intelligent Noise Cancellation the first audio adjustment to enable before changing anything else.
Step 2: Connect a Wireless Microphone Directly to Bypass the Built-In Mic
When the environment is consistently noisy, such as an open office, a shared workspace, or an outdoor setup, the most reliable solution is to close the distance between the microphone and your voice entirely. A lavalier microphone clipped to your collar picks up your voice before room noise can compete with it, rather than trying to filter that noise out afterward.
The Hollyland Lyra includes a built-in wireless receiver for the LARK A1 wireless microphone transmitter. No external receiver is required. The Lyra hosts the receiver internally, eliminating a separate USB audio device and the interference that can come with multiple audio hardware paths running simultaneously.

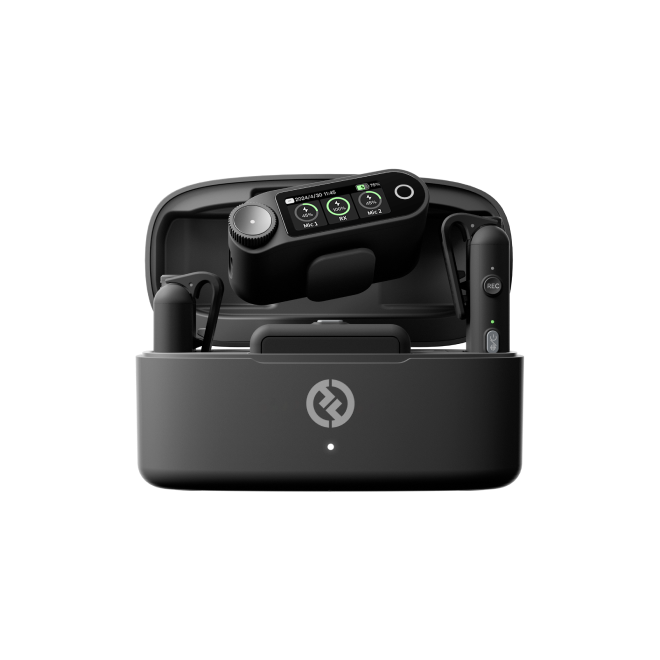
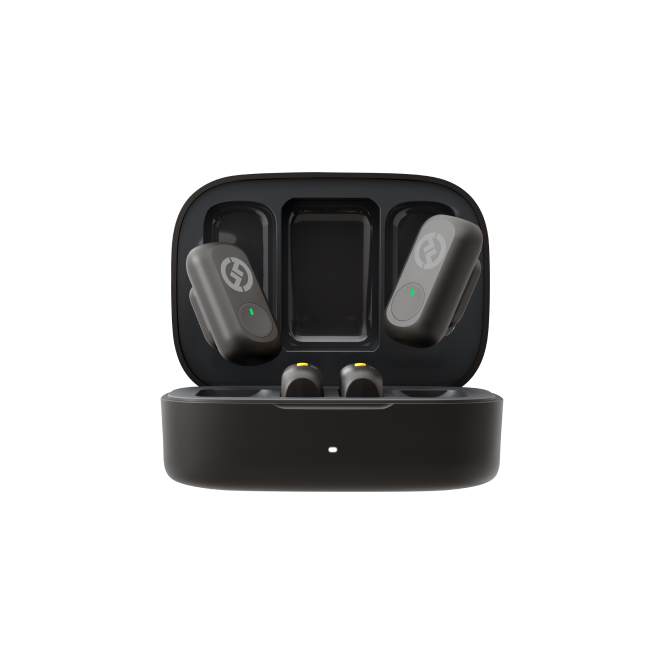
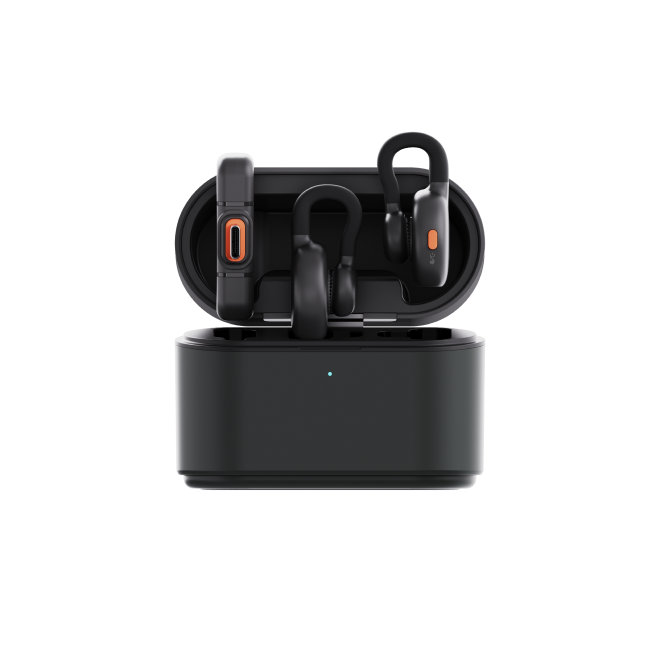
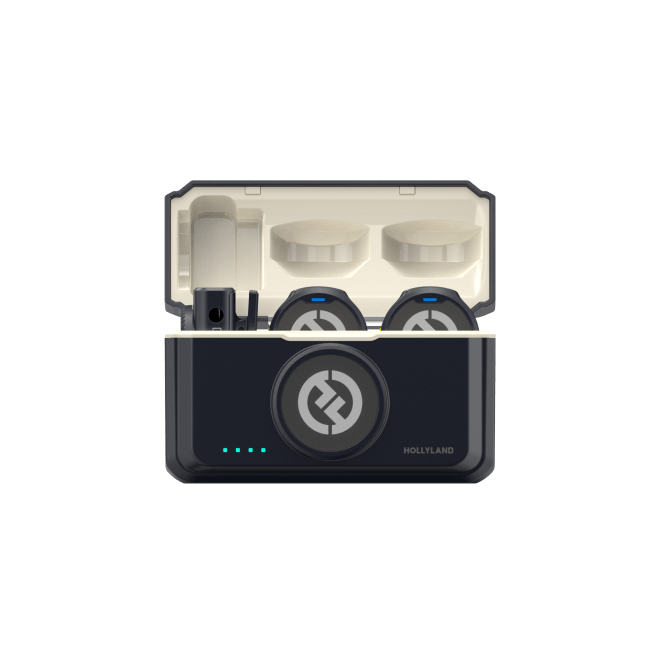
Hollyland LARK A1 - Affordable Wireless Microphone
A perfect starter mic for creators on a budget. It’s simple to use and features effective noise cancellation.
Key Features: 48kHz/24-bit | 3-Level Noise Cancellation | 54-Hour Battery
To set this up:
- Launch the HollyStudio software on your computer.
- Click the gear icon beneath the preview screen to open main Settings.
- Next, click the Audio Settings tab.
- Scroll down and activate the Bluetooth toggle.
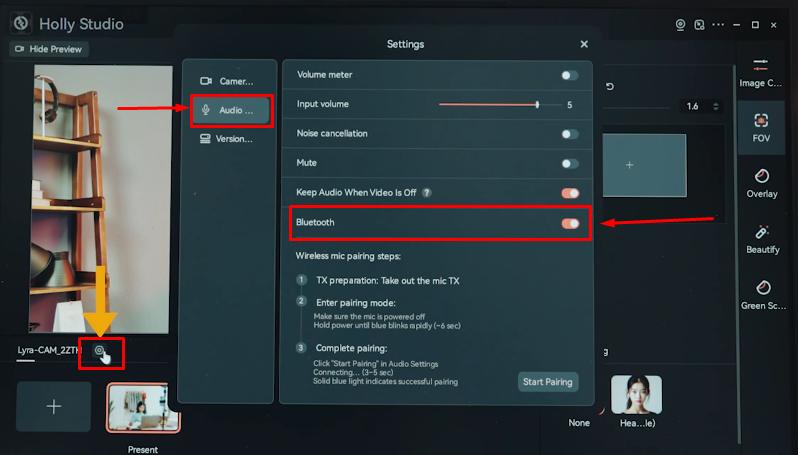
- Click Start Pairing, which puts Lyra into pairing mode.
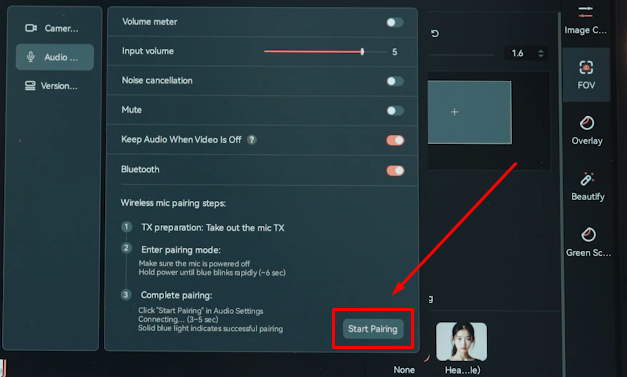
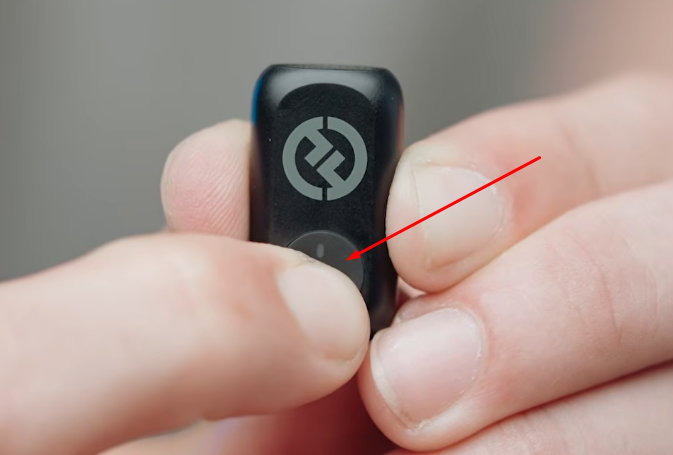
- Turn off the LARK A1 transmitter, then hold its power button for 6 seconds. The flashing blue LED indicates that it has entered pairing mode.
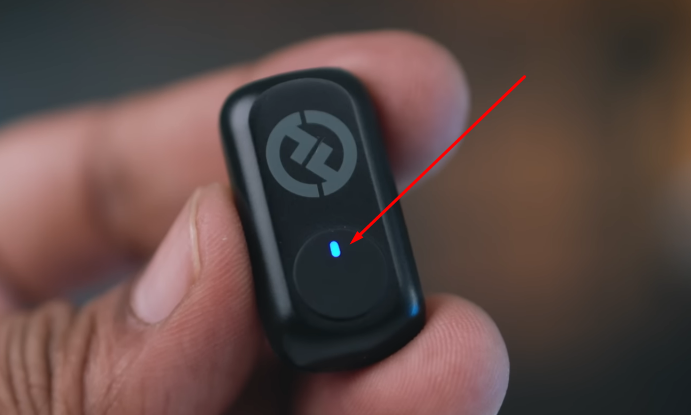
- The LARK A1 TX will be recognized automatically by Lyra, and its LED will turn solid blue.
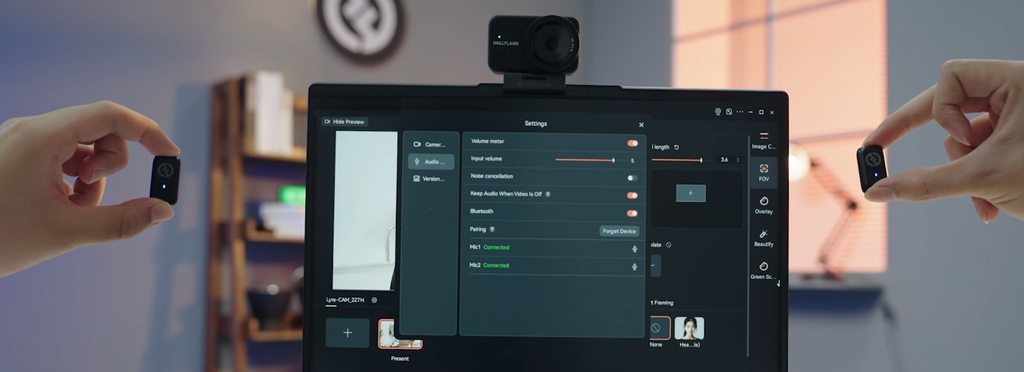
- And once the Lyra is connected to the LARK A1 and the devices are in use, the LED indicator will turn solid green.
Software Noise Filters as a Backup Layer
Software noise reduction is the right tool when your webcam lacks hardware cancellation, or as an additional processing layer on top of what your hardware already does. The two most common contexts are OBS Studio for streaming and recording, and major conferencing platforms for calls.
Applying the Noise Suppression Filter in OBS Studio
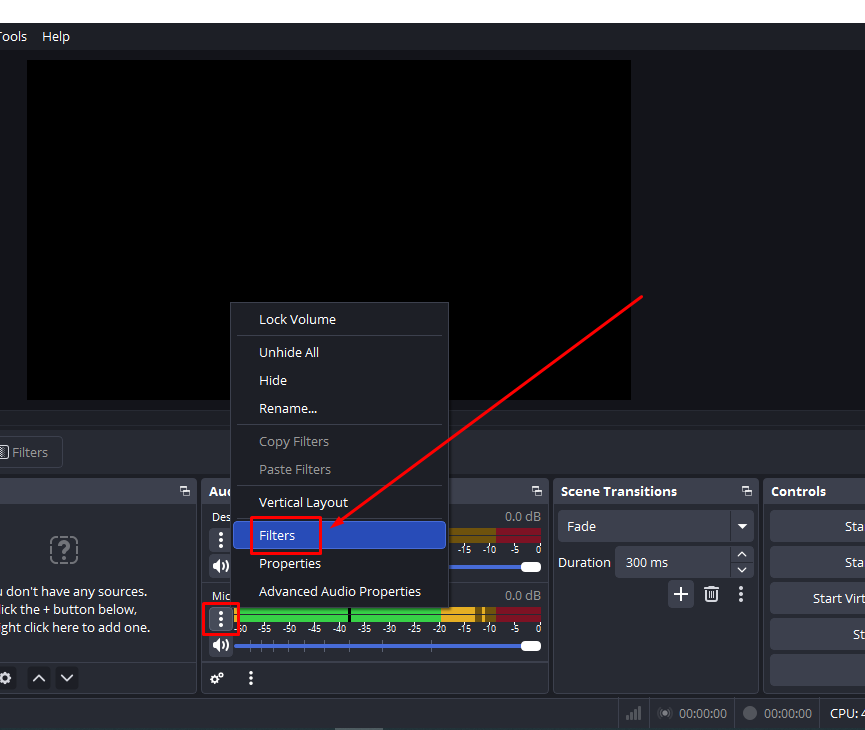
- Open OBS Studio and locate your audio source in the Audio Mixer panel at the bottom of the screen.
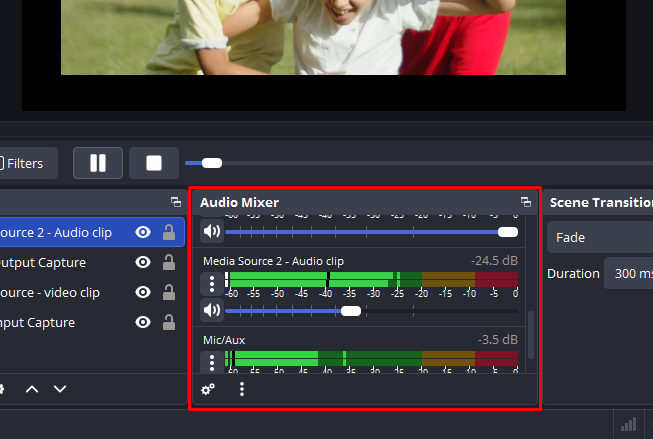
- Click the three vertical dots button next to the audio source and select Filters.
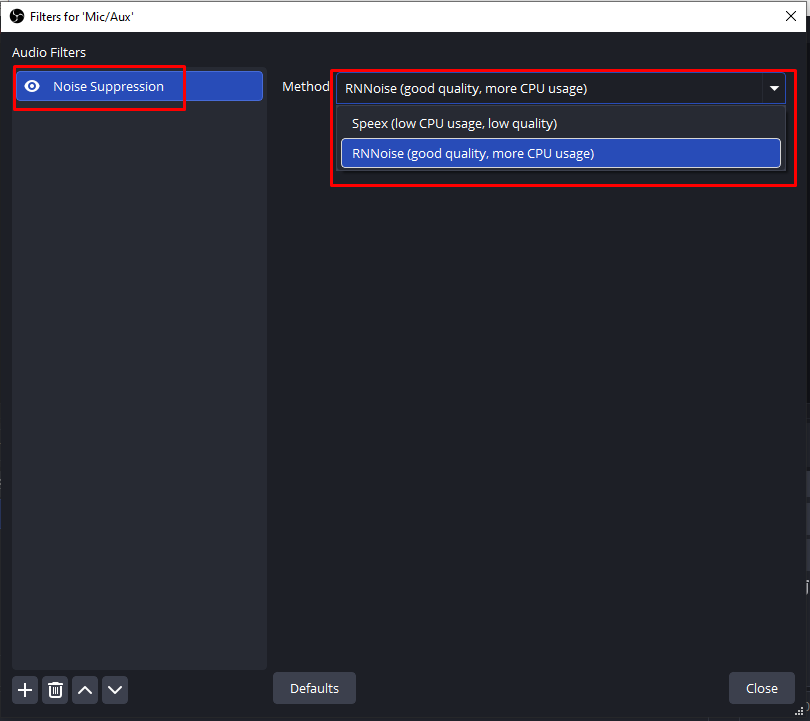
- Click the + button and choose Noise Suppression from the list.
- In the method dropdown, select RNNoise. This produces better voice clarity and fewer artifacts than the Speex option, particularly for spoken voice in a call or streaming context.
- Close the filter window and run a short test recording to confirm the background noise level has dropped.
- If you are already using Lyra’s Intelligent Noise Cancellation, this OBS filter adds a second processing stage. Monitor output audio for over-processing, which causes voices to sound hollow or robotic.
Enabling Noise Cancellation in Zoom, Teams, and Google Meet
| Platform | Setting Path | Recommended Level |
|---|---|---|
| Zoom | Settings > Audio > Suppress background noise | High |
| Microsoft Teams | Settings > Devices > Noise suppression | High |
| Google Meet | Settings > Audio > Noise cancellation | Toggle On |
Three Quick Checks That Are Easy to Miss
These three factors are simple to overlook, but each one can introduce or compound noise independently of your settings:
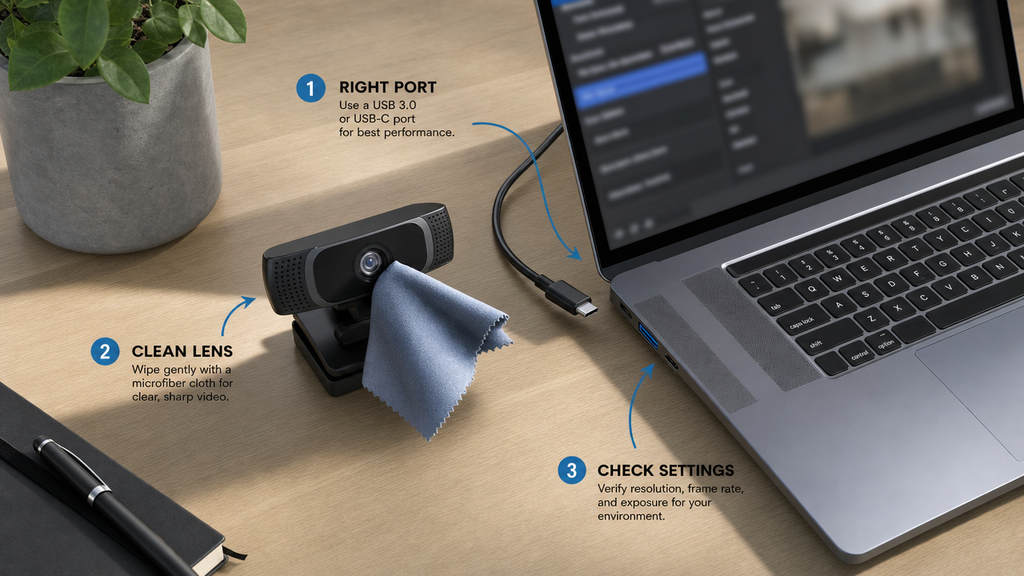
- Use a USB 3.0 or USB-C port. Connecting the Lyra to a USB 2.0 port limits available bandwidth. At higher resolutions, the camera compensates by using MJPEG compression, and heavy compression produces blocking and smearing that resembles grain. Look for a blue-colored USB port (USB 3.0) or use the native USB-C port on your machine.
- Clean the lens. A smudged or dusty lens scatters incoming light, forcing the sensor to work harder to produce a focused, bright image. The result is increased visible noise across the frame. Gently wipe the lens with a microfiber cloth before any session where image quality matters.
- Confirm the resolution and frame rate in HollyStudio. If the output is defaulting to 720p, the camera is operating in a lower-bandwidth mode with heavier compression. In HollyStudio’s Video settings, set the resolution to 1920×1080 at 60 fps or 3840×2160 at 30 fps to ensure the camera is running in its full-quality output mode.
Webcam Noise Reduction Checklist
| Fix | Noise Type Addressed | Where to Apply | Priority |
|---|---|---|---|
| Add a key light or face a window | Video noise | Physical environment | First |
| Lower exposure and white balance | Video noise | HollyStudio > Image Control page | Second |
| Upgrade to a larger-sensor webcam (Lyra 1/1.5” CMOS, F/1.8) | Video noise | Hardware decision | If grain persists |
| Enable Intelligent Noise Cancellation | Audio noise | HollyStudio > Audio tab | First |
| Connect LARK A1 directly to Lyra | Audio noise | Wireless pairing | For noisy environments |
| Apply RNNoise filter in OBS | Audio noise | OBS Audio Filters | Backup layer |
| Enable noise suppression in Zoom, Teams, or Meet | Audio noise | Platform audio settings | Backup layer |
| Use a USB 3.0 or USB-C port | Video artifacts | Physical connection | Quick check |
| Clean the lens | Video noise | Physical device | Quick check |
| Set resolution to 1080p/60 or 4K/30 in HollyStudio | Video artifacts | HollyStudio > Video tab | Quick check |
FAQs
Why is my webcam footage still grainy after improving my lighting?
If grain persists after adding light, check that the exposure setting in HollyStudio is not still set too high. Excessive digital gain overrides good lighting and reintroduces noise into an otherwise well-lit scene. Open HollyStudio, navigate to the Image Control page, and reduce the Exposure slider until the live preview looks clean and stable.
Does enabling noise cancellation degrade audio quality or add latency?
Hardware noise cancellation, such as the Lyra’s Intelligent Noise Cancellation, processes the audio on the device before it reaches your computer, so the latency impact is minimal. Software-only filters applied in OBS or Zoom add a small number of milliseconds of processing delay. For live calls, this is rarely perceptible, but if sync is a concern, prioritize hardware-level cancellation over stacked software filters.
Can I use both the Lyra’s hardware noise cancellation and OBS noise suppression at the same time?
Yes. Running Intelligent Noise Cancellation alongside an OBS RNNoise filter creates a dual-layer noise reduction chain that is particularly useful in very noisy environments. Monitor your output for hollow or robotic voice quality, which is a sign of over-processing. If that happens, reduce the RNNoise filter strength or disable one of the two layers.
What is the difference between image noise and compression artifacts?
Image noise appears as random grain or colored speckles distributed across the frame and is caused by high digital gain at the sensor level. Compression artifacts appear as blocky patterns or smearing, typically in areas of motion, caused by insufficient USB bandwidth or a low bitrate setting. The fixes are different: noise requires better lighting or lower gain; artifacts require a USB 3.0 connection and a higher resolution or format setting in HollyStudio.
Does a higher resolution setting reduce noise?
Indirectly. A higher-resolution mode, such as 4K/30, uses more USB bandwidth, which typically reduces the compression applied to the video stream. Less compression means fewer compression artifacts. True image noise from the sensor is not reduced by resolution alone. That requires better ambient lighting or a physically larger sensor, like the 1/1.5” CMOS in the Hollyland Lyra.
Conclusion
Fix video noise by improving your ambient lighting first, then lowering exposure in HollyStudio. Fix audio noise by enabling Intelligent Noise Cancellation in Audio Settings. The Hollyland Lyra’s 1/1.5” CMOS sensor, F/1.8 aperture, and on-device noise cancellation address both problems at the hardware level, while OBS and platform filters provide a useful backup layer on top. Open HollyStudio, work through the checklist in section order, and run a short test recording before your next call or stream.