.png)
 简体中文

Your webcam is connected, but your video call is still pulling audio from the laptop’s built-in mic. This is one of the most common setup frustrations for remote workers, educators, and streamers. Keep in mind that setting up a webcam microphone requires three separate steps. And this guide explains everything with the Hollyland Lyra webcam. The same steps also apply to other UVC webcams.
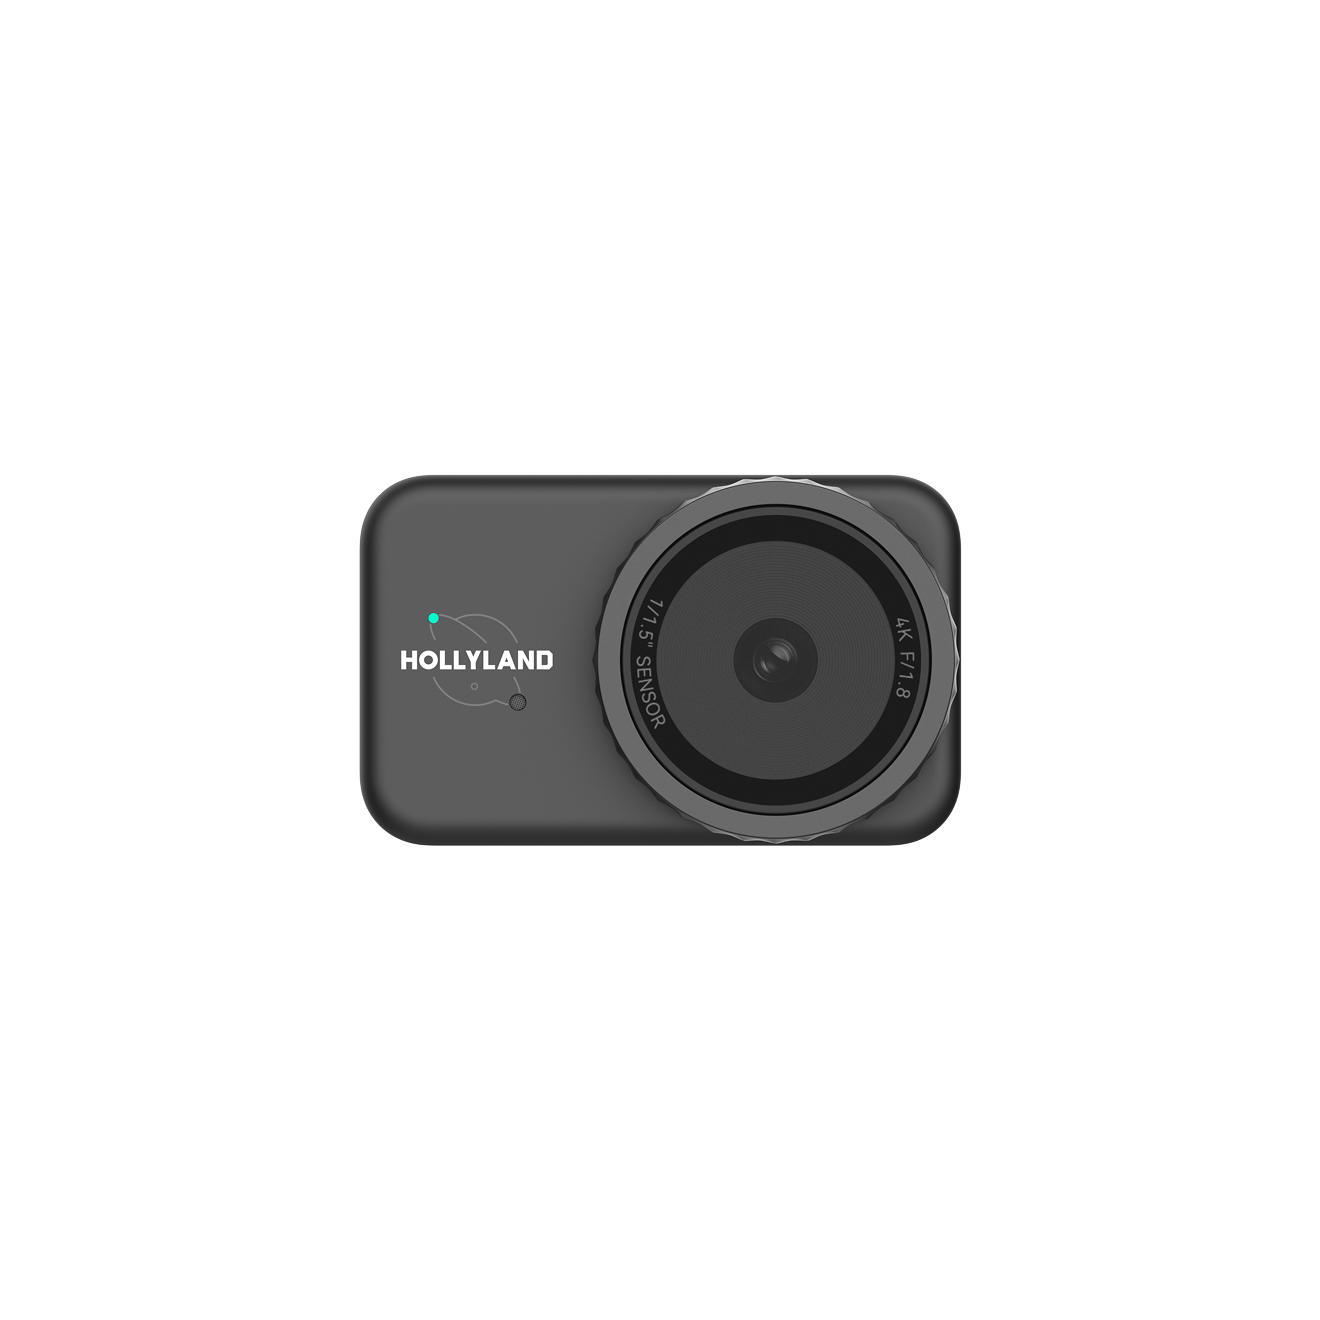
Hollyland Lyra - 4K AI Webcam
A flagship 4K AI webcam featuring a large 1/1.5″ CMOS sensor, smart auto-framing, and studio-grade 48 kHz/24-bit audio for effortless streaming and conferencing.
Key Features: 1/1.5″ CMOS & 4K30 | AI Tracking & Auto Framing | 48 kHz/24-bit Audio
Before You Start: What Webcam Microphone Setup Actually Involves
Setting up a webcam microphone requires three layers:
- The OS must recognize the webcam as an audio input device
- You must select it as the default microphone in system settings
- You must choose it inside each individual application. Skipping any layer means your apps will continue defaulting to a different mic

The Hollyland Lyra connects via USB-C and is UVC-compliant, meaning Windows 10/11 and macOS 12 and later recognize both its video and audio streams automatically on connection. No driver download is required before you begin the steps below.
Step 1: Connect the Webcam and Confirm the Microphone Is Detected
Before adjusting any software setting, confirm the Lyra is physically mounted, connected, and recognized.
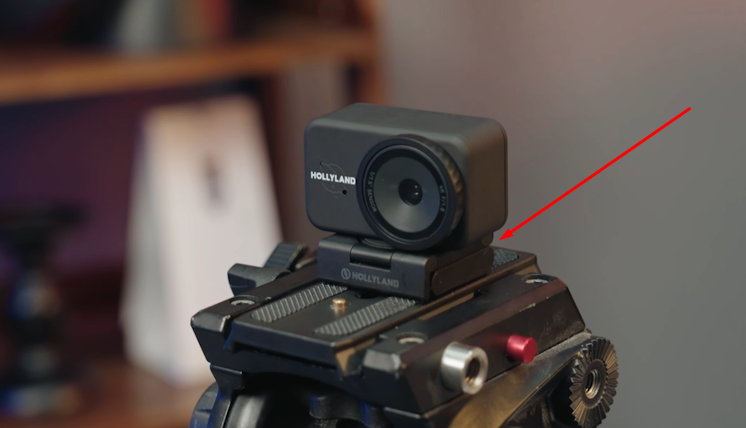
- Mount the Lyra. Seat the front part of the magnetic mount on the top edge of your monitor.
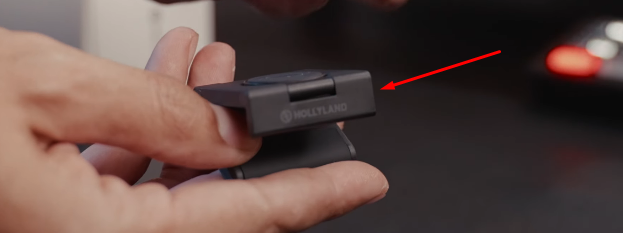
The hinge lets you adjust the tilt angle so the lens aligns with your eye level.
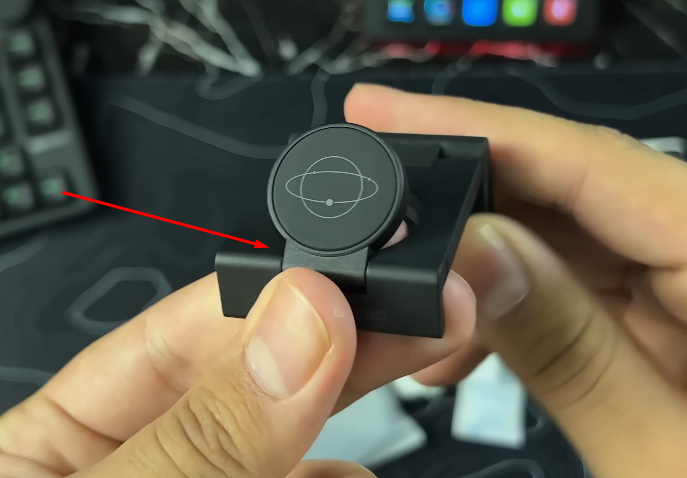
Then attach Lyra to the base of the mount.
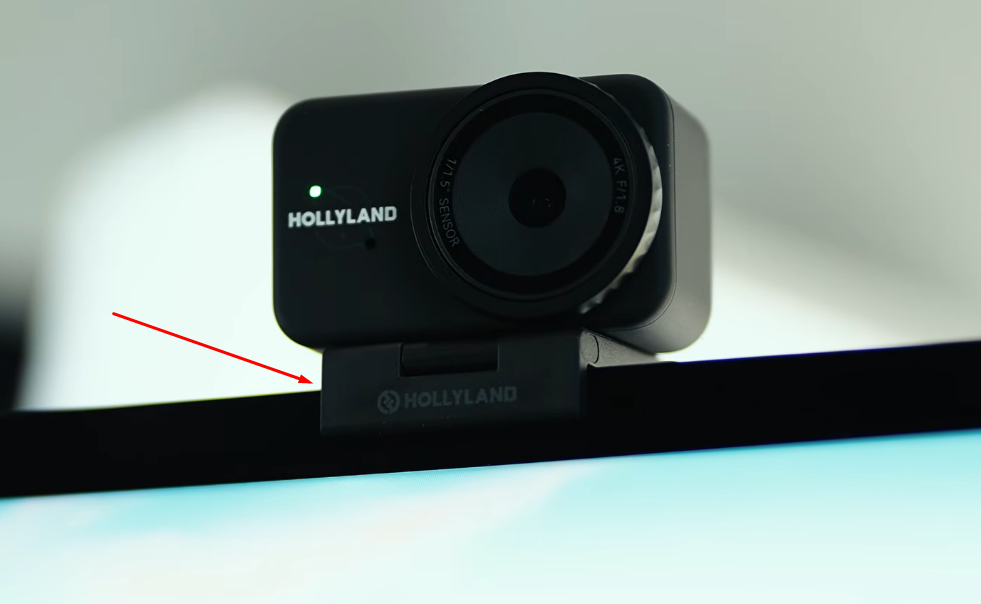
For tripod use, the base accepts a standard 1/4”-20 screw.
- Connect the USB-C cable. The USB-C port is on the rear of the Lyra body. Plug the included USB-C cable into that port and into a USB-C port on your computer. If only USB-A ports are available, use the included USB-C to USB-A adapter.
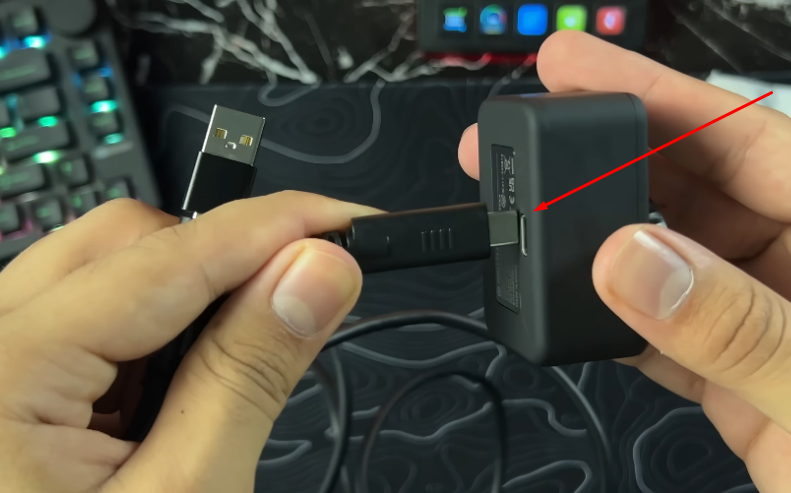
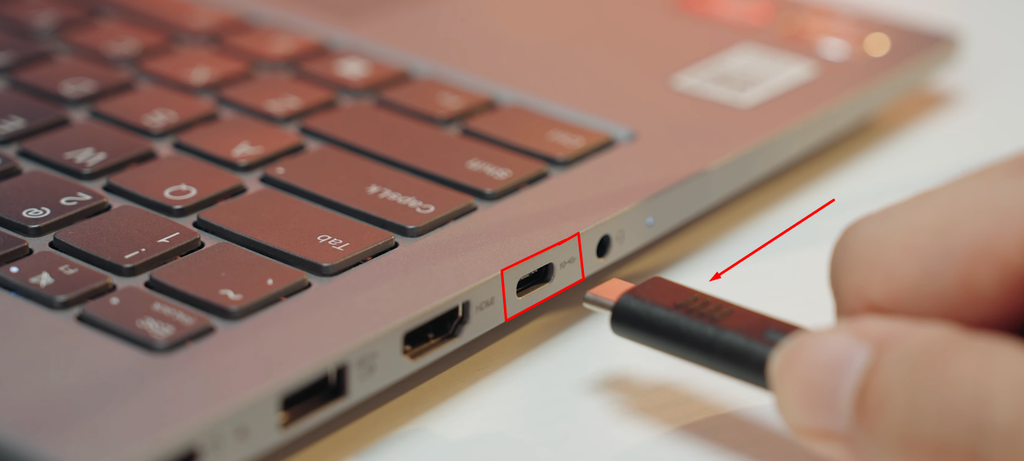
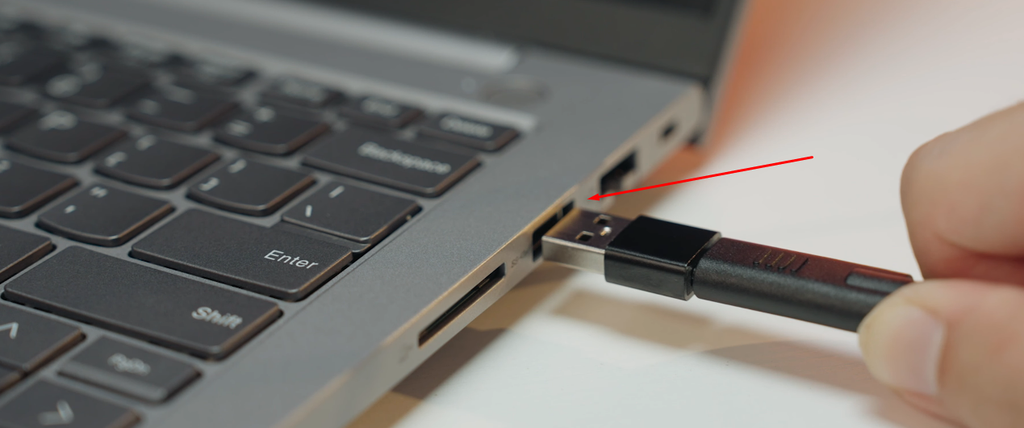
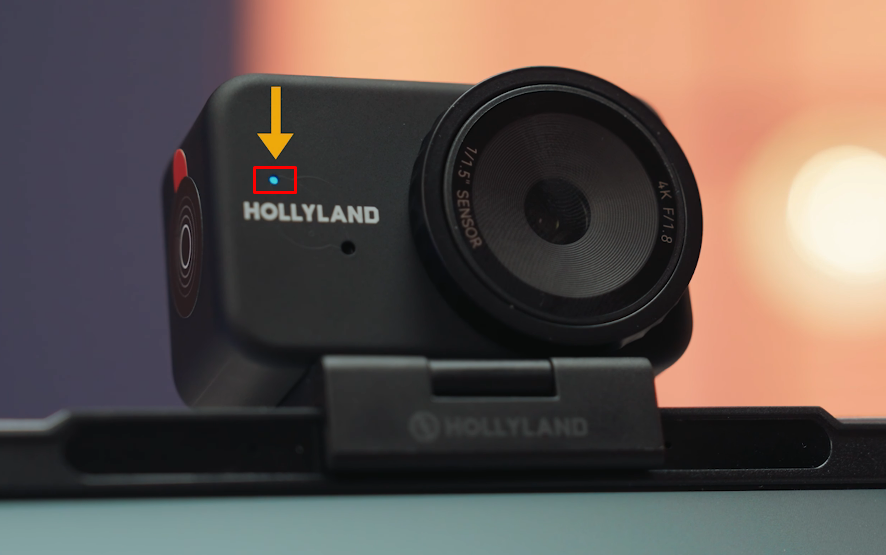
- Check the LED. A solid blue LED on the front face of the Lyra confirms successful USB enumeration and an active connection. A blinking LED or no light means the connection was not established. Try a different port or swap the cable before proceeding.
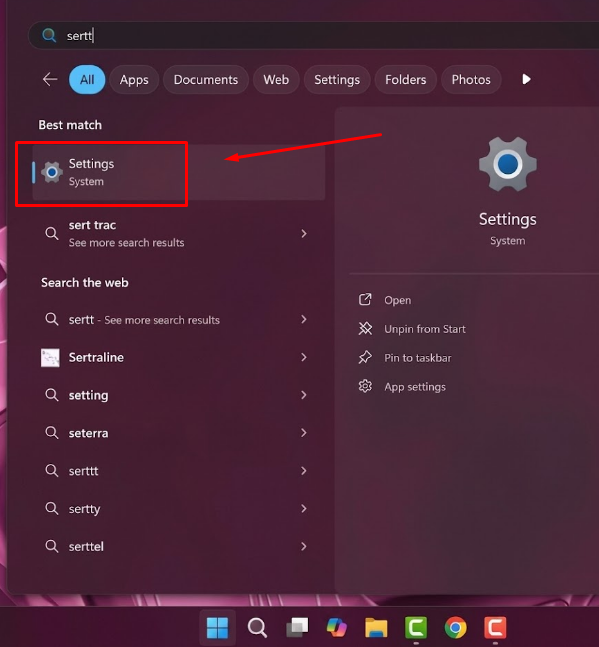
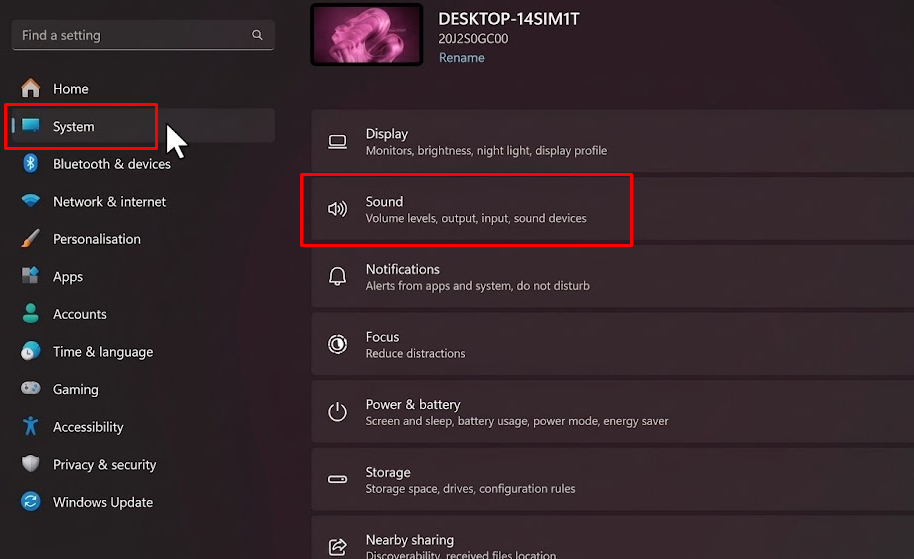
- Verify on Windows. Open Start > Settings > System > Sound > Input. The Lyra should appear as a named audio input device. You can also open the classic Sound panel via Start > Run > mmsys.cpl and check the Recording tab.
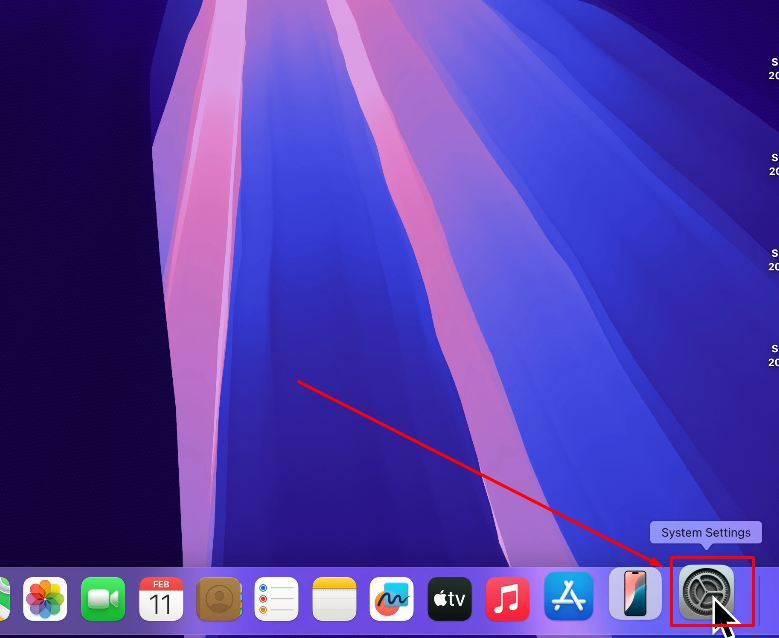
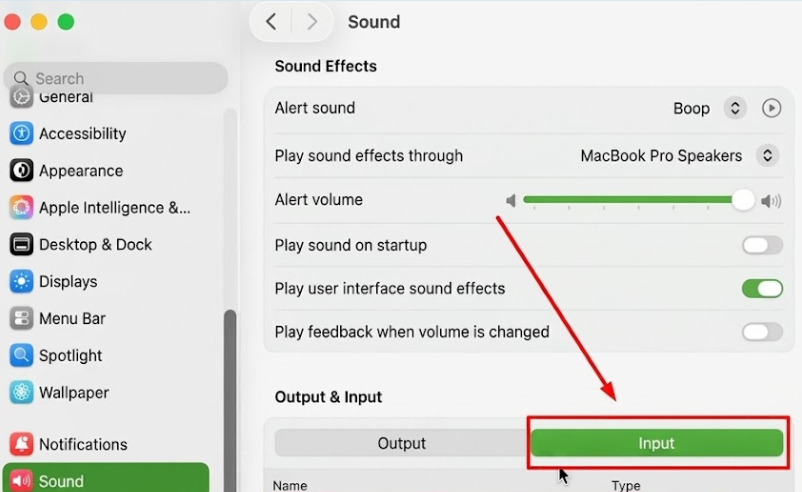
- Verify on macOS. Open System Settings > Sound > Input tab. The Lyra should appear as a device, and the input level meter should respond when you speak toward the webcam.
Step 2: Set the Webcam Microphone as Default Input on Windows
Windows stores audio preferences in both the modern Settings panel and the legacy Sound control panel. Aligning both ensures consistent device selection across all applications.
Windows 11:
- Open Settings, then navigate to System and select Sound.
- Find Input and choose Lyra or “USB Audio Device” as the default microphone.
- Click the arrow (>) beside Lyra to access its properties.
- In the Input settings, locate the Format dropdown menu.
- Choose 2 channel, 24 bit, 48000 Hz (Studio Quality). Your changes will apply automatically.
Windows 10:
- Go to Settings > System > Sound, scroll to the Input section, and select Lyra from the Choose your input device dropdown.
- Click Sound Control Panel in the right-hand sidebar to open the legacy panel, then select the Recording tab.
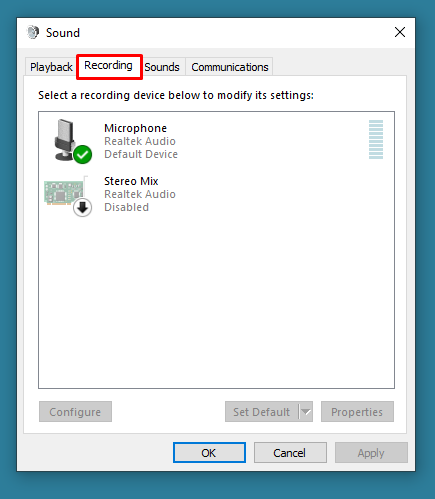
- Right-click the Lyra entry and choose Set as Default Device. Optionally select Set as Default Communication Device as well, to route call audio explicitly through the Lyra.
- Open Properties > Advanced and set the format to 2 channel, 24 bit, 48000 Hz (Studio Quality).
The green level bar next to the Lyra entry in the Recording tab should animate in response to your voice. If the bar is static despite a solid white LED, open Settings > Privacy & Security > Microphone and confirm that both Microphone access and Let desktop apps access your microphone are toggled on.
Pro Tip: Setting the Lyra as both Default Device and Default Communication Device prevents Windows from redirecting audio routing automatically when a Zoom or Teams call starts.
Step 3: Set the Webcam Microphone as Default Input on macOS
macOS manages audio input through System Settings and gates app access through Privacy controls. Both need to be addressed.
- Open System Settings > Sound, then click the Input tab.
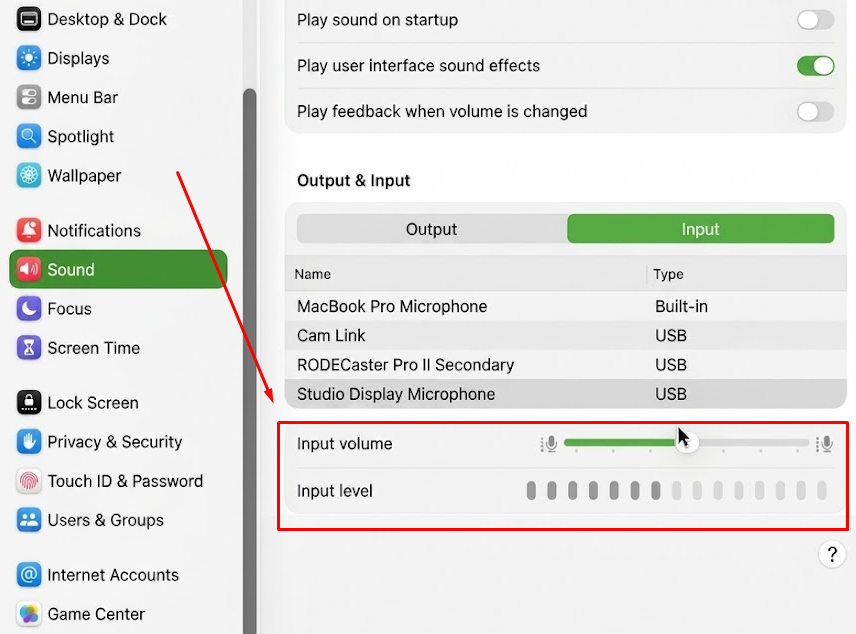
- Select Lyra (or “USB Audio”) from the device list.
- Speak toward the Lyra and confirm the Input level bar animates. A static bar means the mic capsule is not active or macOS has not yet permitted access.
- Set the Input volume slider to approximately 70 to 80 percent as a starting baseline. The Lyra’s onboard audio processing handles further gain compensation when HollyStudio is running.
- Open System Settings > Privacy & Security > Microphone. Confirm the main toggle is on and that each app you plan to use, including Zoom, Teams, and OBS, appears in the list and is permitted. If an app is missing, launch it and attempt to access the microphone to trigger the macOS permission request.
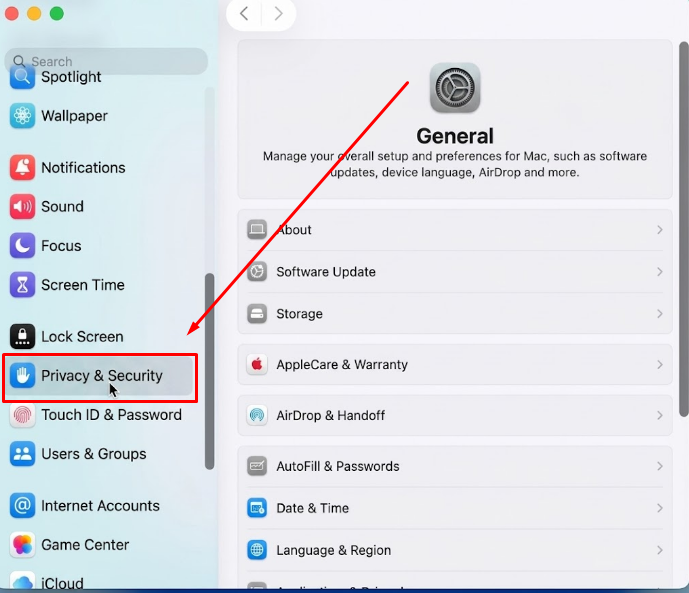
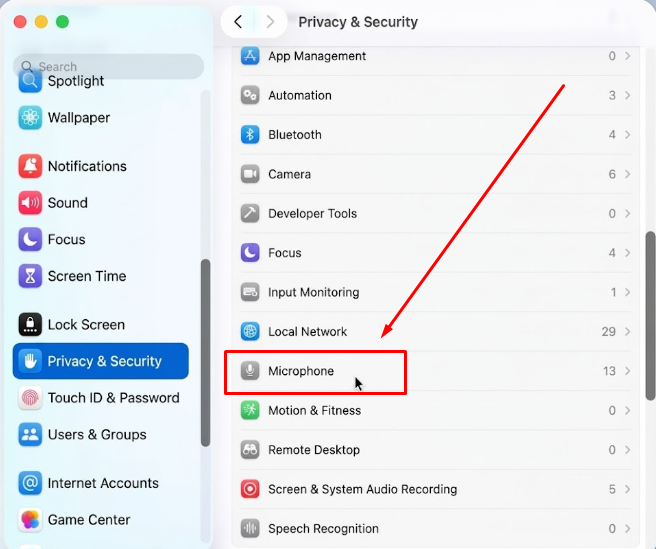
Note: The per-app permission list only populates after an app has requested microphone access for the first time. If Zoom or Teams is not listed, open the app and start a test meeting to trigger the prompt.
Step 4: Select the Webcam Microphone Inside Your Video or Streaming App
Every major video and streaming application manages its own audio device selection separately from the OS default. Even after setting the Lyra as the system default input, you must confirm the selection within each app.
Zoom
- Open Zoom, click your profile image, and select Settings.
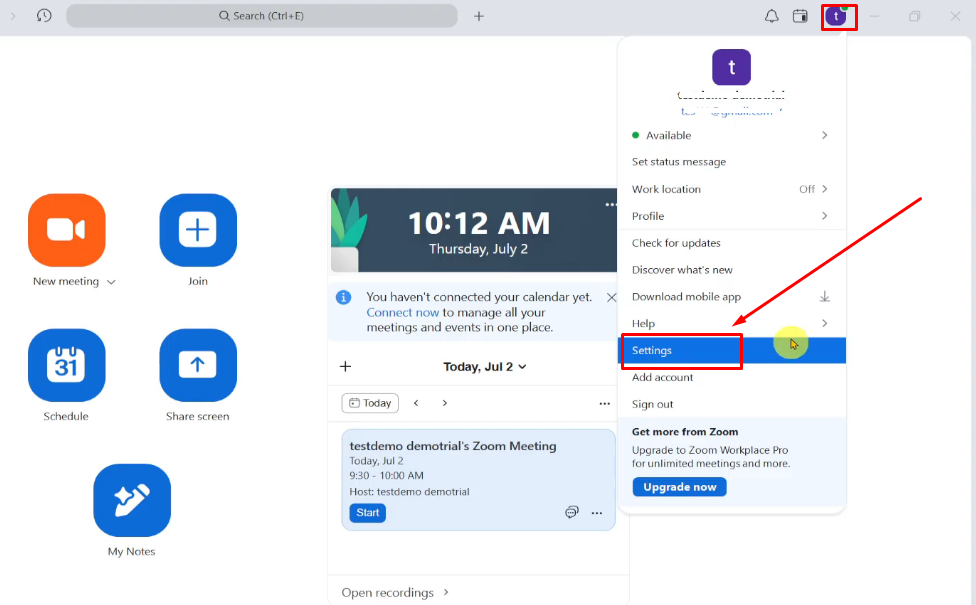
- Click on the Audio tab.
- In the Microphone dropdown, select Lyra or “USB Audio Device.”
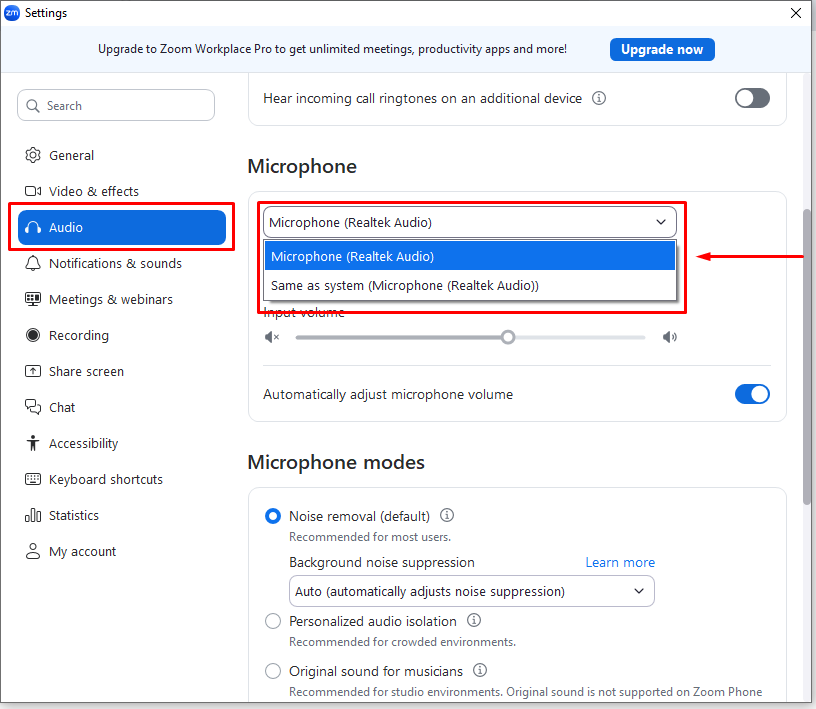
- Turn Automatically adjust microphone volume off. Zoom’s auto-gain competes with the Lyra’s onboard AI Tuning and can cause volume inconsistencies during calls.
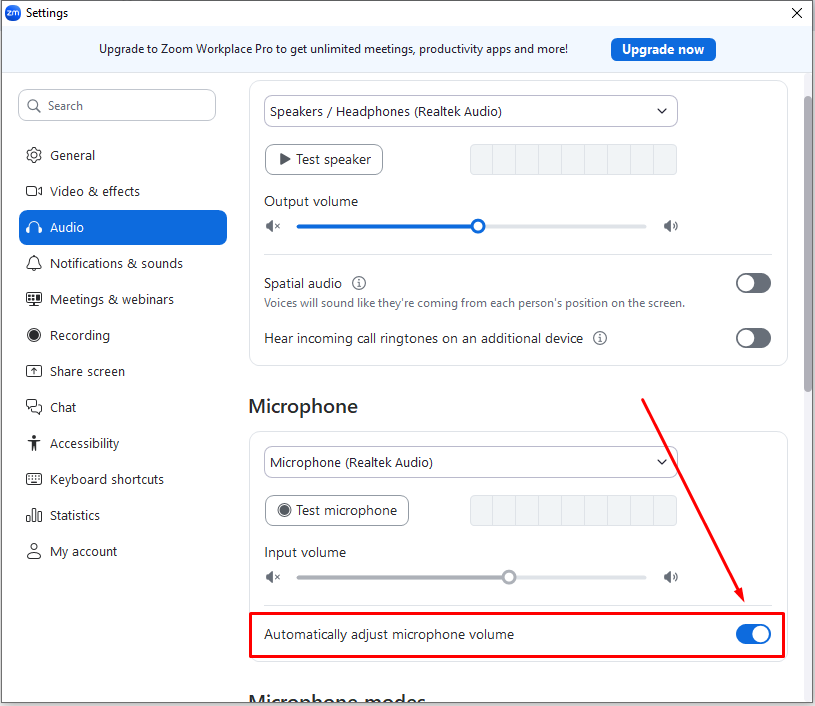
- Click Test Mic and confirm the level bar responds.
- Zoom’s built-in noise suppression can be set to low or disabled entirely if you are using Lyra’s Intelligent Noise Cancellation through HollyStudio. Running both simultaneously can produce an over-processed, robotic sound.
Microsoft Teams
- Click the three-dot menu (…) in Teams, then go to Settings > Devices.
- Under Microphone, select Lyra from the dropdown.
- Confirm the real-time input level bar registers your voice before joining a meeting.
- Go to Settings > Audio and set Noise suppression to Off when Lyra’s Intelligent Noise Cancellation is active in HollyStudio. Running both noise suppression systems simultaneously causes muffled audio.
OBS Studio
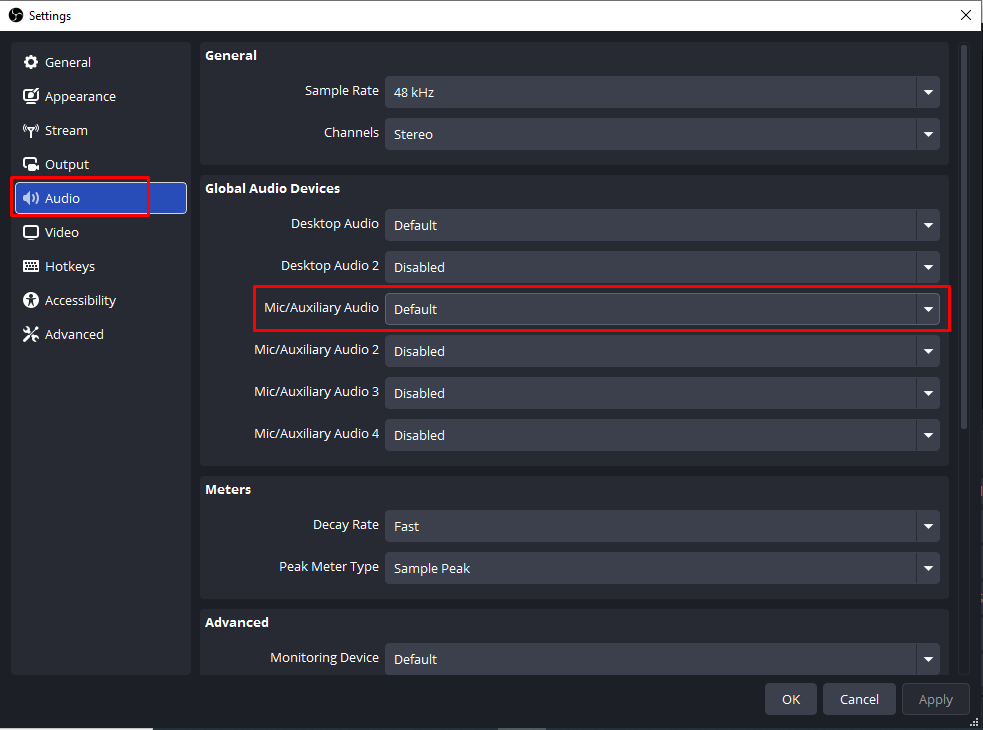
- Open OBS and go to Settings > Audio > Global Audio Devices. Set Mic/Auxiliary Audio to Lyra (or “USB Audio Device”).
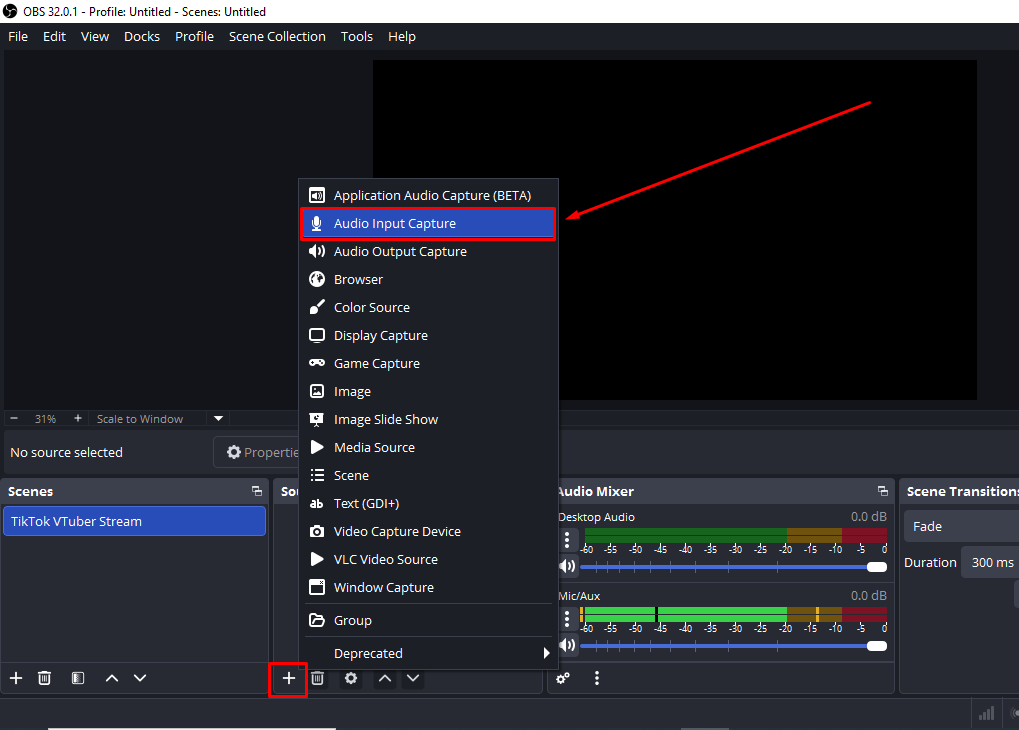
- For per-scene routing, add an Audio Input Capture source to a scene, open its properties, and select Lyra as the device. This lets you assign different audio sources to different scenes independently.
- In the Audio Mixer, the Lyra channel appears as a VU meter. Right-click the channel and select Properties to confirm the device assignment.
- If you add a Noise Suppression filter to the Lyra channel in OBS, disable it when HollyStudio’s Intelligent Noise Cancellation is already active to avoid the same double-processing issue.
Step 5: Optimize Audio Quality Using HollyStudio
The Lyra’s built-in microphone captures 48 kHz/24-bit audio, but the full range of audio controls is only accessible through the HollyStudio companion application. This section covers the three settings with the most direct impact on microphone quality.
Install and launch HollyStudio:
- Download HollyStudio from the Hollyland website.
- Install and launch the app with the Lyra already connected and showing a solid blue LED.
- HollyStudio detects the Lyra automatically over the same USB-C connection. No additional configuration is needed for detection.
Core audio settings:
- Intelligent Noise Cancellation. Click the gear icon under the preview screen to open Settings. Click the Audio Settings panel and turn on the Noise cancellation switch. Toggle this on to suppress keyboard clicks, fan noise, HVAC hum, and room echo. Processing operates at the device level, meaning it modifies the audio stream before any app receives it. When this is active, disable app-level noise filters in Zoom, Teams, or OBS.
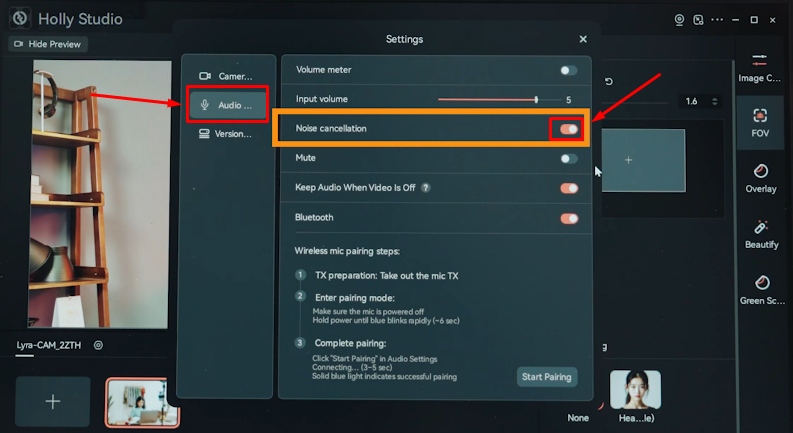
All changes take effect immediately on the live USB audio stream. No reboot or app restart is needed after adjusting settings in HollyStudio.
Expanding the Microphone Setup: Connecting the LARK A1 to the Lyra
The Lyra includes a built-in wireless receiver that pairs directly with the LARK A1 transmitter, letting you capture close-mic audio from a lapel position without adding a separate receiver dongle or audio interface to your setup. This is particularly useful for educators or presenters who move away from their desks during a session.

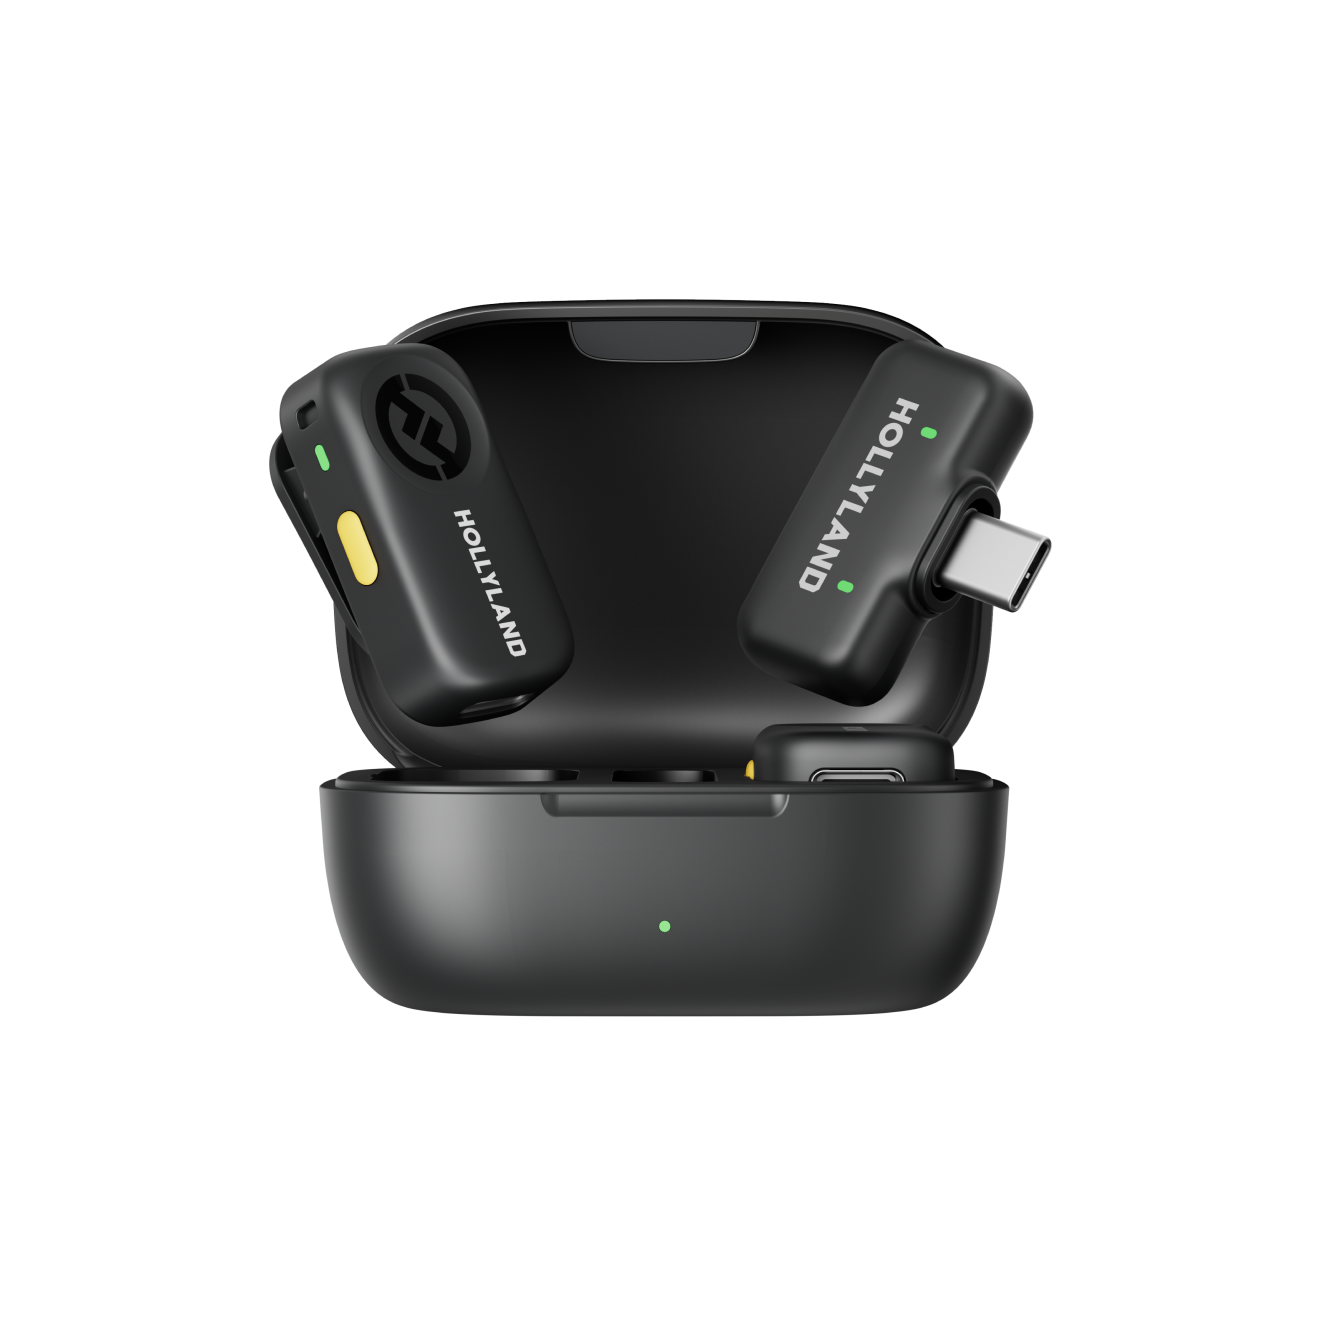
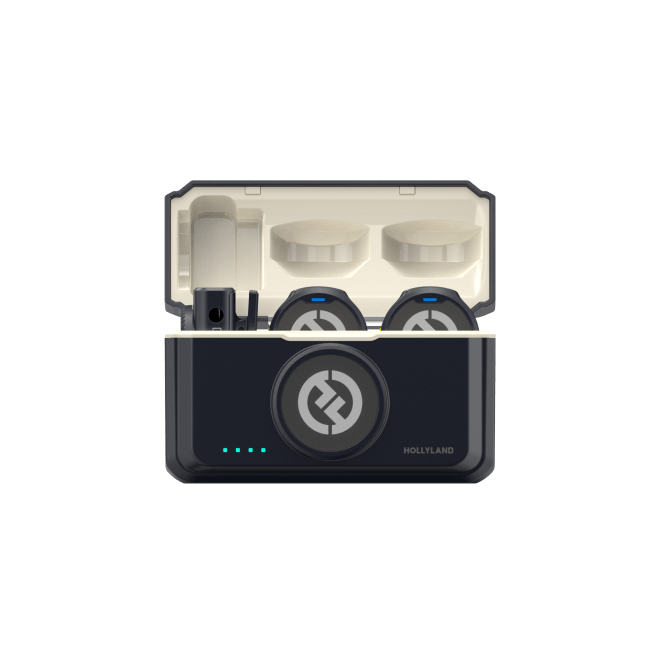
Hollyland LARK A1 - Affordable Wireless Microphone
A perfect starter mic for creators on a budget. It’s simple to use and features effective noise cancellation.
Key Features: 48kHz/24-bit | 3-Level Noise Cancellation | 54-Hour Battery
Pairing steps:
- Confirm the Lyra is connected and showing a solid blue LED, and that HollyStudio is open.
- Turn off the LARK A1 transmitter if it is currently powered on.
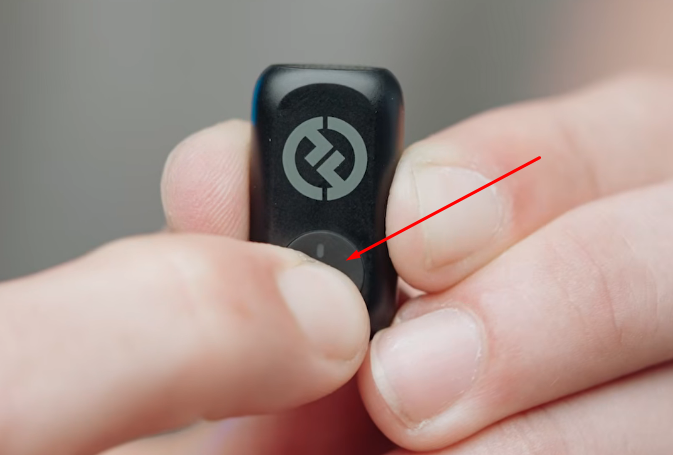
- Long-press the LARK A1 power button for approximately 6 seconds until the indicator flashes rapidly, which places it in pairing mode.

- In HollyStudio, navigate to Settings (gear icon under the preview screen) > Audio Settings > Toggle ON Bluetooth, and click Start Pairing.

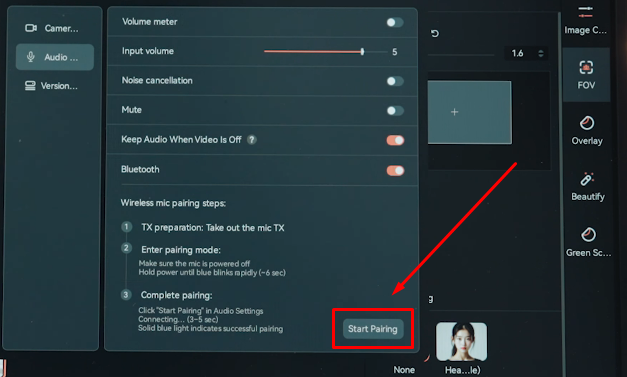
- Wait for the LARK A1 indicator to go solid. Solid blue means Lyra and LARK A1 are paired, and solid green means that both devices are successfully connected and are in use.
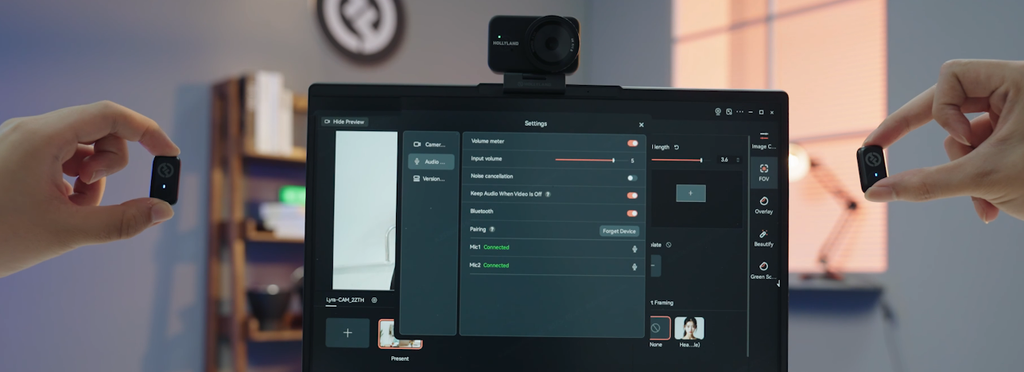
Once paired, the LARK A1 audio feeds into the same USB audio stream the computer reads. No additional changes are needed in Zoom, Teams, or OBS.
Troubleshooting: Webcam Microphone Not Showing Up or No Sound
If the Lyra’s microphone is missing from device lists or recognized but silent, the checklist below covers the five most common failure states.
- LED not illuminated after plugging in: The USB port may not be supplying the required 5V/1A power. Try a different USB-C or USB-Aport, switch from a passive hub to a direct or powered dock connection, and swap the USB-C cable to rule out a cable fault.
- Lyra not listed in OS input devices: On Windows, open Device Manager > Sound, video and game controllers and look for a yellow warning icon on any Lyra or USB audio entry. Unplug the Lyra, wait 10 seconds, and reconnect to force re-enumeration. On macOS, open Audio MIDI Setup in Applications > Utilities and check whether the Lyra appears as a device independently of System Settings.
- Device listed but input level does not respond: Confirm Windows privacy toggles are on at Settings > Privacy & Security > Microphone. On macOS, confirm per-app permission in Privacy & Security. Then open HollyStudio and check that Intelligent Noise Cancellation is not set to an extreme suppression level that is silencing ambient input; reduce the threshold and retest.
- Audio sounds muffled or robotic: Disable the app-level noise filter in Zoom, Teams, or OBS when Lyra’s Intelligent Noise Cancellation is active in HollyStudio. Running both simultaneously produces heavily over-processed audio.
- Lyra works in one app but not another: Each app maintains independent device selection. Return to Step 4 and confirm Lyra is explicitly selected as the microphone in the affected app’s audio or device settings panel.
Frequently Asked Questions
Does a webcam microphone work without installing any drivers?
Yes. UVC-compliant webcams like the Lyra are recognized as both a video device and an audio input device by Windows 10/11 and macOS 12 and later via plug-and-play over USB-C. No separate driver installation is required for basic microphone functionality. HollyStudio is only needed for advanced audio controls such as Noise cancellation and LARK A1 pairing.
Why does my app keep defaulting back to my laptop microphone?
Most apps save device settings locally, separate from OS defaults. Selecting your webcam mic under Audio or Devices applies immediately. Zoom and Teams usually remember this choice. If the app switches back to your laptop mic, check for USB disconnections, power-saving sleep, blocked Windows or macOS microphone permissions, or app updates and cleared caches resetting settings. To prevent this, connect directly to a high-power USB port, disable “Allow applications to take exclusive control of this device,” and grant Zoom or Teams permanent microphone access in system privacy settings.
Can I use the Lyra’s built-in mic and a wireless lavalier at the same time?
The Lyra’s built-in wireless receiver for LARK A1 lets you pair a LARK A1 transmitter directly to the webcam. You can activate Bluetooth and select the Start Pairing option from the Audio Settings panel in HollyStudio
What sample rate should I set in Windows for the best webcam microphone quality?
Set the Windows audio format to 2 channel, 24 bit, 48000 Hz in the Lyra’s Advanced properties panel, accessible from the Recording tab in the classic Sound control panel. This matches the Lyra’s native 48 kHz/24-bit output and avoids resampling artifacts that can reduce audio clarity.
Why does my webcam microphone sound muffled or robotic?
Double-stacking noise suppression is the most common cause. Running both an app-level noise filter in Zoom, Teams, or OBS and the Lyra’s Intelligent Noise Cancellation simultaneously creates over-processed audio. Turn off the app-level filter when Lyra’s Intelligent Noise Cancellation is active in HollyStudio.
Conclusion
A few audio settings can make the difference across your entire setup. Once the Hollyland Lyra appears in Windows or macOS, choose its microphone as the default and assign it within each app. This keeps meetings, recordings, and streams connected to your intended audio source.