.png)
 简体中文

Introduction
Ever recorded a video only to hear muffled audio? Or struggled when nobody could hear you during calls? Your iPhone mic might not be working properly. But that doesn’t always mean the hardware is damaged. Simple settings and connection issues can cause similar problems. We have shown some tests in this guide that you can perform to figure out the trouble. For instance, you’ll learn how to check built-in and external microphones. It also covers common issues and their possible fixes. By the end, you’ll know where to look.
Why Your iPhone Mic Might Seem Like It’s Not Working
Don’t rush to blame the hardware! Check a few common causes first. Many mic problems can come from temporary blockages or settings.
- App Permissions: iOS blocks microphone access when permission is denied. Check Settings > Privacy & Security > Microphone.
- Bluetooth Audio Routing: AirPods or car systems may take over audio input. Check Control Center or temporarily turn Bluetooth off.
- Physical Obstructions: Phone cases or protective films may cover microphone openings. Remove the case and clear away any pocket lint.
- iOS Input Settings: External devices may change the selected audio source. Check Settings > Sounds & Haptics > Input.
How to Test the Built-in iPhone Microphone
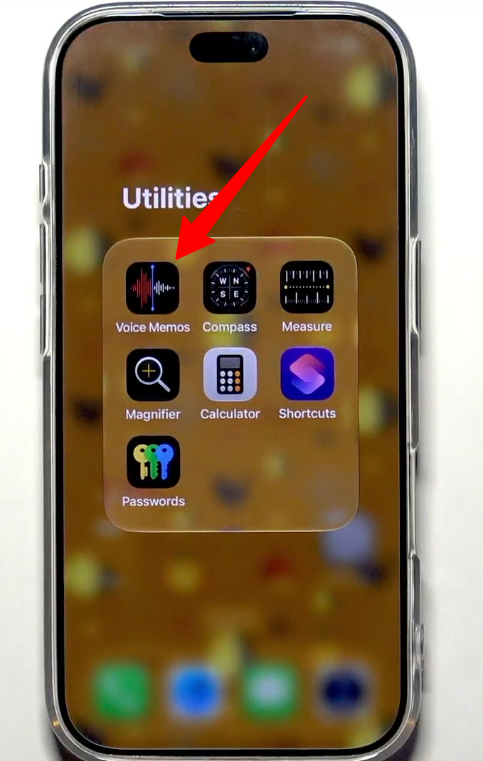
Using the Voice Memos App
- Remove your iPhone case to make sure nothing blocks the bottom microphone.
- Disconnect Bluetooth devices, including AirPods, before starting.
- Open the Voice Memos app and tap the red Record button.

- Hold your phone normally and speak clearly for at least 10 seconds.
- Speak in different styles, like softly, normally, and then loudly.
- Tap Stop and play back your recording.
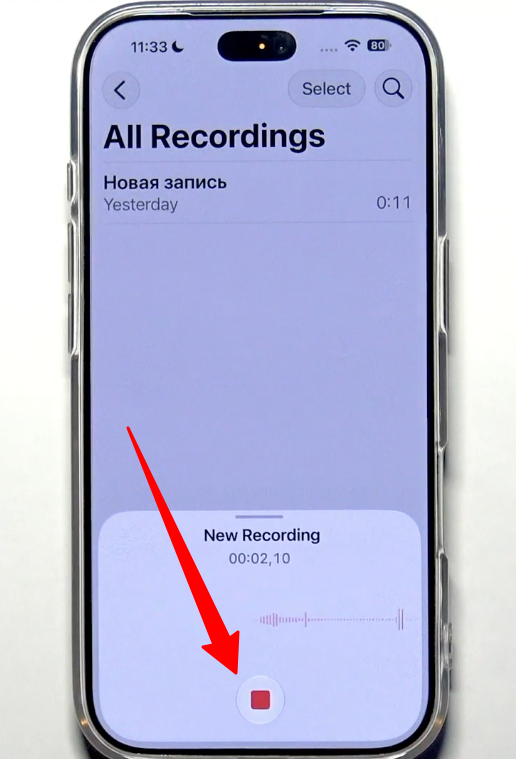
- Listen to your recording. If it’s clear, your built-in iPhone mic is working.
Making a Test Call or Video Recording
You can test your iPhone microphones through calls or videos. FaceTime and voicemail are useful options for this. iPhones have multiple microphones at the bottom, front, and rear. Different microphones work depending on the app and phone position.
Option 1: FaceTime A Friend or Record a Video
- Open FaceTime and video call a trusted friend or family member.
- Hold your iPhone near your ear and speak normally.
- Ask the recipient if your voice sounds clear, muffled, or crackly.
- Switch to speakerphone and hold your phone in front of your face.
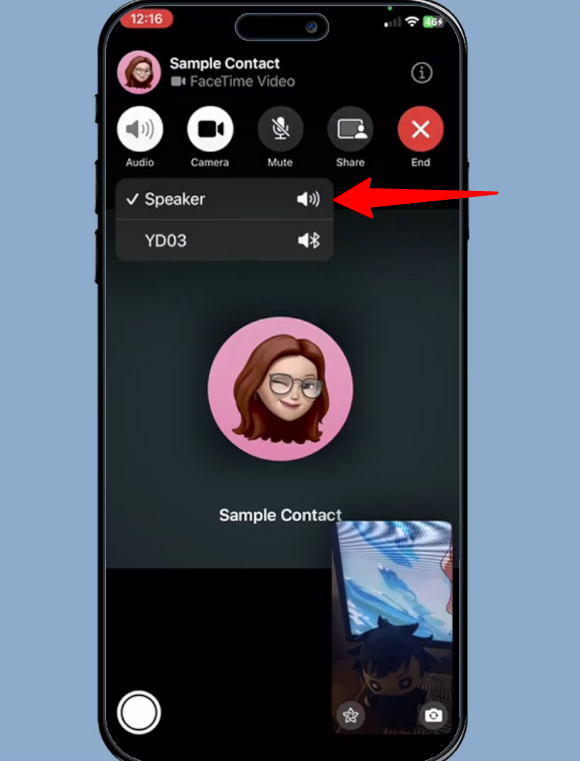
- Speak naturally from about one foot away and check audio clarity.
- If nobody answers, open the Camera app and select Video.

- Switch to the front-facing camera and record yourself speaking.

- Record for 10 seconds, then play the clip back.
- Listen for clear audio, distortion, or other sound issues.
Option 2: Send a Dummy Voicemail
This method checks the primary (bottom) mic of your iPhone used during regular phone calls. It works through your carrier’s voicemail service.
- Go to the Phone app and open its dial pad.
- Hold down the 1 button to reach your voicemail. If that doesn’t work, call your own number.
- Follow the automated instructions to change your voicemail greeting or recorded name.
- Keep your iPhone near your mouth and speak clearly.
- When the system plays your recording, listen carefully.
- Notice any weak sound, background static, or crackling.
- Hang up without confirming the changes to keep your existing greeting.
Testing Each Mic Separately
Your iPhone has three microphones in different locations. Each one handles different recording and calling tasks. You can check them separately using built-in apps.
Bottom Microphone (Primary Mic)

The bottom microphone handles regular calls and voice recordings. It also captures audio through the Voice Memos app. Open Voice Memos and record yourself speaking near the phone’s bottom edge.
Front Microphone (Receiver Mic)

The front mic is situated near the top earpiece. It helps capture audio during FaceTime and speakerphone calls. It also works with front-camera video recordings. That’s mainly through the Camera app’s video mode.
Rear Microphone
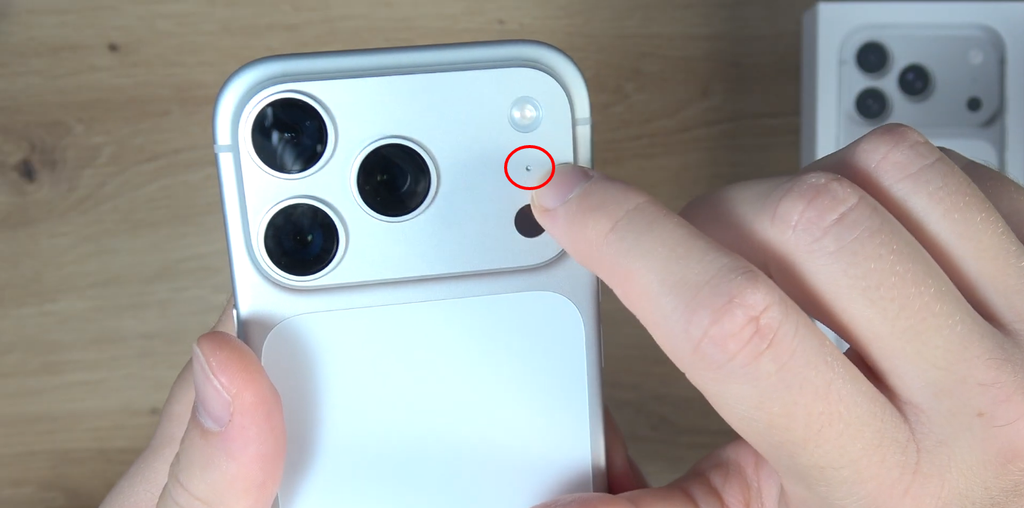
The rear mic is located near the iPhone’s camera lenses. It captures sound during regular rear-camera video recordings.
How to Test an External Mic on iPhone
Connecting an External Microphone Through Lightning or USB-C
Choosing the Right Adapter
The adapter you need depends on your mic’s connection. USB-C microphones can plug directly into compatible iPhones. No extra adapter is needed for these models. Using a USB-A microphone? Grab a USB-C to USB-A adapter.
For 3.5mm microphones, you’ll need a different adapter. Get a USB-C to 3.5mm adapter supporting microphone input. Apple’s USB-C to 3.5mm Headphone Jack Adapter works as one option.
- Connect your mic and adapter to your iPhone.
- Then open your favorite recording or calling app.
- Check the mic’s indicator lights for power confirmation.
- These lights may also display gain or connection status.
Checking Whether iOS Detects Your Microphone
iPhones don’t display a permanent icon for external microphones. But you can check connected audio devices through Control Center.
- Swipe down from the screen’s upper-right corner.
- Tap the AirPlay icon inside the media playback panel.
- Look for Headphones or your microphone’s device name.
- It should replace the usual iPhone audio output label.
Making Sure the App Uses Your External Microphone
Some iPhone apps don’t automatically switch to external microphones. They might keep using the built-in mic instead. A quick recording test can help identify the active input.
Using Voice Memos
Open Voice Memos and bring your external mic near your mouth. Whisper into it without touching the iPhone’s bottom mic. Next, gently scratch the built-in microphone opening. Watch how the recording waveform reacts to both sounds. A stronger response to your whisper suggests external mic usage. A much weaker response to scratching supports that result.
Using Third-Party Recording Apps
Some recording apps let you choose audio inputs manually. Popular options include Blackmagic Cam, Filmic Pro, and ShurePlus MOTIV. Head into the app’s audio settings and check available options. Look for Audio Source or Input Selection. Select External Microphone instead of Built-in Microphone. Some apps might call it Digital Audio Interface.
Checking Through Control Center
Start recording with your preferred iPhone app first. Then swipe down to open Control Center. Look for the orange microphone indicator near the screen’s top. iOS also shows which app currently accesses your microphone.
Testing a Wireless Lavalier Microphone
Wireless mics need extra checks. Test their connection and audio levels before recording. This helps catch pairing issues and unwanted distortion early.

Checking the Wireless Connection
Plug the wireless receiver (RX) into your iPhone’s USB-C port. Turn on the transmitter (TX) and check their indicator lights. Constantly lit lights usually mean both units are paired. Once connected, you can start recording right away.
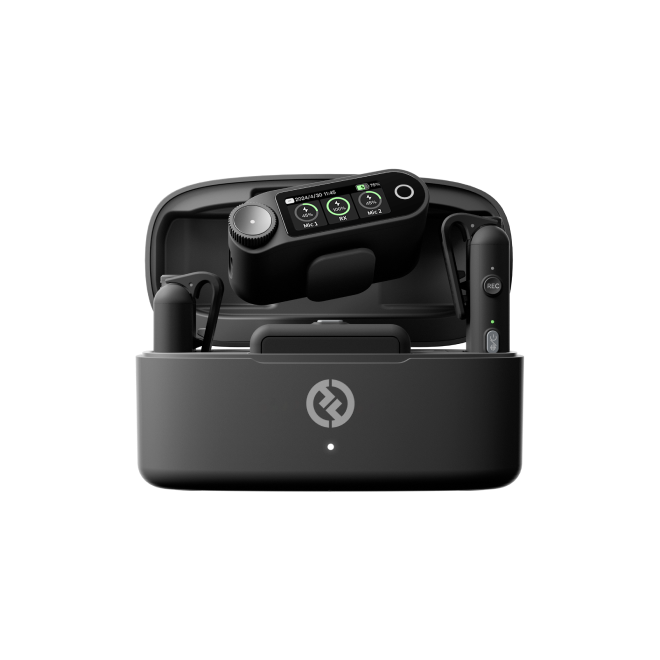
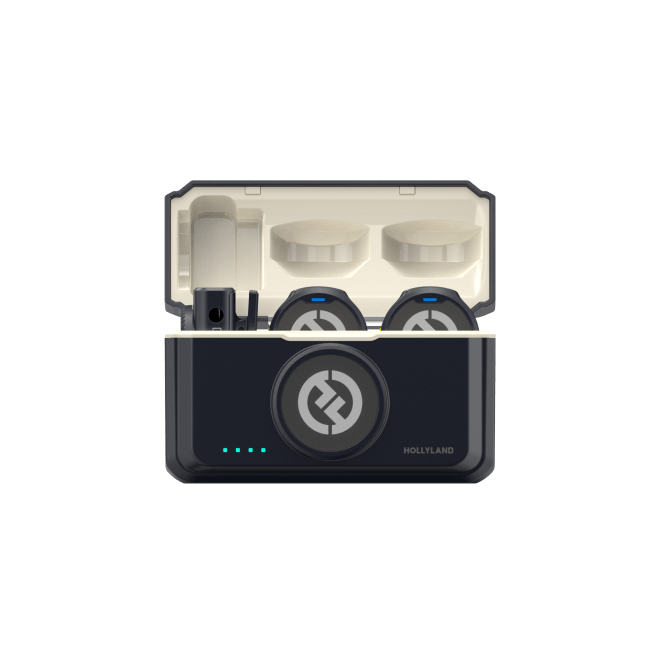
Some external wireless options may not have status indicators, while others do, such as the Hollyland LARK A2. The receiver and transmitter lights stay blue when the mic is paired and recording audio at 48kHz/24-bit. So it’s easier to confirm wireless connection stability in such mics just from a quick glance.
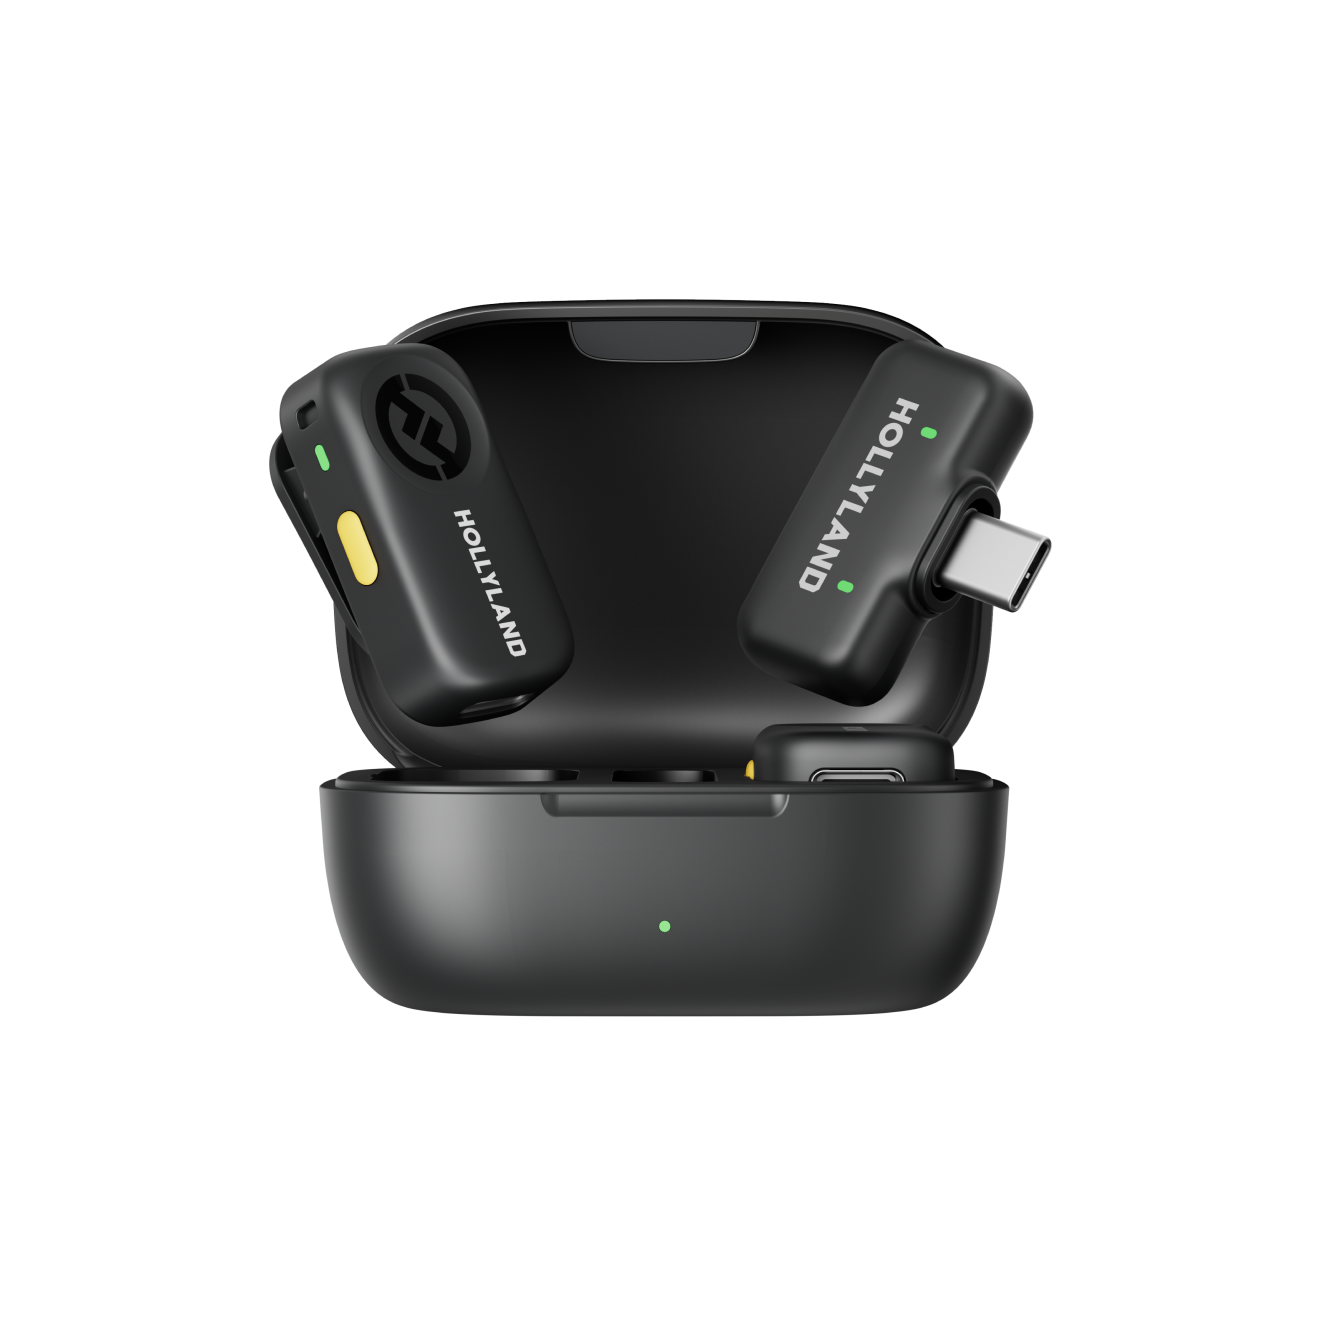
Hollyland LARK A2 - Clip-on Microphone
An ultra-light 8.5g wireless microphone engineered for effortless mobile recording, featuring smart AI noise cancellation and studio-grade sound.
Key Features: 8.5g Clip & Go | AI Noise Cancellation | 42 Hours Battery

Checking Recording Levels
Speak naturally into the lavalier before starting your recording. Watch the receiver display or your app’s audio meters. Try keeping audio peaks between -12 dB and -6 dB. This range usually gives your recording enough headroom. If the meter hits red, lower the transmitter’s gain. This helps prevent clipping and unwanted digital distortion.
Testing Distance and Sound Quality
Clip the microphone onto your shirt and start recording. Walk away from your iPhone while wearing the mic. Turn your back to check how the signal holds up. Play the recording through headphones and listen closely. Watch for static, interrupted audio, or excessive background noise.
How to Check Microphone Permissions on iPhone
When an app isn’t granted microphone permission, iPhone blocks its access. This can make the mic seem broken. The app may stay silent, fail recordings, or show errors.
Fixing Microphone Permissions for Individual Apps on iPhone: Step by Step
If an app cannot hear your voice, follow these steps:
- Open the Settings app on your iPhone.

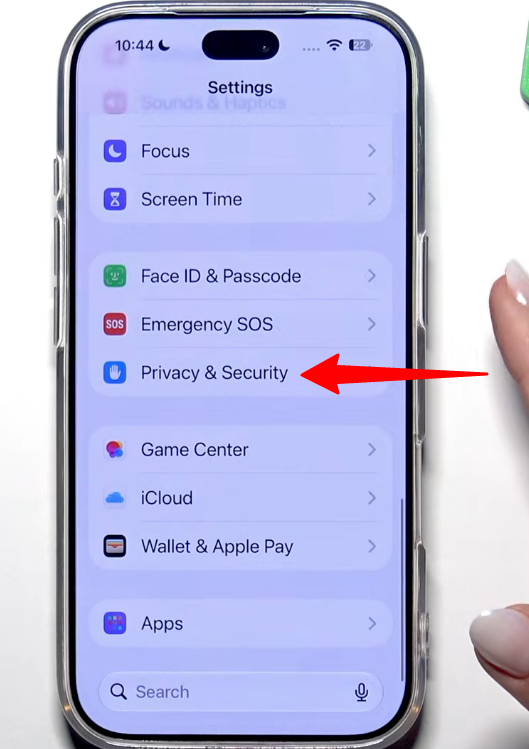
- Scroll down and select Privacy & Security.
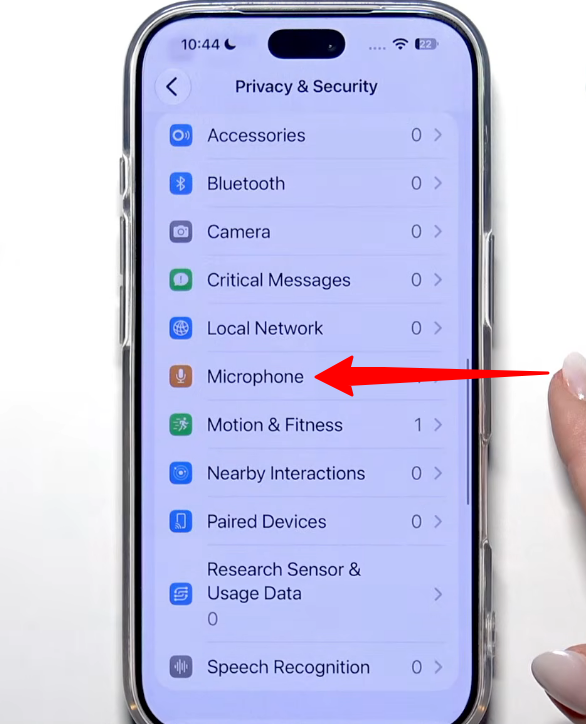
- Tap Microphone to view apps requesting access.
- Find the app that cannot capture your voice.
- Turn its switch On until it appears green.
Troubleshooting When the Mic Test Fails
| Symptoms | Causes | Fixes |
| Voice Memos sound muffled or unusually low. | Dirt, pocket debris, or a phone case covering the bottom mic. | Remove the case. Gently clear the microphone openings with a soft, dry toothbrush. |
| Regular calls cannot capture your voice, but Speakerphone works. | A faulty bottom mic or incorrect audio filtering settings. | Open Settings > Accessibility > Audio/Visual. Disable Phone Noise Cancellation, if available. Select Standard under Mic Mode during calls. |
| Siri cannot hear you, and Voice Memos records silence. | A temporary iOS error or a stuck audio system. | Restart your iPhone forcefully. Press Volume Up, then Volume Down. Hold the Side button until the Apple logo appears. |
| Your mic works during calls but fails in certain apps. | Microphone access is disabled, or the app cache is damaged. | Visit Settings > Privacy & Security > Microphone.Allow access for the affected app. Restart or reinstall it if necessary. |
| The microphone stops working while Bluetooth or AirPlay is connected. | Audio input is being redirected to another connected device. | Disable Bluetooth and test Voice Memos again. Remove the problematic device from your Bluetooth list if audio returns. |
| Recorded videos contain silence or unwanted static. | Something is covering the front or rear microphone openings. | Carefully clean the microphone openings. Test both front and rear cameras to locate the affected microphone. |
| A connected external mic fails to capture audio. | Your iPhone may be using the wrong audio input source. | Plug in the microphone receiver. Open Settings > Sounds & Haptics > Input and choose the external mic, if available. |
Conclusion
Getting your iPhone mic working doesn’t need to be a headache. Start with a few quick checks before going to the service center! Check app permissions, Bluetooth connections, and anything blocking the holes. Then test your audio using Voice Memos and other apps. If your built-in mic keeps sounding weak, try an external option, like the Hollyland LARK A2. Its noise cancellation and auto-level limiter help keep audio clear. These fixes sound simple but can save you time and unnecessary trips to the repair shops.