.png)
Do you feel like something is missing in your OBS livestream, even though your camera and microphone look good? Most probably, it’s the background music. It’s because background music can fill the awkward silence in your live stream and keep your audience engaged through every pause and transition. But the question is how to add background music to OBS, right?
In this article, we are going to talk about adding music to your livestream in detail.
So, let’s get into it!
Steps to Add Background Music in OBS Studio
When it comes to inserting background music in OBS, it’s not simply a matter of opening a new music tab on your desktop or streaming from Spotify. Rather, it’s more of making a complete playlist and then inserting that into the OBS itself. Here’s a step-by-step guide on how to go about it:
Create a Scene in OBS 2025
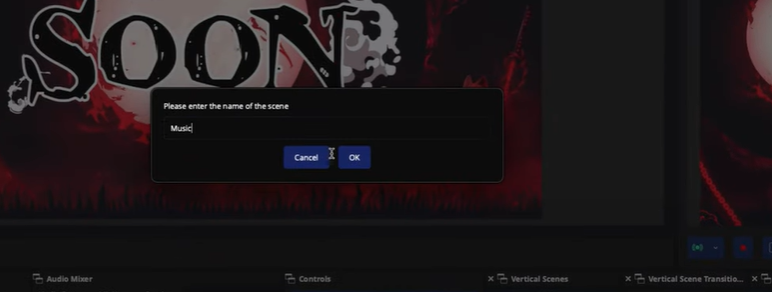
First things first. Open the OBS Studio and after that go to the bottom left of your screen and click the “+” icon.

There you will be asked to name the scene. In this case let’s name it “Music”.
It is important to create a scene in OBS so the same music playlist applies to the whole video, even when switching to “Countdown Timer” or chats.
By creating a scene called “Music” here, you will be able to add that very scene to everything from chats to gameplay. In short, your background music will keep playing no matter what.
Source Music Files for Your Track
Now, the next step is to source your media files to be added in the background. For that, you need to add MP3 files. You can go to any website where you can find royalty-free music for streaming. It can be Epidemic music or even Pixabay.

Search for the music in your favorite category. For instance, in gaming, we can choose upbeat music. Now, in the next tab, you will find an option to pick the mood for your music.

Once done, go to the next tab and pick the movement tab. You may choose any movement from slow to even chasing.
Select timing and move to the “Theme” tab. Click on the “Background Music” option from the dropdown menu. Lastly, hit the “Apply” button.

Here, you will find a list of tracks to choose from.
Simply head over to the track, trim the section you want, and hit download the MP3 file.
Cross-check if each of these music files is free to use.

Merge your Songs into a Single File
Once all your individual music files are ready, you should compile them into a single file.
For this, you can use Audacity.com.

Simply open the “Downloads” folder on your computer and drag and drop your files into Audacity one by one.

You will notice the music files stacked upon each other. Place them together one after another. In case you have 5 songs, simply drag them and attach them right after a song ends. You may even add a few seconds of 1-2 seconds of break if you want.


After this, head to files and then select “Export Audio” and then “Export Audio to the Computer.”
Make sure to download the MP3 format only.

Enable Looping and Set Audio Behavior
In the next step, import the music file to OBS Studio. For this, go to “Scenes” and select the “Music” scene that you have created in the beginning.
Now, under the “Sources” window, click on the “+” icon and click on “Media Source.”

Create a new name for this here before you proceed with setting the files on a loop. Hit “OK”.

Click on the Browse button next to the Local Source option and add the files you downloaded from Audacity.

Click on the OBS music loop feature right under the file.

Adjust Volume Levels in the Audio Mixer
Once everything is in place, the next step is to set the loudness of your music as compared to your voice. For that, go to the Audio Mixer tab and then select the playlist you have just created.
Set the volume to -35 to -40 as per your requirements.

Add the Playlist to other Scenes
Since you have decided on the pitch and edited the audio as per your custom needs, add this file to each of the scenes individually.

Under the “Scenes” tab, click on “Starting Soon.” After that, hit the “+” icon and find “Music” in the dropdown menu. Click “OK”.

Replicate the same thing for other aspects of your OBS livestream, such as Countdown Timer, Be Right Back, or even Chats.
Test Playback and Start Streaming Confidently
Now, the last thing after setting up is to test playback on the OBS Studio. Hit the Preview button in OBS to see how your audio levels sound in real time.
Make sure your voice is clear, the music isn’t too loud, and the loop plays smoothly without interruptions. You can also record a short test clip to double-check the final output. Once you’re happy with the mix, hit Start Streaming and go live with confidence.
And that’s all you need to start streaming with background audio!
Conclusion
There, you have it! That’s how you can add background music to OBS without having to worry about multiple tabs opened and taking fewer resources from your PC, enhancing the live stream with music.
In case you are going for a long stream, you may choose to add a few more songs to your playlist using the same process.
Even though it seems like a bit of a setup in the beginning, it’s totally worth your time.
FAQs
Does OBS Studio include built-in music or sound effects?
No, OBS Studio doesn’t offer any preloaded music or sound effects. You need to upload your own audio files or download royalty-free music from external sites. This gives you full control over what plays and when.
Which kind of audio is the best to use as background music in OBS?
Although OBS Studio can support different kinds of audio like OGG and WAV, using an MP3 file is the best option. It’s because it loads smoothly and takes less load on the system.
Can I make background music start automatically during a stream?
Yes, you can automate playback using OBS tools like Scene Transitions or third-party plugins such as Advanced Scene Switcher. Youc can set it up to trigger music when switching to specific scenes.
Will viewers hear the background music in my stream and recordings?
Yes, if you add music to your OBS scene, it becomes part of your broadcast and recordings. Make sure to check your audio track settings to include it in both outputs.
What should I avoid when adding background music?
Avoid copyrighted tracks, music with distracting vocals, or overly loud audio. Always test volume levels before going live to ensure the background complements your main content.