.png)
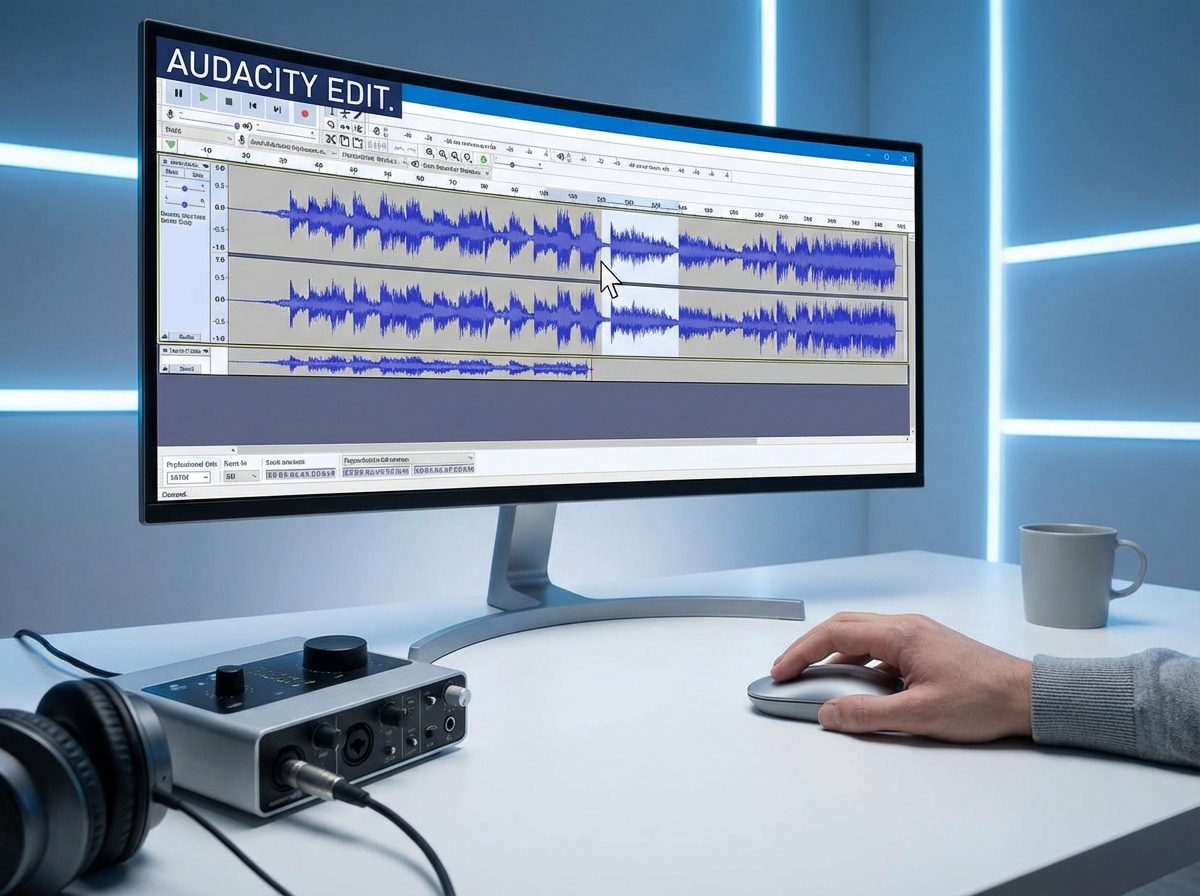
Audio editing is a crucial skill for anyone involved in music production, podcasting, or audio content creation. Among the plethora of audio editing software available, Audacity stands out as a powerful and user-friendly tool. One of the fundamental tasks in audio editing is trimming, which involves removing unwanted parts of audio files to enhance the overall quality and flow. In this comprehensive guide, we’ll delve into the intricacies of trimming audio in Audacity, providing step-by-step instructions and practical tips for users at all skill levels.
Understanding the Basics of Audacity
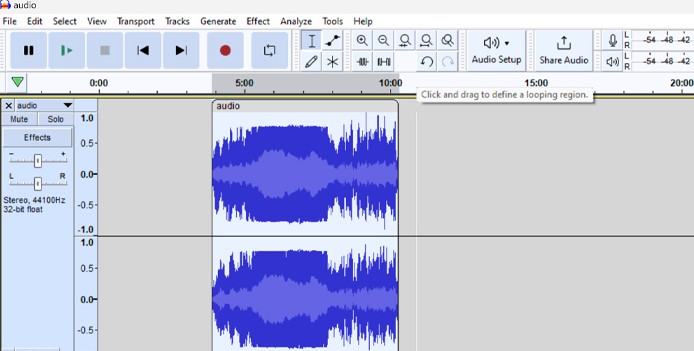
Before diving into trimming techniques, it’s essential to familiarize yourself with Audacity’s interface and basic functionalities. Audacity features a user-friendly layout with intuitive controls, making it accessible to both beginners and seasoned professionals. Upon launching Audacity, you’re greeted with a straightforward workspace comprising tracks, playback controls, and a variety of editing tools.

Audacity’s Notable Effects
Audacity facilitates audio recording from various sources, including standard microphones, mixers, and digital files extracted from videos or recordings. Additionally, it can capture live audio streams if your computer is equipped with the appropriate sound card.
The software encompasses a wide array of built-in effects to customize audio files according to your preferences. Additionally, Audacity offers a range of specialized effects, including:
- Distortion: Alter the audio file to create a ‘crunchy’ or ‘abrasive’ sound.
- Truncate Silence: Minimize passages with audio below a defined threshold to avoid excessive silent parts.
- Wahwah: Create sound using a movable band-pass filter regulated by a low-frequency oscillator.
- Phaser: Combine phase-shifted signals with the original signal, controlled by a low-frequency oscillator.
- Reverb: Add reverberation to enhance ambiance and authenticity.
- Reverse: Invert the audio, playing the end first and the beginning last, useful for censoring or encoding hidden messages.
- Echo: Repeat selected audio at intervals to simulate an echo effect.
- Limiter: Control signals below a specified input level to prevent signal surges from exceeding the threshold.
- Paulstretch (extreme stretch): Significantly slow down audio with minimal pitch alteration.
These effects provide users with a versatile toolkit to enhance and manipulate audio content according to their creative vision and technical requirements.
Trimming Audio in Audacity
Trimming audio allows you to retain specific segments within your audio track while discarding everything else. Ensure you’ve selected the Selection tool, accessible by pressing F1 if the toolbar isn’t visible.
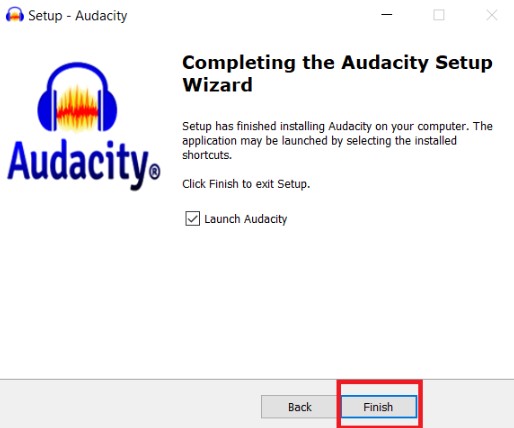
Step 1: Installation and Launching Audacity
Obtain Audacity from the official website and install it on your computer. Initiate Audacity by double-clicking its icon.
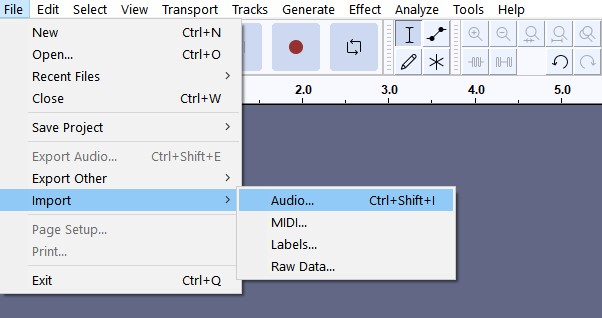
Step 2: Importing Your Audio
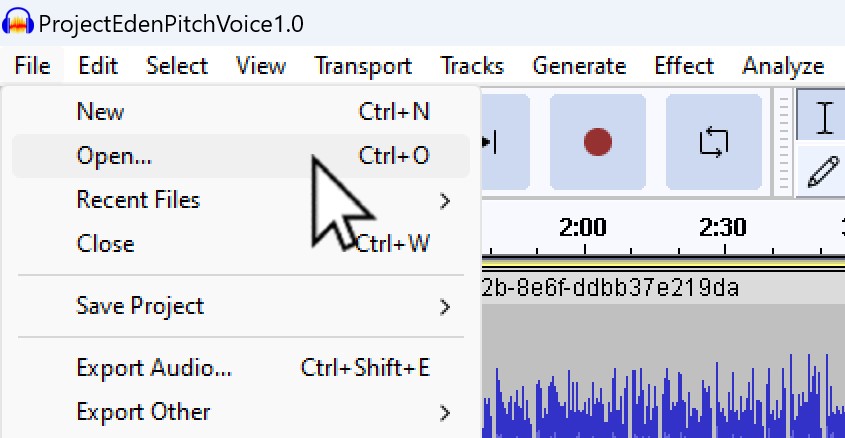
Navigate to “File” > “Open” and pick the audio file you intend to trim. Alternatively, drag and drop the audio file directly into Audacity or utilize the import option.
Step 3: Auditory Assessment
Before proceeding with trimming, it’s advisable to listen to your audio. Press the Spacebar to commence playback and press it again to halt. This allows you to identify the sections for trimming.
Step 4: Selecting and Trimming
- Choose the section of the audio track you wish to preserve.
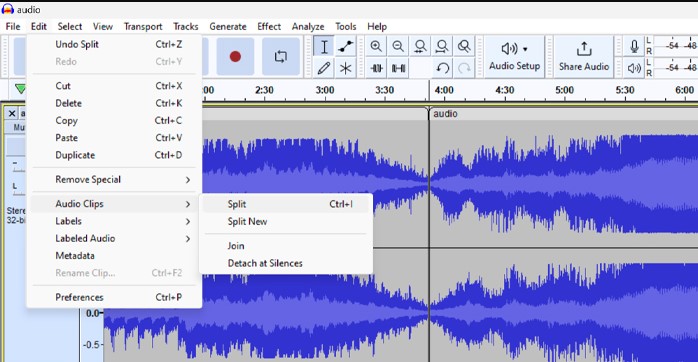
- Navigate to the Edit menu, then Remove Special (or Clip Boundaries) > Trim Audio. Alternatively, use the shortcut Ctrl + T.

- This action removes all except your chosen selection, leaving a single audio clip.
Step 5: Splitting an Audio Track
- Splitting an audio file enables you to divide it into two clips, facilitating the addition of background music or rearrangement of the recording sequence.
- With the Selection tool, pinpoint the location in the audio track where you intend to split it. Ensure accuracy by listening to the audio track.
- Zoom in and out using Ctrl + 1 and Ctrl + 3 or the lens icon to refine your selection.
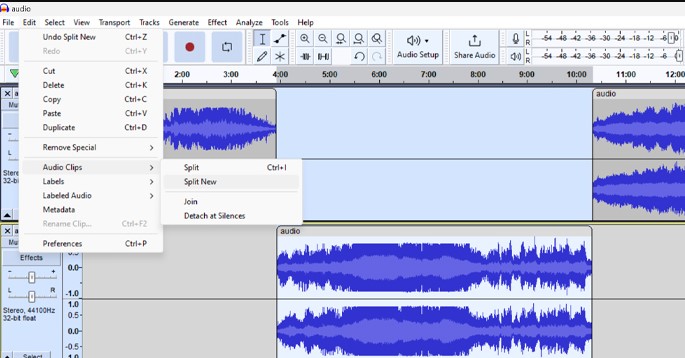
- After identifying the desired spot, access the Edit menu and choose Audio Clips > Split or use the shortcut Ctrl + I.
- This action divides your audio track into two separate clips, each editable individually.
Step 6: Combining Trimming and Splitting
- Suppose you want to remove a section from the middle of the audio track while splitting it, creating a gap between the resulting clips.
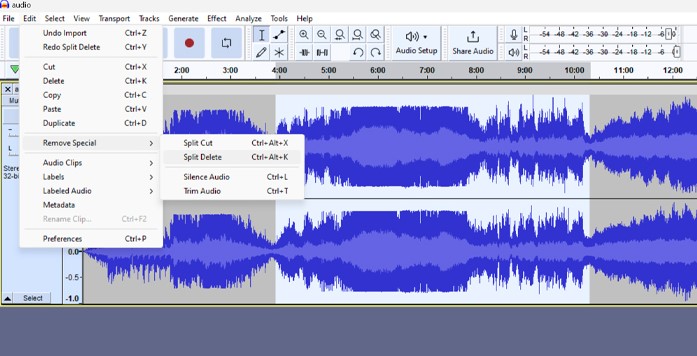
- Select the segment for removal and click Edit > Remove Special > Split Delete.
- This action yields two clips with a gap between them, preserving the project’s duration when incorporating additional music or audio tracks.
Step 7: Creating Separate Tracks
- In instances where you wish to retain a trimmed segment in a separate track for future use or individual editing:
- Select the segment you want to preserve and navigate to Edit > Audio Clips > Split New.
- The trimmed audio will be segregated into a distinct track, distinct from the original.
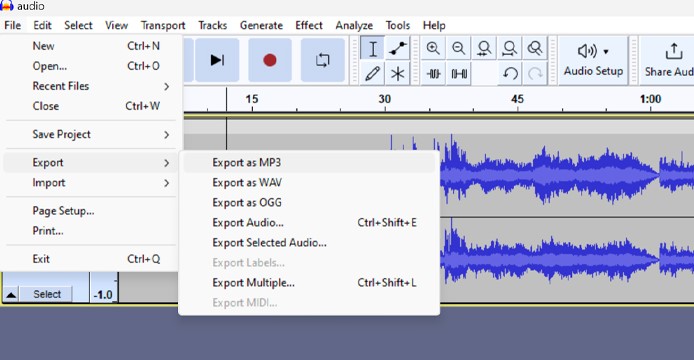
Step 8: Exporting Your Trimmed Audio
Post-trimming, proceed to “File” > “Export” and opt for your preferred audio format (e.g., MP3, WAV). Assign a filename, select a storage location, and click “Save.” Depending on the chosen format, additional information may be required.
These techniques empower users to precisely manipulate audio content in Audacity, whether for concise editing or intricate project organization.
Cutting Audio in Audacity
Step 1: Initiating the Process
- Commence your audio editing journey by launching Audacity, a versatile tool renowned for its prowess in audio manipulation. Access the ‘File’ menu located at the top left corner of the interface.
- Within the ‘File’ menu, locate and click on ‘Open’ to explore your computer’s files and select the desired audio file. Audacity accommodates various formats, ensuring seamless integration regardless of the file type.
Step 2: Audio Selection

- With your chosen file open, the next pivotal step entails pinpointing the specific segment of the audio for cutting. This task is facilitated by the “Selection Tool,” identifiable in the toolbar by its ‘I-beam’ icon.
- Click on the timeline to mark the commencement of your desired section, then drag to delineate its endpoint. This action highlights the targeted portion of the audio. Attention to detail is crucial here, warranting meticulous selection to ensure accuracy.
Step 3: Execution of the Cut
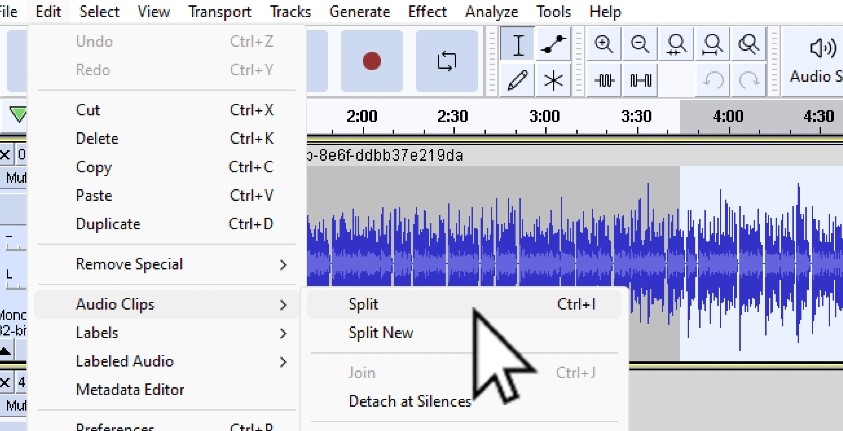
- Once content with your selection, proceed to execute the cut. Navigate through the ‘Edit’ menu, progressing to ‘Audio Clips,’ and ultimately, opt for ‘Split.’ This maneuver effectively isolates the selected segment from the remainder of the audio, simplifying its removal without affecting adjacent sections.
- To expunge the isolated segment, simply depress the ‘Delete’ key on your keyboard. This action eradicates the designated part, leaving the rest of the audio unscathed.
Through these delineated steps, we’ve demystified the fundamental process of cutting audio in Audacity. Mastery of these procedures equips you with the proficiency to navigate through audio editing endeavors seamlessly, fostering the creation of refined and professional-grade audio projects.
Cutting and Trimming Multiple Tracks
As a podcaster, managing various audio files for each participant in your project is commonplace. Suppose you aim to eliminate a recurring introductory segment across all tracks. In that case, you can efficiently cut audio simultaneously from the beginnings of multiple clips.
Step 1: Selecting and Cutting
- Listen to the audio and determine the duration you wish to remove from the tracks.
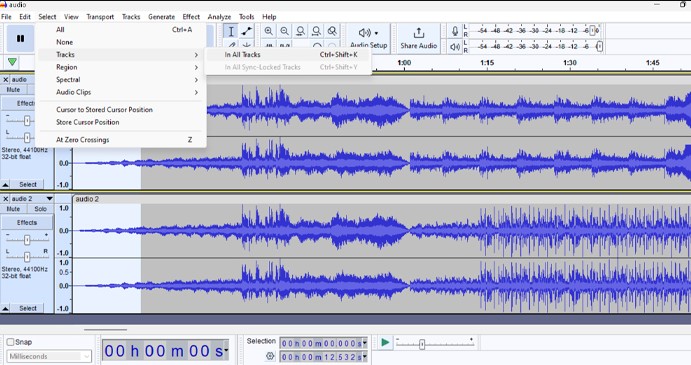
- Navigate to Select > Tracks > In All Tracks or use the shortcut Ctrl+ Shift + K. Audacity will highlight the identical section across all tracks.
- Press Delete to eradicate the selected area from all tracks simultaneously.
Step 2: Rearranging Clips and Editing
In Audacity, after splitting, trimming, and cutting audio files, you have the flexibility to rearrange them to craft the narrative of your project. Move trimmed audio files within the timeline by positioning the cursor stop the audio track, where the file name is displayed. Click and drag the audio clip as the cursor transitions to a hand icon.
Step 3: Expanding Editing Capabilities
Audacity offers a plethora of editing capabilities beyond cutting and trimming. You can adjust volume, eliminate echo and noise, incorporate sound effects, apply EQ, and much more. Once mastered, Audacity emerges as an indispensable tool capable of elevating the quality of your audio projects.
Step 4: Exporting the Audio File
To preserve your trimmed audio file, exporting is essential. Listen to the file to ensure all cuts and trims are executed accurately.
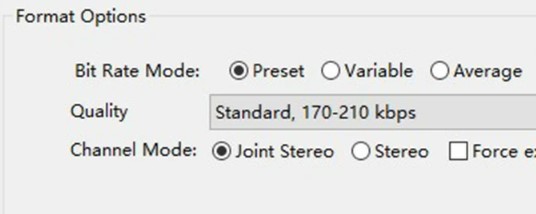
- To export the audio, navigate to File > Export and select your desired audio format. Choose the destination folder and assign a name for the newly trimmed audio file. Additionally, you can specify bitrate mode, quality, and channel mode.

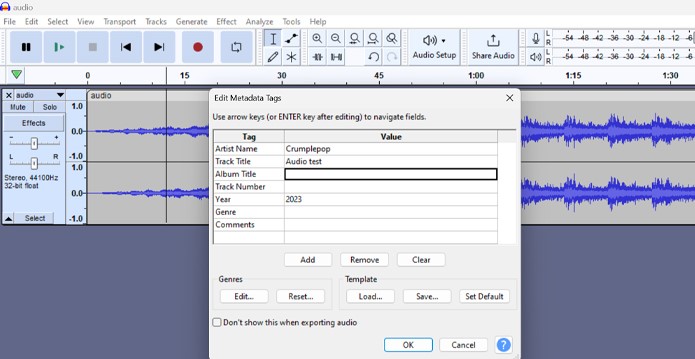
- Click Save and proceed to input metadata tags. These tags are crucial for podcasts, allowing you to set the name and episode number. Ensure to include them during the export process.
- Click OK to finalize the export, and your trimmed audio will be stored in the designated folder.
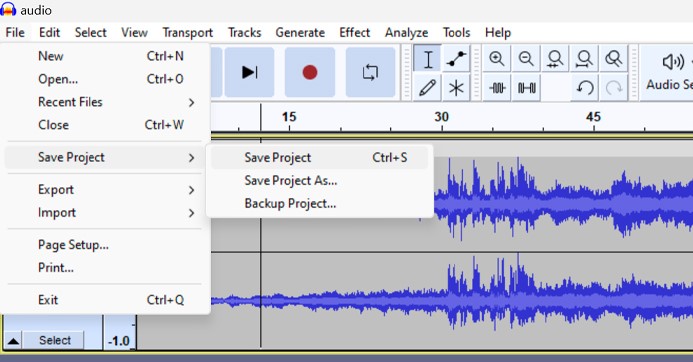
Step 5:Saving the Audacity Project
If you intend to resume your editing session at a later time, saving the Audacity project is advisable. Simply navigate to File > Save Project to preserve your work for future editing sessions.
Addressing Common Audio Editing Challenges
Problem: Difficulty in Precise Selection
Solution: Achieving accurate selection can be challenging. To enhance precision, utilize the zoom feature. Navigate to ‘View > Zoom’ and opt for ‘Zoom In,’ or utilize the magnifying glass icon. Zooming in enables a closer examination of the waveform, facilitating pinpointing the exact start and end points of your desired segment.
Problem: Audio Distortion Post-Editing
Solution: If you encounter audio distortion following cutting or trimming, employing the ‘Fade In’ or ‘Fade Out’ effect can alleviate the issue. Access these effects via the ‘Effect’ menu. Application of these effects fosters smoother transitions, mitigating harsh beginnings or endings and elevating the overall audio quality.
Conclusion
Mastering the art of trimming audio in Audacity is essential for achieving professional-quality results in your audio projects. By following the step-by-step guide and implementing practical tips, you can efficiently remove unwanted sections from your audio tracks while maintaining seamless transitions. Moreover, Audacity offers a robust toolkit to elevate the quality of audio projects across various domains. With practice and experimentation, you’ll develop proficiency in audio editing and unleash your creativity in producing captivating audio content.
We value your thoughts and experiences with Audacity and the techniques discussed in this article. Please share your feedback, suggestions, or any challenges you encountered while implementing these strategies. Your insights will help us improve our content and better cater to your audio editing needs. Share your reviews in the comments section below!
Once you’ve trimmed and refined your audio tracks in Audacity, you’ll want to ensure the original recordings are crystal clear and professional. A wireless lavalier microphone can significantly enhance audio quality right at the source, making post-processing much quicker and easier.
Frequently Asked Question
Can I undo a trim action in Audacity?
Yes, you can undo a trim action in Audacity. Audacity provides a straightforward method to revert any editing actions, including trimming. Simply press Ctrl+Z (Command+Z on Mac) on your keyboard, or navigate to the Edit menu and select “Undo Trim” to undo the last trim action. You can continue to undo multiple trim actions by repeating this process.
How do I select multiple parts of an audio track for trimming?
To select multiple parts of an audio track for trimming in Audacity, follow these steps:
- Click and drag to select the first part of the audio you want to trim.
- Hold down the Shift key on your keyboard.
- Click and drag to select additional parts of the audio track. Each selection will be added to the existing selection.
- Once you have selected all the desired parts, proceed with trimming as usual.
What formats can I export my trimmed audio in?
Audacity offers a variety of export options for trimmed audio files, including popular formats such as MP3, WAV, AIFF, FLAC, and OGG Vorbis. Additionally, you can export audio in other formats by installing optional plug-ins or codecs.
Is it possible to trim multiple tracks at once in Audacity?
Yes, Audacity allows you to trim multiple tracks simultaneously. To do this, select the desired portions of each track using the Selection tool or by clicking and dragging. Then, proceed with trimming as usual, and the selected sections will be trimmed from all tracks.
How do I ensure that my trimmed audio doesn’t clip or distort?
To prevent clipping or distortion in your trimmed audio, ensure that the volume levels are appropriately adjusted. You can use Audacity‘s built-in tools like Amplify or Normalize to adjust the volume levels before or after trimming. Additionally, applying a fade-in or fade-out effect can help smooth transitions and minimize clipping.
Can I trim an audio file without re-encoding it in Audacity?
Yes, Audacity allows you to trim audio files without re-encoding them, preserving the original audio quality. When you trim a section of an audio file, Audacity simply removes the selected portion without altering the remaining audio data, thus avoiding the need for re-encoding.
What’s the difference between trimming and cutting in Audacity?
In Audacity, trimming refers to removing portions of an audio track while maintaining its continuity. Cutting, on the other hand, involves splitting an audio track into two separate segments. Trimming preserves the audio’s flow, while cutting creates distinct sections that can be rearranged or removed entirely.
How can I fade in or fade out the trimmed audio?
To fade in or fade out the trimmed audio in Audacity, select the desired portion of the audio track and navigate to the Effect menu. From there, choose either “Fade In” or “Fade Out” to apply the respective effect to the selected section.
Is there a limit to how much I can trim from an audio file in Audacity?
Audacity does not impose a specific limit on how much you can trim from an audio file. However, the practical limit may depend on factors such as available memory and system resources. In general, Audacity can handle large audio files and extensive trimming operations with ease.
Can I trim audio files in batch with Audacity?
No, Audacity does not have a built-in feature for batch trimming audio files. However, you can use third-party software or scripts to automate the process of trimming multiple audio files simultaneously. Additionally, Audacity’s batch processing capabilities can be used to apply certain effects or edits to multiple files at once, though trimming is not included in this functionality.