.png)
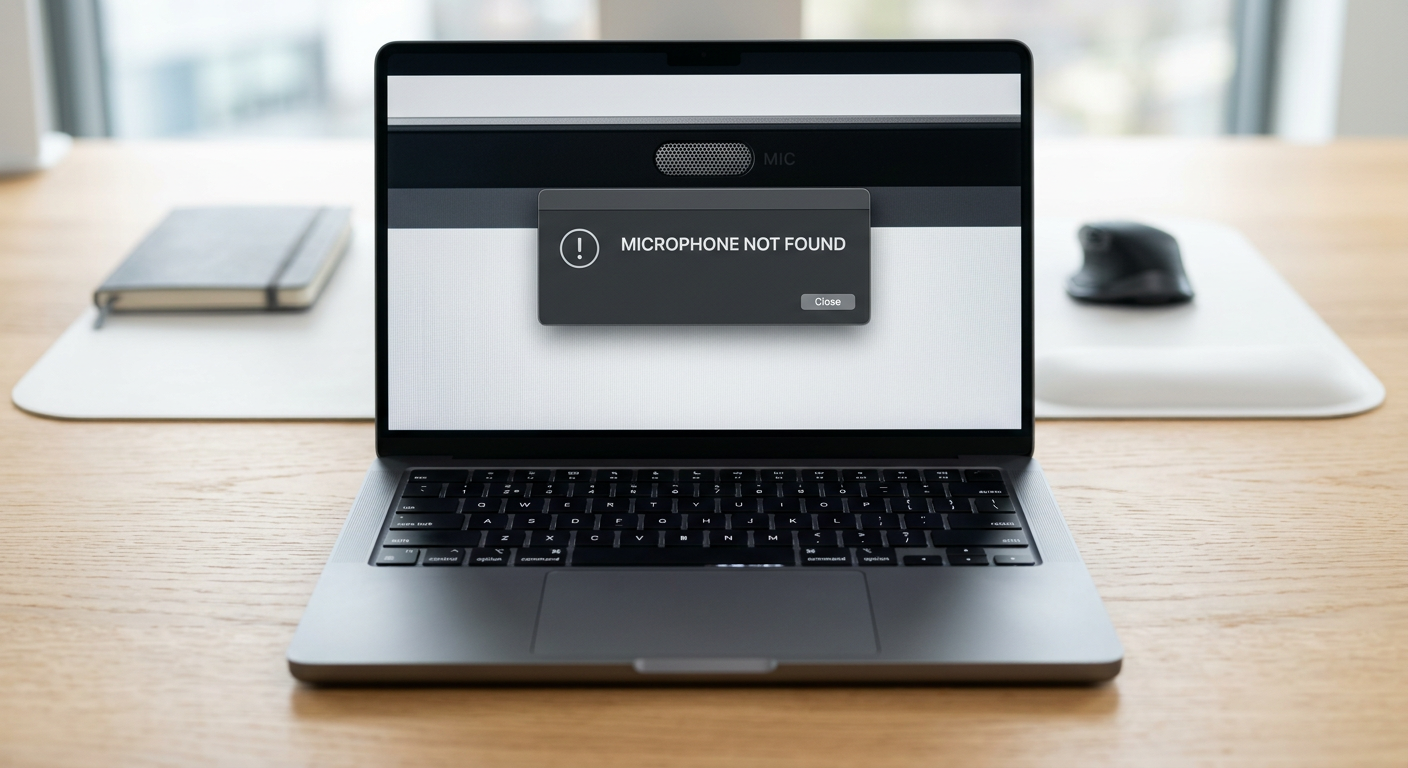
When your Dell laptop’s microphone suddenly stops working, it can interrupt important calls, virtual meetings, or online classes. Fortunately, many issues can be resolved with simple troubleshooting steps.
In this article, we’ll walk you through 10 quick fixes to restore your microphone functionality and get you back online.
If these steps don’t work, consider upgrading to an external solution for even better audio performance.
Why Might Your Dell Microphone Not Be Working?
If your Dell microphone isn’t functioning properly, several factors could be causing the issue. Understanding the possible reasons can help you troubleshoot more effectively. Below are the most common causes and how to address them.
1. Hardware Issues
Dust, dirt, or debris inside the microphone port or internal components can block or distort sound input. Inspect and clean the port carefully.
External microphones may have loose connections, damaged cables, or worn-out jacks that cause audio issues. Test with a different microphone or cable to rule out connection problems.
If the built-in or external mic has sustained damage, it may no longer function correctly. Try using another microphone to check if the issue is hardware-related.
2. Outdated or Corrupt Drivers
If your audio drivers are outdated or corrupted, your microphone may stop working. Updating or reinstalling the drivers can resolve this.
A new Windows update may introduce compatibility issues with older drivers, preventing the microphone from working properly. Always check for driver updates after installing major Windows updates.
3. Incorrect Windows Sound Settings
Windows may use a different audio input device than your microphone. Go to Sound Settings and select the correct mic as the default input device.
The microphone will not pick up sound properly if the input volume is too low or muted. Adjust the microphone levels in Sound Settings to ensure the volume is sufficient.
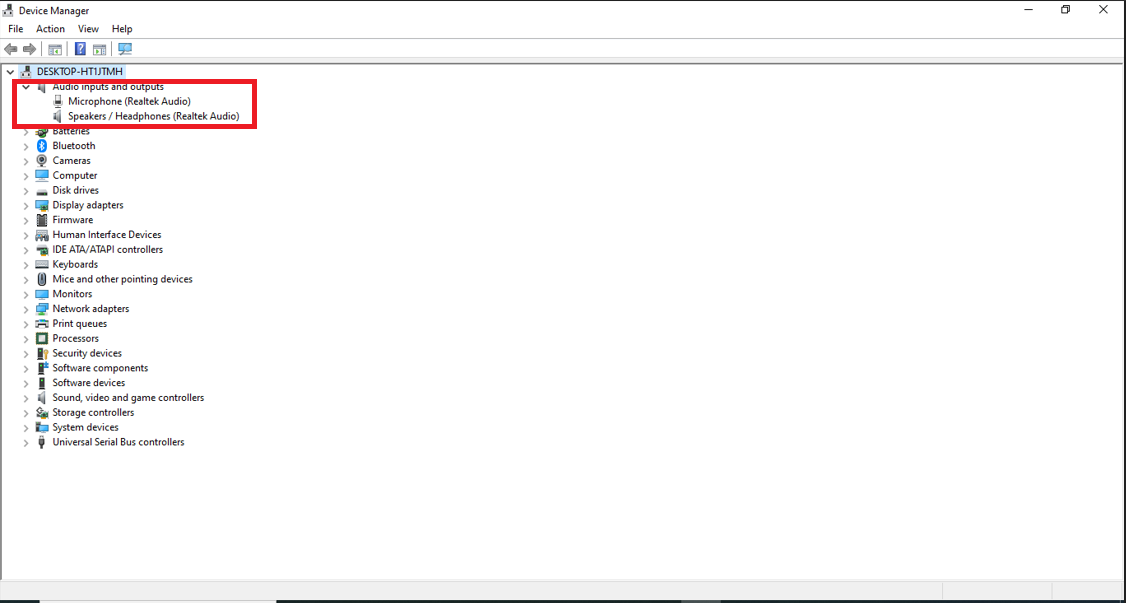
Sometimes, the microphone may be turned off in Device Manager. Navigate to Device Manager > Audio inputs and outputs, right-click your microphone and enable it if necessary.
4. Privacy and Security Settings
Windows privacy settings may block apps from using the microphone. Go to Settings > Privacy & Security > Microphone and ensure microphone access is enabled for apps.
Some security applications, including antivirus software, may restrict microphone usage for privacy reasons. Check your security software settings and allow microphone access where needed.
IT administrators may restrict microphone access via Group Policy in corporate or work environments. If you’re using a work laptop, check with your IT department for assistance.
5. Software Conflicts or Application Issues
Some applications, such as Zoom, Microsoft Teams, or Discord, have microphone settings that override system settings. Verify that the correct microphone is selected within the app.
If multiple apps are using the microphone simultaneously, they might interfere with each other. Close unnecessary applications and check if the mic works.
6. BIOS or Firmware Settings
Some Dell devices allow users to turn off the microphone in the BIOS. To do so, enter the BIOS/UEFI settings (press F2 during startup) and ensure the microphone is enabled.
An outdated BIOS may cause hardware communication issues. Updating the BIOS from Dell’s official website can sometimes resolve microphone problems.
Certain security settings in BIOS restrict microphone functionality, especially if changes have been made recently. Resetting BIOS to default settings can help.
7. Interference from Third-Party Accessories
If you have Bluetooth headphones or other audio devices connected, your system might prioritize them over the built-in microphone. Disconnect Bluetooth devices and test again.
If your microphone is connected through a docking station or USB hub, it may not function properly due to compatibility issues. Try plugging it directly into the laptop.
Some headsets have built-in microphones that override your Dell microphone. Ensure your system is using the correct input source.
8. Windows or Software Bugs
Some Windows updates have been known to disrupt microphone functionality. If your microphone stopped working after an update, try returning to a previous version.
Windows Audio Services need to be running for the microphone to function.
In rare cases, a corrupt Windows user profile can affect microphone settings. Try creating a new user account and testing the microphone there.
How To Fix Your Dell Microphone? (10 Proven Ways)
Try these 10 quick fixes to restore your Dell microphone’s functionality:
1. Check Physical Connections
Ensure external microphones and cables are securely connected.
Inspect the microphone area for dust or obstructions; use a soft brush or compressed air to clean it.
2. Restart Your Laptop
Restarting can resolve minor glitches by refreshing the system and reinitializing hardware components.

3. Verify Windows Sound Settings
Navigate to Settings > System > Sound > Input and confirm that the correct microphone is selected.
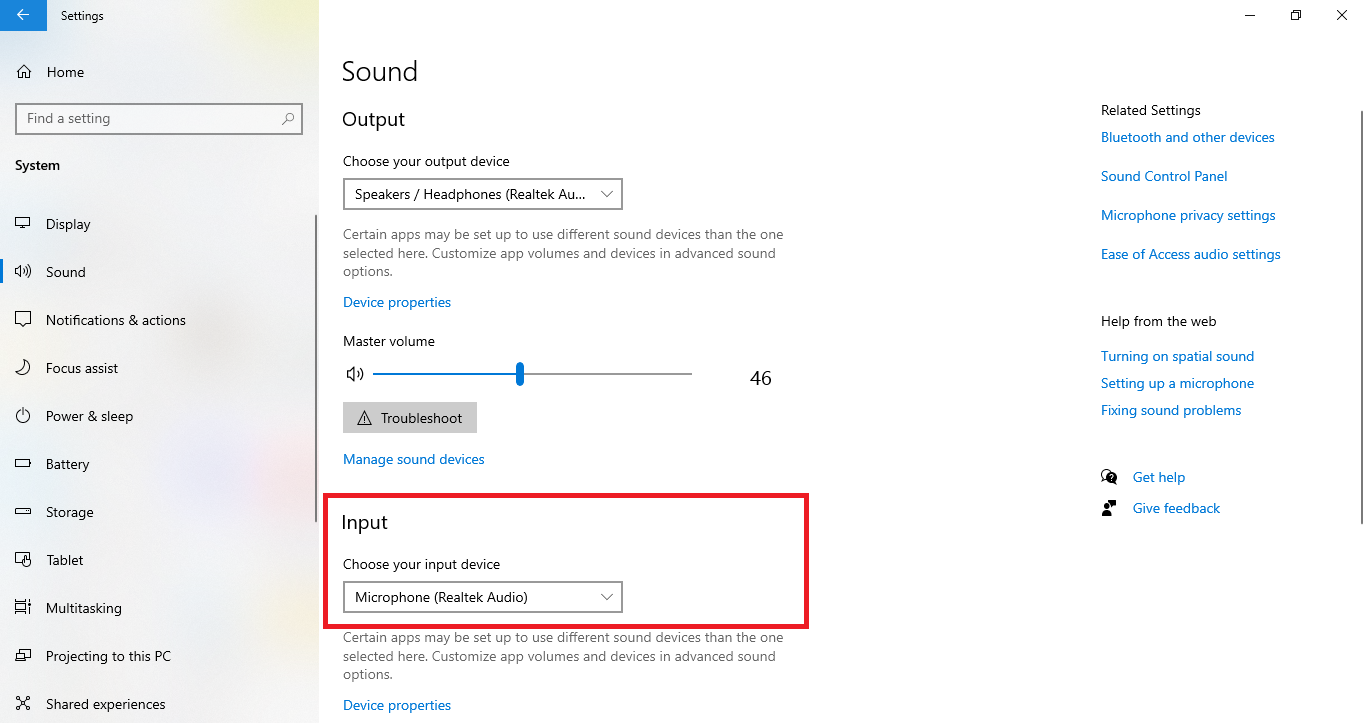
Increase the input volume if it’s too low and ensure the device isn’t muted.
4. Run the Windows Troubleshooter
Go to Settings > Update & Security > Troubleshoot > Recording Audio and run the troubleshooter to detect and fix issues automatically.

5. Update Audio Drivers
Open Device Manager, expand Audio Inputs and Outputs, right-click your microphone, and select Update Driver.
Alternatively, download the latest drivers from Dell’s official support website.
6. Check Privacy Settings
Visit Settings > Privacy > Microphone to ensure access to apps is allowed.

Make sure the apps you use have explicit permission to use the microphone.
7. Test with Different Applications
Use various apps such as Voice Recorder, Zoom, or online mic test tools to determine if the issue is application-specific.
Adjust the problematic app’s settings if the mic works in one app but not another.
8. Disable Exclusive Mode
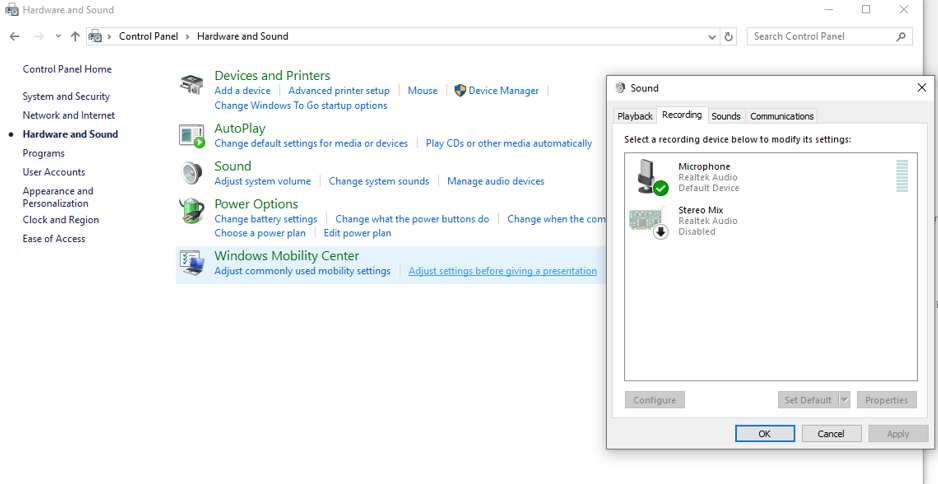
Go to Control Panel > Sound > Recording, select your microphone, open Properties > Advanced, and uncheck “Allow applications to take exclusive control of this device” to avoid conflicts.
9. Reinstall Audio Drivers
Uninstall the current audio drivers from Device Manager, then restart your laptop to allow Windows to reinstall fresh drivers automatically.
10. Reset BIOS Settings
Restart your laptop and enter the BIOS/UEFI settings (commonly by pressing F2 or Delete during boot). Restore the default settings, save changes, and reboot to see if this resolves the issue.
Additional Tips to Solve the Issue
Beyond the core troubleshooting steps, here are a few extra tips to enhance your problem-solving approach:
- Software Refresh: Occasionally, reinstall your favorite communication or recording apps to clear out any corrupt settings affecting audio performance.
- System Cleanup: Regularly perform disk cleanups and remove unnecessary software that might interfere with audio processes.
- Check External Interference: Ensure no external electronic devices interfere with your audio signals. This can sometimes lead to unpredictable mic behavior.
- Monitor Updates: Look for and install any Windows or driver updates that could impact audio functionality promptly.
What If My Dell Laptop’s Microphone Issue Persists?
If you’ve tried all the above troubleshooting steps and your Dell microphone still isn’t working, it may be time to consider an external solution. An external microphone can provide superior audio quality and consistent performance for professional needs.
The Hollyland Lark M2S is an excellent choice for a reliable backup solution. It boasts a logo-free design for a sleek, professional appearance, complemented by a titanium clip-on that offers a secure, lightweight attachment ideal for on-the-go use. With a robust wireless transmission range of up to 300 meters (1,000 feet) in line-of-sight conditions, the Lark M2S ensures stable and reliable audio capture, even in challenging environments. Besides, the Lark M2S offers impressive battery performance, providing up to 9 hours of continuous operation on a single charge.

Hollyland LARK M2S - Wireless Hidden Microphone
An ultra-discreet wireless microphone featuring a clip-on transmitter for an “invisible” fit.
Key Features: No-Logo Fit | Ti+ Design | 48 kHz/24-bit
Conclusion
Dell microphone issues can arise from various factors, including hardware problems, outdated drivers, or misconfigured settings. Following these 10 quick fixes, you can troubleshoot and often resolve the issue yourself. If problems persist, consider upgrading to an external solution to ensure professional-grade audio quality for all your communication needs.
FAQs
Q: How do I check if my Dell laptop’s microphone works properly?
Open Settings > Sound > Input and use the test feature, or record audio with a built-in app like Voice Recorder.
Q: Why is my Dell laptop’s audio distorted when using the microphone?
Distortion may be caused by a high input volume, interference from other software, or outdated drivers. Lower the volume and update your drivers to see improvements.
Q: Can I use multiple microphones simultaneously on my Dell laptop?
You can connect multiple microphones via USB or the 3.5mm jack and manage them through Windows’ sound settings.
Q: How do I prevent my Dell laptop’s microphone from picking up background noise?
Adjust the microphone sensitivity, use noise suppression software, or consider an external microphone with built-in noise reduction features.
Q: How do I update my Dell laptop’s audio drivers to fix microphone issues?
Open Device Manager > Sound, video, and game controllers, right-click your audio device, and select “Update driver.” Alternatively, download the latest drivers from Dell’s support site.
Q: Can I use a wireless microphone with my Dell laptop?
Wireless microphones that connect via Bluetooth or USB-C are available. Compared to built-in microphones, they often offer enhanced audio quality and flexibility.