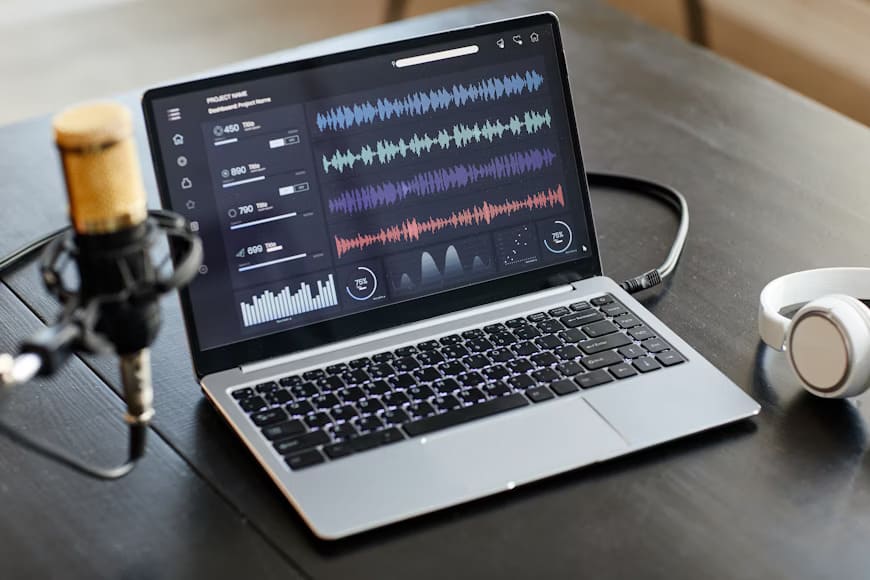
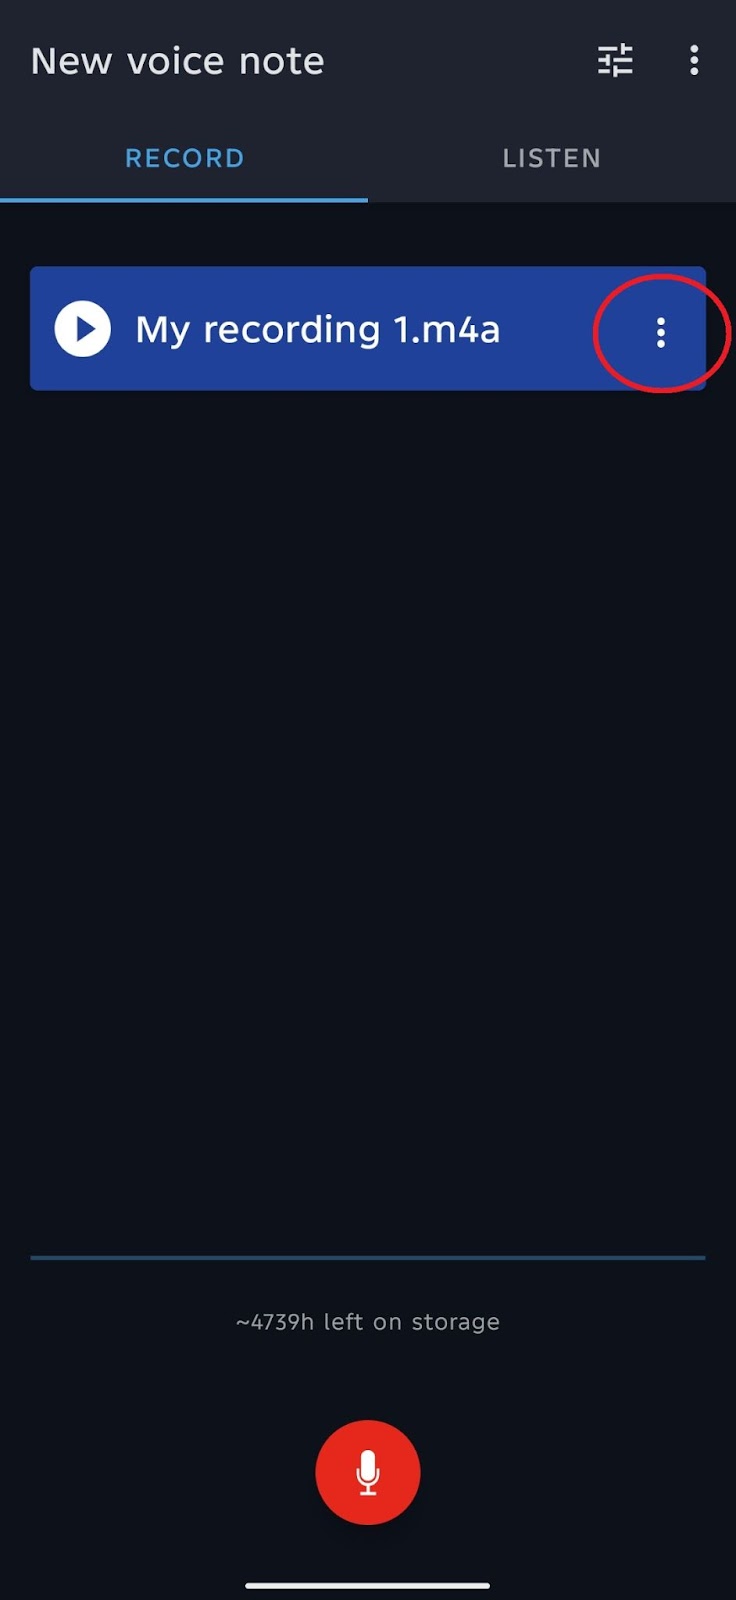
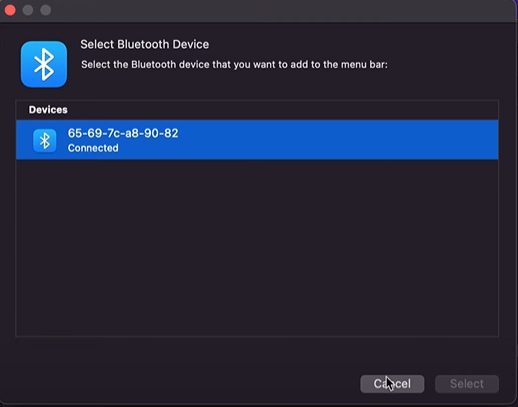
MacBook comes with built-in microphones that allow you to record audio and use them for several purposes. However, it might be difficult to understand MacBook’s instructions to record audio.
So, we will share an easy-to-follow step-by-step guide on how to record audio on a MacBook to help you make the best of your expensive device.
Part 1: Understanding Your MacBook’s Built-in Capabilities
There are two things you need for recording any audio and MacBook has them both.
Overview of Built-in Microphones
Macbooks come with built-in microphones having single or dual audio ports. These microphones allow you to record audio, communicate with others on a call, and record videos with audio.
While you can work with MacBook’s microphones as a beginner, you might need premium microphones for recording high-quality sounds. For this, you can choose an option from Wireless Lavalier Microphones & Systems.
Introduction to Pre-Installed Software for Audio Recording
QuickTime Player
QuickTime Player is a multimedia app pre-installed on Apple devices. It is used for recording, playing, editing, and streaming both audio and video clips.
GarageBand
GarageBand is another pre-installed software by Apple that is exclusive for music and audio recording.
Both of these software are more than enough for working on a Macbook to record audio.
Part 2: Preparing to Record Audio
Before beginning to record audio, you need to prepare your system and equipment. This will allow you to work professionally as well.
Selecting the Right Environment
The first thing is to record audio in an optimal environment.
Tips for Reducing Background Noise
Here are tips to reduce external noise,
- Choose a location with no noise. While a soundproof room can work for this, you can also record audio in the quietest corner of your home.
- High-quality microphones with noise cancellation, omnidirectional sound reception, and high sensitivity can help you enhance the experience.
- Set the input level of your audio recording software in a way that your voice is recorded without the background noise.
- Pop-filter and windscreens can be helpful.
Importance of Acoustics
Acoustics are mandatory for producing high-quality sounds as they help in creating a neutral environment. Moreover, it is especially important for you if you are planning on editing, mixing, and mastering the sounds.
Setting Up External Microphones (Optional)
External microphones can enhance the quality of audio recorded. Therefore, you can use them as well.
Types of Microphones Compatible with MacBook
USB-connected microphones with 3.5 mm input work for Macbook.
How to Connect an External Microphone
Here are the steps to connect an external microphone to a MacBook.
- Buy a jack splitter with two ends or use a USB microphone
- Connect the microphone to one end of the splitter and attach it to the MacBook
- Open Apple menu
- Go to “system preference”
- From here choose “Input” in the “Sound” menu
- Select your microphone here
Part 3: Using QuickTime Player for Audio Recording
Let us talk about how to use QuickTime Player to record audio.
Opening QuickTime Player
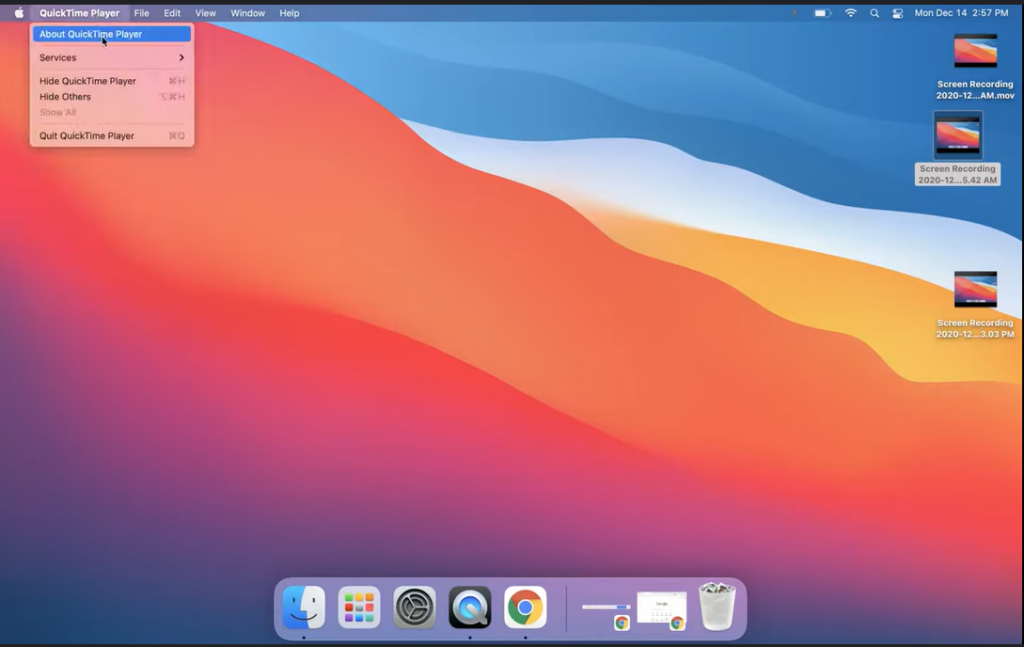
To open QuickTime Player,
- Find and click on the “QuickTime Player” on your MacBook
- Click on the “QuickTime Player” tool you see on the top left side of the screen to check the specifications of the software
Starting a New Audio Recording
Once you open the app, it is time to start your audio recording. follow the steps given below for this.
Navigating to the “File” menu
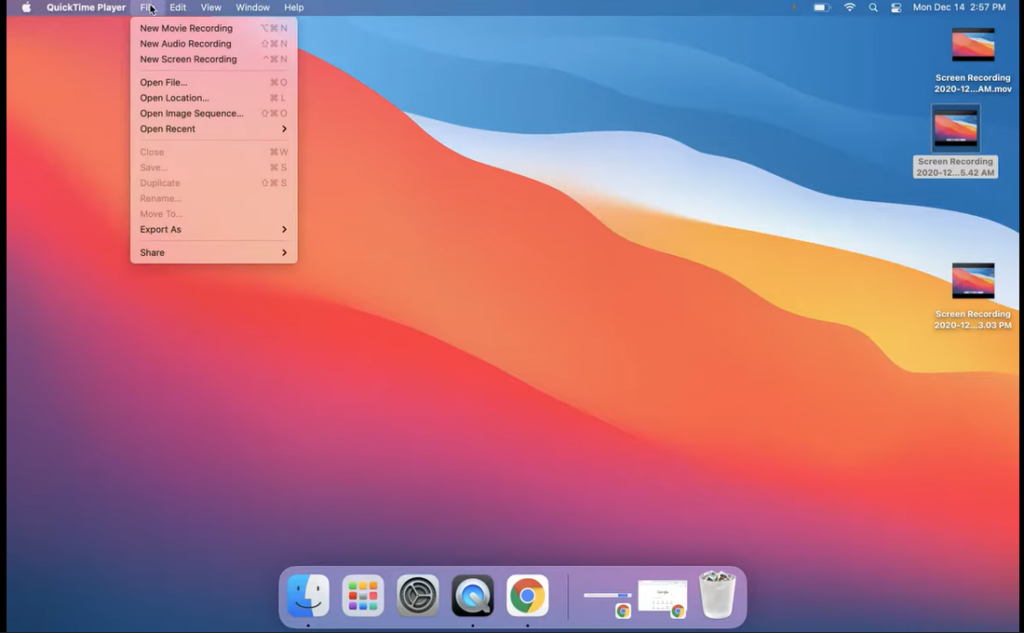
Just right to the “QuickTime Player” on top of the screen, you will see a “File” menu. Click on this.
Selecting “New Audio Recording”
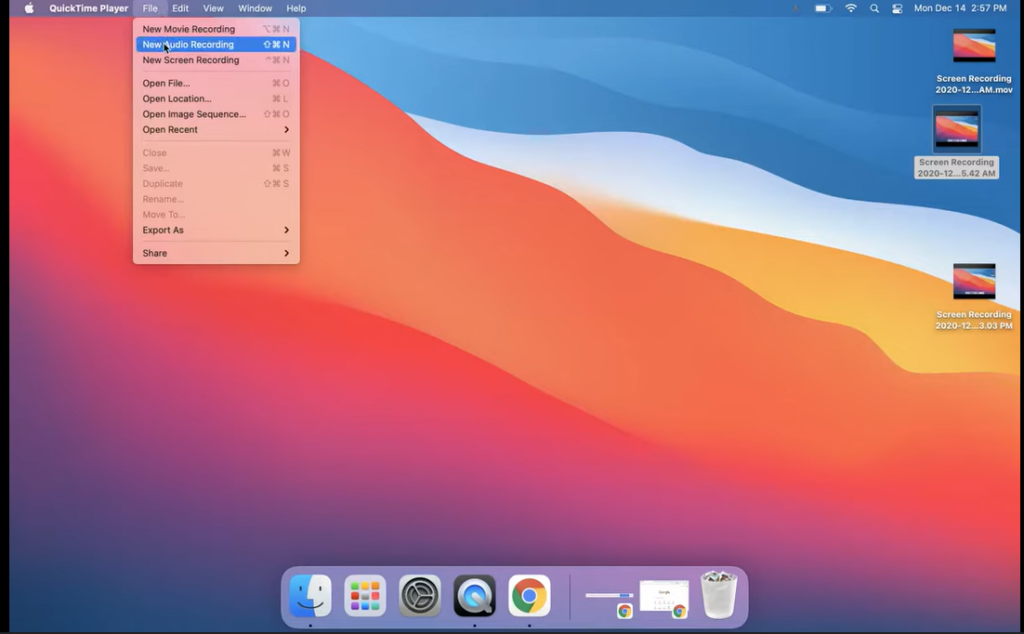
In the “File” menu, you will see several options like new movies, audio, and screen recording. Click on the “New Audio Recording” menu here.
Configuring Recording Options
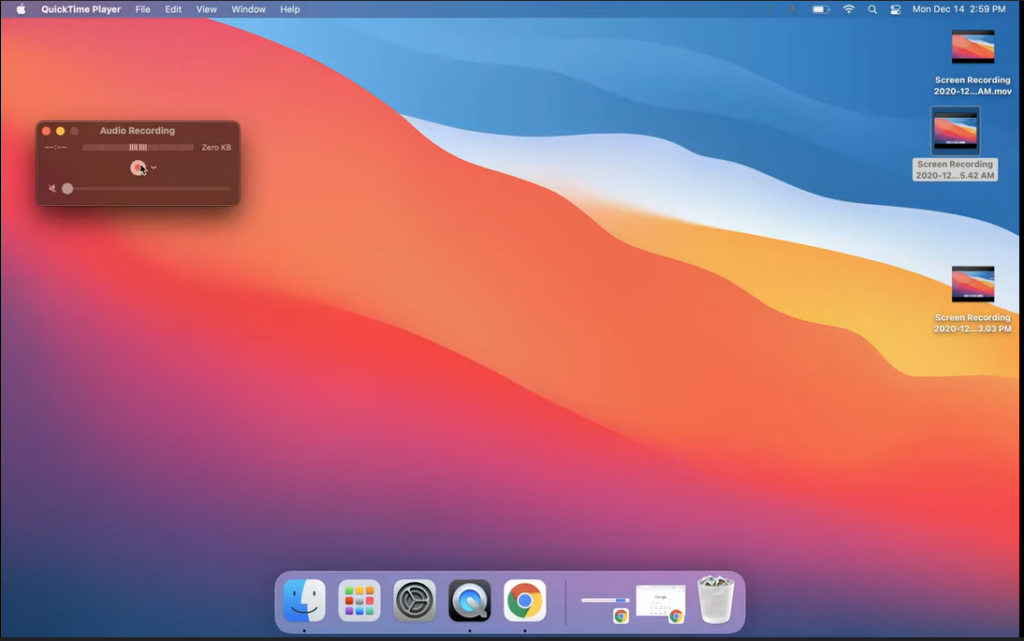
As you click on the “New Audio Recording” option, a small window with audio recording will open up.
Choosing the Input Source
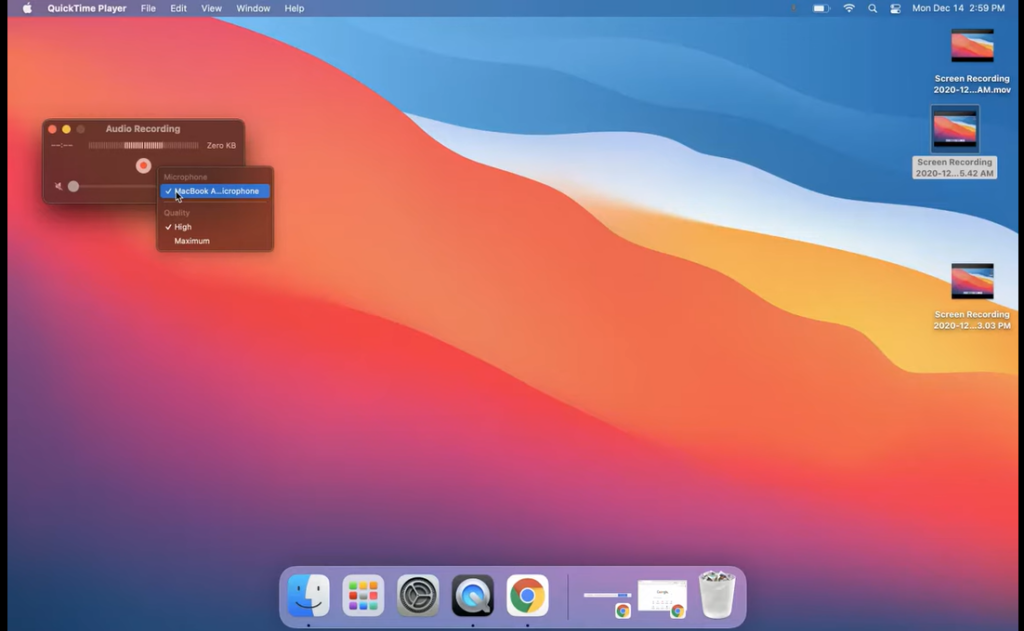
On the right side of the red circle, you will see a click-down arrow. Hit the arrow open to choose your input source.
Also, keep the volume line given in this window at the lowest if you are not using headphones.
Adjusting the Quality of the Recording
When you choose the “Internal Microphones/External Microphone” option in the click-down arrow, you will also see options for “Quality” settings there.
Here,
- High-quality produce compressed sounds
- Maximum quality produces uncompressed sounds
Recording Your Audio
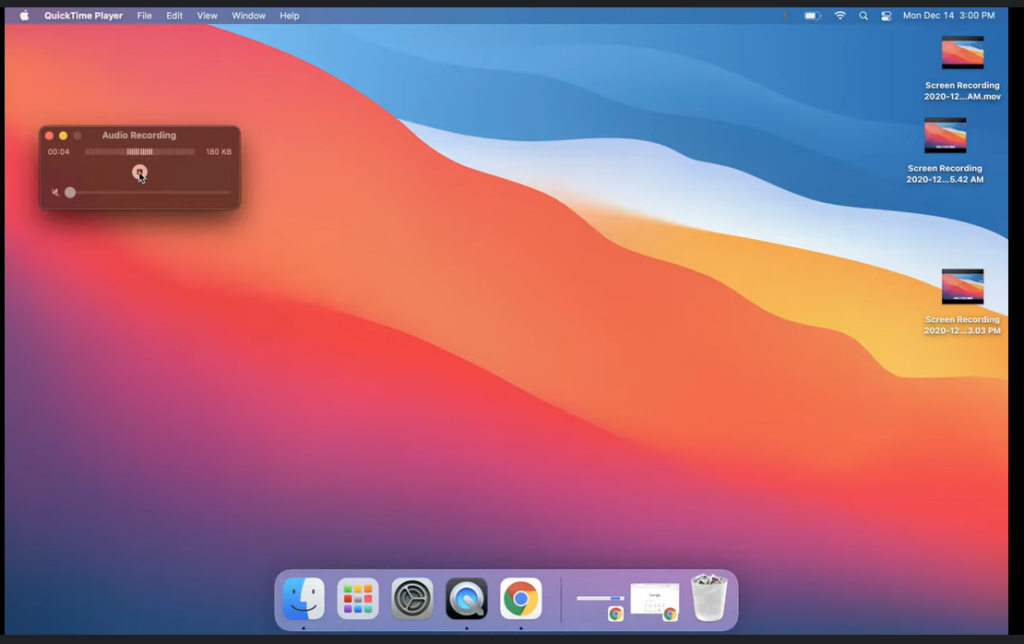
The red dot in the center of the window is a navigator button for recording your audio.
Steps to Start, Pause, and Stop Recording
Here are the navigations of the red dot.
- Click on the “red dot” to start recording the audio
- To pause the audio, option click on this button
- Once you are done recording your audio, click on the square option
Saving and Sharing the Recorded Audio
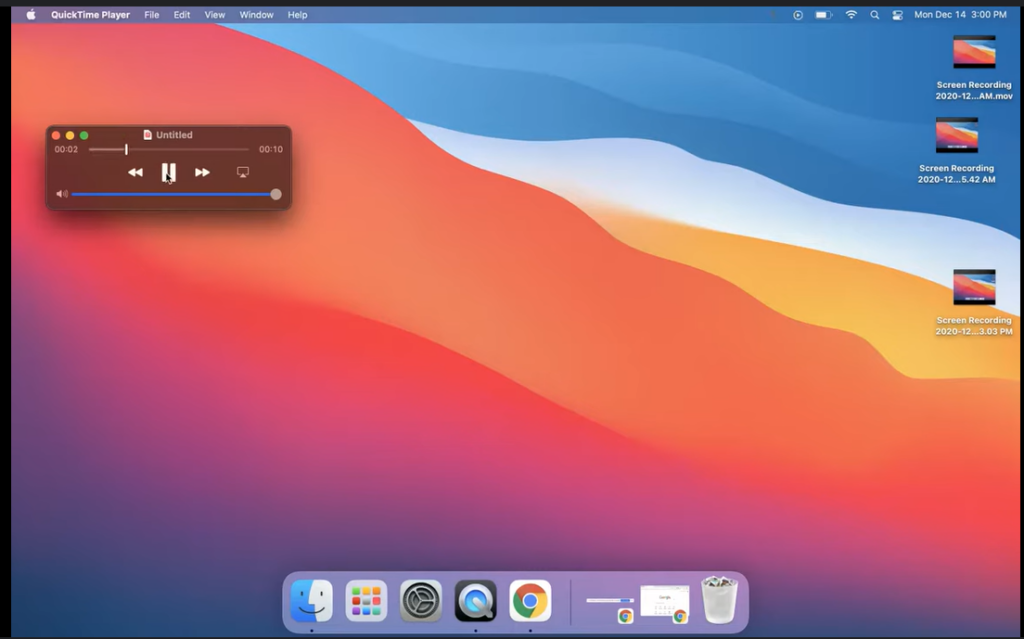
When you complete the audio recording, listen to the audio once and check if it needs any improvement.
Saving the Audio

On the top left side of the window, there are three dots. Click on the red one to save the audio.
Another way to save the audio is to go to “File” and click “Save”.
File Formats and Compatibility
The compatible audio file formats for MacBook include WAV, AAC, ALAC, MP3, MP4a, Ogg, and a few more.
Part 4: Using GarageBand for More Advanced Audio Recording
Introduction to GarageBand
The second software that can be used to record audio on a MacBook is GarageBand. As it is an exclusive music and audio app, it provides advanced options for audio recording.
Some of its pros include,
- Free of cost
- User-friendly interface
- Offers professional audio recording and editing experience
Setting Up a New Project
Click on the “Garageband” logo on your device and open it.
Selecting the Appropriate Project Type for Audio Recording

Once you open the GarageBand, you will see several project types. You can choose any project type from these options or select an “Empty Project” here and modify the project type afterward.
Configuring Audio Input

After selecting the audio, it is your turn to select an audio input.
How to Select and Configure the Audio Input Source
On the left side of the window, you will see the “Details” option, choose Audio Input Under the new project, you will see an “Input” menu. Select your input and output options from this menu.
Also, select tempo and key signature to configure the audio input. Then, click on the “Choose” option given on the right lower side of the screen.
Recording Tracks

A new window will open allowing you to work on recording the audio.
Steps to Record Multiple Audio Tracks

Above the new track, there lies a “+” sign. You can click on it to record multiple audio tracks.
- For the new track, choose your project type and input

- You will see a new project on the left side of the screen, here you can modify the volume and other settings

On the top of the screen, you will see a record and a play option.
- Click on the “red highlighted dot” to start recording your audio.
- Bring the recording line back to the starting
- Listen to your audio
Editing and Enhancing Your Audio
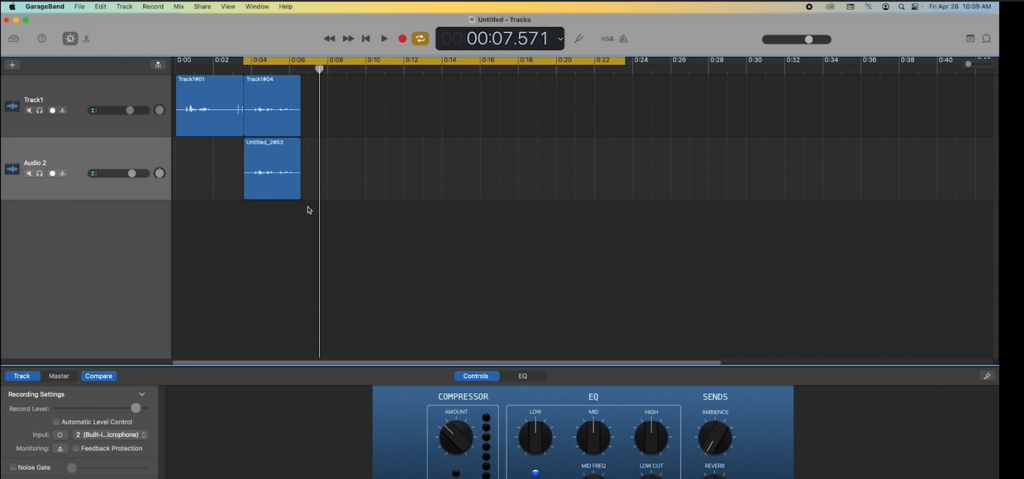
If you love the recorded audio, that is great. If not, you can edit it.
Basic Editing Tools and Effects Available in GarageBand
The basic tools and effects to edit audio in Garageband include,
- Trim tool to reduce the size of the clip from the sides
- Split at the playhead tool to cut the clip in midway
- Automation tool to manually adjust the volume
Exporting Your Project
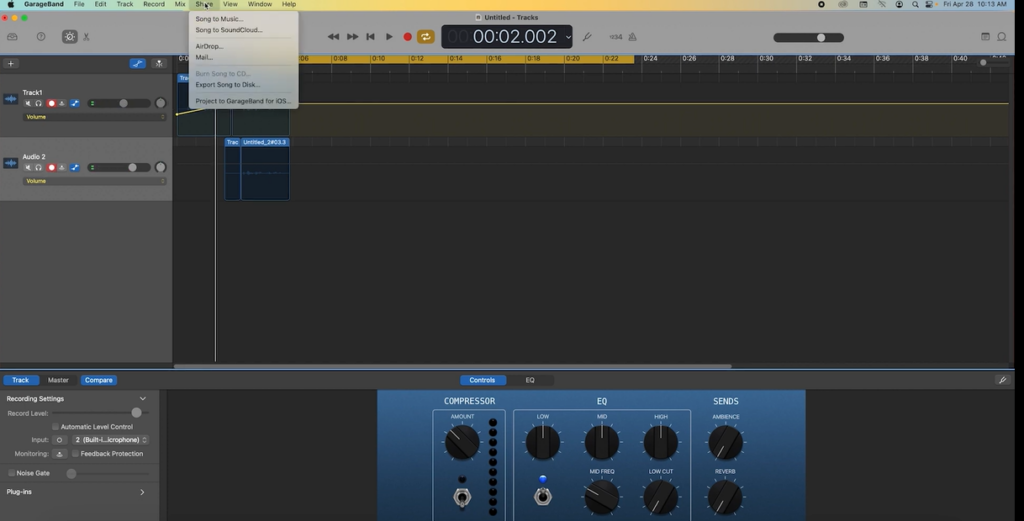
Finally, you can export the project. For this, click on the “Share” option given at the top of the screen and hit export.
Saving Your Recording in Various Formats
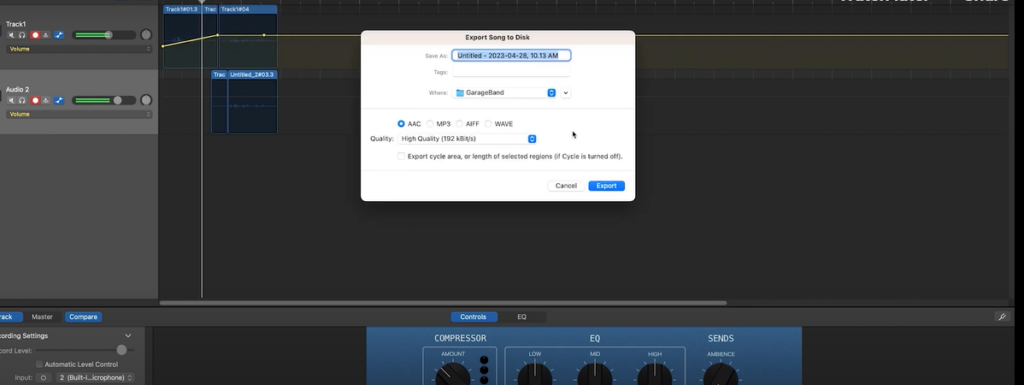
While exporting the audio, you will see many formats and audio quality. Select the options of your preference here before saving the audio.
Part 5: Tips for Improving Audio Quality
Here are some tips to improve the audio quality of your recording.
Using Pop Filters and Windscreens
Place a pop filter just in front of your microphone so that the sound you produce is not mixed with the sound of air going through the microphones.
Similarly, placing windscreens on your microphone will reduce the noise of breathing and hissing. In addition, both these tools reduce the awkward recording sounds caused by pronouncing some letters like s, t, b, z, sh, and t.
Monitoring Levels During Recording
Do not record the full audio and share it in one go. Rather, keep listening to your recording and monitor the features of the audio. This will allow you to adjust and improve the audio quality as you record instead of having to work on the same content all over again.
Utilizing Post-Recording Editing Software
Most often, the audio we record is not perfect. In such cases, you can use tools like Noise Gate, Noise Reduction Plugin, Adobe Audition, Audacity, Garageband, and more. Such tools will help you make the audio more clear and engaging.
Part 6. Troubleshooting Common Issues
Dealing with Background Noise
Background noise can mess up the quality of your recorded audio. That is why, make an effort to record sounds in a place where there is no traffic, the sound of kids playing, no working machinery, or people speaking.
For this, get yourself a soundproof room or use acoustic treatment.
Managing Input Level Problems
Try changing your distance from the microphone and keeping it constant if your voice sounds too loud in the audio. Also, adjust the input settings of the software before you start recording.
Lastly, the compression and normalization effects of audio editing software can help you manage input-level issues.
Resolving Connectivity Issues with External Microphones
Ensure that your external microphones are compatible and connected to external microphones. Furthermore, change your input settings, allow external microphone permissions, check for MacBook microphone malware, turn on dictation, and restart your project or MacBook.
If you’re looking to achieve professional-quality audio recordings easily with your MacBook, a wireless lavalier microphone could be your ideal solution. It’s compact, simple to set up, and delivers crystal-clear sound\u2014perfect for tutorials, presentations, or voiceovers.
FAQs
1. Can I Record Audio on a MacBook Without an External Microphone?
Yes, you can record audio on a MacBook without any external microphones as MacBook has its own built-in microphone that allows you to record audio.
2. What Formats can I Save my Recordings in Using QuickTime Player and GarageBand?
QuickTime Player supports AIFF, WAV, DV-DIF, MP3, and MPEG formats while GarageBand supports AIFF, CAF, WAV, AAC, Apple Lossless, MP3, and MIDI.
3. How can I Reduce Echo While Recording Audio on my MacBook?
The use of pop filters and windscreens along with keeping the microphones to a certain distance can reduce the echo while recording audio on a Macbook.
In addition, you can edit and delete the echo after recording.
4. Is it Possible to Record System Audio Directly on a MacBook?
Yes, MacBook allows the recording of system/internal audio with QuickTime Player.


.png)


