.png)
Whether you’re a professional who needs a screen recording for an important presentation, a developer creating a how-to video tutorial, or simply someone who wants to share an interesting video clip, there are several different ways you can record your screen activity on your laptop.
While both macOS and Windows have built-in tools that allow you to capture and record your screen, there is also a wide range of third-party screen recording apps available for the operating systems. Here are some of the easiest ways you can record on a laptop:
Xbox Game Bar
Available in both Windows 11 and Windows 10, the Xbox Game Bar is a screen-recording tool originally designed to capture gameplay on your computer. However, it’s extremely versatile and can capture almost any other kind of screen activity.
You can easily use the Xbox Game Bar to record your screen, switch on the mic to capture your voice or any other audio and save the recording on your PC. Xbox Game Bar saves the video as an MP4 file, allowing you to modify or edit it later with the video editor of your choice. Here’s what you need to do to set up the Game bar if you’re working with Windows 10:
- Go to ‘Settings,’ select ‘Gaming,’ and then click on ‘Xbox Game Bar.’
- Toggle the Xbox Game Bar button.
- If you want to enable the Xbox Game Bar using the Xbox button on your Xbox controller, check the box under the toggle button.
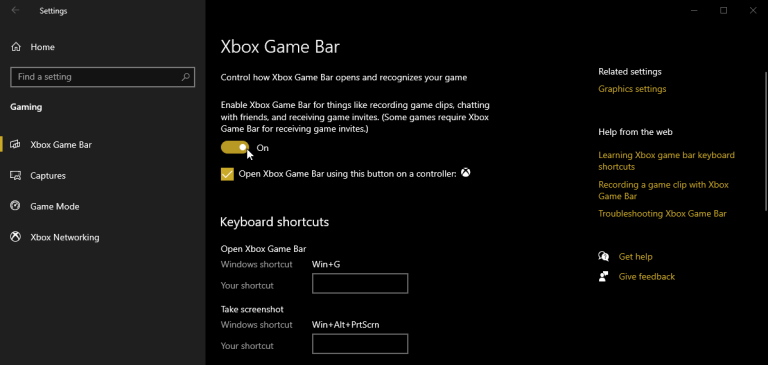
This screen shows all the default shortcuts for different Xbox Game Bar actions, but you can customize these actions using your key combinations as well.
If you’re working with Windows 11, then here’s what you need to do to set up the Game Bar:
- Go to ‘Settings,’ select ‘Gaming,’ and then click on ‘Xbox Game Bar.’
- Toggle the button next to ‘Open Game Bar using this button on a controller.’
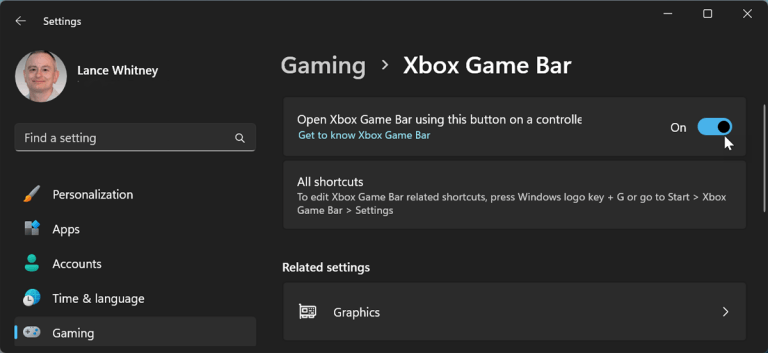
- You can view and customize all keyboard shortcuts by launching the Xbox Game Bar app and accessing the ‘Settings’ menu.
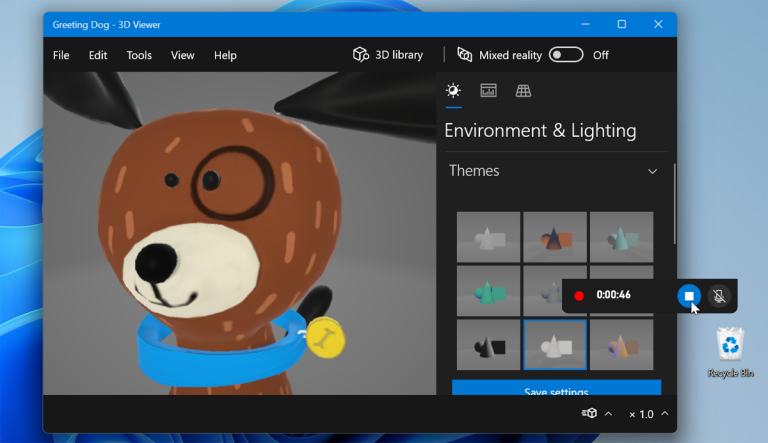
Once you’ve enabled Xbox Game Bar, here’s what you need to do:
- Go to the screen you want to record and open the Xbox Game Bar by pressing Win+G. You should see several different widgets on your screen with options for recording audio and video, capturing screenshots, and broadcasting screen activity.
- Press Win+Alt+R or select the ‘Start Recording’ option to record the screen activity on your laptop.

- Once you start recording, all Game Bar widgets will vanish, and you’ll only have a small floating box in your screen’s upper-right corner for controlling the recording. You can end the recording by clicking on the Recording icon in the floating box.
Along with viewing the finished recording in the Xbox Game Bar, you can also access it from the ‘Videos’ folder in File Explorer. The Xbox Game Bar will store all recordings in the ‘Videos’ folder as MP4 files, but you can easily upload or move them elsewhere according to your preferences.
Windows 11 Snipping Tool
If you have Windows 11 (version number 22621.1344) or above, you can use the Snipping Tool to record your laptop screen as well. You can check whether you have the correct version by following these steps:
- Go to your laptop’s ‘Settings.’
- Select ‘System’ and then click on ‘About.’
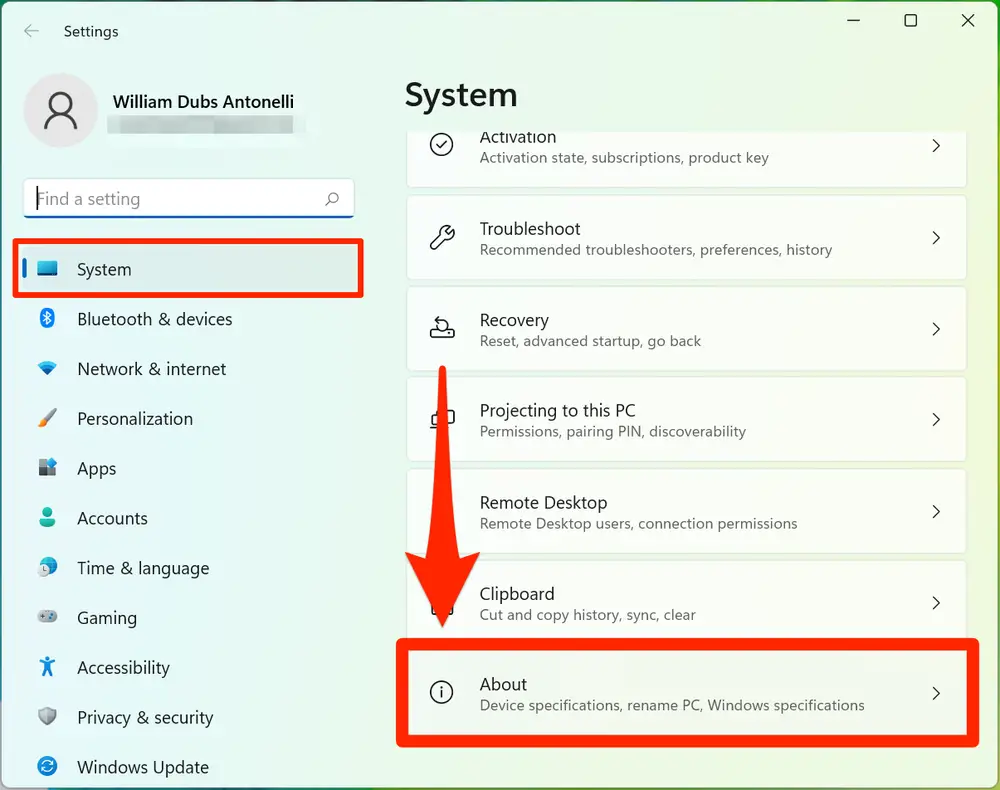
- Check your laptop’s OS version under the ‘Windows Specification’ section.
If your laptop is running on an older version of Windows, here’s how you can update it:
- Go to ‘Settings.’
- Click on ‘Windows Update’ in the upper right corner of your screen, and install the latest version update.
- Launch the Microsoft Store application.
- Download and install the Snipping Tool update from your library.
Once the installation is complete, follow these steps to record your laptop screen:
- Open the window or tab that you wish to record.
- Enable the Snipping Tool by searching and clicking on it from your Start menu or by pressing Win+Shift+S.
- Navigate to the toolbar, click on the video camera icon, and then select the ‘New’ button.
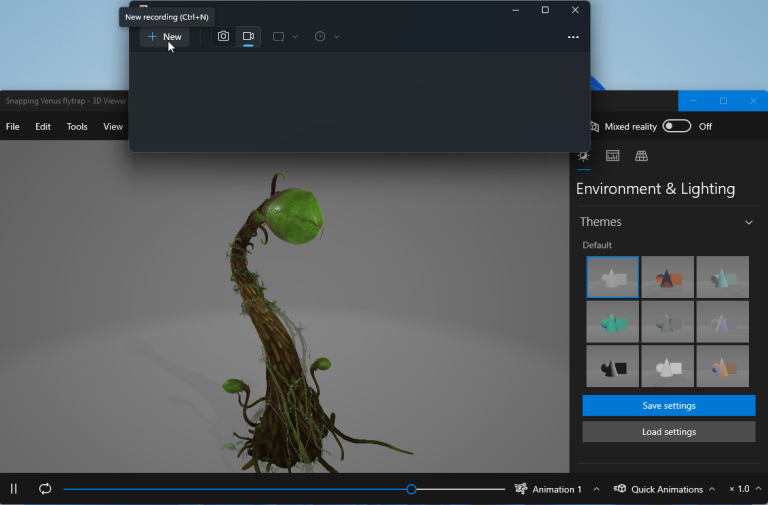
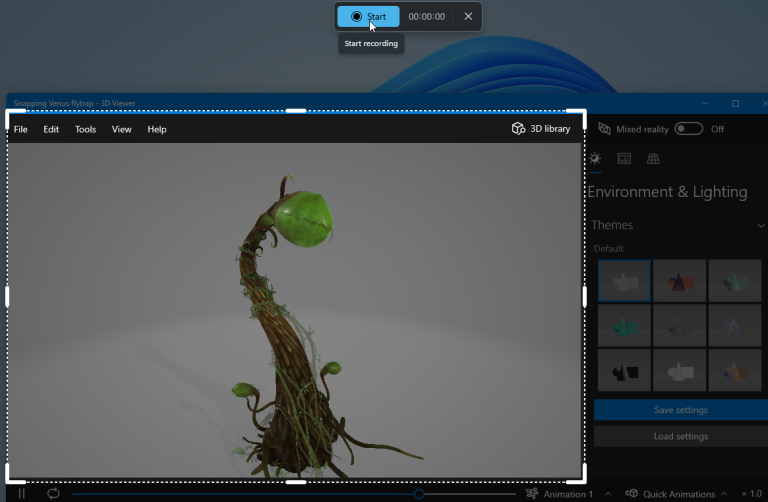
- You should now see a small recording toolbar at the top of your screen. Hold and drag your cursor to select the part of your screen you wish to capture, and then click ‘Start’ on the toolbar.
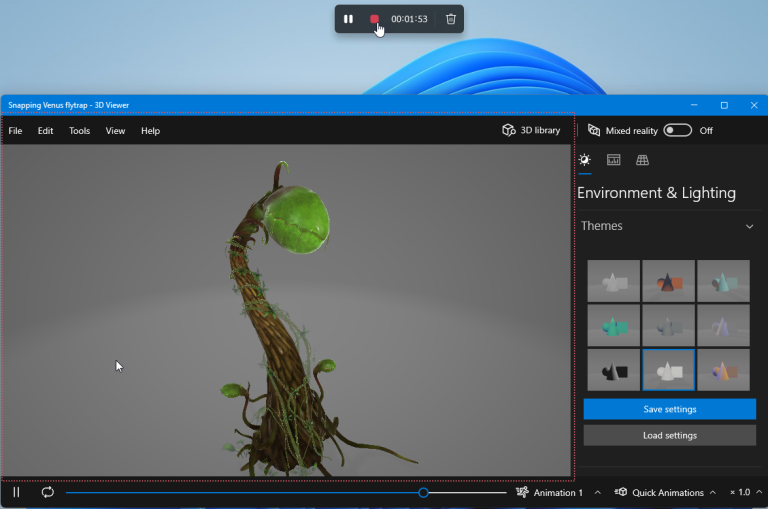
- You can stop the recording by selecting the ‘Pause’ button and then resume it by clicking on ‘Play.’
- Once you’re done recording, press the red Stop icon to finish.
Your recording will then appear on the screen and you can review it. You can also share the video with an app, service, or person by clicking the Share icon, or you can save it in an MP4 format by clicking on the Save icon.
macOS Screenshot Tool
Macs with macOS Mojave and later versions come with a built-in screen recording feature. Here’s how you can use the screenshot tool to record on your laptop:
- Open the window or app you want to screen record.
- Open the screenshot tool by pressing Shift+Command+5.
- Choose whether you want to capture a specific window, a custom part of your screen, or the entire screen from the toolbar at the bottom.
QuickTime Player
If you’re working with an older macOS version, you can use the QuickTime Player to capture your Mac’s screen. The tool is installed on all Macbooks by default, so you don’t need to download or install anything separately. Here’s what you need to do:
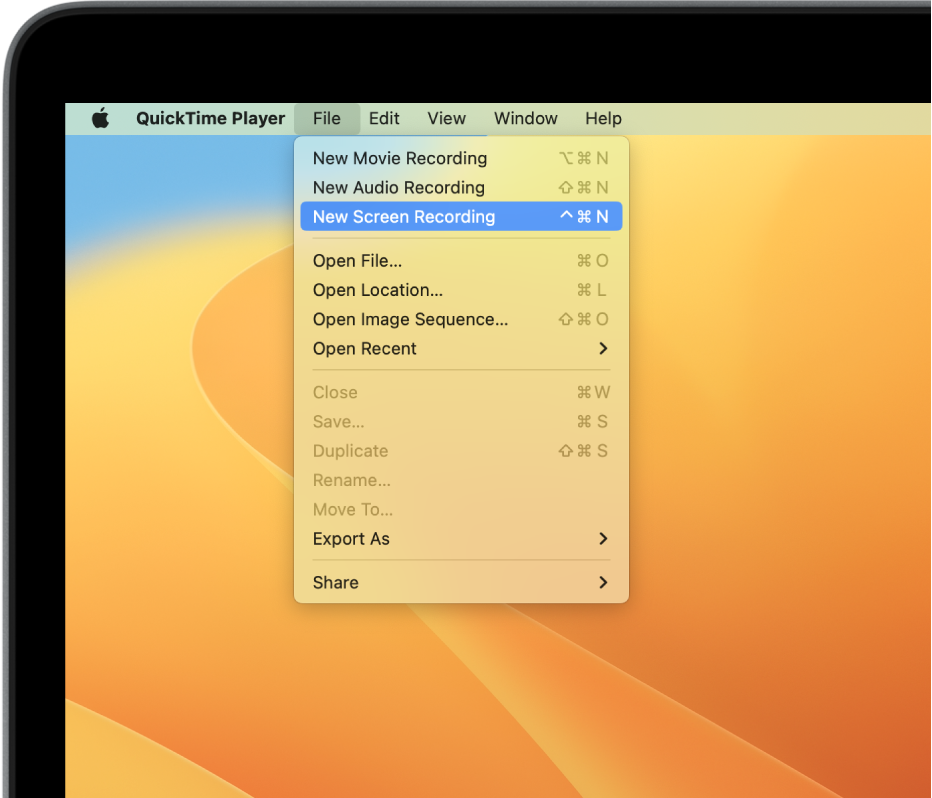
- Launch QuickTime Player.
- Click ‘File’ and then select the ‘New Screen Recording’ button. If you’ve never used QuickTime Player before, you might need to permit it to record your laptop screen. You can do this through the ‘System Preferences’ menu.
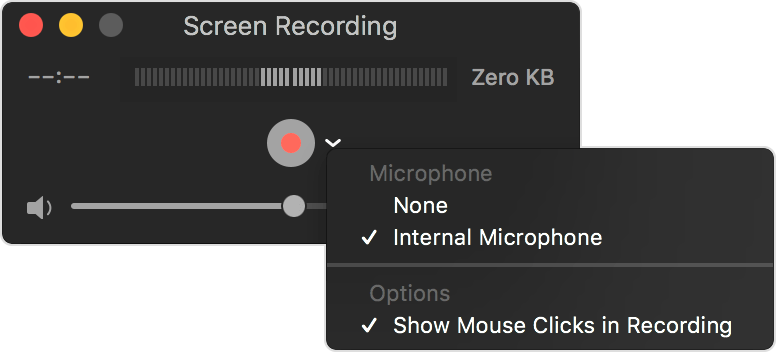
- Select ‘Options’ to customize your recording. For instance, you can change the location of the saved recording, or set the recording to include your clicks or cursor.

- Press the record button to start the screen recording. You can either choose to record your entire laptop screen or a small section of it from the pop-up menu.
- Click on the Stop icon in the toolbar once you’re done recording.
- Review the recording, click on ‘File,’ and then select ‘Save’ to save it in your preferred location.
Third-Party Apps
If your operating system or computer doesn’t come with a built-in screen recording tool, you can simply download and install third-party apps to record on your laptop. Apps like Snagit and OBS Studio are free and offer much more advanced features compared to built-in screen recorders.
OBS Studio
OBS Studio is a free screen-recording software that’s compatible with Linux, macOS, and Windows. Packing a wide range of features, OBS records your screen, computer audio, and microphone, and then saves the video in an MP4 format. Here’s how you can use the software to record your laptop screen:
- Launch OBS Studio. A Scene should be added automatically once you open the software, but if this doesn’t happen, click on the ‘+’ icon in the Scenes panel at your screen’s bottom-left corner.
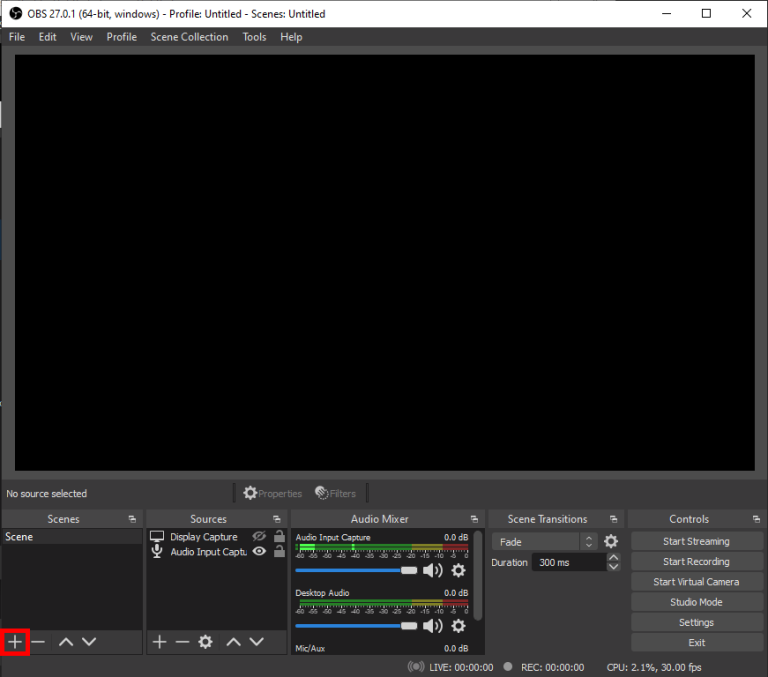
- Click on the ‘+’ icon at the bottom of the ‘Sources’ panel.
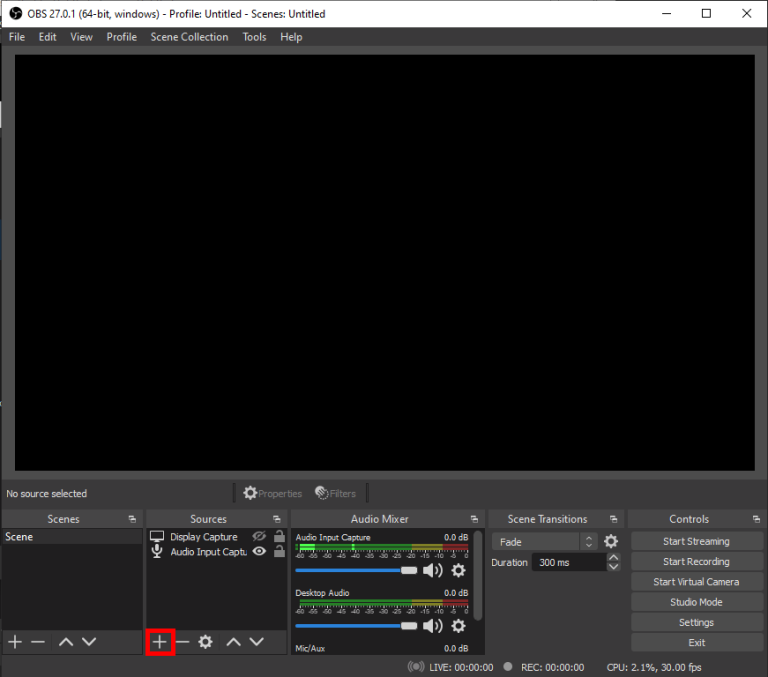
- Select ‘Display Capture’ from the list of options.

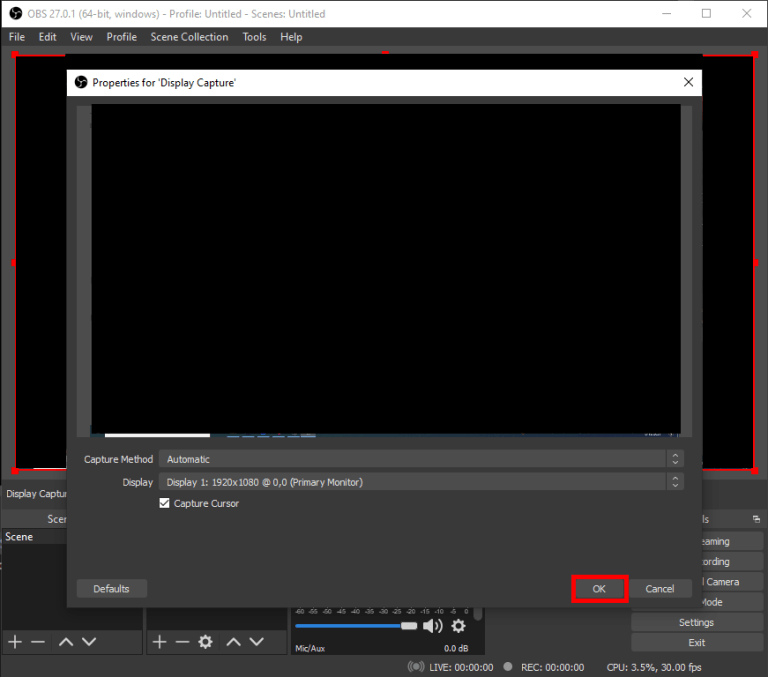
- A pop-up window should appear. Enter a title for the recording and then click on ‘OK.’

- Choose the display you want to capture and select ‘OK’ again.
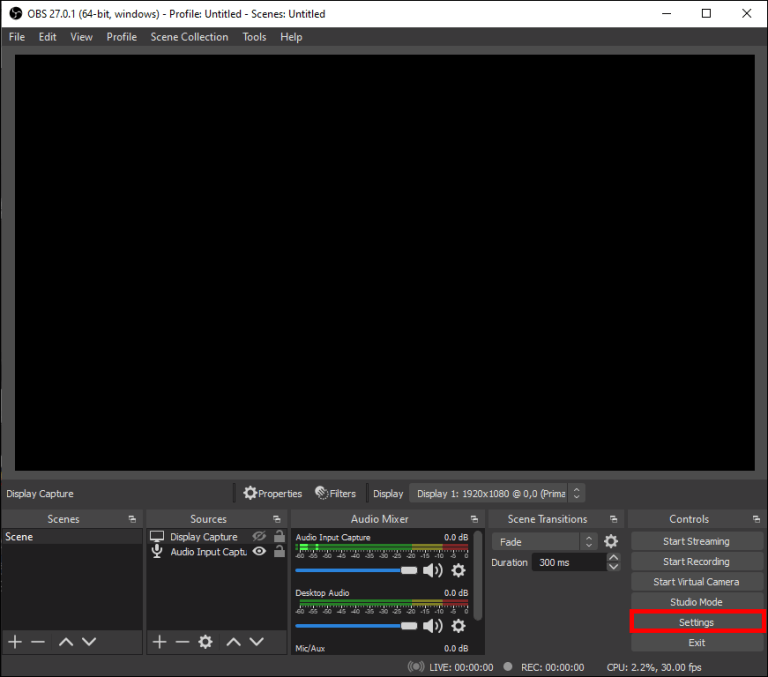
- Click on ‘Start Recording’ at the lower-right corner of your screen.
Snagit
Snagit is perfect for short, simple screen recordings that don’t need a lot of editing. Here’s how you can record your laptop screen with the software:
- Launch Snagit.
- Choose whether you want to record your entire laptop screen or just a small part of it.
- Determine whether you want to record your microphone, webcam, or system audio. You can enable and disable each one individually according to your needs.
- Click on the ‘Capture’ button to start recording.

- Select the Stop button once you’re done recording, and then trim the video according to your preferences.
Conclusion
Hopefully, you can now record your laptop screen regardless of your operating system. While there are free built-in tools like Xbox Game Bar (for Windows) and QuickTime (for Mac), you can also install third-party screen recording apps. However, make sure you choose a recorder with built-in video editing and sound recording options, as these ‘extra; tools can significantly affect the quality of your screen recordings.
To elevate the audio quality of your laptop recordings, consider using a reliable wireless lavalier microphone. Compact and easy-to-use, it offers crystal clear sound, allowing your voice recordings to stand out with professional clarity.
FAQs
How do I record video and audio on a Windows laptop?
You can record video and audio on a Windows laptop by pressing Win+G and bringing up the recording toolbar. Alternatively, you can press Win+Alt+R to start the screen recording automatically.
How do I screen record on a Mac?
You can record your Mac’s screen by using the QuickTime Player. You can also use third-party apps, like Snagit or OBS Studio if you want to take advantage of more advanced recording options.
Can I add sound to my screen recordings?
If you have the right recording software, you can easily record both your computer screen and audio. Although some operating systems and computers have built-in screen recording tools, not all of them are developed with audio-recording features.