


.png)
Are you tired of having reverb in your recordings? One simple step to improve your sound is upgrading to a better microphone system like the Hollyland LARK MAX 2. This versatile wireless mic features advanced 32-bit float recording, capturing crystal-clear audio with incredible dynamic range and detail. Plus, its OWS Bluetooth monitoring allows real-time monitoring via receivers and cell phones, thus helping you spot unwanted reverb as you record.


There are times when, despite all the efforts, some reverb may still sneak in. This article discusses effective methods to reduce or remove reverb, ensuring your recordings stay clean and professional.
How to Remove Reverb from Audio?
Use Noise Gate
Noise Gate is very useful for removing unwanted background noise or quiet sound tails like reverb.
Here’s how to use a noise gate:
- Import the track that has too much reverb into your selected DAW.
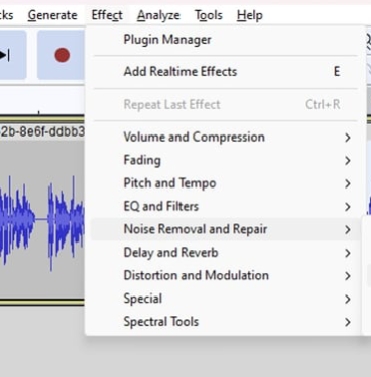
- Most DAWs come with a built-in noise gate. Go to “Effects” and tap on “Noise gate.”
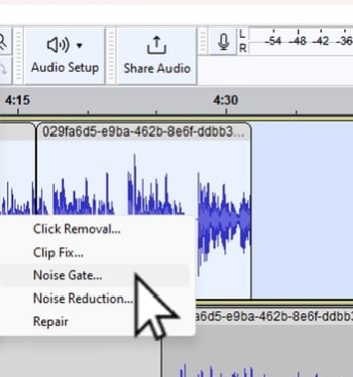
- If you are using Audacity, tap on “Noise Repair and Removal.”
- Tap on the noise gate option.
- Adjust the threshold so the gate opens when the main sound plays but closes during the quieter reverb tail. Start by placing the threshold just below the loudest part of your audio.
- Set a fast attack time to make sure the gate opens immediately when the sound starts, preserving the natural attack of the audio.
- Adjust the hold time to keep the gate open for a short period after the signal drops below the threshold to avoid unnatural chopping of sound.
- Balance the release time to close the gate smoothly after the hold time. A moderately fast release prevents an unnatural cutoff but still tightens the reverb tail.
- Now listen to the audio to finalize and save it on your device.
Phase Cancellation
Phase cancellation occurs when two sound waves of the same frequency are exactly out of phase, causing them to cancel each other out, reducing or eliminating sound.
Here’s how to use Phase Cancellation in Audacity:
- First, you need to duplicate the audio track. Right-click and select Duplicate in Adobe Audition’s Multitrack Editor, or use Edit > Duplicate in Audacity.
- Then invert the phase of the duplicated audio. In Adobe Audition, find “Invert Phase” in the Effects Rack under “Amplitude and Compression,” while in Audacity, use Effect > Invert.
- Align the duplicated track precisely with the original by dragging it on the timeline in both programs.
- Adjust the duplicate’s volume or apply compression. Use Dynamics Processing in Adobe Audition’s Effects Rack or lower the gain slider in Audacity to reduce reverb.
- Fine-tune timing and volume balance of both tracks until the reverb is minimized while preserving audio clarity.
- Experiment for optimal results, as manual adjustments are essential.
Note: You can follow similar steps for other software as well. For most tools, the phase inversion option is present in “Effects.”
Dedicated Deverb Plugins
Dereverb plugins are specifically designed to reduce unwanted reverb in audio recordings with minimal need for extensive adjustments. To use the Dereverb plugin in Audacity, follow these steps:
- Download the Dereverb plugin from a trusted source.
- Locate the folder where Audacity is installed on your computer.
- Within the Audacity installation directory, find the “plugins” folder.

- Copy or move the downloaded Dereverb plugin file into this “plugins” folder.
- Launch Audacity, then open the menu Effect and tap Add / Plugins Manager. Click Rescan to refresh the list of available plugins.
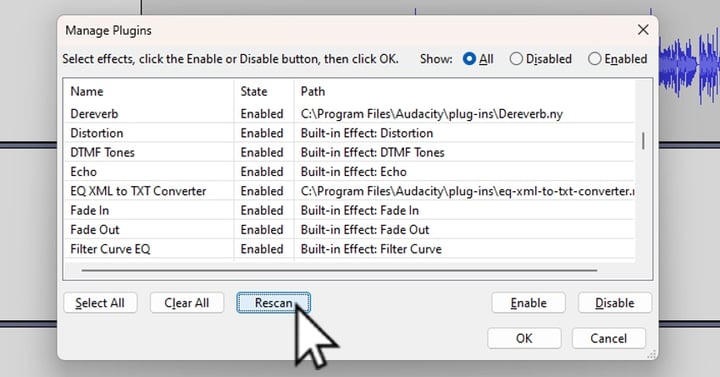
- In the plugin manager, find Dereverb, activate it, then select your audio track.
- Apply the Dereverb effect and adjust its settings as needed to reduce reverb effectively.
Apply Noise Reduction Filter
A noise reduction filter can help you get rid of consistent background noise in the recording and remove mild reverb.
- Load your audio file into your editing software.
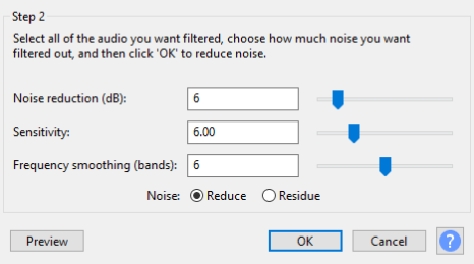
- Choose a noise reduction effect or plugin like iZotope RX from your software’s effects list. For instance, in Audacity, go to “Effects” and tap on “Noise Reduction”. Then select “Noise Profile.”
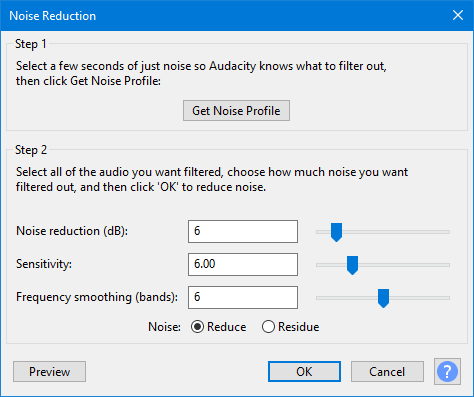
- Select a portion of the audio where only reverb or background noise is present to create a noise profile.
- Adjust the noise reduction using this profile to target the reverb specifically.
- Listen closely and tweak parameters, including sensitivity, frequency, and smoothing sliders, for the best balance between clarity and natural tone.
- Save or export your processed audio once you are satisfied with the improvement.
Use Specialized Editing Tools
Specialized AI-powered tools are also available to remove reverb from audio. These can help you eliminate all the distractions in just a few seconds. Here’s how to find and use them:
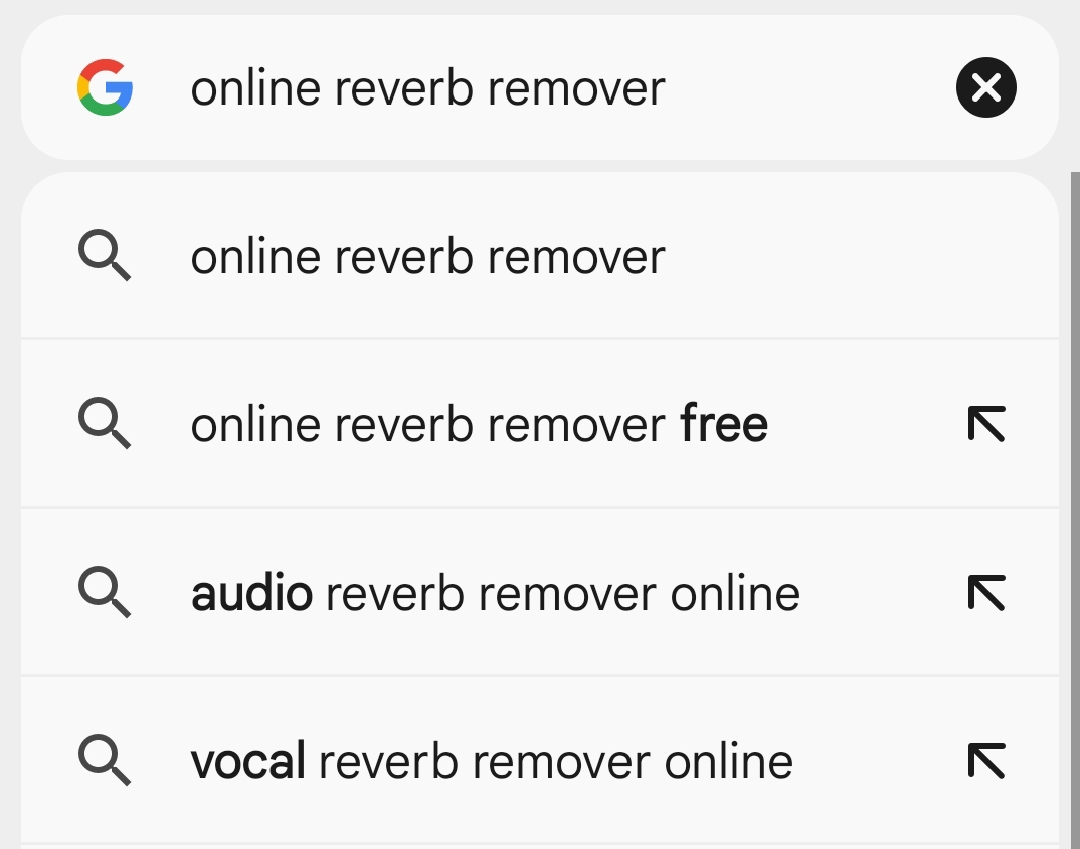
- Go to Google search and find “Online reverb remover tool.”
- Click on the tool and then tap on “Upload Audio.”
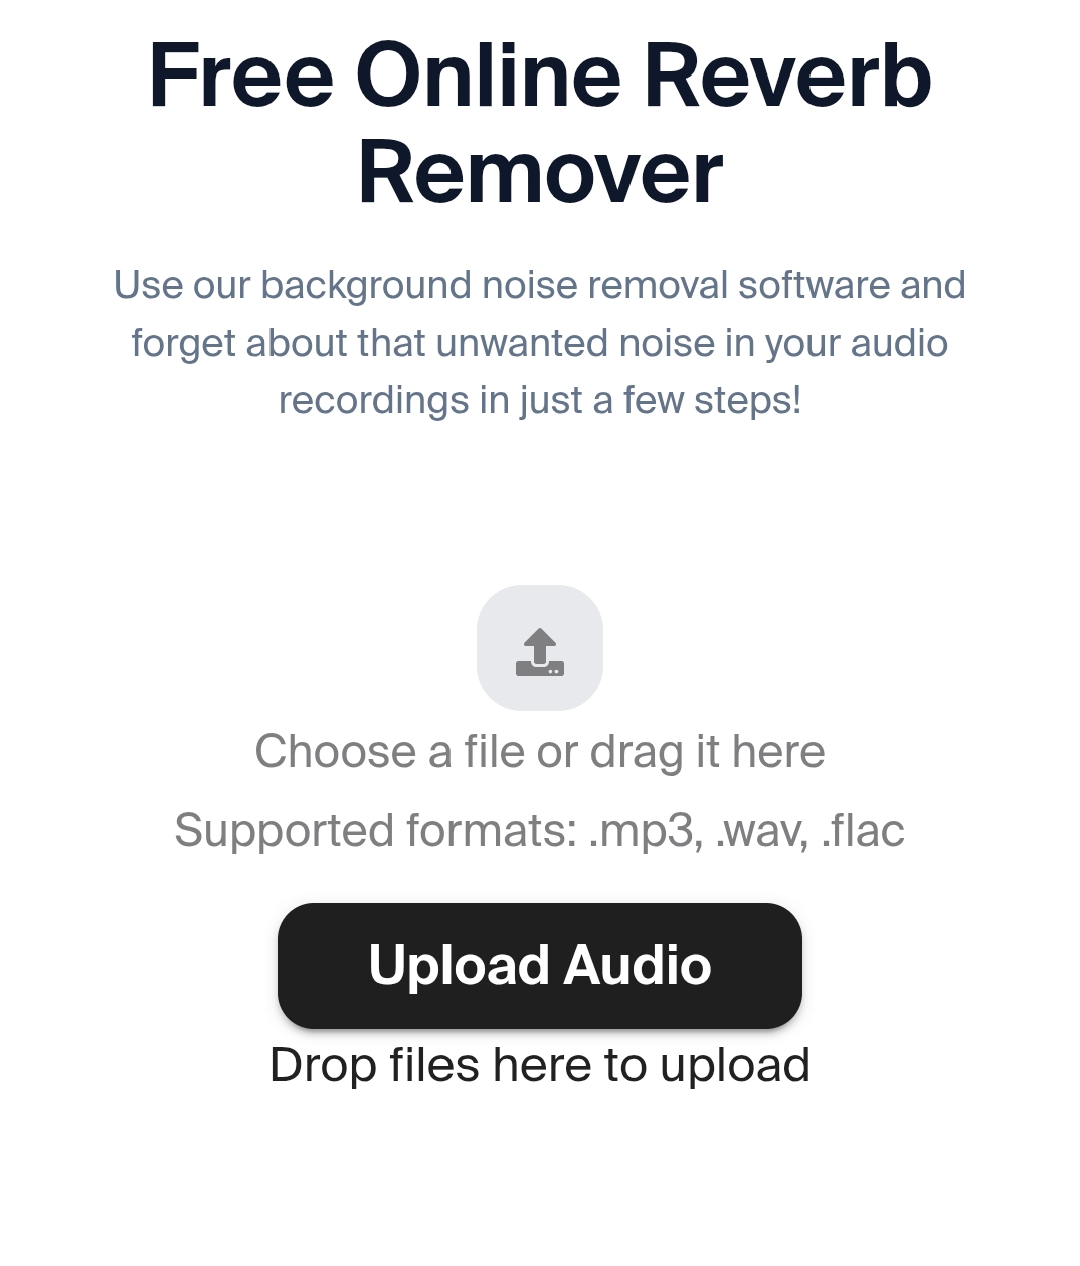
- Select the file you want to edit and let the AI do its work.
- Download the final file on your device.
Employ Equalization Techniques
Equalization (EQ) can help reduce reverb by cutting frequencies where reverberation is most prominent, improving clarity without removing reverb entirely. This is a step-by-step guide on how to do it:
- Open your audio project and load the track with unwanted reverb.
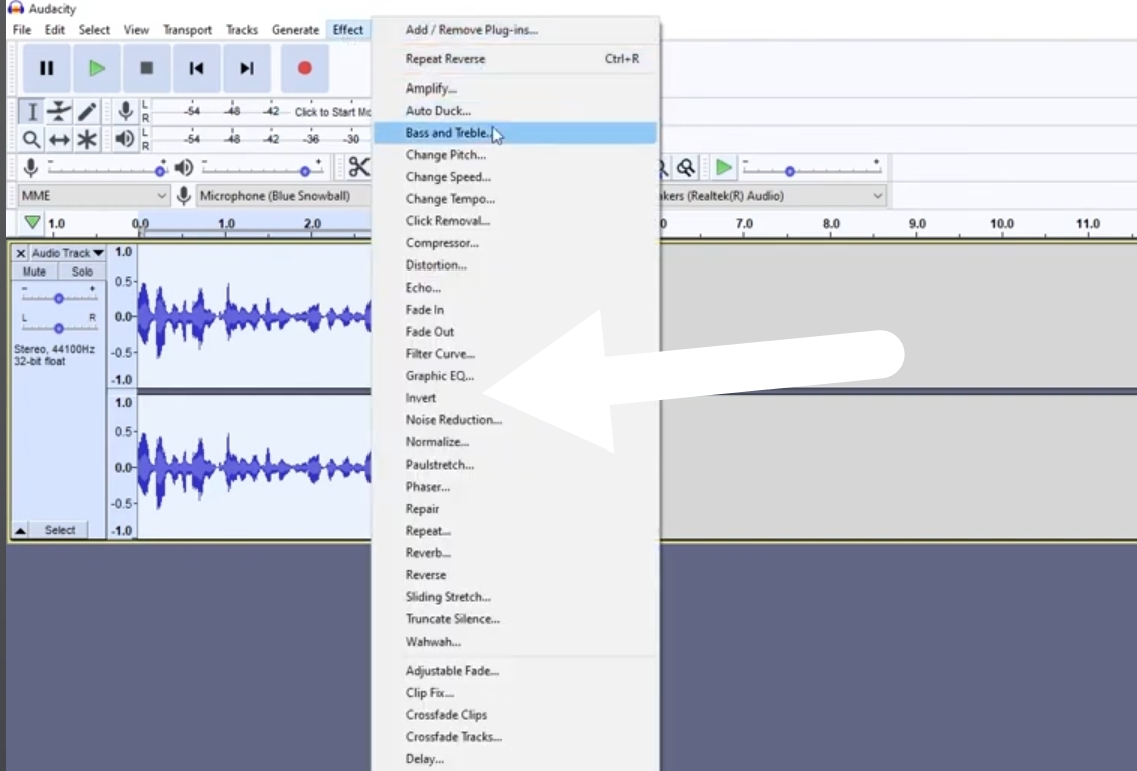
- Add an EQ effect to the track. As for Audacity, you can find it in “Effects” and then go to the “Filter Curve EQ” option.
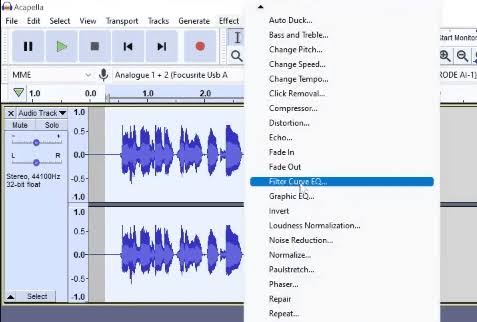
- Use a high-pass filter to cut low-frequency audio that often contributes to muddiness caused by reverb.
- Then adjust the low-pass filter to remove unwanted high-frequency sounds.
- Carefully balance the audio to preserve the natural tone and avoid a thin sound.
- Continuously listen and make adjustments for a natural, clearer result.
- Save the processed audio once you achieve the desired results.
Transient Shaper/Enveloper
The Enveloper plugin works by independently manipulating the attack and release phases of the audio envelope. By reducing the release phase, you effectively shorten the reverberant tails without harsh gating. This results in a cleaner sound while preserving the main audio signals.
The transient shaper needs to be used in a digital workstation. These are the steps to use Enveloper in Logic Pro:
- In Logic Pro, select the channel strip of the track with unwanted reverb. Insert the Enveloper plugin by navigating to Dynamics > Enveloper in the audio effects menu.
- Start with a very low threshold (around -100 dB)..
- For reverb removal, adjust the attack first (the gain button alongside threshold).

You can leave this near the default or slightly boost it to add more punch to the dry sound, making it stand out clearly from the reverb tail.
- Lower the release percentage (gain option on the left of “out level”) gradually to reduce the volume and presence of the reverb tail. Start pulling this down from 0% and listen attentively.

- If the release is reduced too much (close to -100%), the audio will sound abruptly cut off and unnatural. Conversely, if it’s too high, the reverb won’t be sufficiently reduced. A good starting point is around 50% release, then fine-tune based on what sounds natural for your audio.
- After setting attack and release, adjust the threshold if needed to make sure you are only affecting the portions of the audio where reverb is prominent.
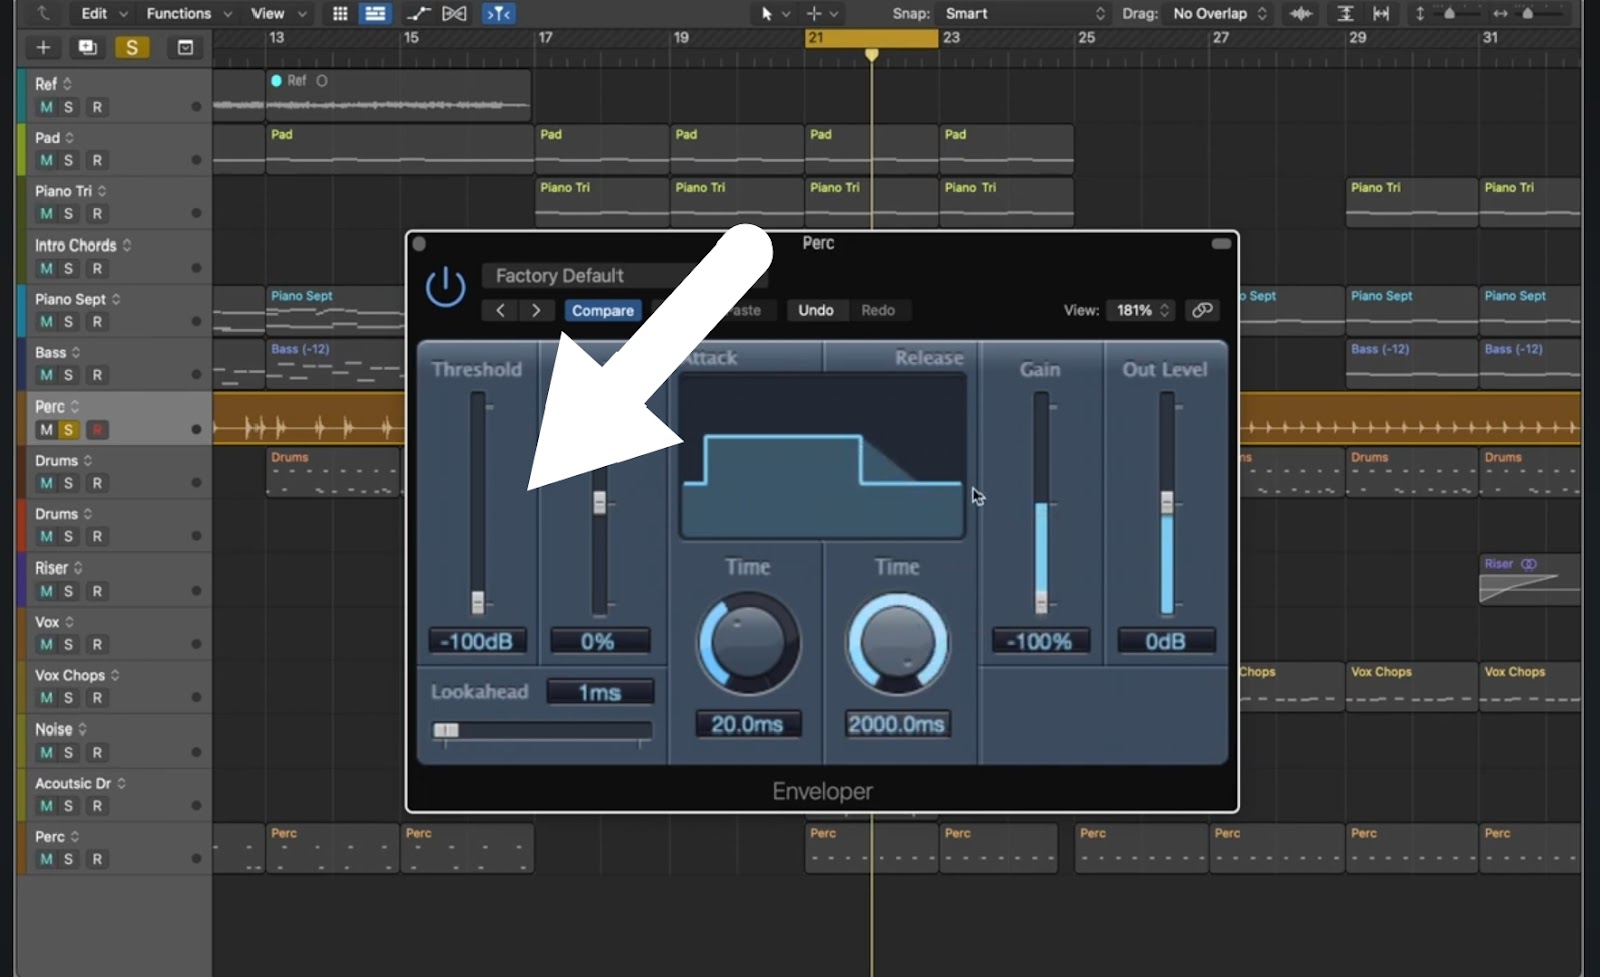
- Once satisfied, save the final audio.
- This method is usually suitable for drums.
Conclusion
Removing reverb can significantly enhance audio clarity. Different techniques work best for different recordings. Often, combining several methods leads to the most natural results. However, it is important to ensure that you do not overly edit the audio, otherwise it will sound unnatural.
FAQs
1. Will removing reverb affect the vocal quality?
Removing reverb can make vocals sound clearer, but too much reduction might strip natural warmth and ambiance. Careful adjustment is essential to keep the voice sounding natural without becoming harsh or overly dry.
2. Should I use multiple methods to remove reverb?
Yes. Combining techniques like noise gating, EQ, and deverb plugins often delivers the best results. Using multiple approaches allows more precise control, ensuring reverb is reduced without sacrificing the natural character of the audio.
3. What is the fastest way to remove reverb from audio?
Dedicated deverb plugins offer the quickest way to reduce reverb effectively. They use advanced algorithms to identify and suppress reverb tails, streamlining the process without the need for complex manual editing or multiple steps.
