


.png)
Football games are a lot more fun when shared with friends. One popular way of doing this is streaming. Streaming gives you the unique opportunity to share games with friends and fans alike. The best part is: it is now easier than ever.
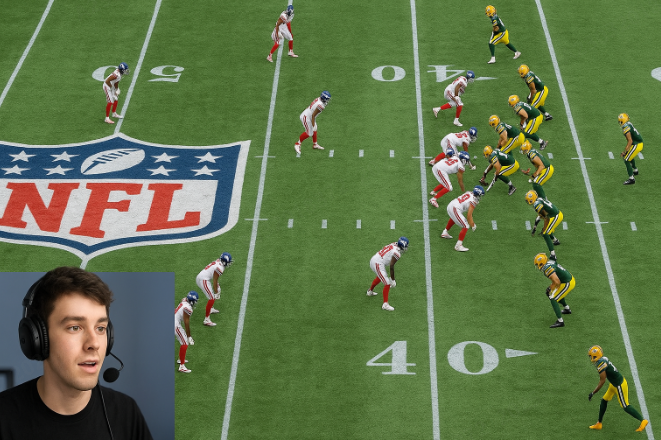
Whether you are thinking of how to legally share live games on your feed or simply run commentaries with the games off-screen, this guide will show you, step-by-step, how to go about it. From the legal requirements to the gear and setup you will need, you will learn everything you need to start streaming right away.
Step 1 – Understand Legal Requirements
Wait! Before you go live on that stream, you need to be sure that you are not violating any legal rights. If you stream a football game without having the appropriate rights, your channel can be shut down, and you can even face prosecution.
You have two options to choose from:
Displaying the Game In-stream
Choosing this option will mean that you will require licensing rights from the NFL, which may be impossible for you to get as an individual content creator.
Just FYI, the process of acquiring licensing rights will require that you submit a bid or proposal (along with other big players like ESPN, CBN, Amazon, etc.) This may, therefore, not be an ideal option for you.
Running Commentary on the Game with the Game Off-screen
This is a much easier option, which won’t require that you get any licensing rights. All you need to do is run commentary and react to the game you are watching, with the camera showing only you and your reaction. You can also include graphics and stats from the game that you have the right to use. However, fair use still isn’t guaranteed.
Step 2 – Set Up Streaming Equipment
Setting up a stream that will run smoothly and without any lag requires the right equipment. Here are the major gears that you will need:
Computer with Sufficient Processing Power
PC users should go for a computer running on at least an Intel i5/Ryzen 5 with 8 to 16GB RAM, a 512GB SSD, and a dedicated graphics card.
MAC users should go for at least an Apple M1/M2 with 16GB unified memory. These are minimum requirements. Getting higher specifications will increase the efficiency of your stream.
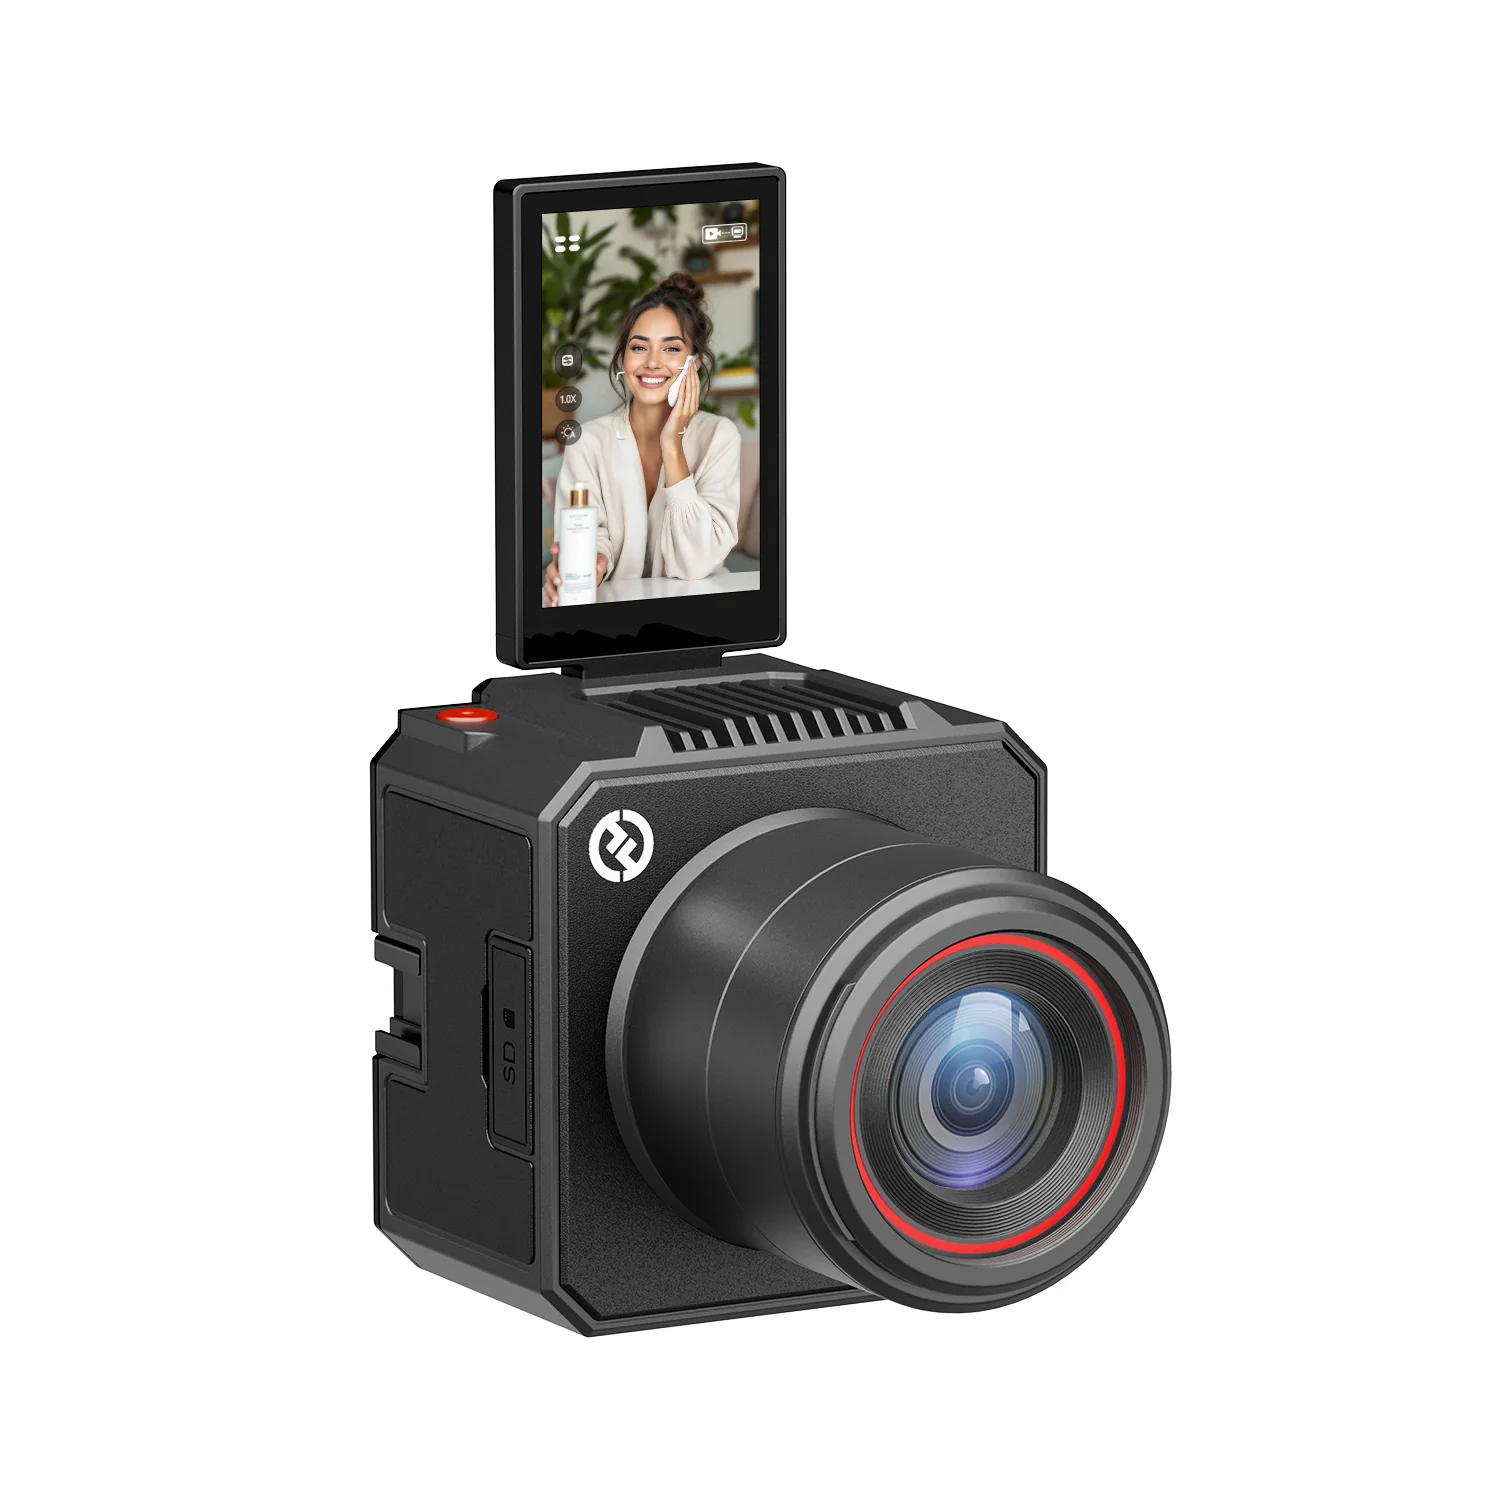
Webcam, Microphone
To achieve a professional-looking result with ease, we suggest using a high-quality camera that supports higher resolution streaming. For example, the Hollyland VenusLiv Air is a compact streaming camera capable of 24/7 streaming while shooting 4k at 30fps.

Stable Internet Connection
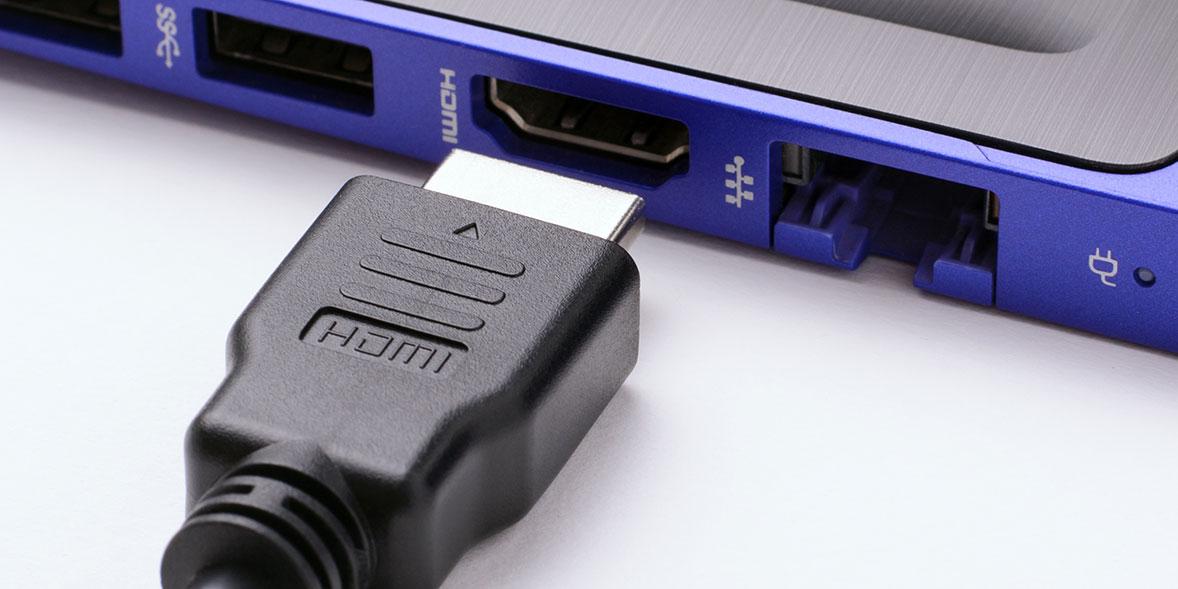
Your entire streaming will rely on the reliability of your internet connection. Your target upload speed should be at least 10Mbps. A wired Ethernet connection will offer a more stable connection than a Wi-Fi connection. So, if you use a newer model of Mac without an in-built Ethernet, you may need to get a USB-C to Ethernet adapter.
Step 3 – Choose and Set Up Streaming Platform (YouTube, Twitch)
Create an Account
If you do not already have an account on your platform of choice, create one. YouTube and Twitch are the two leading platforms for live streaming.
YouTube
- Sign in to YouTube with a Gmail account and create a channel.
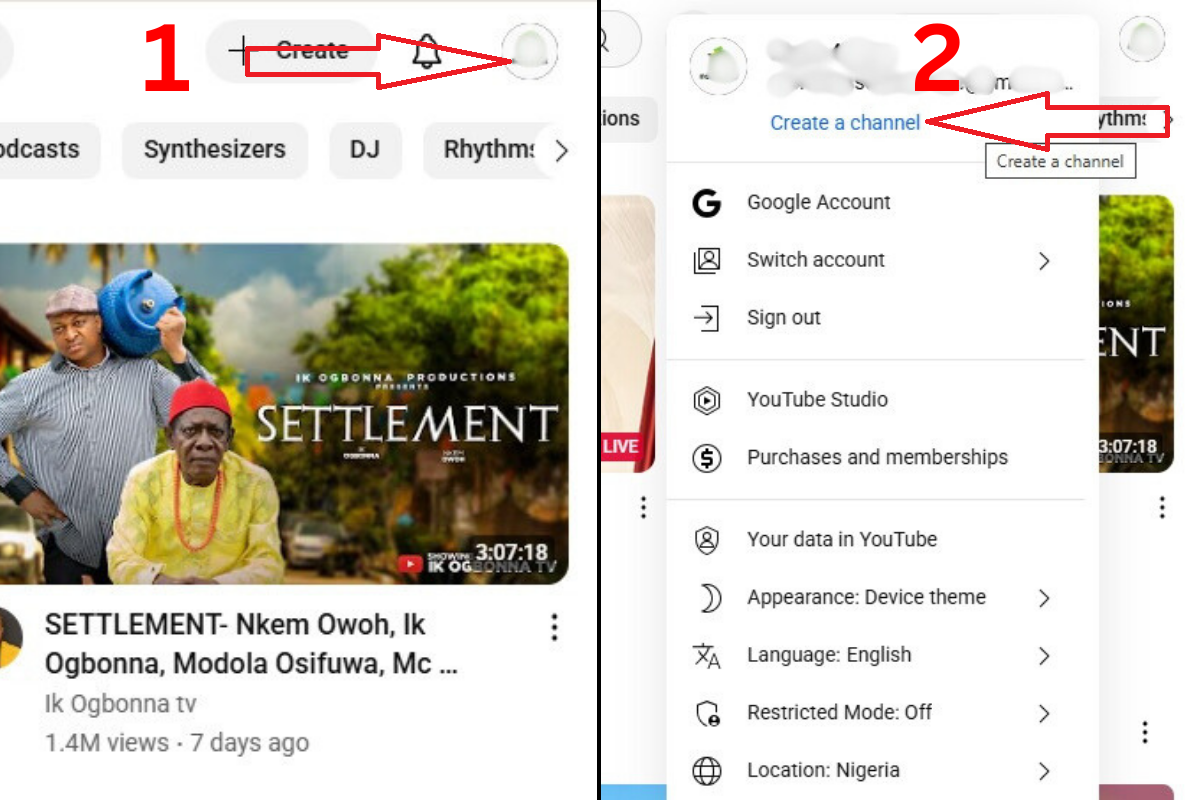
- Verify your phone number to qualify for intermediate features.
- Verify that you have the ability to live stream on YouTube.
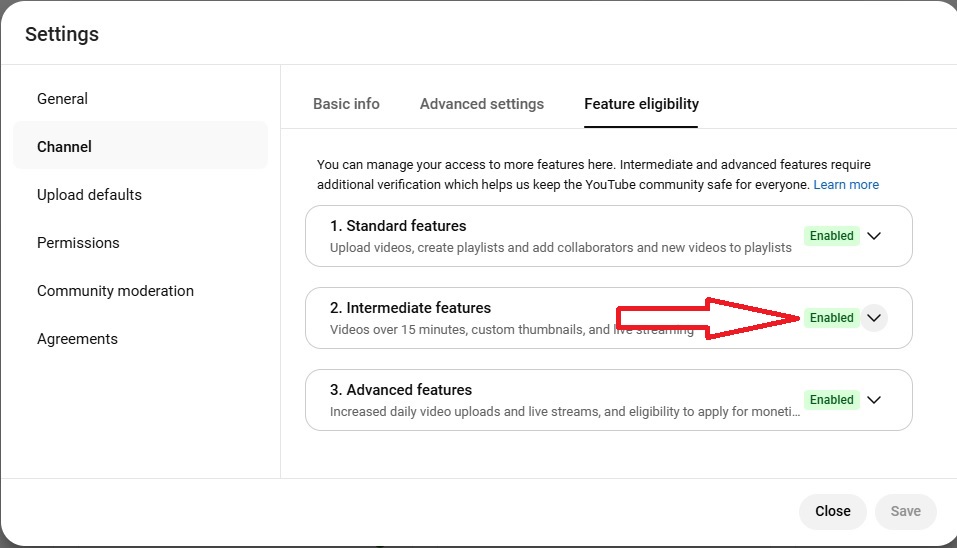
Verify YouTube Account
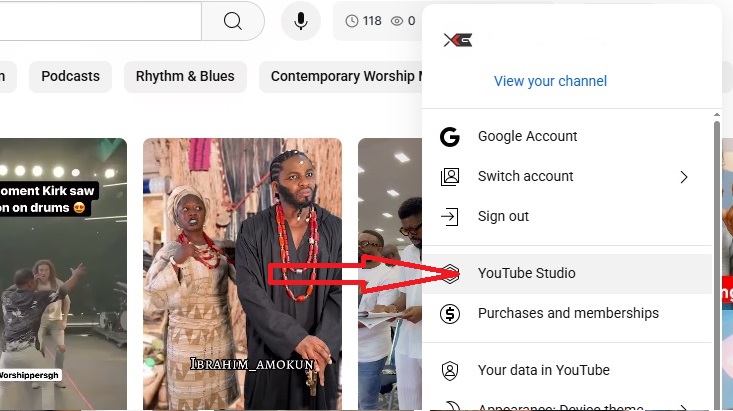
To do this, click on your profile image
On the dropdown menu, go to YouTube Studio
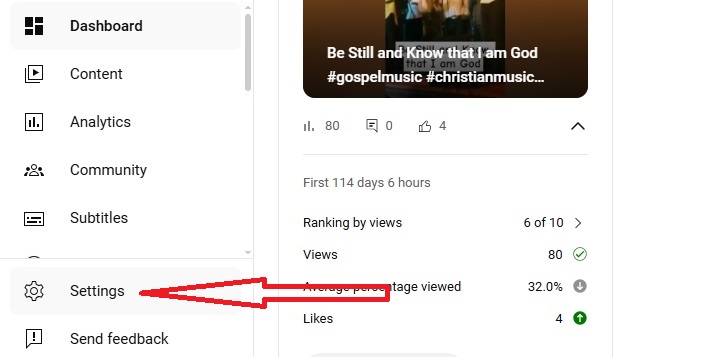
Go to “Settings” at the bottom left corner
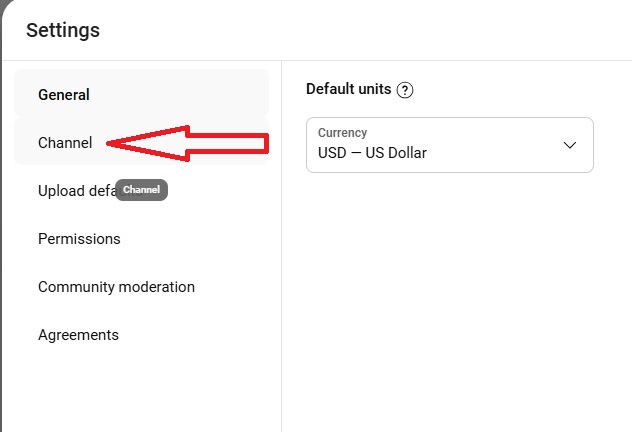
Click on “channel” on the next page
Click on “Feature Eligibility”
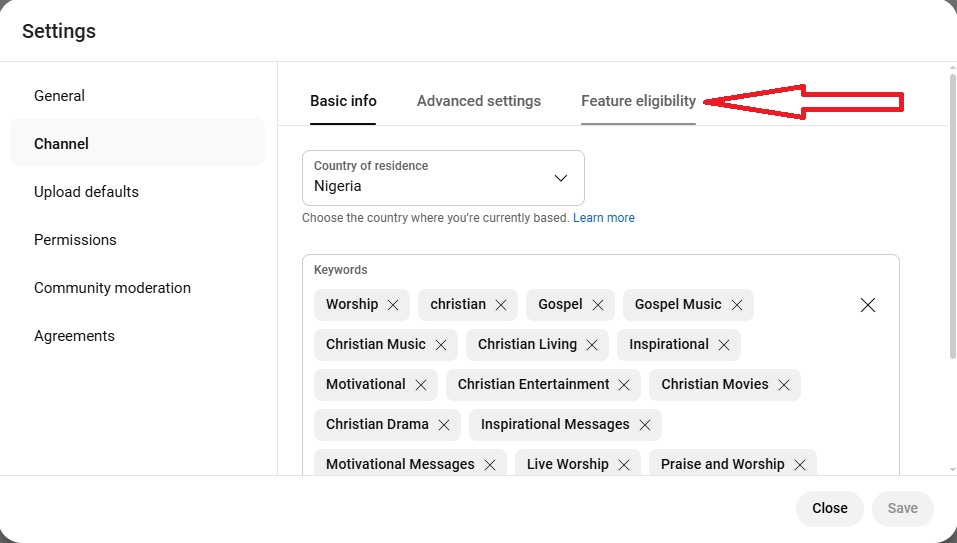
Check to confirm that “Intermediate Features” shows “Enabled”
Now you are ready to stream on YouTube. The next step is to go live.
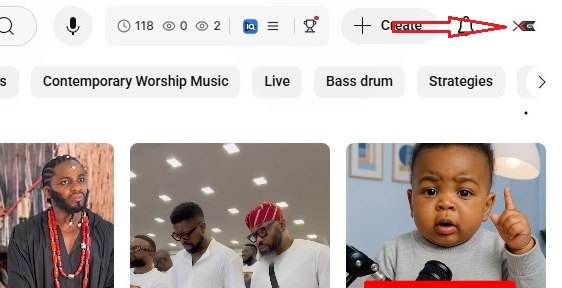
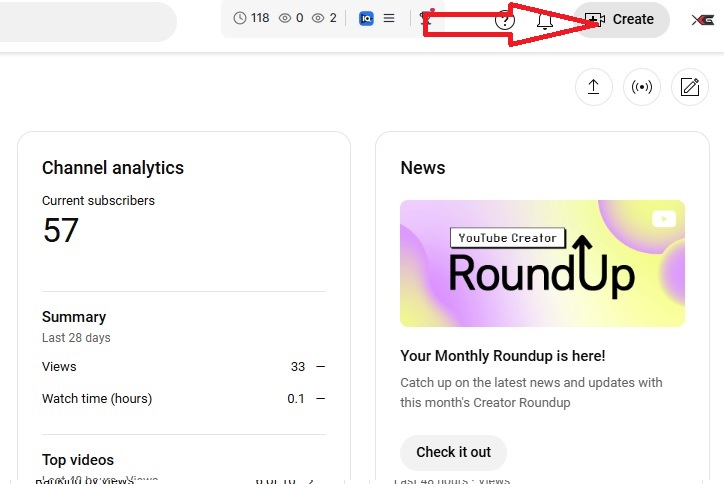
To Go Live
i. Click on “Create” at the top right corner of your screen
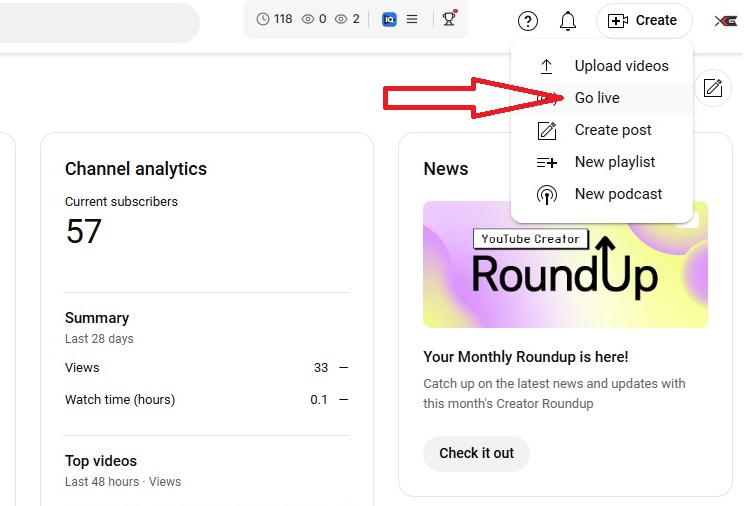
ii. On the dropdown menu, click on “Go Live”
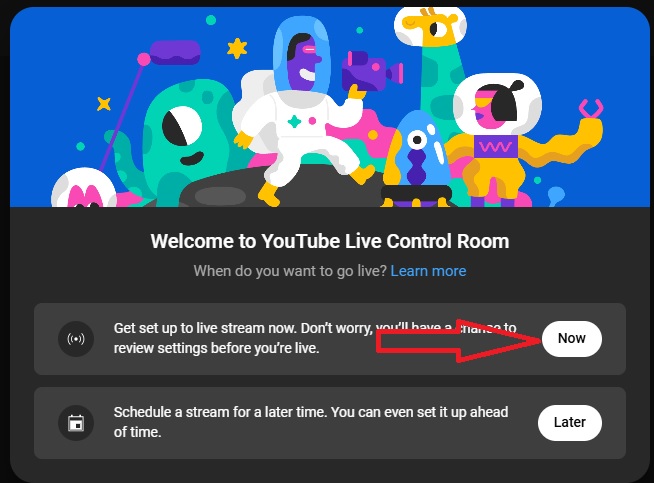
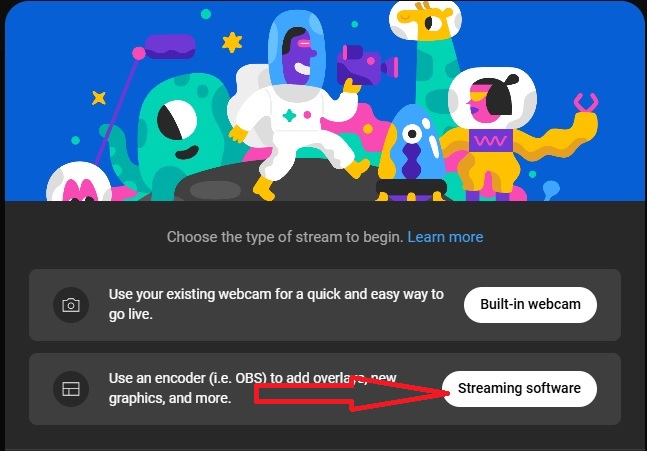
iii. Click on “Now” to start setting up to go live
iv. Choose “Streaming Software” so you can have a more professional setup
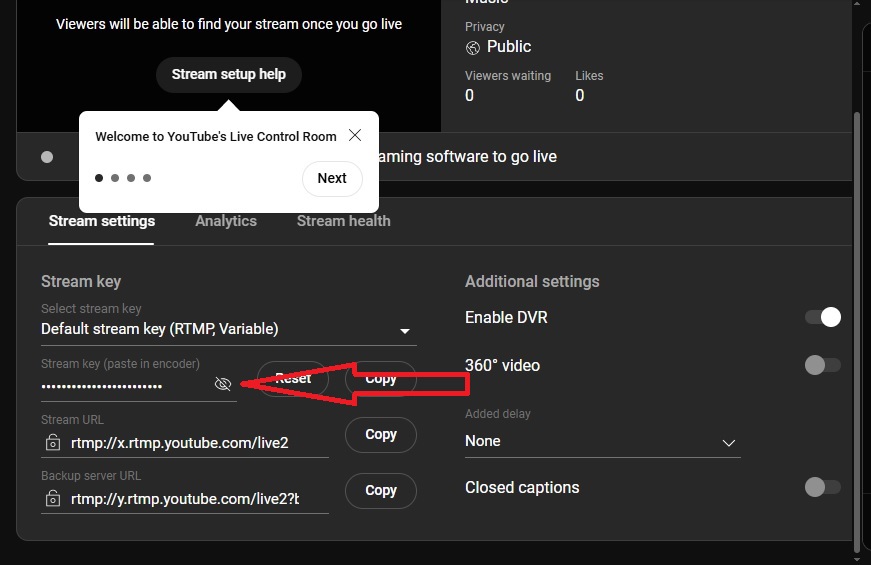
v. Note the stream key
Now you are ready to connect to your streaming software like OBS or Streamlabs. If you want to stream on Twitch, you will sign in to your Twitch account from within OBS.
Step 4 – Choose a Streaming Software (OBS Studio, Streamlabs)
OBS is free and comes highly recommended, so that’s a good place to start.
i. Visit the OBS official website to download and install the software. To configure the software for smooth streaming, take the following steps:
- Launch the program and follow the auto-configuration wizard. If the wizard does not launch automatically, then click on “Profile” on the navigation bar.
- In the dropdown menu, click “New” to add a new profile.
- Add your chosen profile name and ensure that the box for “Show auto-configuration wizard” is checked.
- Follow the auto-configuration wizard and use the following settings:
Base (Canvas) Resolution – 1920×1080
FPS – 30 (this is sufficient for your stream and will also put less stress on the system)
- Connect your Twitch or YouTube account. Use “Connect Account (recommended). You can also connect with the Stream Key you noted above. That is, however, a more advanced approach.
- Complete the configuration and allow the system to run a bitrate and bandwidth estimate test.
Connect your streaming camera and your microphone to your computer.
- Click on the + sign in the “Sources” box

From the dropdown menu, choose “Video Capture Device”, create a name for your camera in the popup box, and click ok.
Locate your streaming camera from the device list and select it.

If your camera is live, you should have pictures on your OBS screen.
Add your USB microphone by also clicking the + button in the “Source” box, like you did for the streaming microphone. But this time, in the dropdown menu, click on “Audio Input Capture”

Choose your microphone from the device selection box and click ok. Your audio should be live.

Confirm that you have audio by talking into the microphone. You should see some movement in the audio meter located in the Audio Mixer Box.

Step 5. Test Your Setup
With your setup done, it’s time to test everything to be sure that you are ready to truly go live.
Run a Private Test Stream
YouTube
To run a private test stream on YouTube, go to YouTube and click on ‘Create’ – ‘Go Live’ – ‘Now’ – ‘Streaming Software’. These steps have already been shown under Step 3 above.
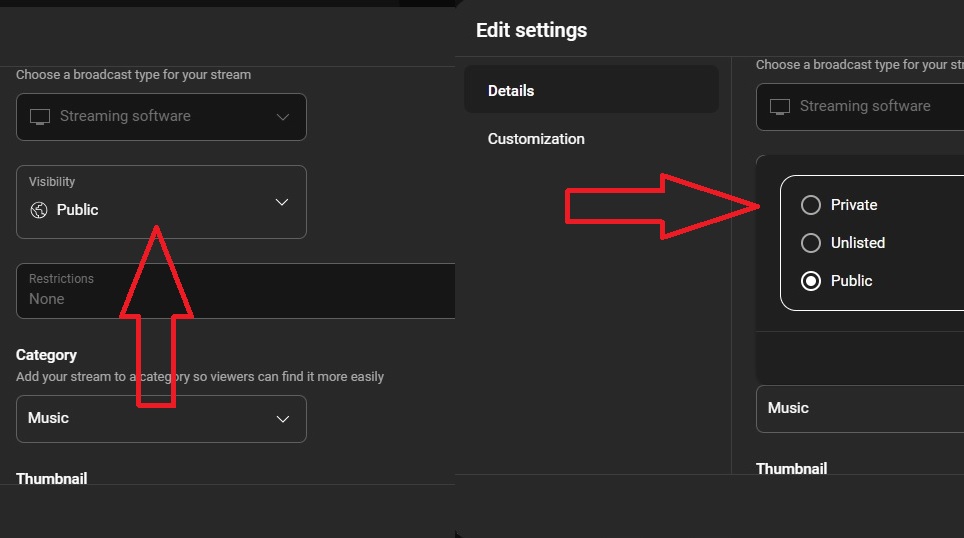
In the window that opens, click on “Edit”
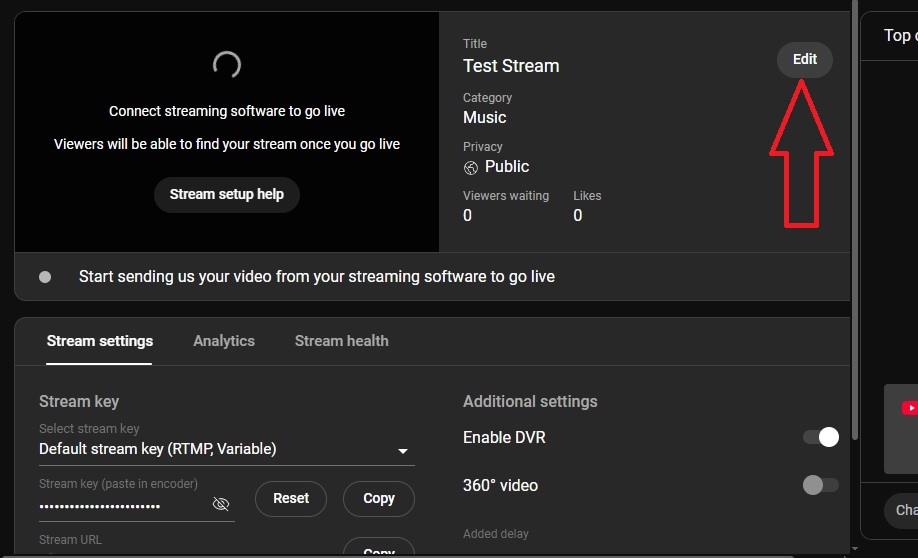
Choose a name for your test stream, and change the privacy setting to ‘Private’
Copy the Stream key
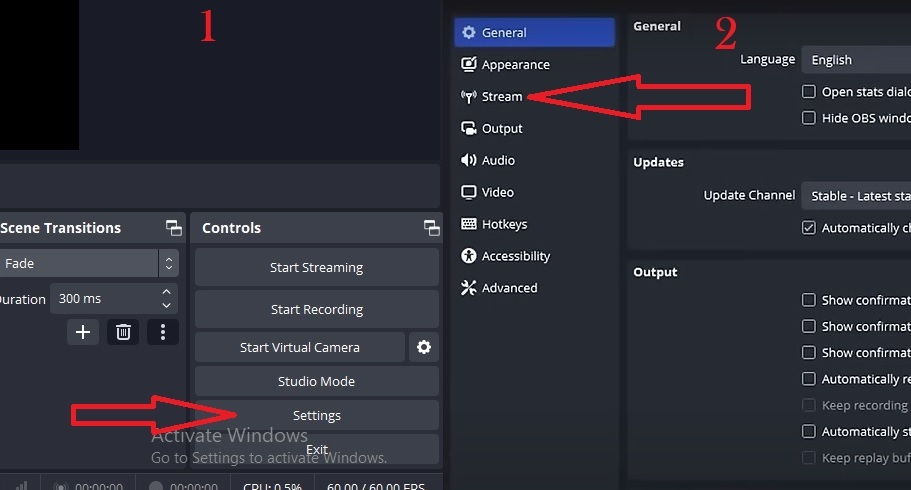
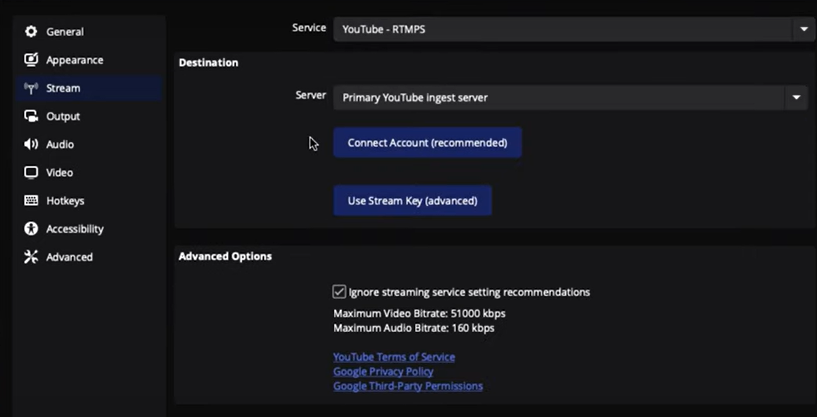
Now go back to OBS. Click on Settings – Stream
On the stream page, choose YouTube and click on “Use Stream Key” to input the stream key to connect the page to the live stream you created earlier on YouTube.
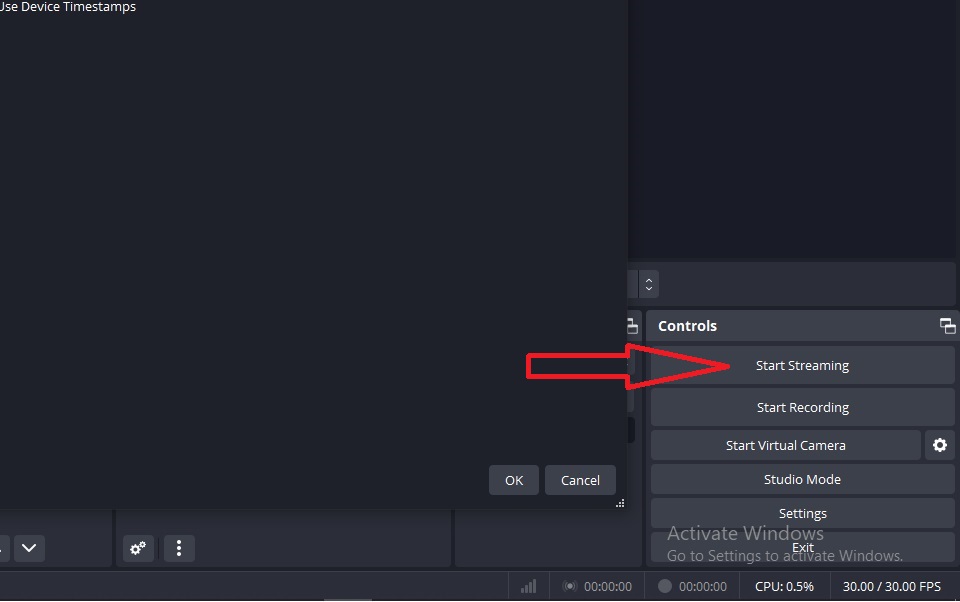
Once YouTube is connected, you can now test your stream by clicking on “Start Streaming”
Your stream should now be live on YouTube. You can go to YouTube and ensure that everything is working fine.
Conclusion
The process of streaming football games is simpler than you may have thought. Following the steps outlined above, you will be connecting with your followers every game day with ease.
Game nights just got more fun.
FAQ
Can I have live game footage in my football game streams?
No! You cannot legally show live games on your stream. You need licencing from the NFL to be able to do this. Given the level of competition and cost involved, it is not something a single content creator can afford.
Which Streaming platform is better for streaming football games – YouTube or Twitch?
YouTube is the leading streaming platform, followed by Twitch. YouTube offers better opportunities for long-term discoverability. This is because streams can be saved and replayed months later, increasing your reach. You can choose to stream to both for the best of both worlds.
Can I stream straight from YouTube without using a streaming software?
Yes! You can! However, using a streaming software like OBS gives you more tools that will make your stream look a lot more professional. This includes using multi-cameras, custom overlays, and more.
Can I make money from streaming football games as a content creator?
Yes! You can make money from your content. It has to legally be your content, which can’t include live footage of games. You can, however, make money from donations, subscriptions, sponsorships, and YouTube ads with your commentary streams of games.


